RECYCLED PAPER-GLASSINE BAG ALBUM – THE FOURTH FOLIO
Today I completed the fourth folio of this recycled album, with a theme of entomology. Lots of bugs!
Before we begin, I downloaded some gorgeous freebies from VectoriaDesigns. Tinne is very generous with her free downloads, some of which are just backgrounds and elements, and others are actual kits to make things. This design is called Antique Library.
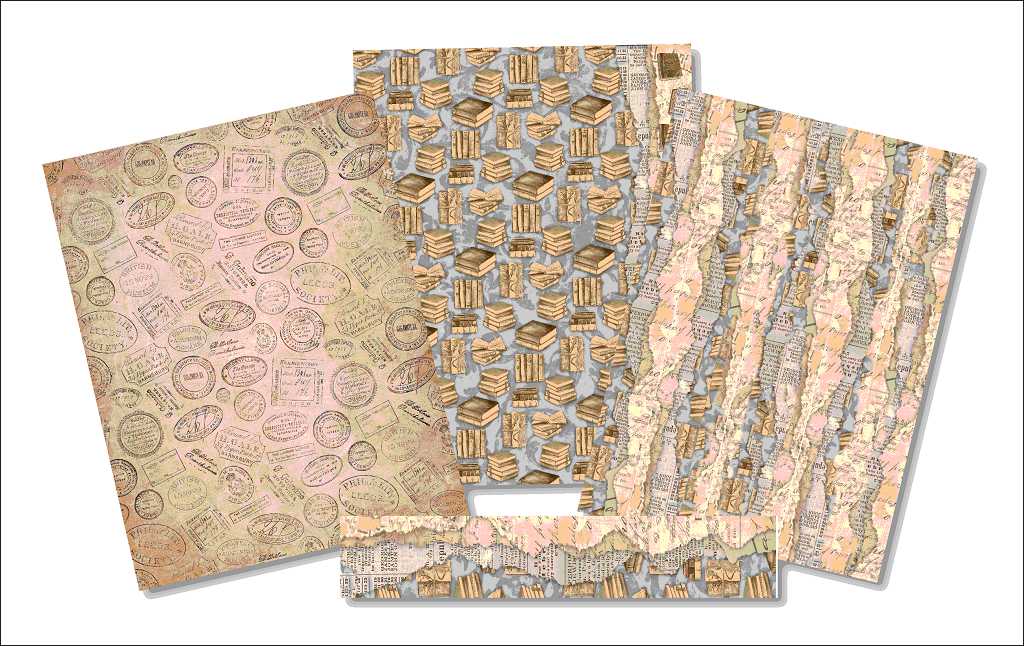
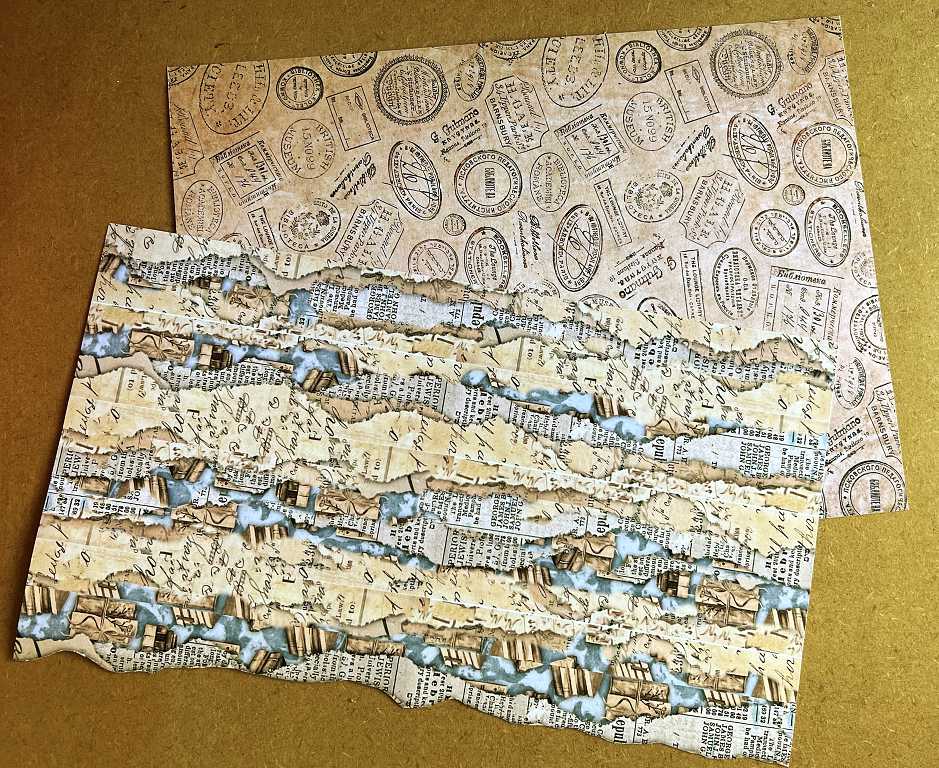
I printed out two copies of the stamped labels background sheet, one to keep as a background and the other to fussy cut. I’ve been doing a fair bit of fussy cutting in the evenings and will do a post about that in due course. The background sheet with the books in the centre of the above montage has a lovely border down the right-hand side, and I created a whole sheet from this, making it as random as I could. When I printed it out there was a slight problem in that there is a tiny white line between each strip, not showing on the screen, but I have discovered that a quick swipe with an ink blending tool deals with this.
The reason I have brought this up now is that I have used some of the ripped edge design in this current folio of the recycled bag album.
Now back to the project.
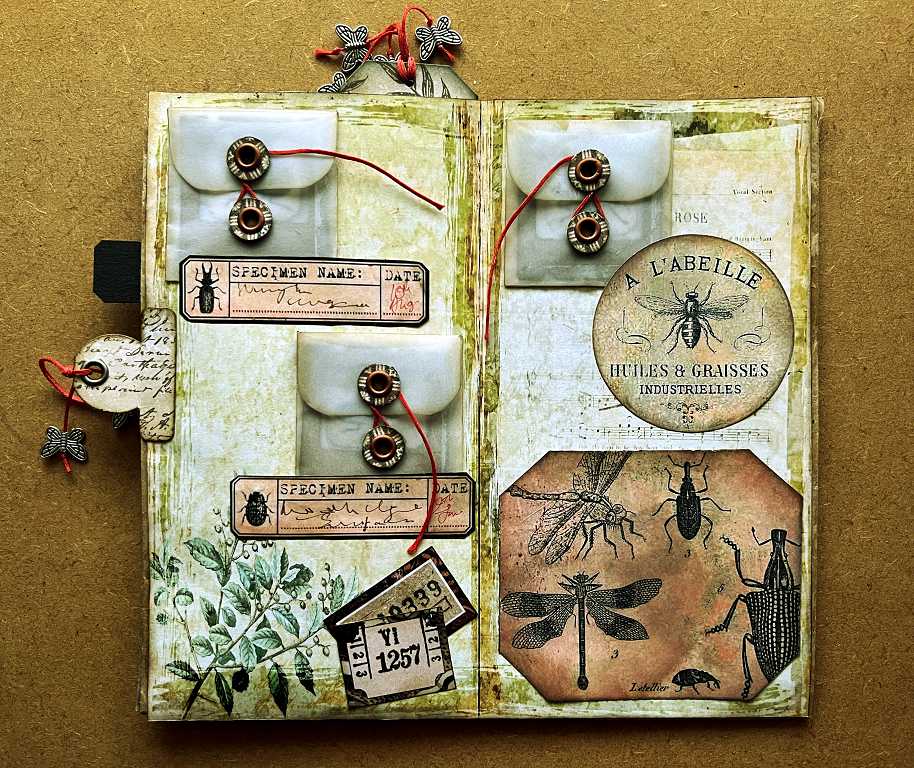
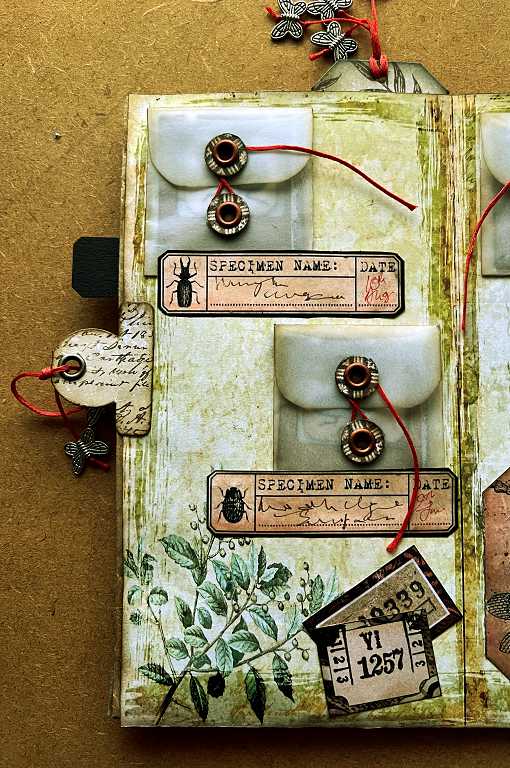
The front page

Lots going on here! I have had a great deal of fun making this folio, and have incorporated several of the die-cut specimen slides.
The top of the page.
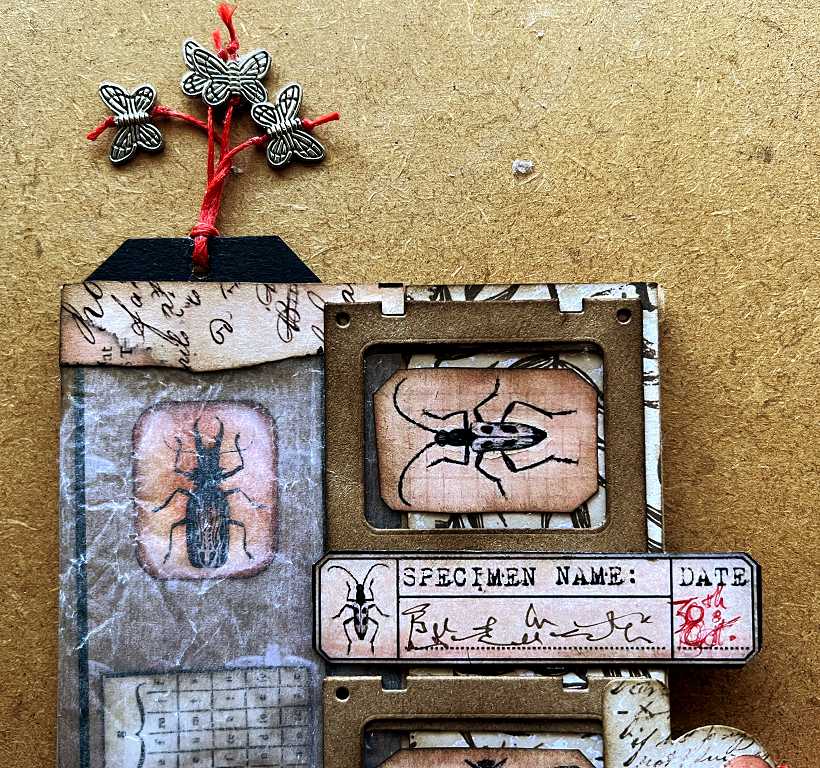
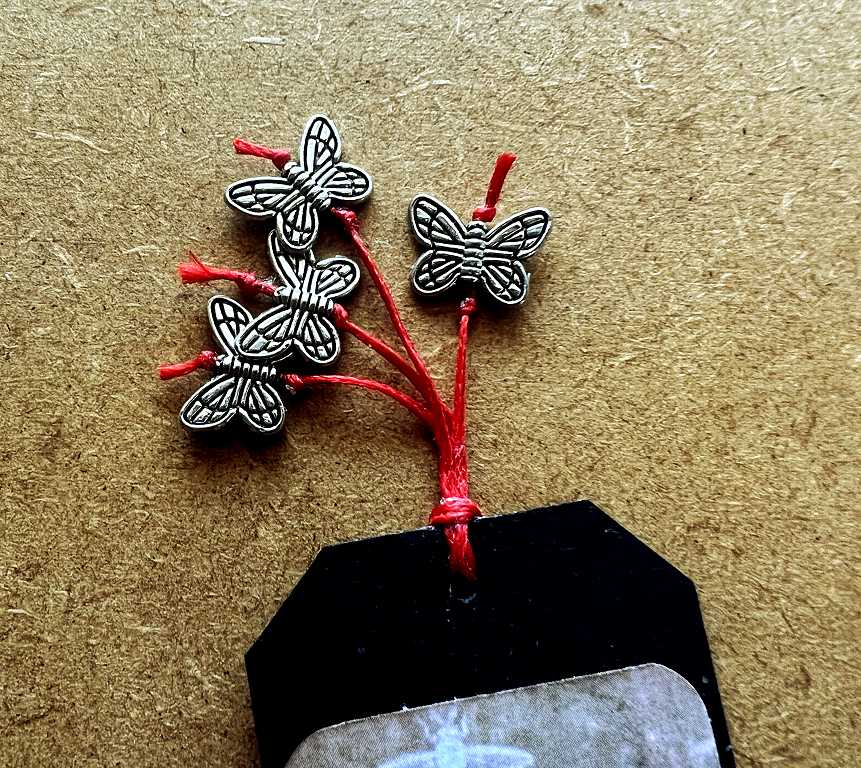
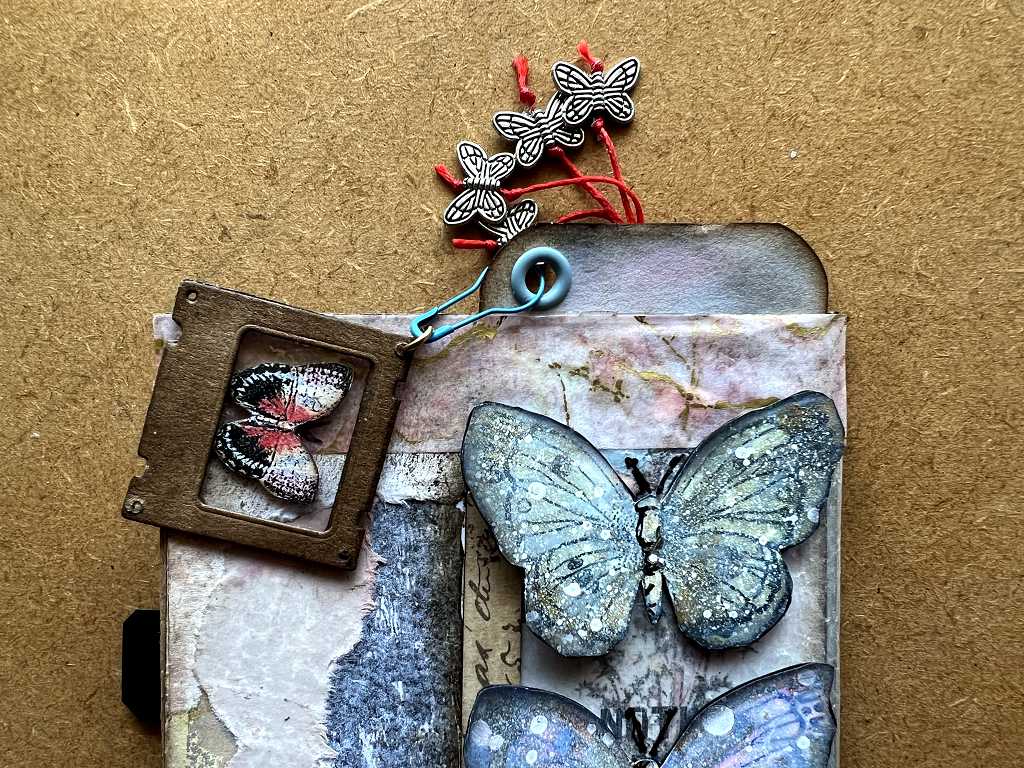
The tag has several little metal butterflies tied on with red cord. I have a lot of these, which were on a coiled wire bangle interspersed with silver beads which I bought in a collection of junk jewellery some time ago. I took this apart and separated the different elements into little baggies for use in projects.
All the bug images and labels are from the Graphics Fairy Premium Membership site.
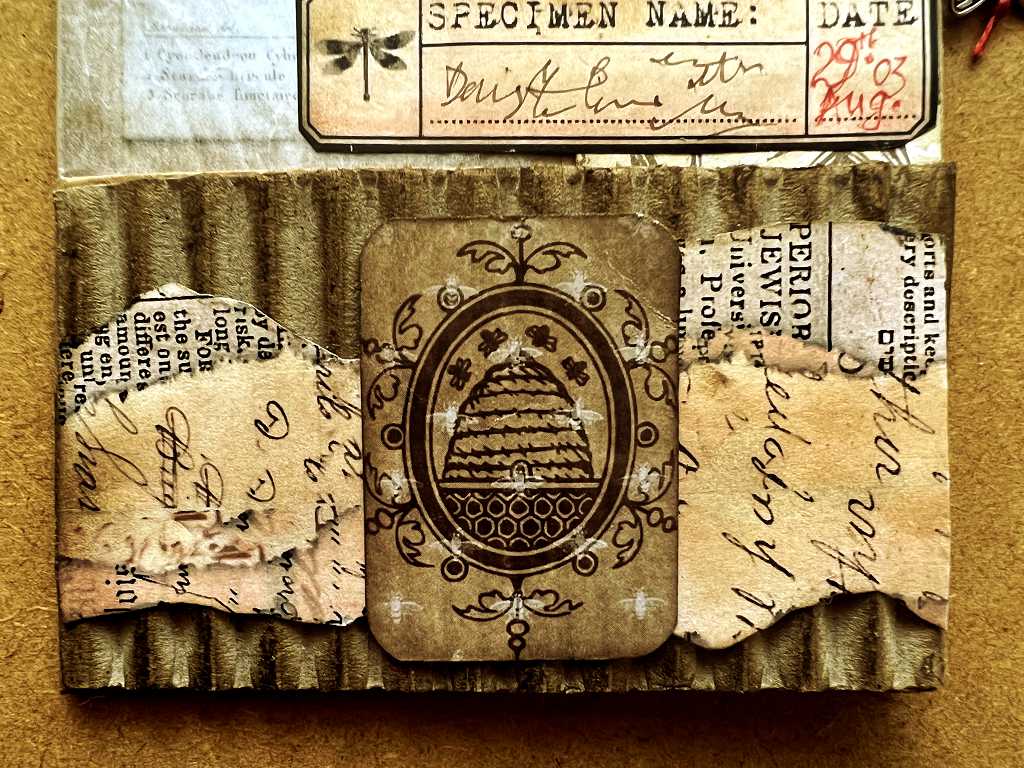
The bottom of the page.
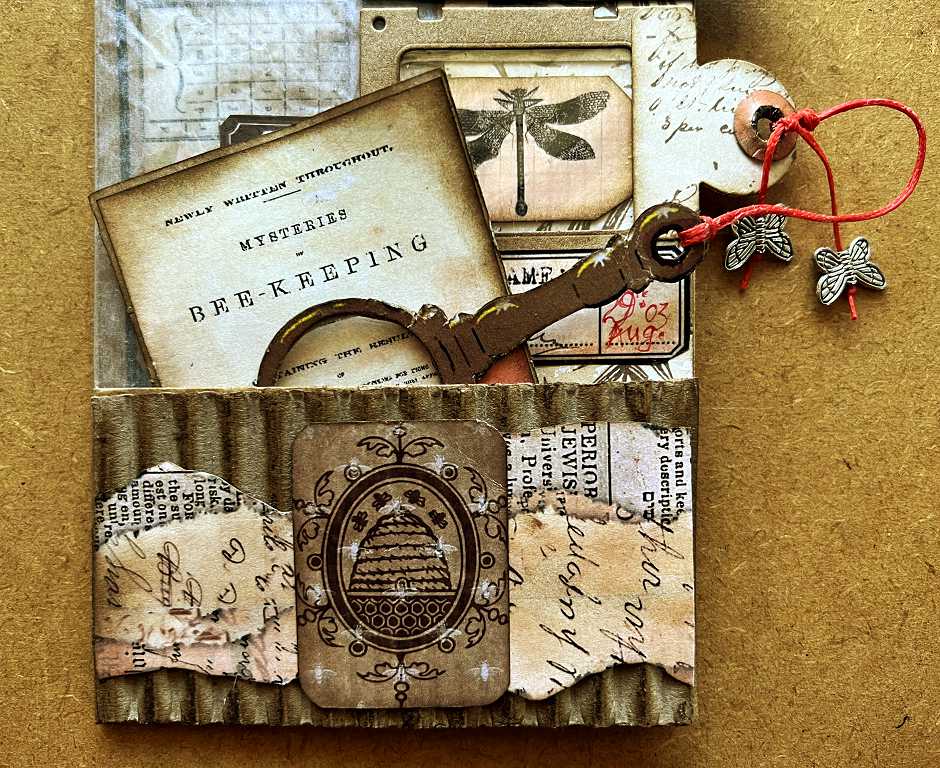
The pocket is made from a piece of corrugated paper after removing the top and bottom layers. I inked the raised corrugations to add more texture. Across the middle is some of the ripped edges printout from VectoriaDesigns mentioned above, and I added a framed beehive image from the Graphics Fairy which I superimposed over a bee background. Tucked into the pocket are a couple of elements we will deal with in more detail below. The tab at the side of the page has two more of the little metal butterflies.
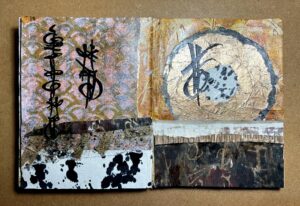
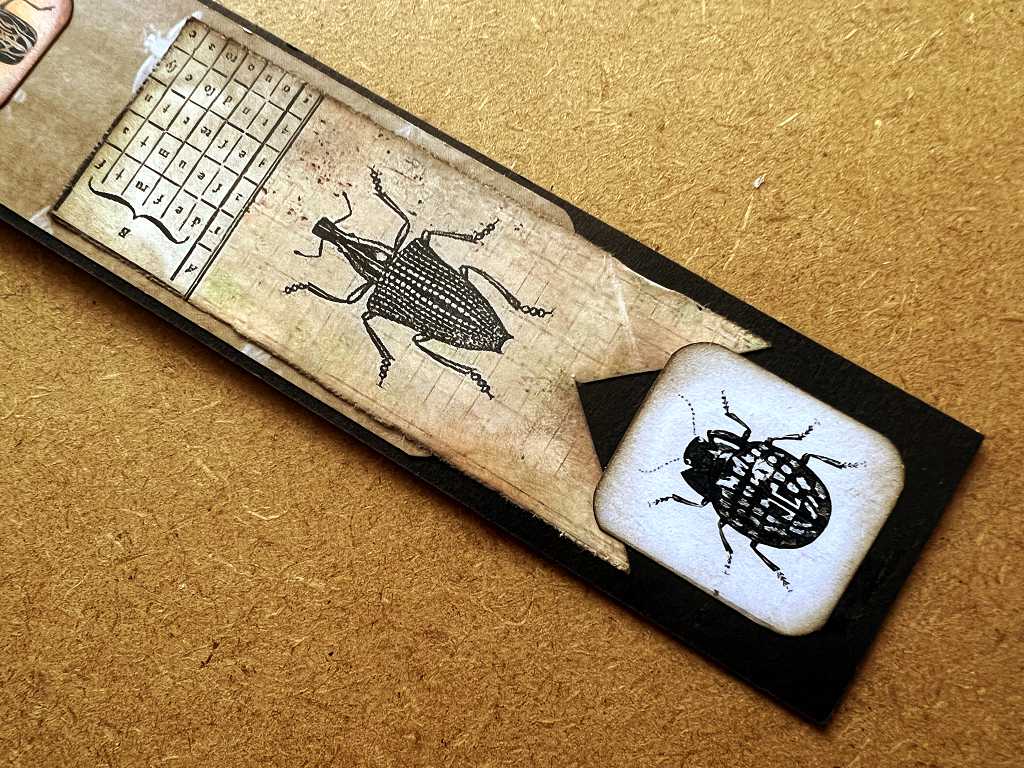
The page with all the tags removed. You can see that there are further bug images under the glassine panel, against more of the bee background I used for the small element at the bottom of the page. Acrss the top of the page I have added a little of one of my coffee-dyed and stamped strips.
The tag, complete with its metal butterfly dangles.
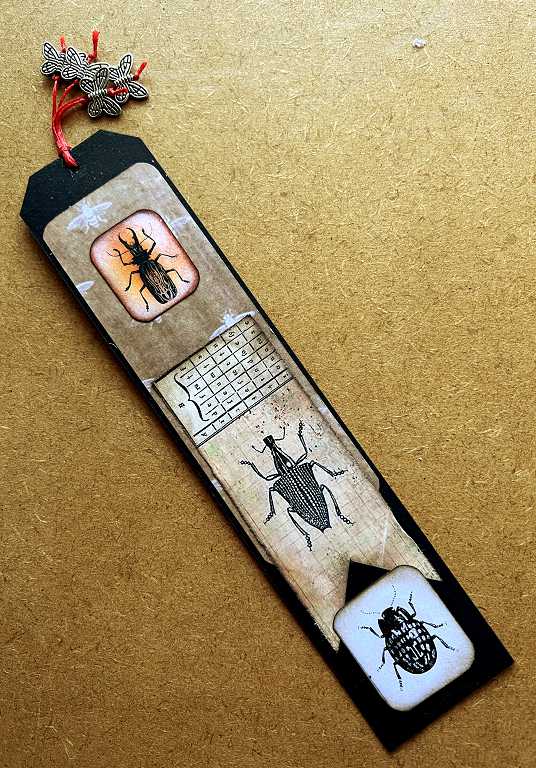
Here they are again, in close-up.
This photo shows the bee background clearly. Also, I added further inking to the bug image at the top to introduce a warmer colour to go with the colour scheme of the page.

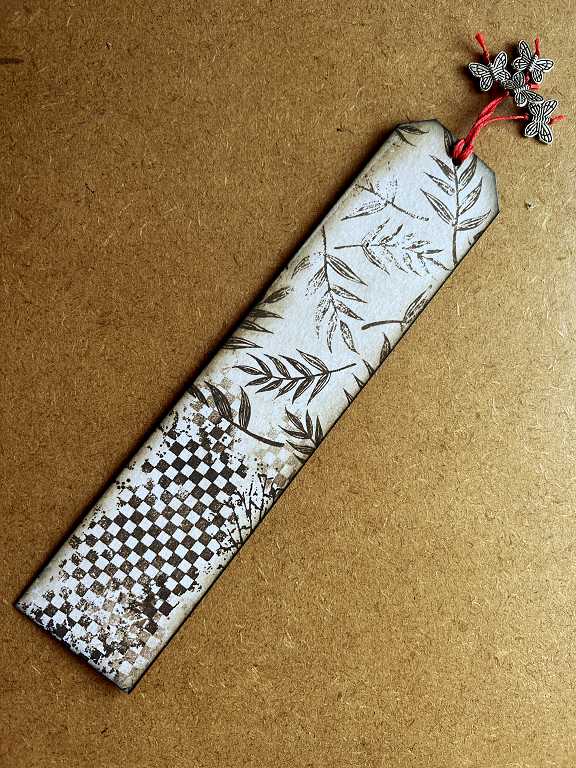
The bugs at the bottom of the tag.
I backed the tag with another of my coffee-dyed and stamped strips.
The elements tucked into the bottom pocket
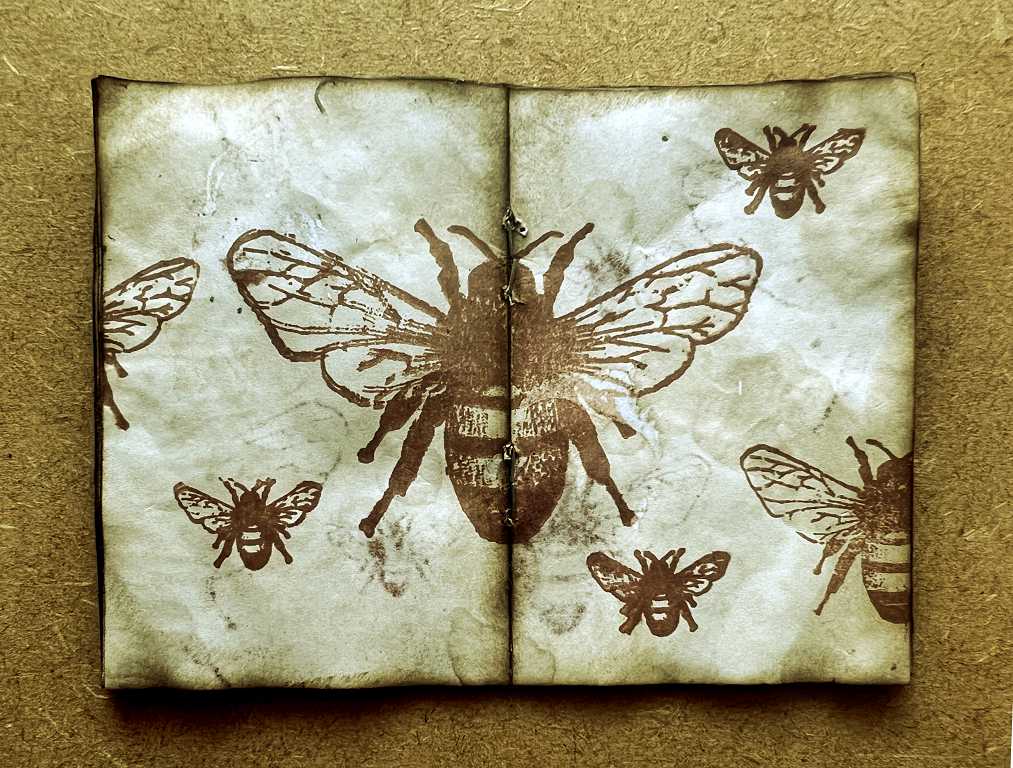
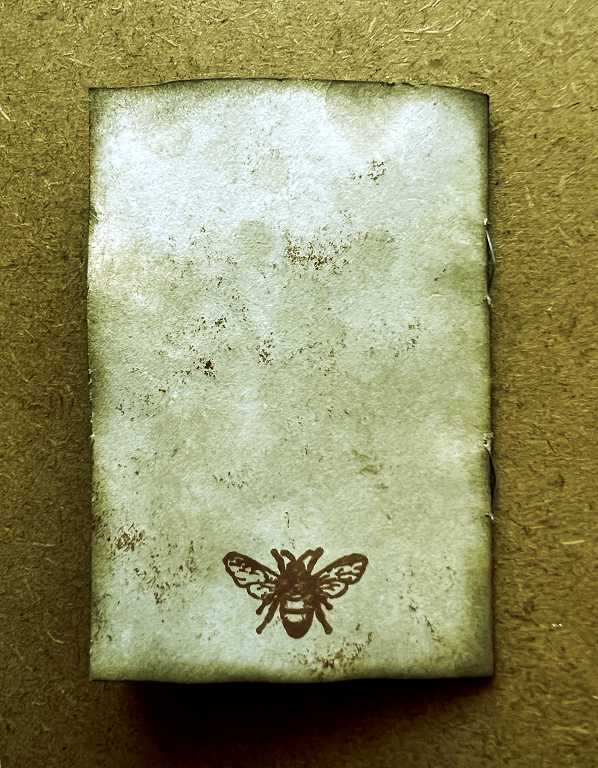
The beekeeping notebook
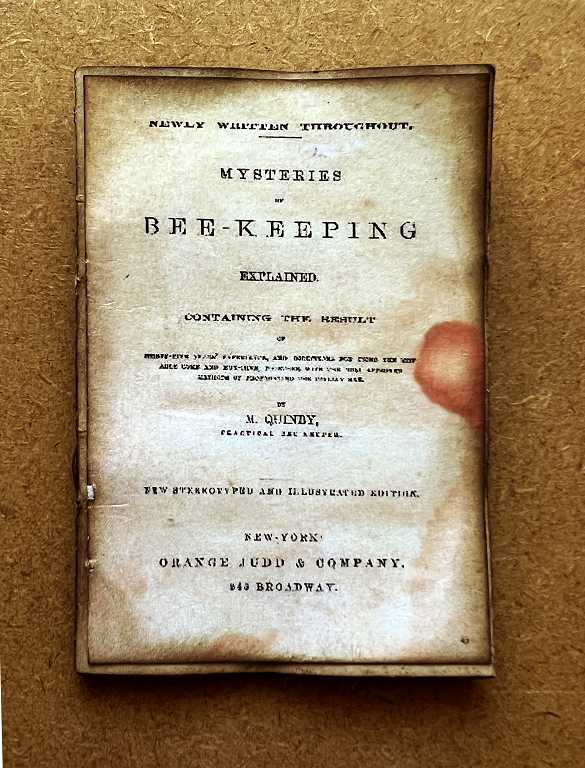
Firstly, the little beekeeping notebook. The front cover is a Graphics Fairy image. I decided to turn this into a little book. It was already nice and grungey with its red stain on one side, and I sprayed it with coffee and added more distress ink, and because it got so wet, it also got pretty wrinkly. I did iron the whole thing but didn’t succeed in flattening it, but I don’t mind as it all adds to the interest!
I made six little pages from normal copier paper which I coffee dyed and then spattered with stronger coffee, and added stamped bees using archival sepia ink. I have a set of three different sized bee stamps. This is one of the page spreads.

The centrefold.
The back cover.
The (non)magnifying glass
I had great fun with this. I showed the design in my last post, which I created using shapes in my desktop publishing software. I sandwiched a piece of black cardstock between two layers of this printout, along with a piece of acetate in between to form the lens. My hubby thinks this is rubbish, because it doesn’t magnify!! I did ask him if he had a spare small Fresnel lens I could cut up and use but he didn’t have one unfortunately, so a non-magnifying magnifying glass it has to be.
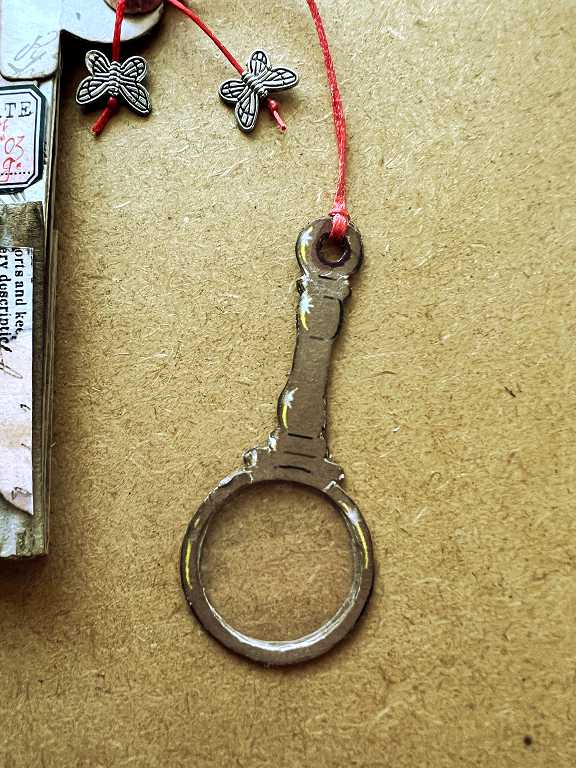
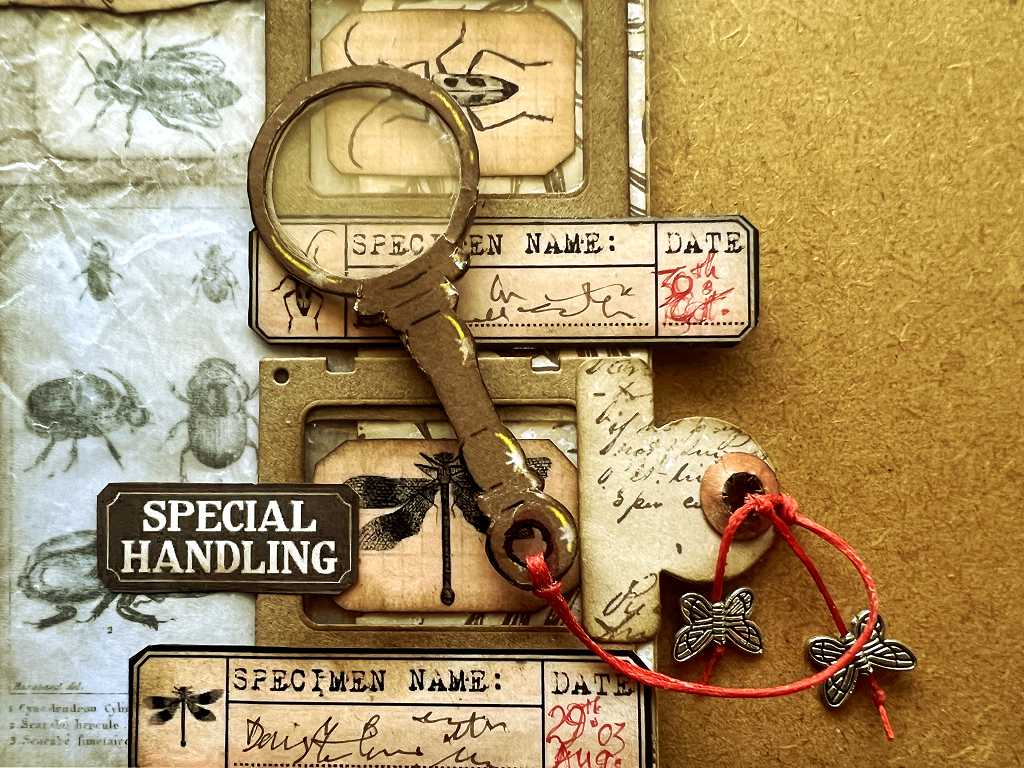
It is simply tied onto the side tab with red cord – I glued the two strands of this together to stop them flapping around so much, and added a couple of the metal butterflies on the ends.
The bottom pocket again, this time with the tags removed.
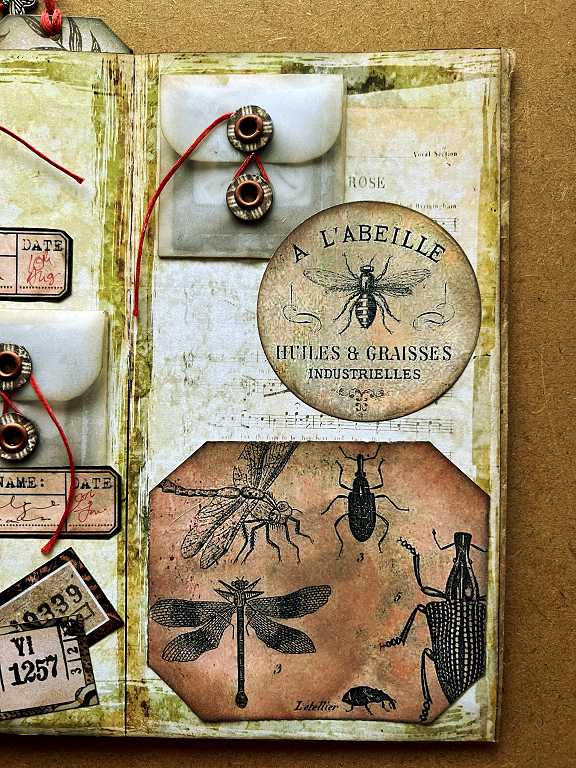
The centrefold
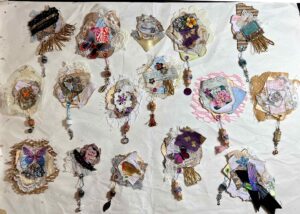
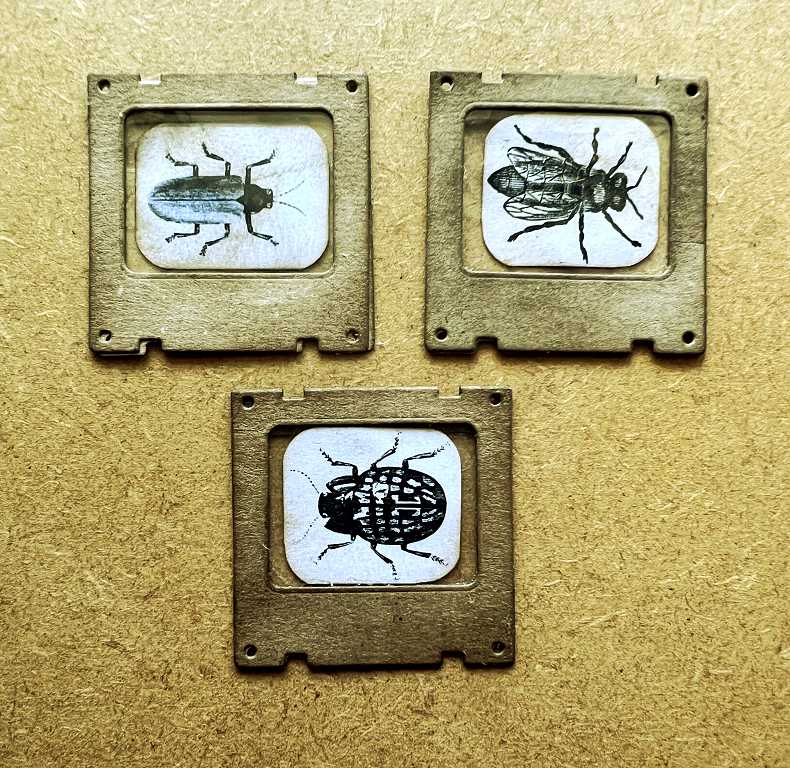
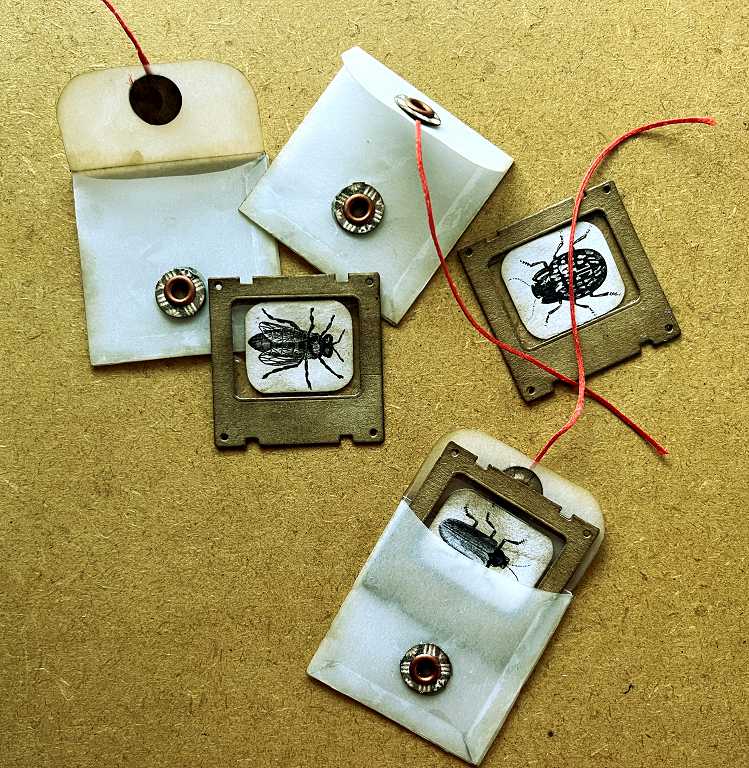
The specimen slides
A selection of specimen slides and labels. The small ones have double-sided butterflies in them, and the larger ones have single-sided images.
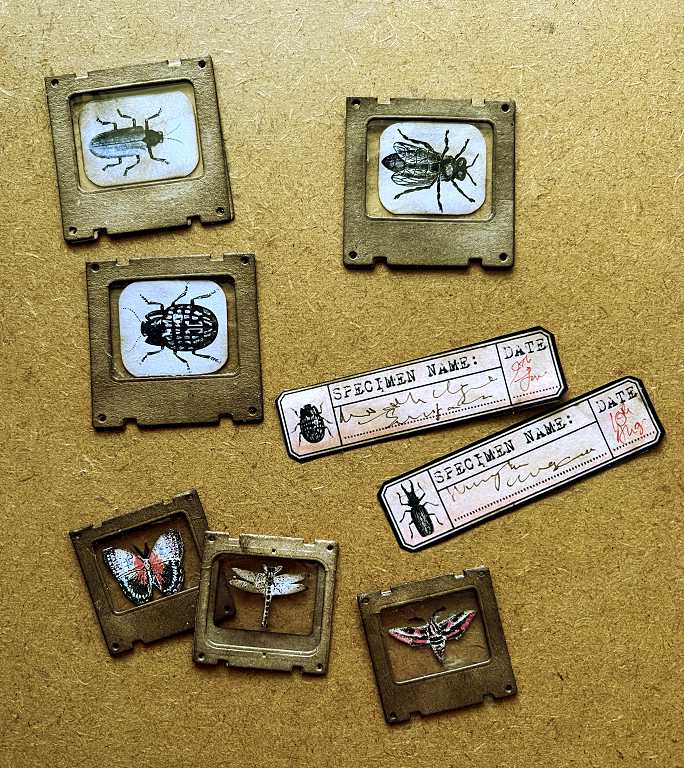
These are the ones I used for this centrefold.
The vellum envelopes
These are the little vellum envelopes I made for the specimen slides.
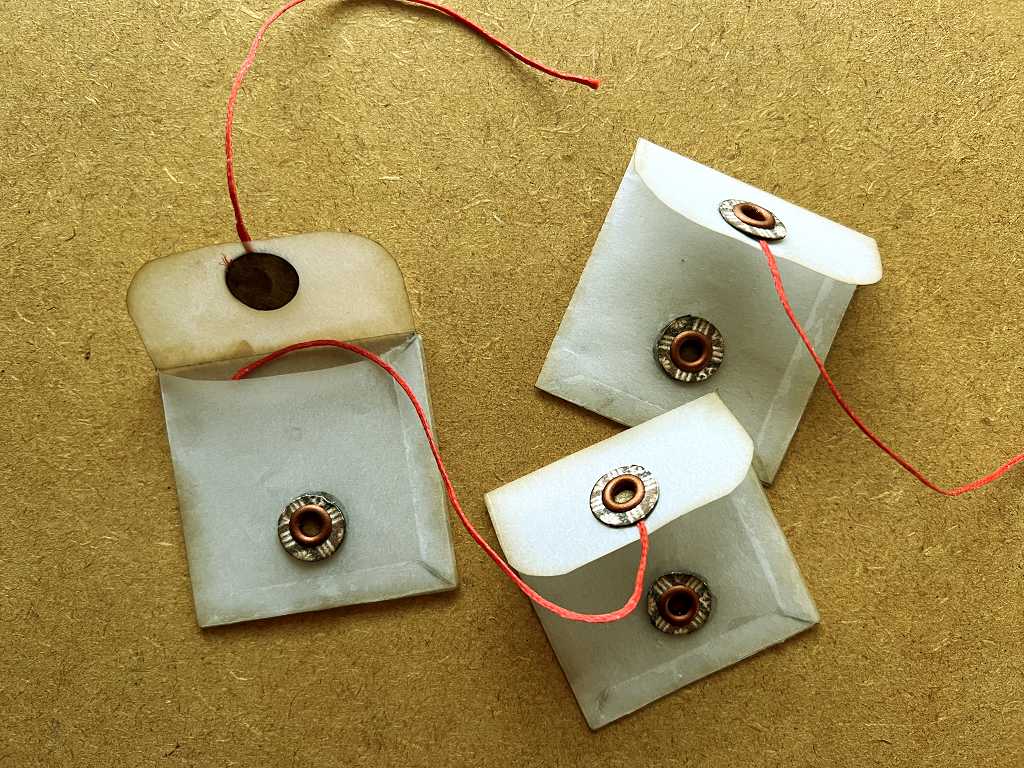
I watched a video about this yesterday, where she showed the template she made for her envelopes. Unfortunately by the time I got into the studio, I thought I’d remembered correctly, but I put the tabs to stick the envelope together onto the back instead of onto the front, so they show through. Once the specimen slides are in place, though, it doesn’t seem to show too much. In the meantime, I have made another template for myself, this time the correct version, so should I choose to make these again, they will be OK. I didn’t want to re-make these ones because I’d used six eyelets in total and didn’t want to waste them.
Here is my correct template.
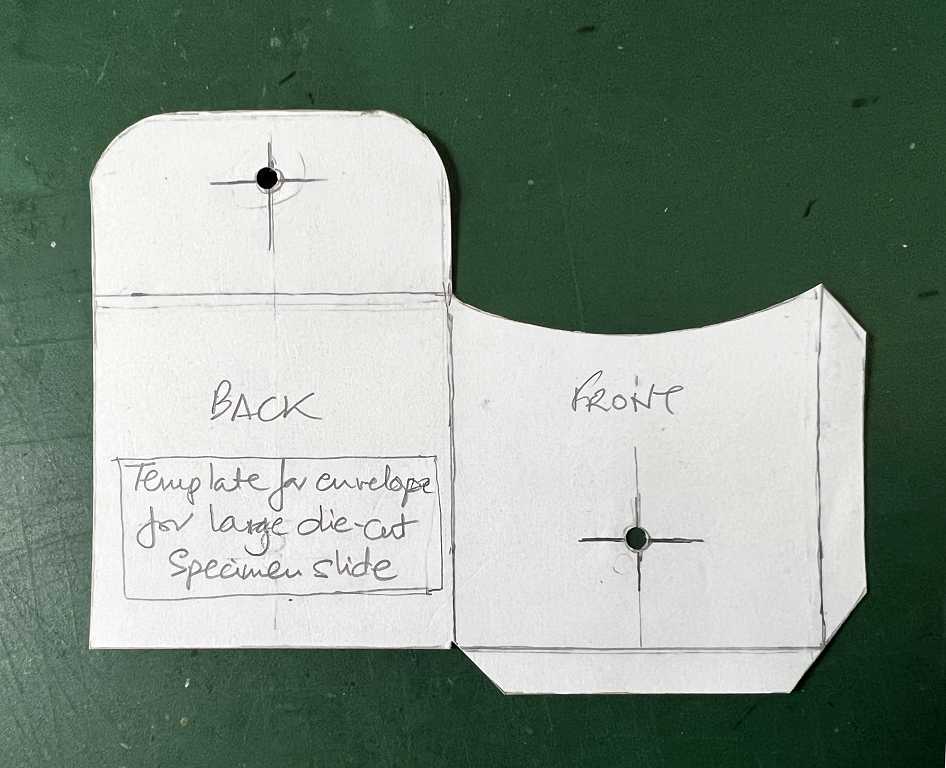
The parts for the main body of the envelope each measure 2 inches square, and the tabs to assemble the envelope are 1/4 in. The flap to close the envelope is 1 in deep, and I used a 1/2 in corner rounder to create the shape.
Regarding the eyelets: as usual, I covered the backs with a disc of paper, this time with no hole in the centre. The backs are always rather unattractive and a bit scratchy, and I wanted the specimen slides to slip into the envelopes easily. I cut small discs from Amazon packaging paper with a punch, and inked them with Walnut Stain Distress Ink and stuck them in place. I think it gives a nice finish on the front, too.
The person on the video had a clever way of attaching the string. Before setting the eyelet, she threaded the string through the hole from front to back, and held the tail while inserting the eyelet. When this was set, it held the string firmly in place, and she was able to trim off the tail. The eyelet was set through another disc of card on the front, around which the string could be wound to close the envelope.
For this I chose some spare printed discs which were already reinforced with a layer of card, from a VectoriaDesigns project I did several months ago. I just had to punch these discs with a smaller punch as they were too large for this project, but I like the pattern on them which suits this project well. As you can see, I used copper-coloured eyelets.
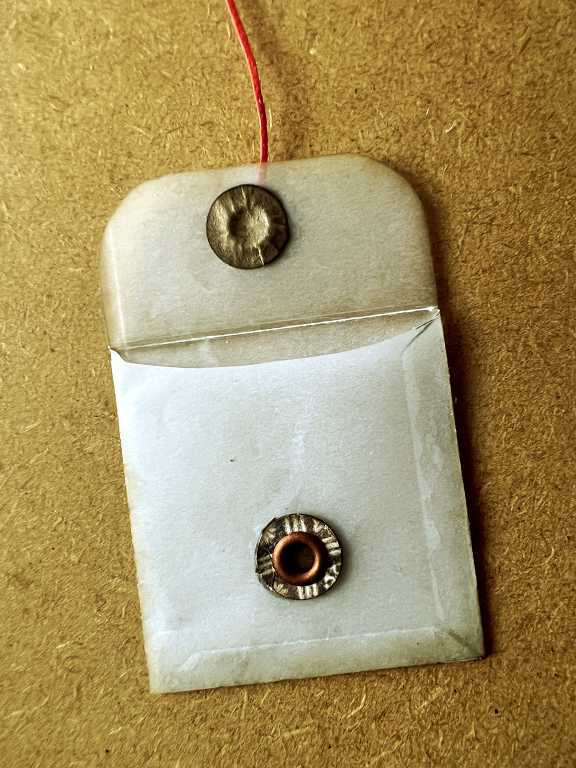
There’s only one problem remaining with these. It is very difficult to get the slides out of the envelopes! I am going to attach a string to the corner of the slide to facilitate this. Apart from the visible construction tabs, I think they look OK. I distressed the edges with Walnut Stain Distress Ink to antique them.
The completed centrefold
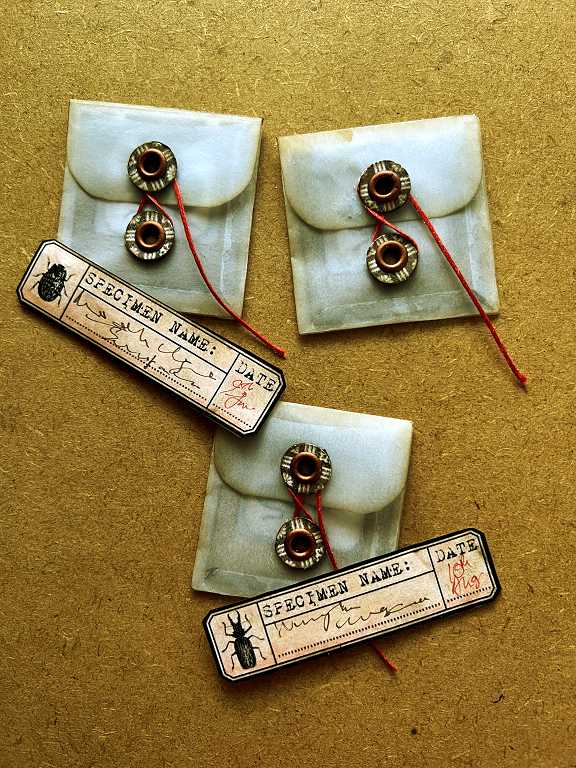
Here are all the envelopes and labels, and some other collage elements stuck down onto the centrefold.
The back page
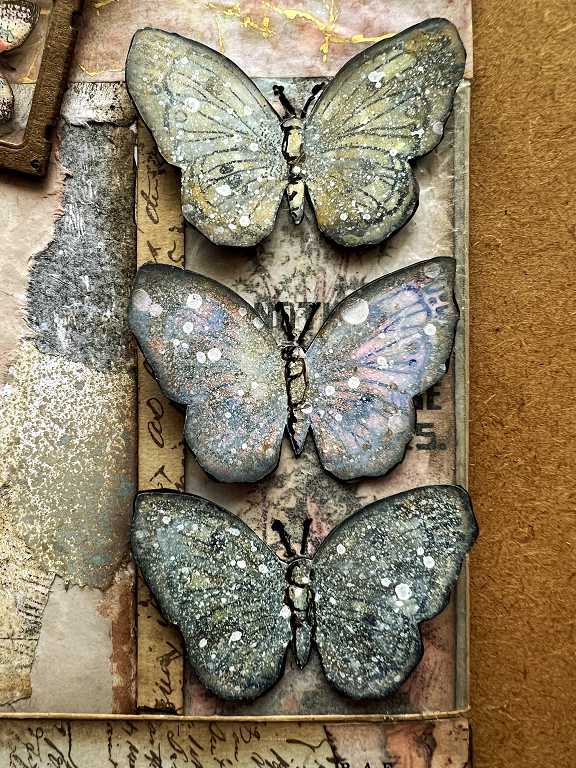
Butterflies. Lots of butterflies!
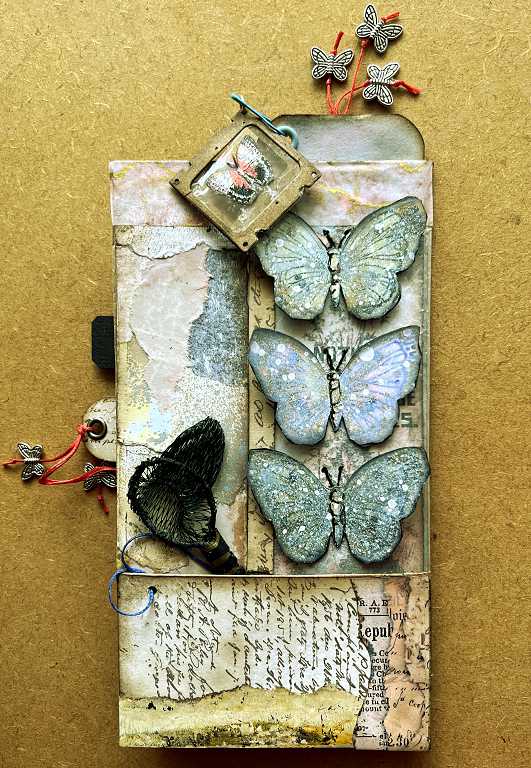
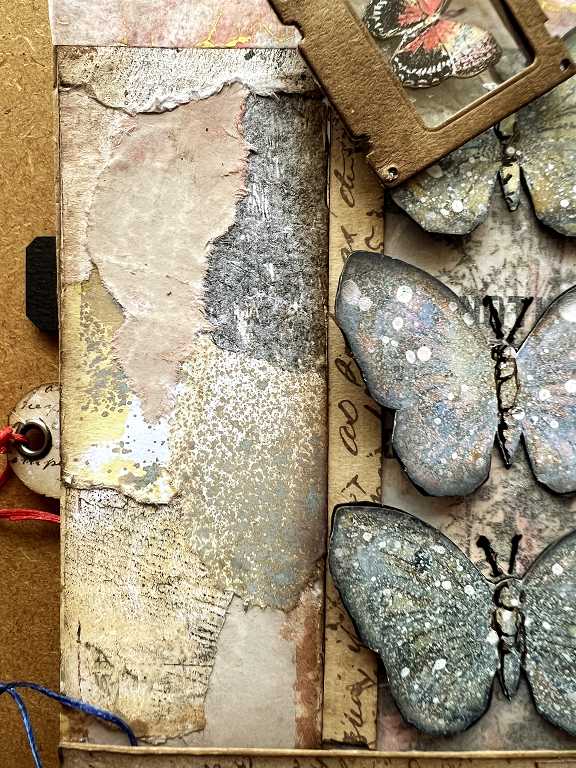
Only the bodies of the three main butterflies on this page are stuck down onto the glassine panel, so that the wings are free. These butterflies were left over from a project I was working on ages ago using glossy photo paper and Distress Oxides, and had remained in my stash ever since. (This is a technique I should return to as it was brilliant!)
The colour is a bit off in this next photo – the light was beginnning to fade and I had to do a fair bit of photo editing.
On the panel to the left of the glassine window, I have stuck down a piece of one of my collage strips. I made these by sticking down random fragments of torn papers onto strips of scrap card.
I added some washi tape across the top which slightly reinforces the edge of the glassine panel, and a narrow strip of coffee-dyed and stamped card down the centre to cover the join.
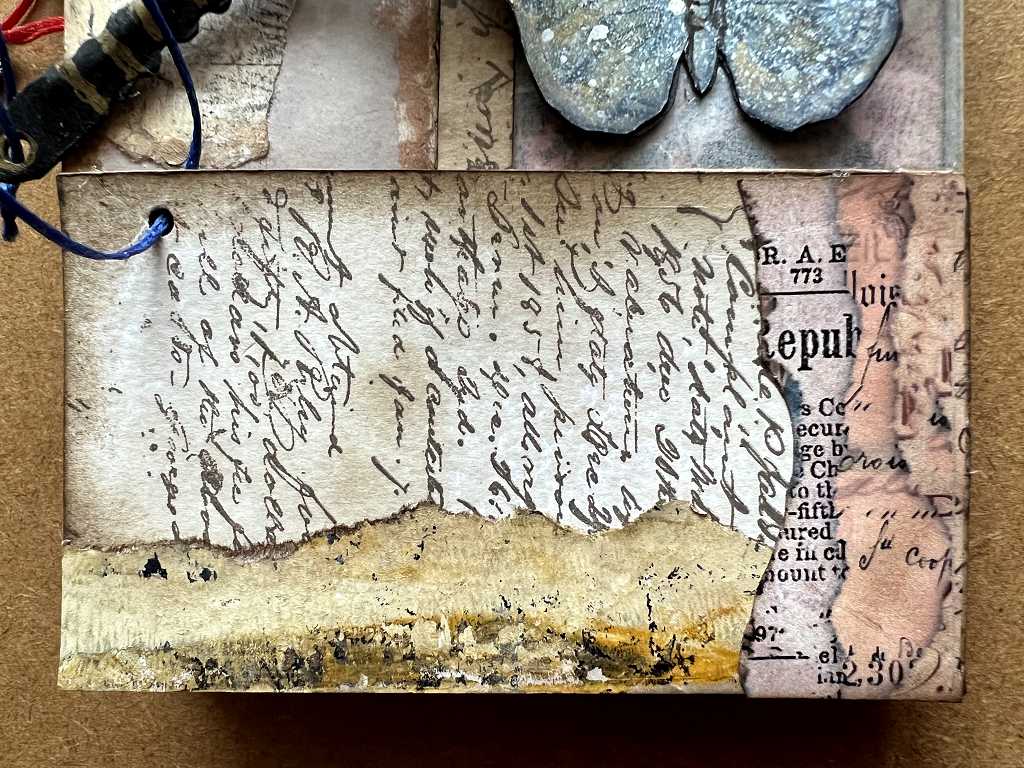
The pocket across the bottom is collaged with another of my coffee-dyed and stamped strips, and along the bottom is a bit more of that fragment of the edge of a gel print which was so delightfully grungey that I couldn’t throw it away! Down the right-hand side is a fragment of the VectoriaDesigns torn edging collage paper. I punched a hole in the top of the pocket for another fun element in this folio!
Butterfly net
A little butterfly net! I didn’t think of doing this until I had already started the page.
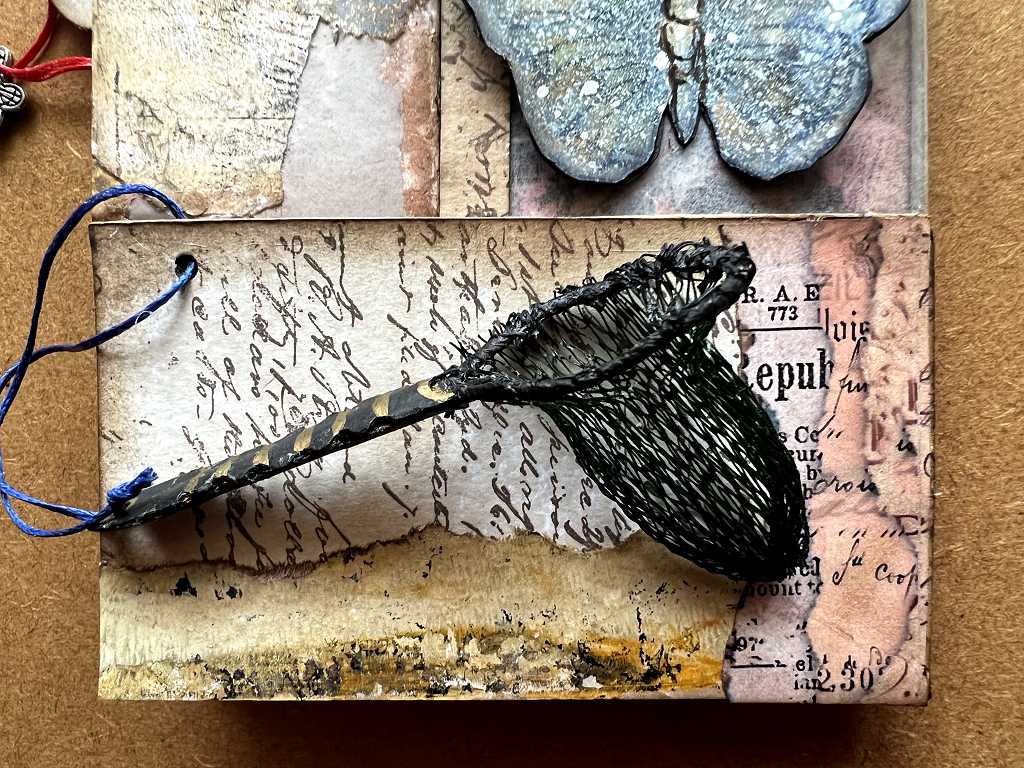
I took a piece of wire and formed it into a loop, twisting the ends together to form the handle. I wrapped the whole thing in black florist’s tape which is tacky and sticks to itself. I wanted to add some thickness, and provide a surface that might be a bit easier to attach the net to. I covered the handle with 3 strips of black cardstock which extended a little further beyond the wire so that I could punch a hole in it.
The edges were indented by cutting carefully along them with my fancy schmancy interchangeable scissors – really fiddly to do! The final touch was to add the gold bands with a gold pen once the net was assembled.
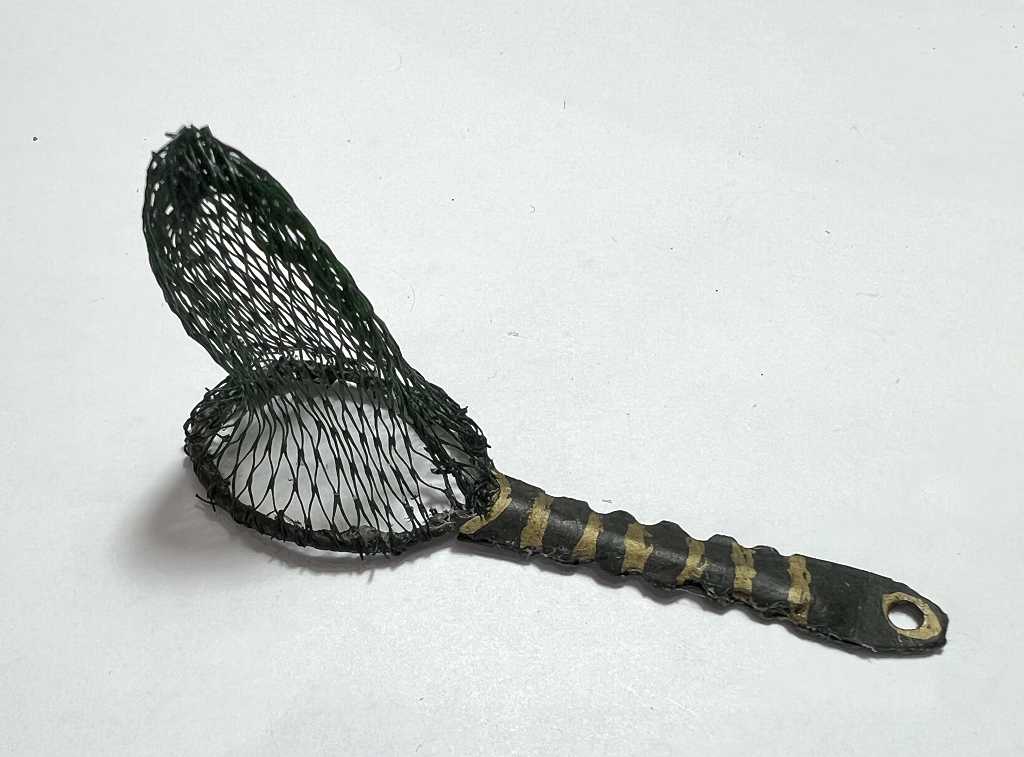
I have a small box of fruit nets in my stash, which includes some finer mesh netting made from stiffer plastic – I think this particular one (very dark green) was around some garlic. Most fruit net is much larger gauge netting but you can reduce the size by heating it – it shrinks up wonderfully and gets quite hard, and you can paint it. In this case I thought this was more suitable, though. I cut a small section and sewed it into a tube with black cotton thread, and across the bottom, gathering it up to form the shape of the butterfly net. I turned it inside out and sewed it to the covered wire hoop, turning the edges to the inside. It was very fiddly to do, and there were lots of little bits sticking up. I added glue and trimmed bits off until it was reasonably tidy, and to cover up any paler-looking bits of glue, I ran around the whole of the top with a broad black Posca pen. Quite a lot of fiddly work but I think it was worth it as it’s a bit of fun in a folio that includes a non-magnifying magnifying glass – that and a butterfly net are essential tools for an aspiring entomologist! I attached the butterfly net with some blue cord through the hole I had punched in the top of the pocket. The net can be slipped into the pocket for safe keeping.
The page with the tags removed. Behind the glassine panel is a piece of blue patterned background paper but you can’t see too much of this because of the large butterflies.
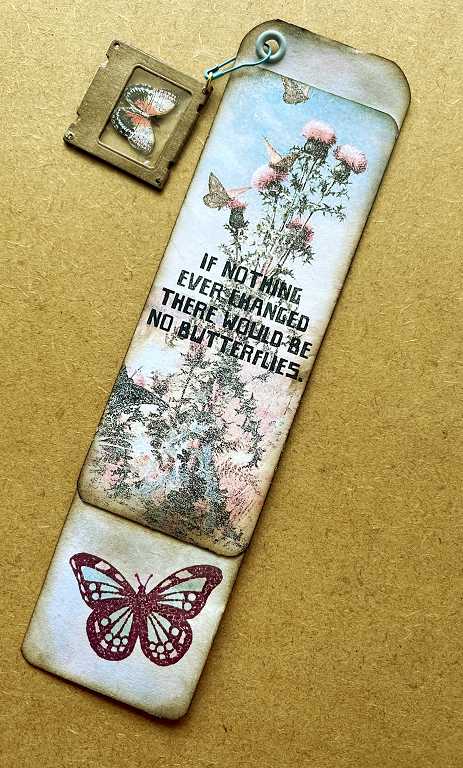
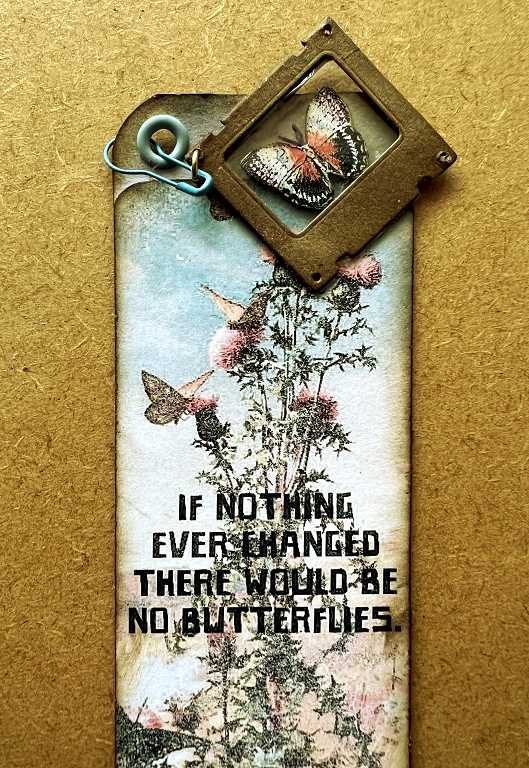
The tag
The tag is embellished with a Grahics Fairy image with a rather nice quote. I mounted this on a longer piece of card and stamped a butterfly on the bottom with plum archival ink and then painted with Distress Inks. At the top, I added an eyelet with a bulb pin to attach one of the small specimen slides containing a double-sided butterfly.
The reverse side of the tag.
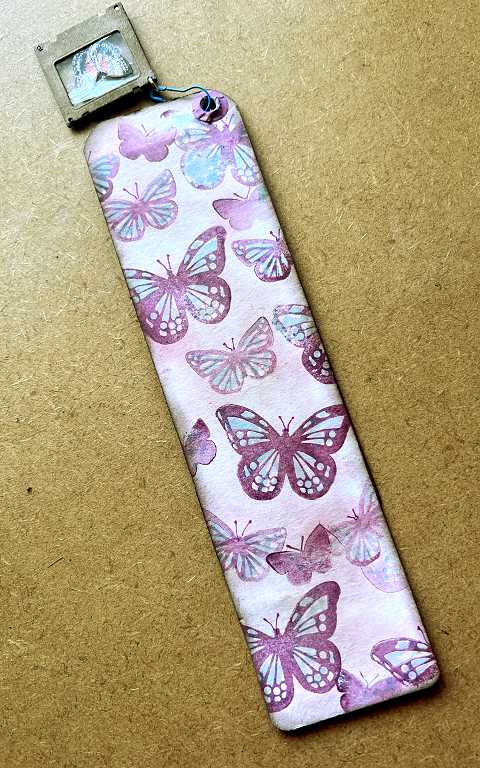
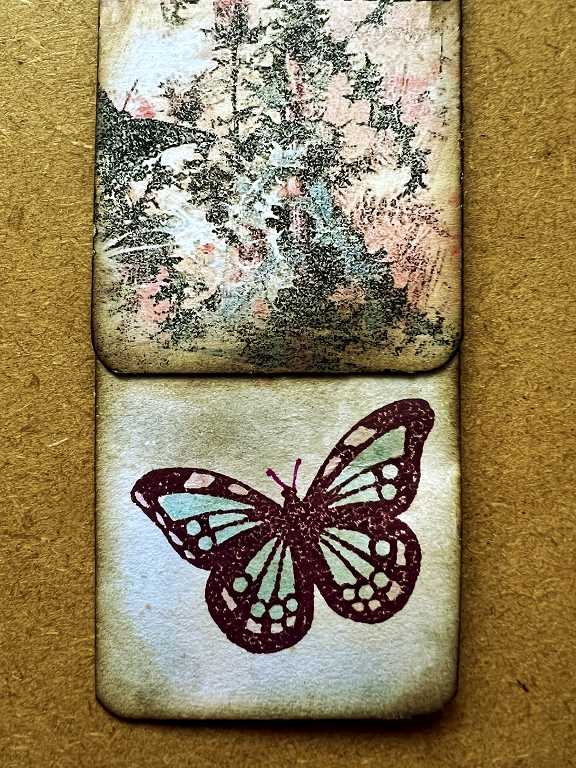
I added some Distress Oxide Inks with blending brushes in pink and blue and spritzed them with water to activate them. Once dry, I did ghost stamping with several sizes of butterfly stamps using plum archival ink – stamping off on scrap paper first and then onto the tag. I added Distress Inks with a wet brush to colour them randomly afterwards.
You can see that I have added a paper ring around the back of the eyelet at the top.
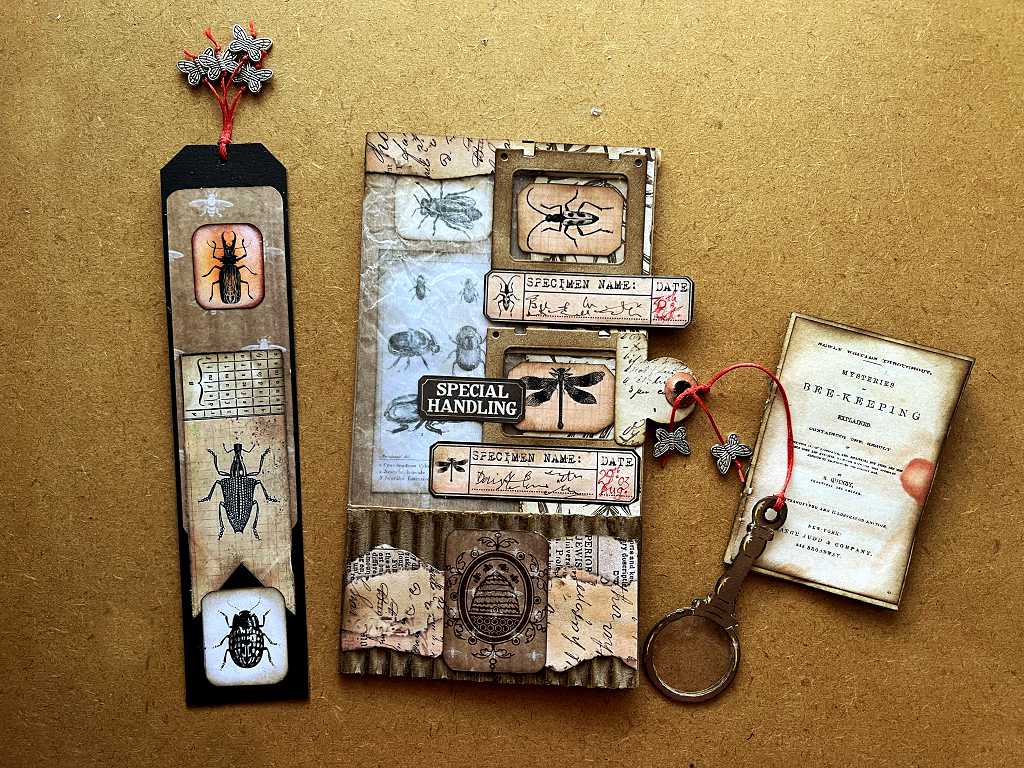
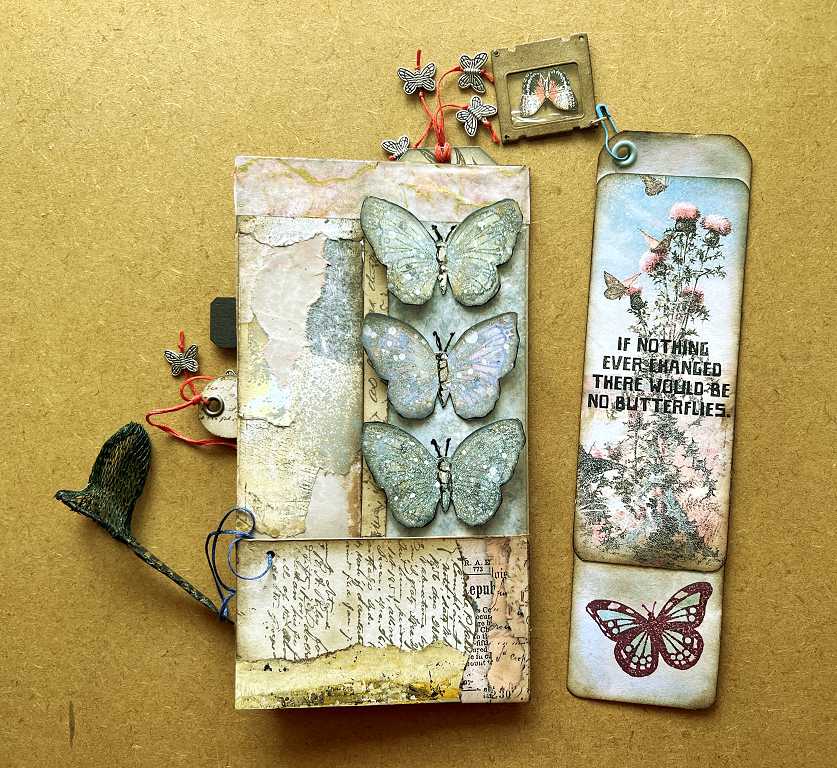
A quick resume of the three parts of this completed folio.
I hope you have enjoyed this tour of the entomology-themed folio as much as I enjoyed making it.