I wasn’t able to share this last week, but I am sure Cindy has received it by now so I won’t spoil the surprise.
This card is to say a big thank you to Cindy for the gift of her ToDo foiling machine, which I received shortly before I went into hospital for my operation, and it was only at the beginning of this week that I was finally able to settle down and explore what it could do. It not only does hot foiling, but it also embosses, does letterpress and cuts dies.

I decided to make a card for her, using the machine. It seemed fitting that the first project I ever made with it should be a card for Cindy.
I used a die set I bought several years ago at a craft show. It is really designed to make an easel card but you can use the various elements in whatever way you like.
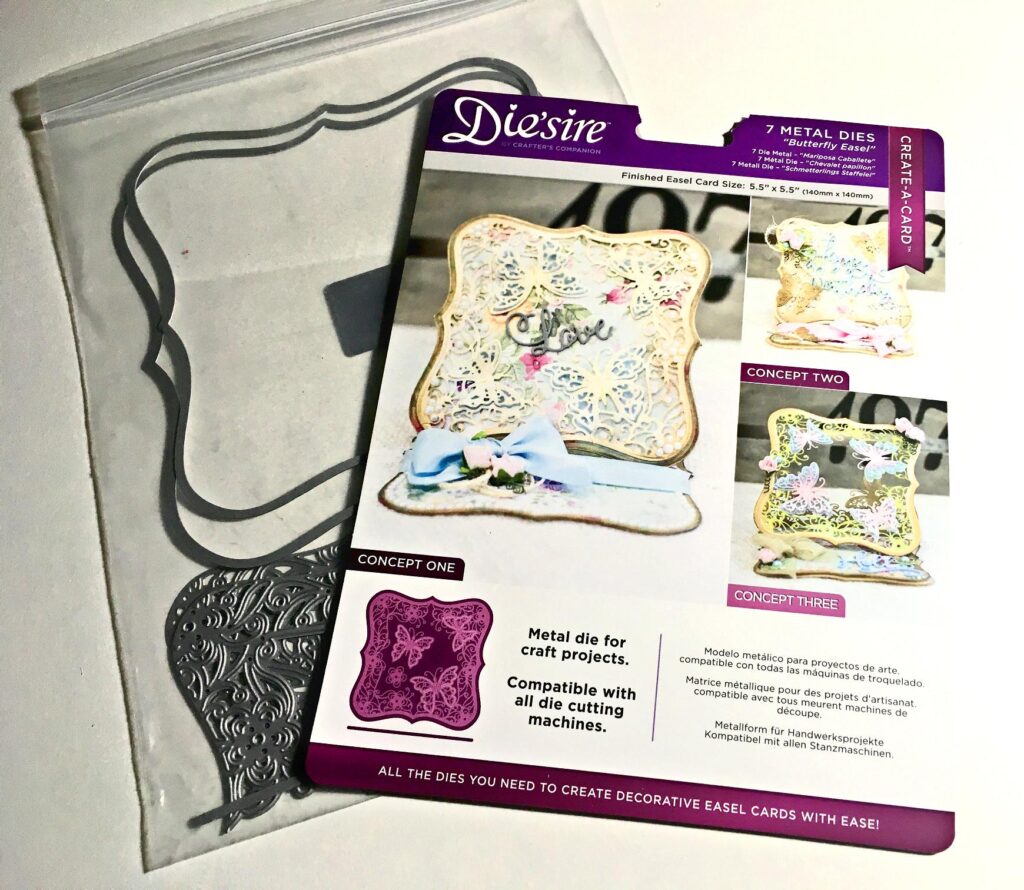
Here are the two dies taped down, ready to do letterpress on a piece of cardstock. You can use these dies like this to create a whole design, or separately.

Unfortunately I didn’t have a great success with the letterpress effect. It might be better with a dedicated hot foil/letterpress die which has a larger imprint to emboss the paper than the single cut-line of the die. In some areas (mostly in the centre) it didn’t seem to make much impression at all, whereas at the edges in some places it almost cut through the card. I don’t know what the answer to this is.
Anyway, I thought I could emphasise the design a bit by applying some Antique Linen and Tattered Rose Distress Oxide ink with a blending tool. The result is quite pleasing – it’s very subtle and doesn’t overwhelm the rest of the design. Here are the pieces ready to assemble. I cut the narrow frame and butterfly and little flowers from some gold mirror card, and used the heating element of the ToDo to make the foiled sentiment, which I cut out with its accompanying die. This was cut from white cardstock. I cut three more identical pieces and layered them together with liquid glue to create some dimension. The butterfly was also backed with a white cardstock piece for strength; the outer part of the wings and the butterfly’s body are glued down but the rest of the wing portions are left free.
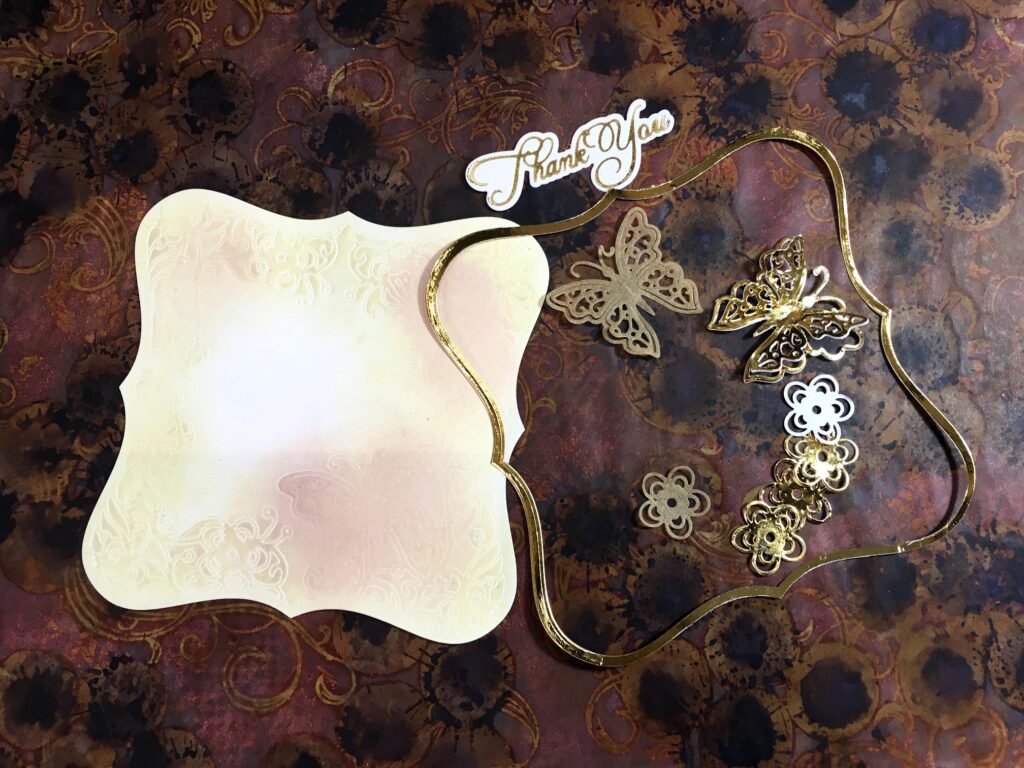
I had a terrible time releasing the gold card from the intricate dies. Looking up this problem, people recommend putting a piece of drier sheet between the die and the card and this makes for easy release, but I didn’t have any. Someone else suggested baking parchment, and I had some success with this, aothough it was still quite difficult to get the small pieces out without damaging them. When I released them, I found some of the baking parchment pieces had come out complete, so I thought I would incorporate these into the design as well, for a subtle, ghosted effect.
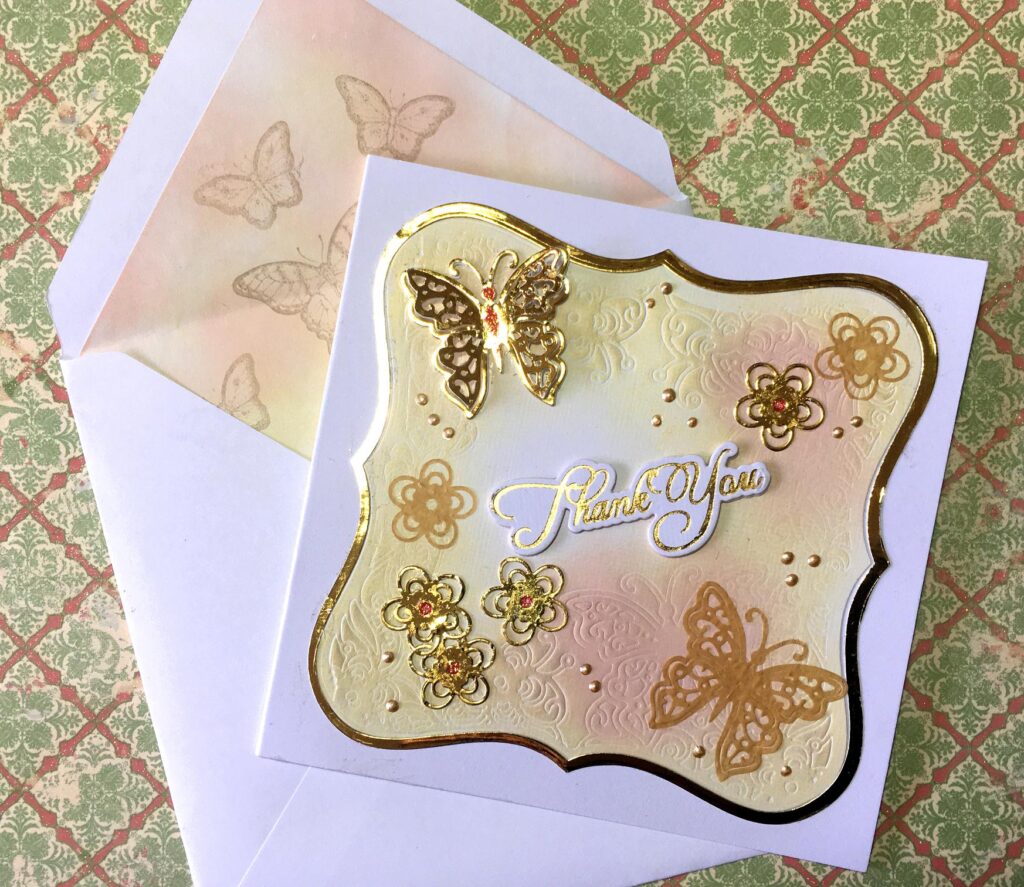
Here is the completed card.

The card measures 5 3/4 inches square. I added some bisque liquid pearls randomly on the background, and some Fruit Cocktail Stickles glitter glue (my favourite Stickles colour – I always seem to come back to this one!) on the body of the gold butterfly and in the centres of the gold flowers for a bit of bling. Everything was stuck down with liquid glue.
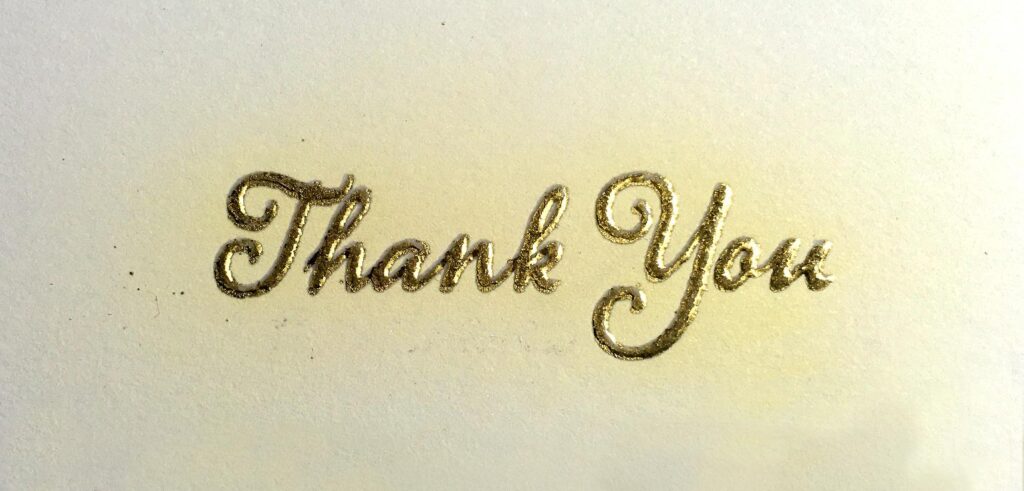
I heat-embossed a “thank you” sentiment inside the card using my Tim Holtz stamp positioner. I did two layers of gold embossing and a final layer of clear, so that the text is nice and raised and shiny. I inked lightly over this with more Antique Linen Distress Oxide and buffed it up to remove the ink from the embossed letters.
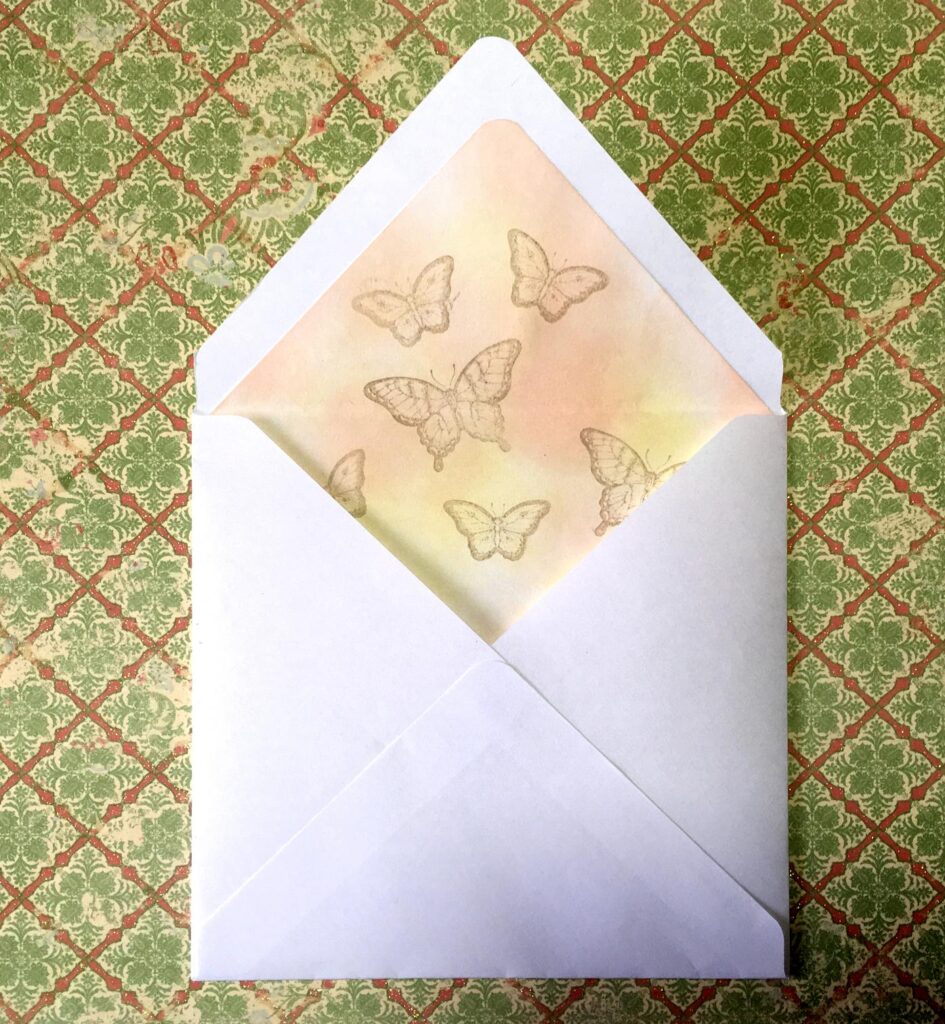
I made the envelope from plain white paper using my envelope punch board. I made an envelope liner and inked this to match the card. When it came to choosing a colour to stamp the butterflies (using a Stampin’ Up stamp set I have), I had to try several different Distress inks on scrap paper before I found what I wanted. I eventually used Frayed Burlap, using a ghosting technique, stamping on scrap paper first to remove some of the ink, and then stamping the rest on the project. This gave the effect I was after – the right shade, but not too dark.
The completed card and envelope.
Thank you again, Cindy, for your wonderful and generous gift. I’m going to have endless fun with it.