TISSUE BOX CARDS
Over the past couple of days I have made two cards – a birthday card (due next month) and a Valentine card for my hubby (cutting it fine – got to be ready for tomorrow!). I thought I would make the two cards together as they would be using the same format, one with a cool colour scheme and the other a warm one.
I have been saving bits and pieces over the past few months for album making, including empty tissue boxes. These have a long oval window already in place. As I have been busy with a lot of other things, the tissue boxes have been mounting up and I have not yet begun to use this material for album making, so I decided to use two of them for the basis for these cards.
Fortunately the pieces, once cut from the boxes, are just the right size for matting and layering onto A4 folded vertically, with a little cut off the end, forming a tall slimline card.
Originally I planned to cover or paint over the existing design on these pieces, but in the end I decided to leave them as they were, and incorporate the pattern and colour into the design of each card. The oval window edges were a bit rough because they were perforated, so I cleaned up this edge with very fine scissors and some fine sandpaper.
The birthday card
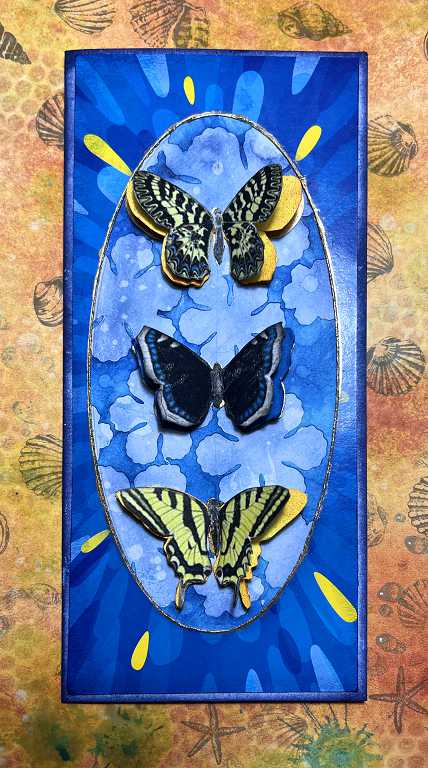
Perversely, given the short time-frame, I began with the birthday card rather than the Valentine card! This was the cool colour scheme one, with a focal point of three 3-D butterflies.
Preparing the papers
Rummaging through my scraps box, I found quite a few pieces of card left over from die-cutting a group of flowers. I thought one of these negative space pieces would make a nice background behind the oval window. The pieces separating the petals were very delicate and needed careful handling during the inking and glueing down process. I applied Prize Ribbon Distress Ink with a blending brush, and then spattered it with water and blotted it off.
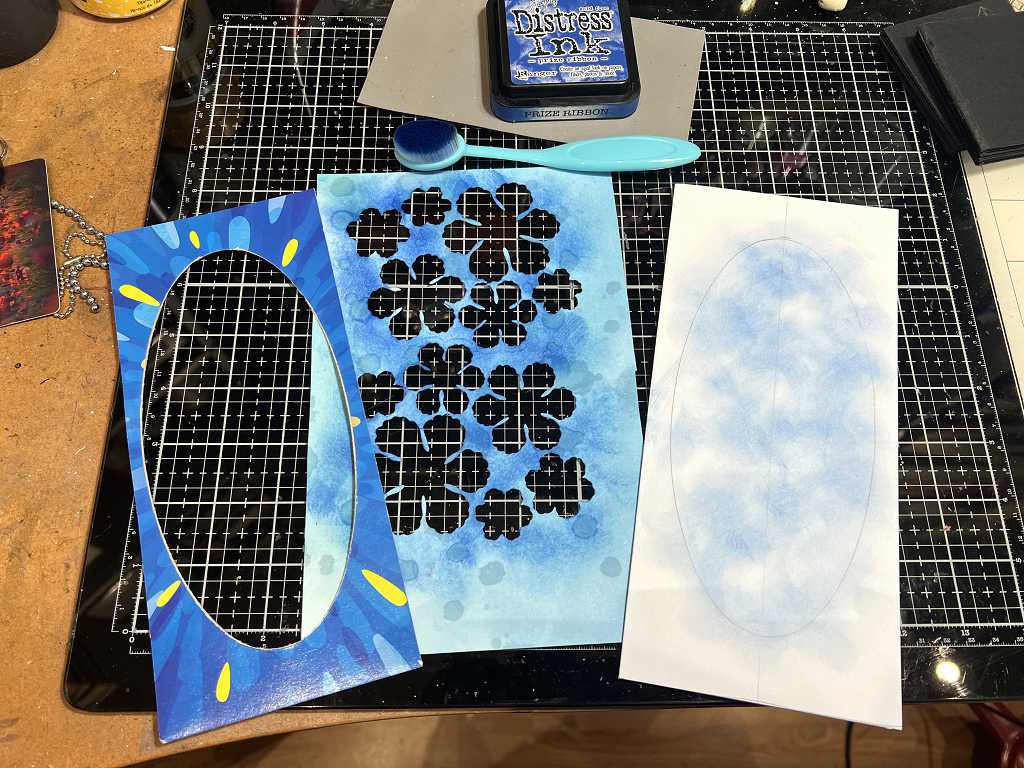
On the right you can see the card base to which I have added some more of the same ink, using the blending brush without additionall ink, creating a cloud-like pattern. I have traced in pencil the outline of the oval to determine the area for inking.
Making the butterflies
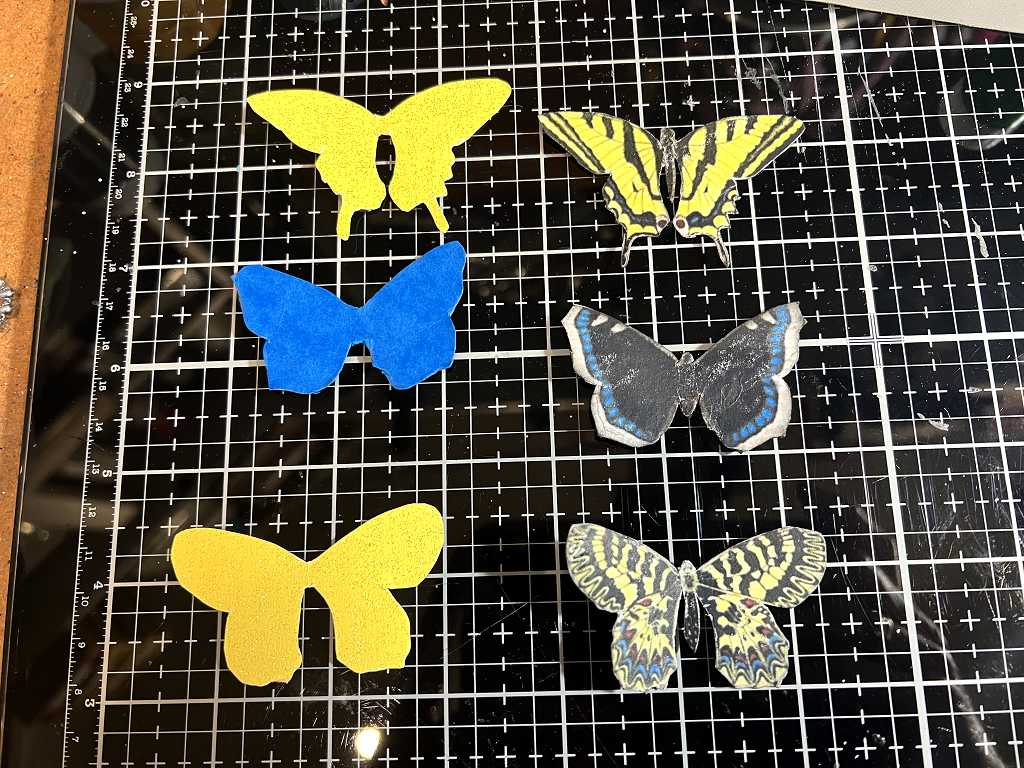
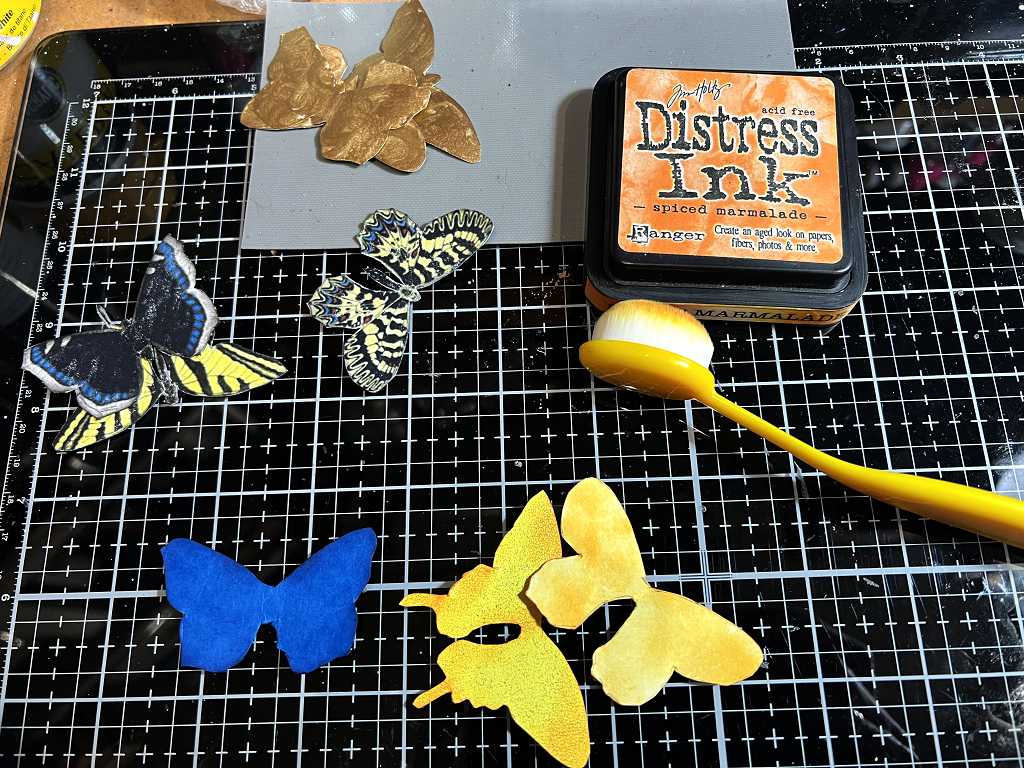
I fussy-cut three butterflies from the sheet I had printed out from the Graphics Fairy downloads, choosing yellow and blue to co-ordinate with the tissue box. I stuck them down onto scrap card and cut them out, and then traced around them and cut out three more pieces from yellow and blue card scraps – the top one is actually yellow glitter card but the sparkle doesn’t show on the photo.
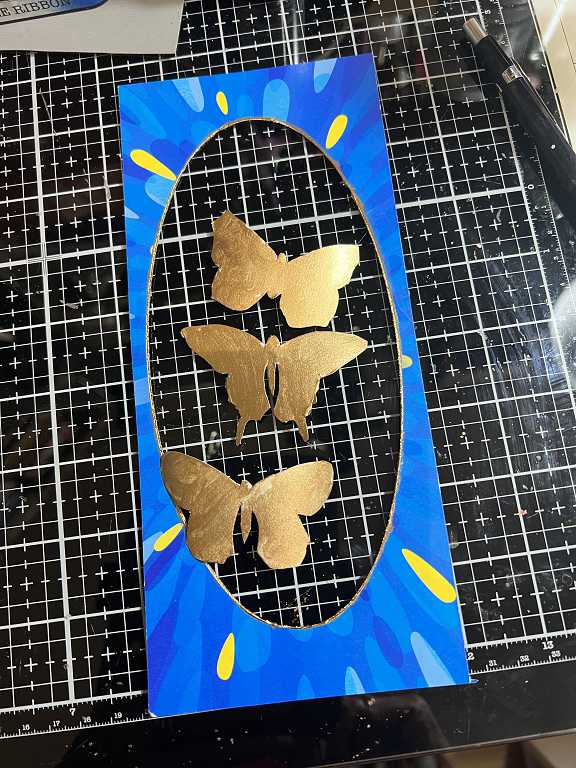
I painted the backs with gold, and while I had brush and paint on the go, I painted the edge of the oval window with gold as well.
Assembling the card
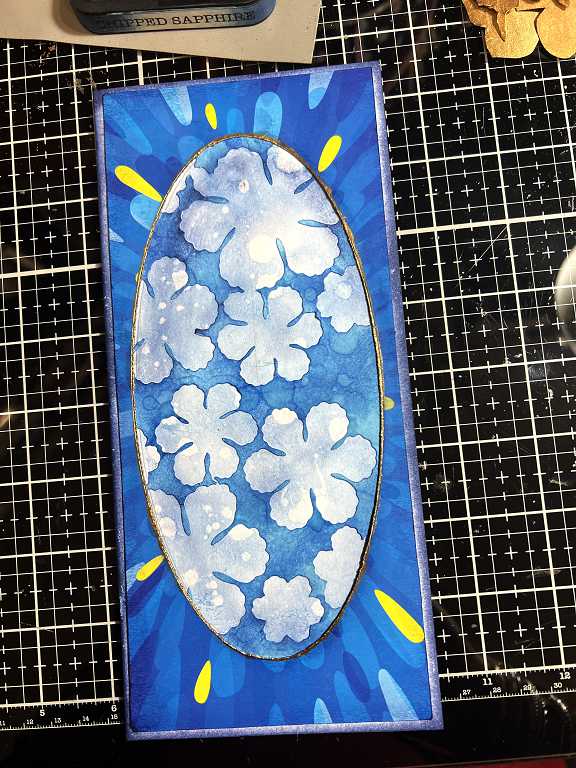
Here is the piece with the background stuck to its back, and the whole thing mounted onto the card base. Before doing this, I inked around the edge of the card base with the Prize Ribbon Distress Ink. You can see that I had also spattered the inked card base – this is what is showing through the flower cut-outs.
I inked the yellow and blue butterfly shapes with Spiced Marmalade Distress Ink, and cut another set from scrap card which were painted with gold.
Adding the butterflies to the card
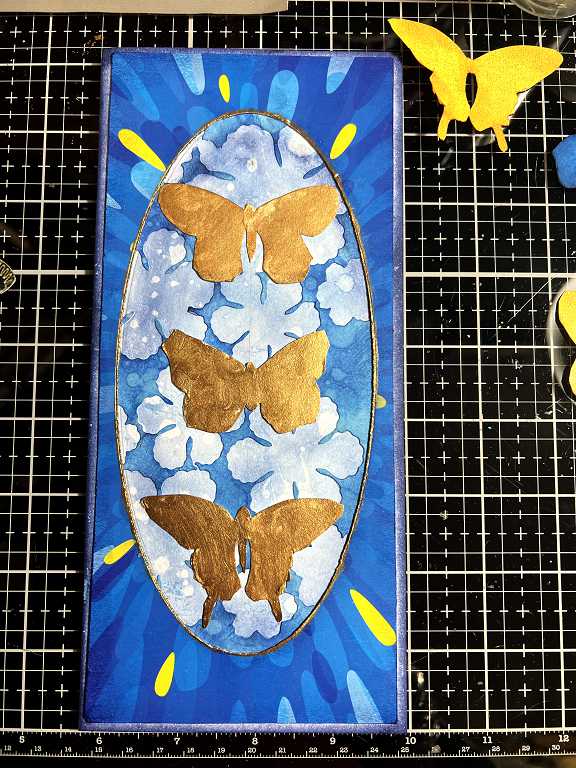
The gold-painted butterflies with heads and abdomens were stuck down onto the window in the card.
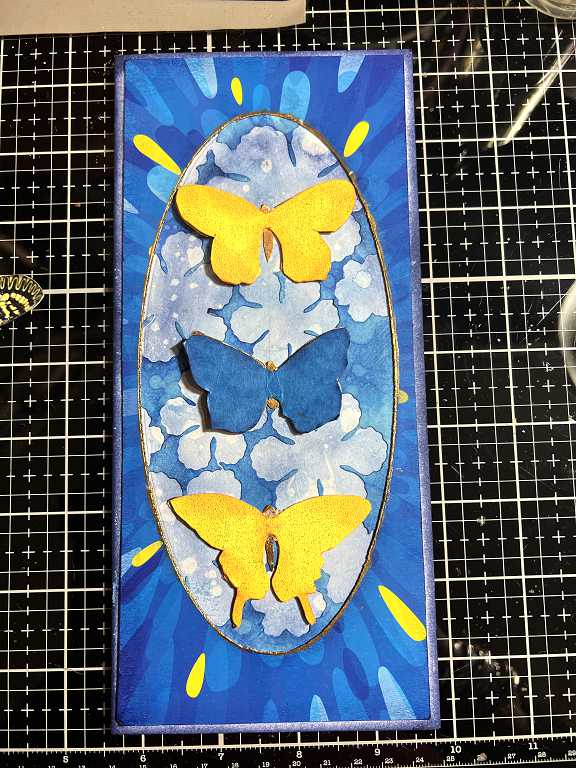
Next, I layered the coloured card butterflies (cut without heads or abdomens), sticking them down in the centres only with tacky glue.
Finally, the printed butterflies were stuck down in the same manner.
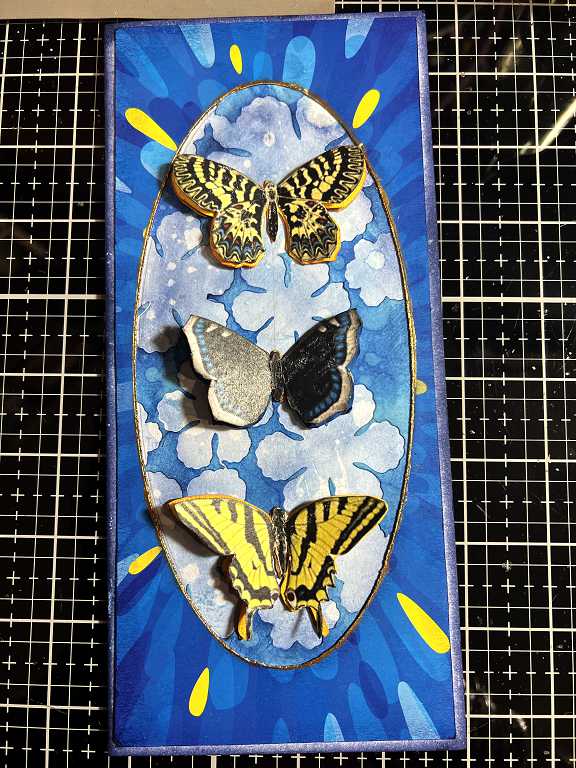
In this way, each butterfly consists of three layers – a gold layer, stuck down fully onto the card base, a middle layer of blue or yellow card, and the top layer being the printed butterfly.
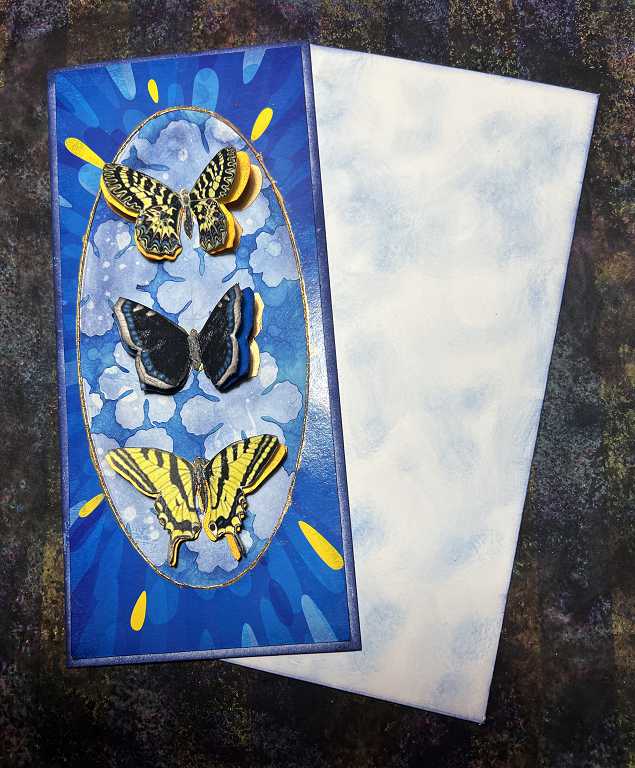
The completed card
Here is the completed card. I like how the radiating yellow streaks on the tissue box accentuate the design and pick up the gold colour of the two outer butterflies.
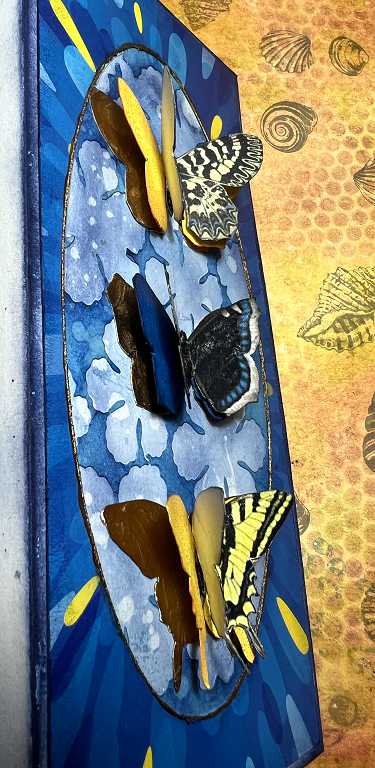
A view of the card from the side, showing the 3-D butterflies.
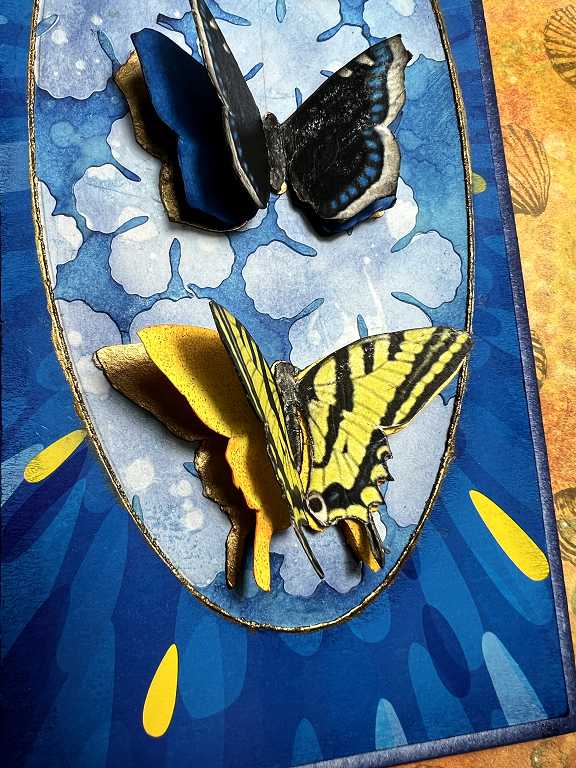
A detail shot.
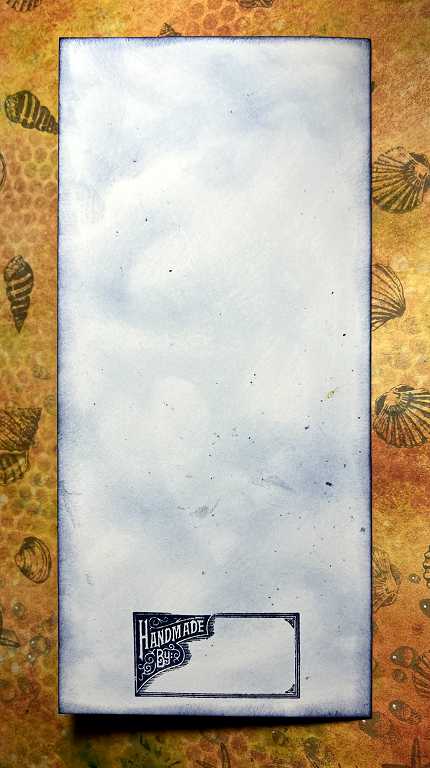
For the back of the card, I echoed the blotchy cloud-like inking, using Prize Ribbon Distress Ink – what was already on the blending brush for a nice soft effect. I distressed the edges using the same ink.
The completed card with its envelope, inked in the same way. (More on the envelopes later.)
The Valentine card
This required quite a bit more work than the birthday card, because it involved altering the papers I used for the 3-D hearts I made.
Altering the papers
I rummaged in my scrap card box and was able to find everything I needed as a basis. I did not want to use plain card because I love layers and texture and thought I could make the pieces a lot more interesting with some inking, printing and stencilling.
For the first piece, which was plain pink card, I used a blending brush to apply Pumice Stone Distress Ink through one of my stencils, and then used a Tim Holtz text stamp with Brushed Corduroy Distress Ink for added texture.
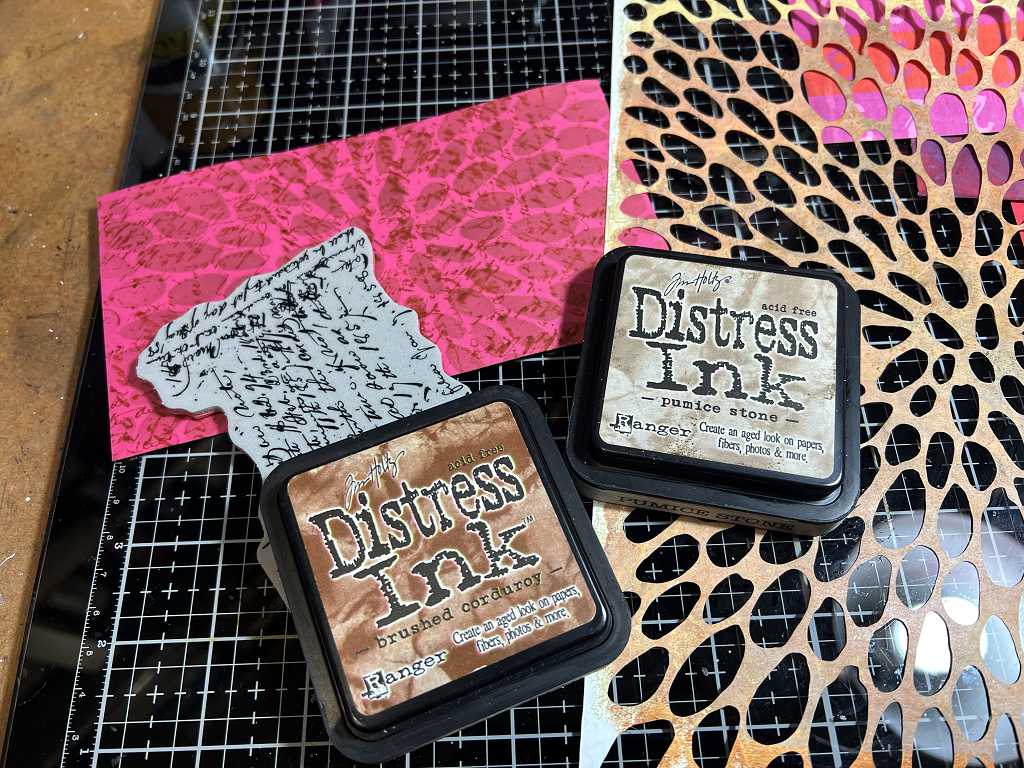
This piece did acquire some further treatment later.
Anyone who has followed me for any length of time will remember my love-hate (mostly hate!) relationship with a horrible pack of scrapbooking paper I bought way back in my early days. It hung around for years gathering dust until I used the bulk of it to make an album about my mum, in which I radically altered most of the papers with inks, which was difficult because the paper has a slightly waxy surface which resists water-based media. There are quite a few scraps of this paper in my scrap card box, and this is one of them.
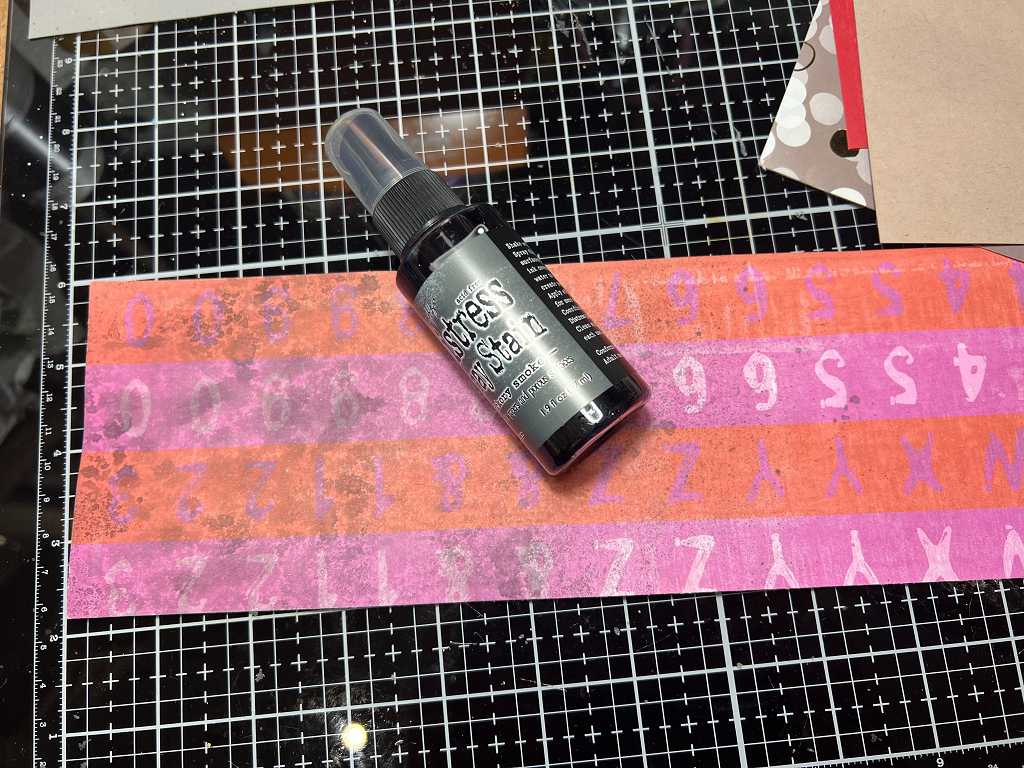
I sprayed it with Hickory Smoke Distress Spray stain and spritzed it with water. Heat setting and repeating the process gave a mottled effect.
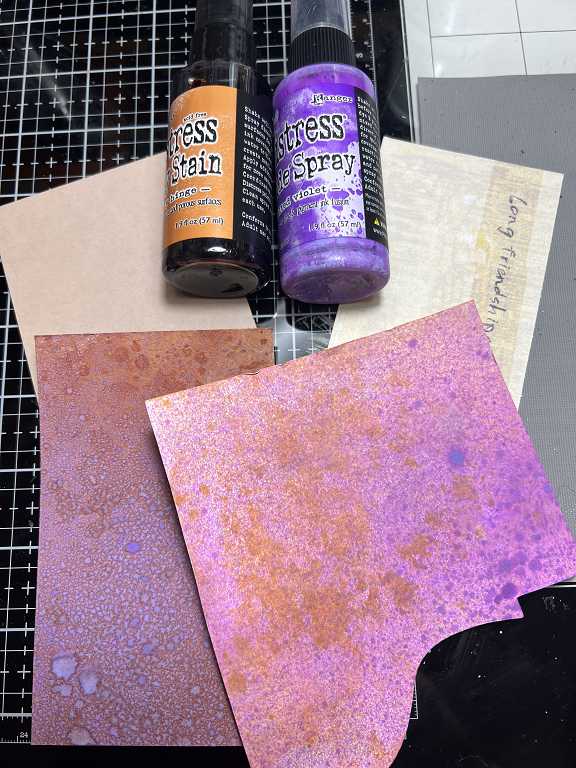
I chose two scraps of beige card. The one on the left is plain beige cardstock, and the one on the right is another scrap from the scrapbooking papers. I sprayed them first with Rusty Hinge Distress Spray Stain, and then, after heat-setting, with Wilted Violet Distress Oxide spray, which I activated with a water spritz. Really lovely effect! I particularly like the splotches at bottom left on the left-hand piece. Yummy!
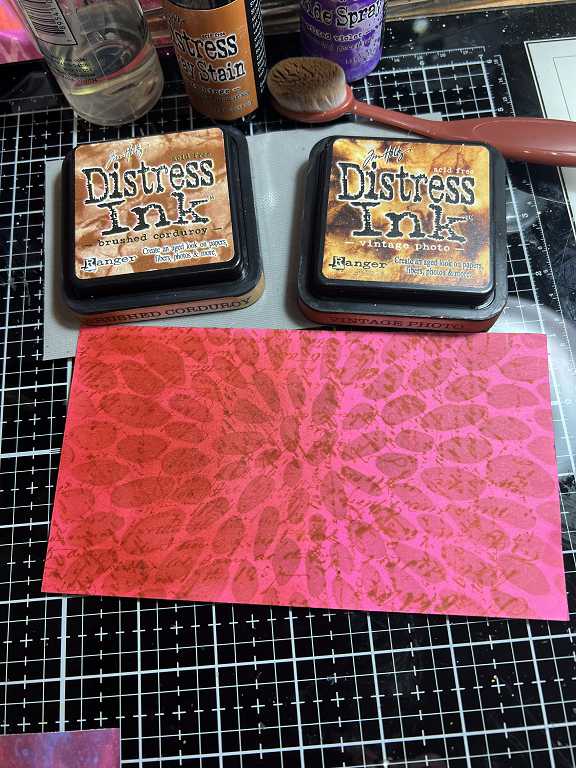
Returning to the first piece, laying it alongside what I had done subsequently, it really didn’t fit, wo I added some more inking with Brushed Corduroy and Vintage Photo Distress Inks. I was happier with it after this.
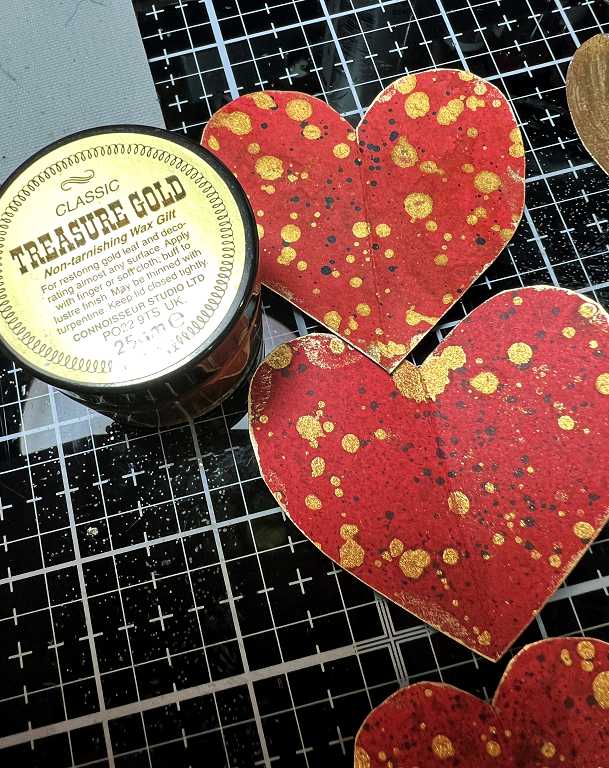
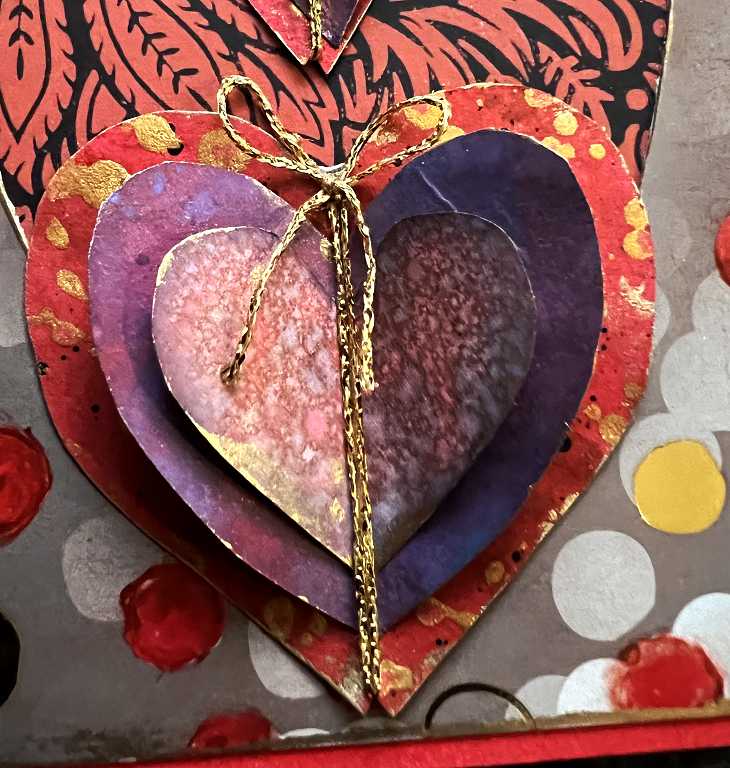
I took some scraps of red card and sprayed them with Rusty Hinge and Walnut Stain Distress Spray Stains and spritzed them with water, and once I had dried them, I spattered them with some black Indian Ink and some Seth Apter Izink in Goldmine (this stuff is gooooorrrrgeous!!!).

Really great effect – I was very pleased with how this turned out. Later, once I’d cut out the hearts from these pieces, I added further gold spatters.
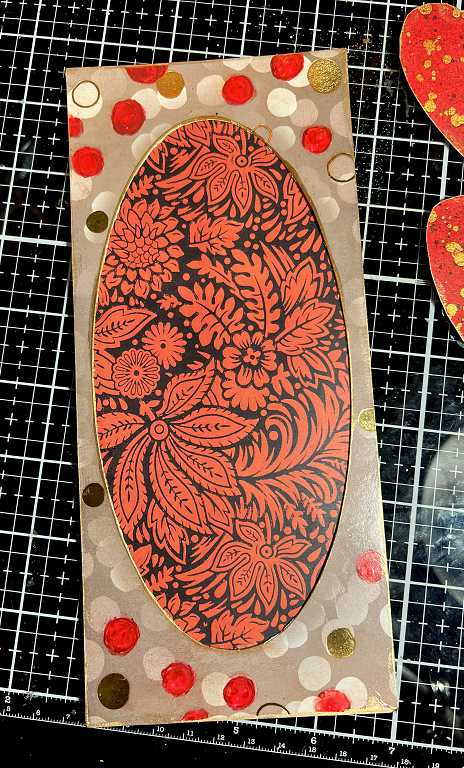
Turning to the tissue box, the colour of this wasn’t quite right with what I had done with the papers, and I wasn’t sure whether it would take the inks or not, having a slightly shiny surface, but it seemed to work quite well, particularly after heat-setting. You can see the difference with some of the original box underneath. I like the bokeh effect of the design, and the presence of some gold circles. I returned to this piece later with some further alteration.

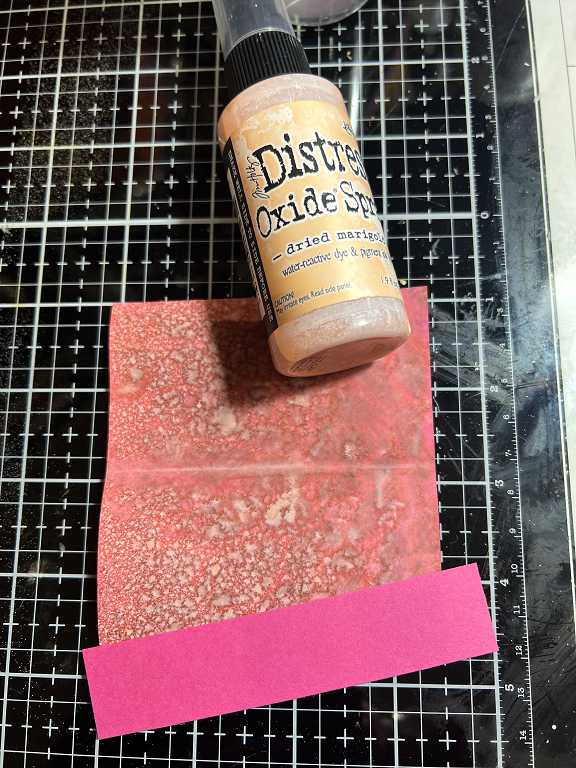
More pink card, this time sprayed with Dried Marigold Distress Oxide and activated with a water spritz. You can see the difference this treatment makes – some of the original colour is below.
I drew some heart templates on scrap card folded in half, and cut them out. I used them to trace around, to created the three layers of the hearts for the card.
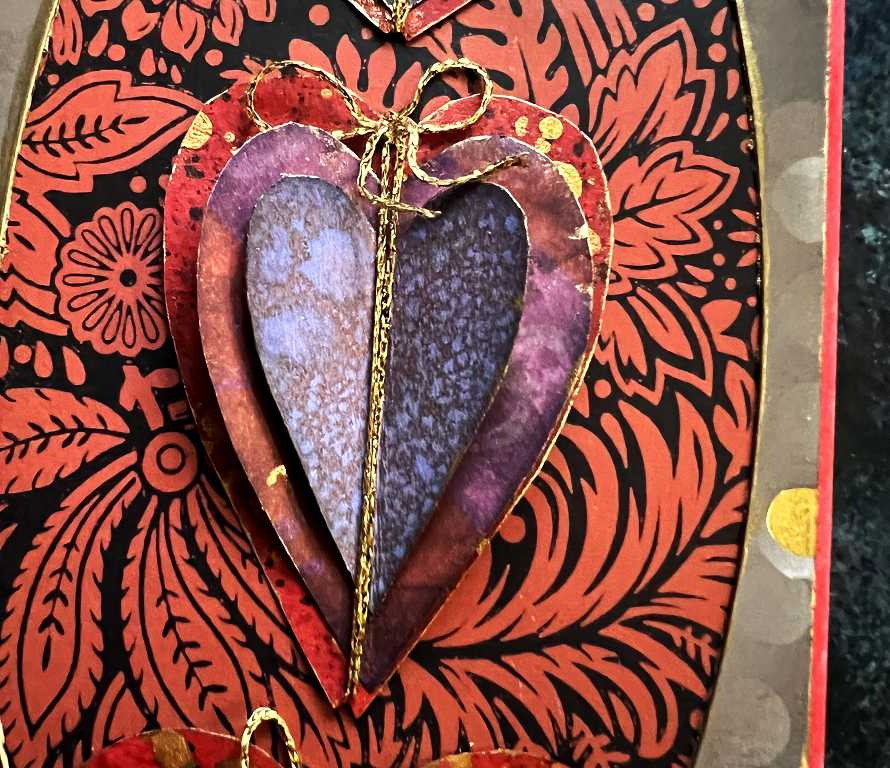
Hre are all the pieces ready for assembling. The backing piece is one of my Graphics Fairy printouts. I made a whole series of different colours of this design, and this one is terracotta on a very dark brown background – very rich.
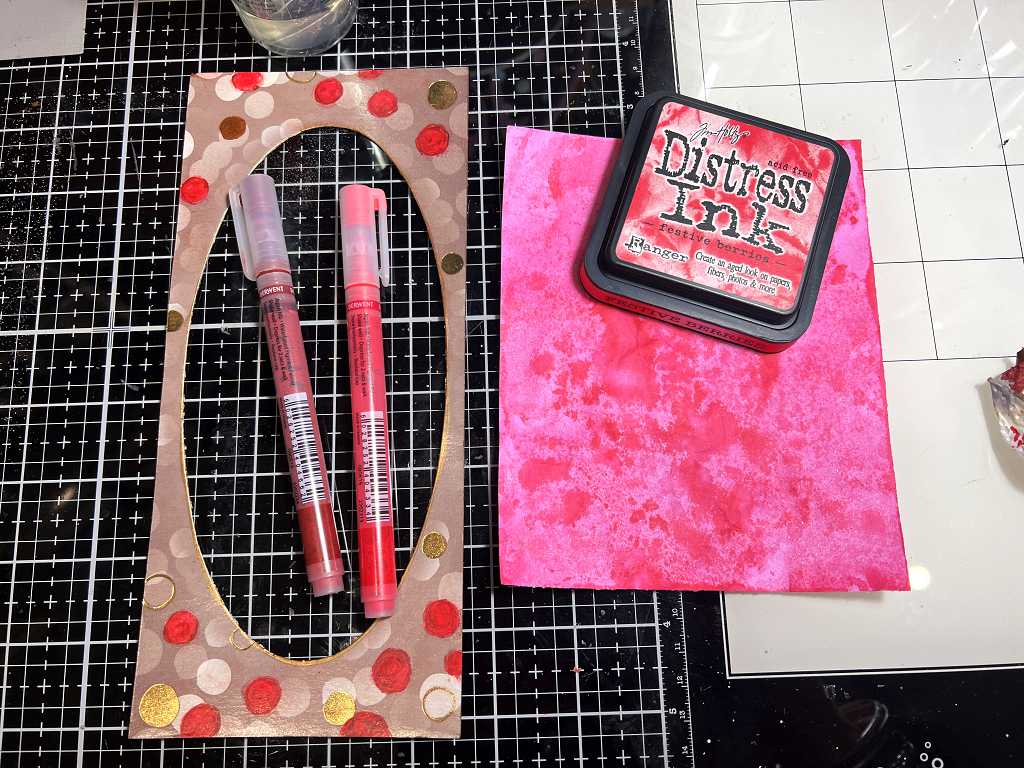
It was at this point that I realised that the tissue box still didn’t fit with the colour scheme, and needed something added to marry it all together. I decided to paint some of the circles red. I first attempted this with some Festive Berries Distress Ink, smooshed onto my glass media mat and spritzed with water. Because the tissue box is a bit shiny, this didn’t work properly, and the ink tended to pool into one place. Even after a couple of attempts, heat setting in between, it didn’t work as I wanted, so I got out a red and a brown pen from my Derwent Graphik paint marker set and used those to colour the circles – this is acrylic paint, and it worked much better. I did it in red first, and then blended a little brown from the edges. I also painted the edge of the tissue box window with gold.
There was quite a bit of the Distress Ink left on the mat, so I spritzed it with more water and mopped it up on a piece of scrap pink card. This has gone back into my stash for further use.
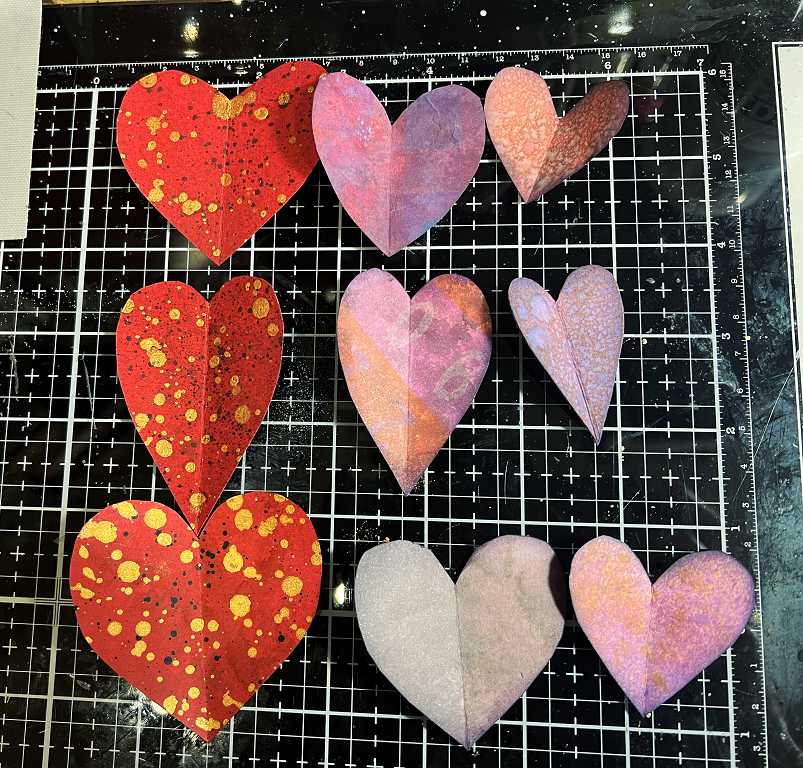
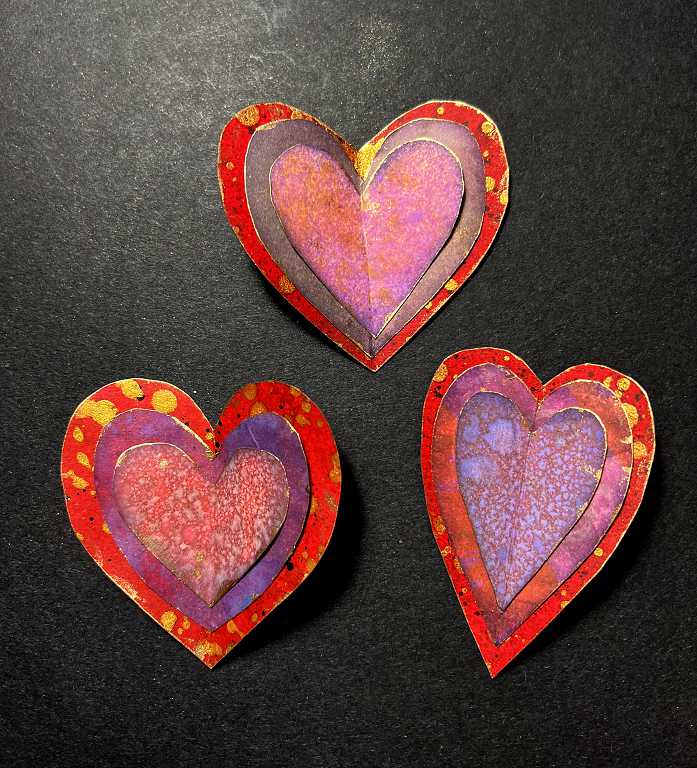
All the heart pieces. You can see the extra gold spatters on the red ones.
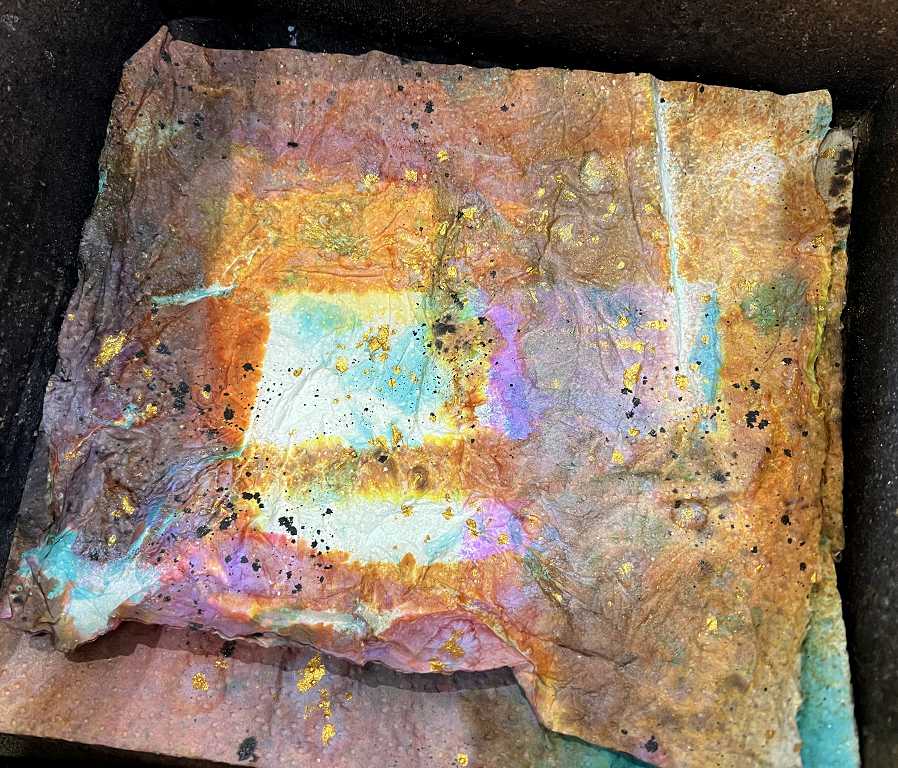
At this point I just had to photograph the papers inside my splat box which are maturing nicely! – especially as they are now spattered with gold!
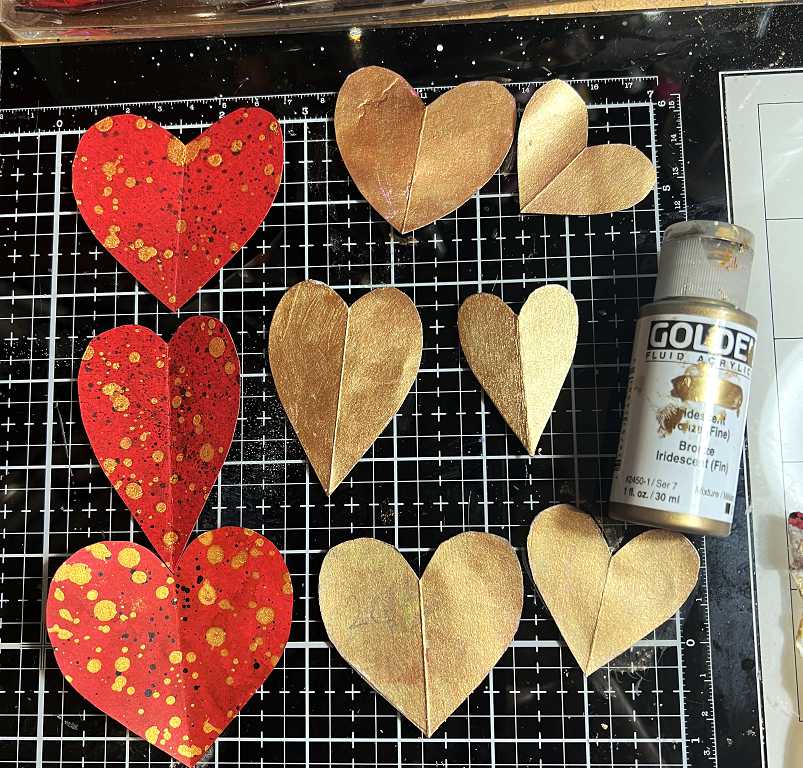
I painted the backs of all but the red hearts with gold. This Golden paint (iridescent bronze fine fluid acrylic) is my go-to gold paint – it is highly metallic and utterly gorgeous – pricey but so worth it. I shall need to buy some more soon as the bottle is now half-empty!
I then remembered my Treasure Gold (gilding wax) and got this out to gild the edges of the hearts. It’s a lot easier to handle for this than paint, as it is applied with your fingertip.
Assembling the card
The backing sheet stuck to the back of the tissue box. You can see that the addition of the red paint has made this much more cohesive than previously.
Assembling the 3-D hearts
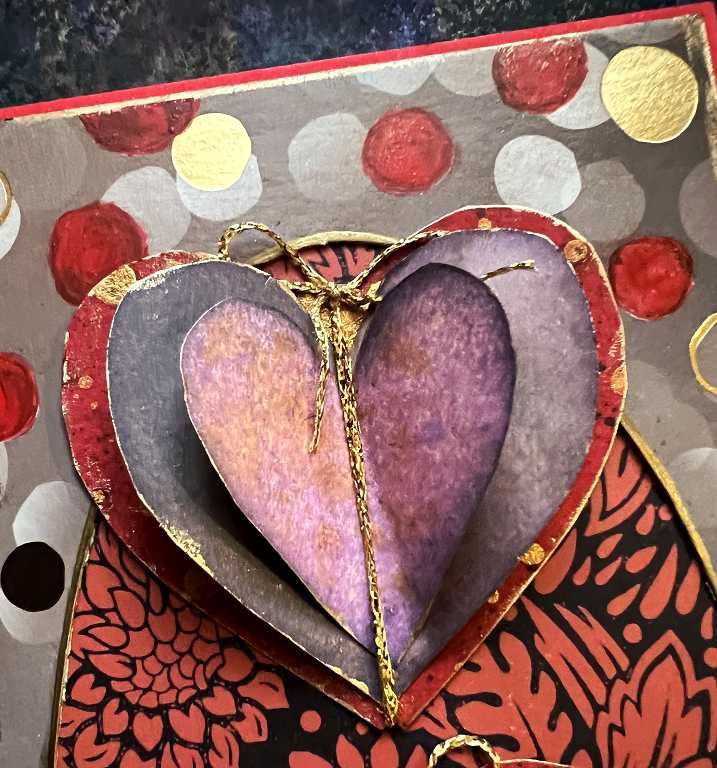
The gold-edged heart pieces all stuck together.
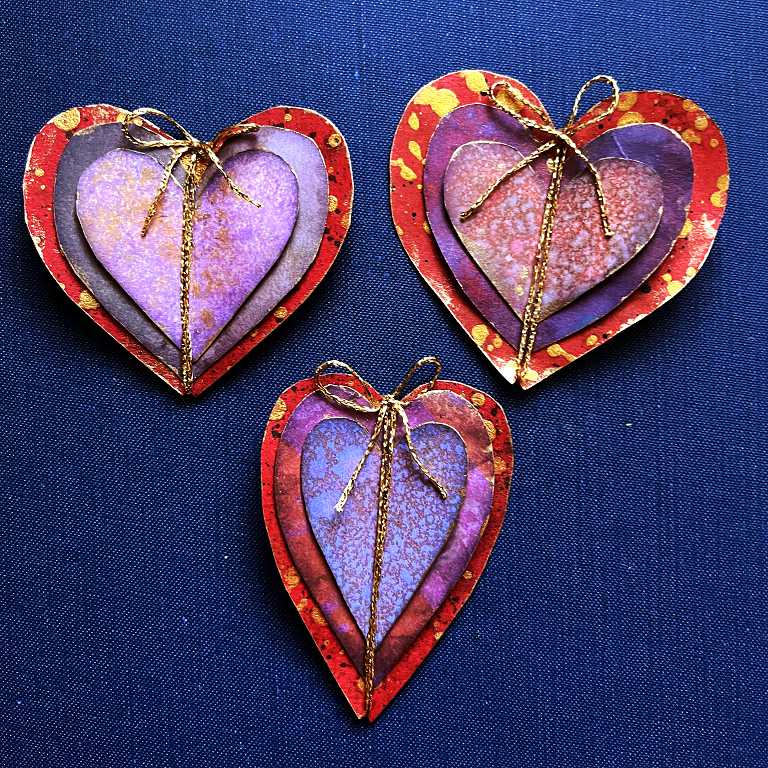
I cut a tiny notch into the bottom tip of the hearts, and wrapped some gold embroidery thread around. The notch keeps the thread in place at the bottom of the heart. I tied a bow, trimmed the ends and added a dot of tacky glue to keep the bow in place.
I inked around the edges of the card base with Festive Berries Distress Ink and then stuck the tissue box and backing sheet in place.
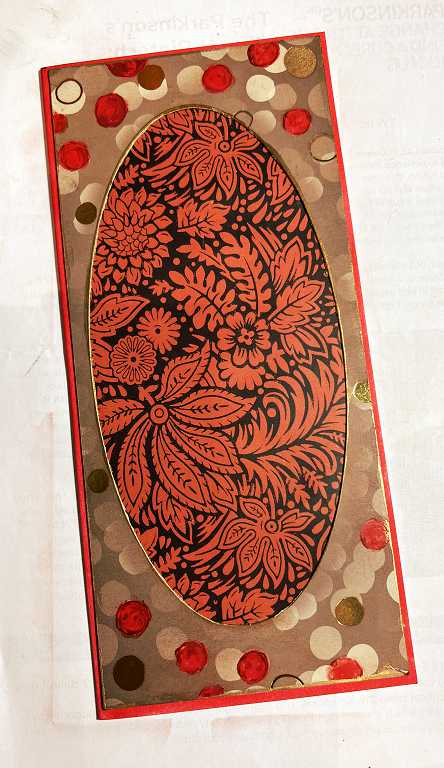
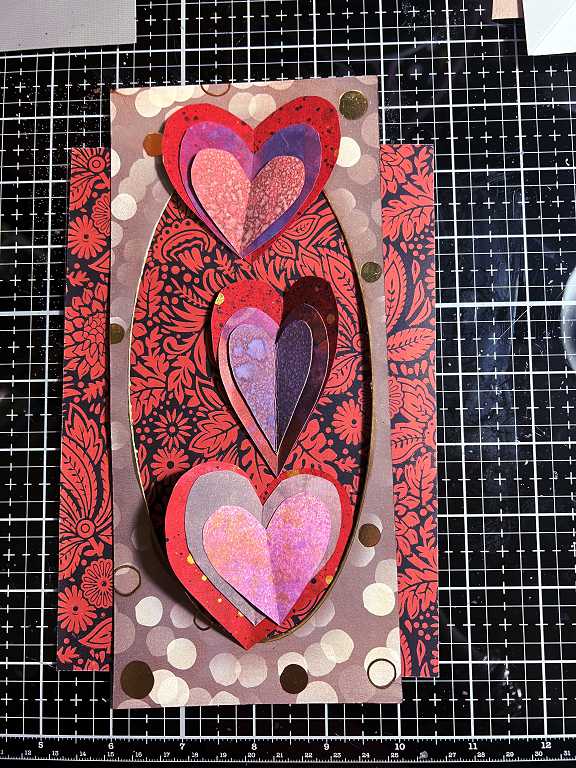
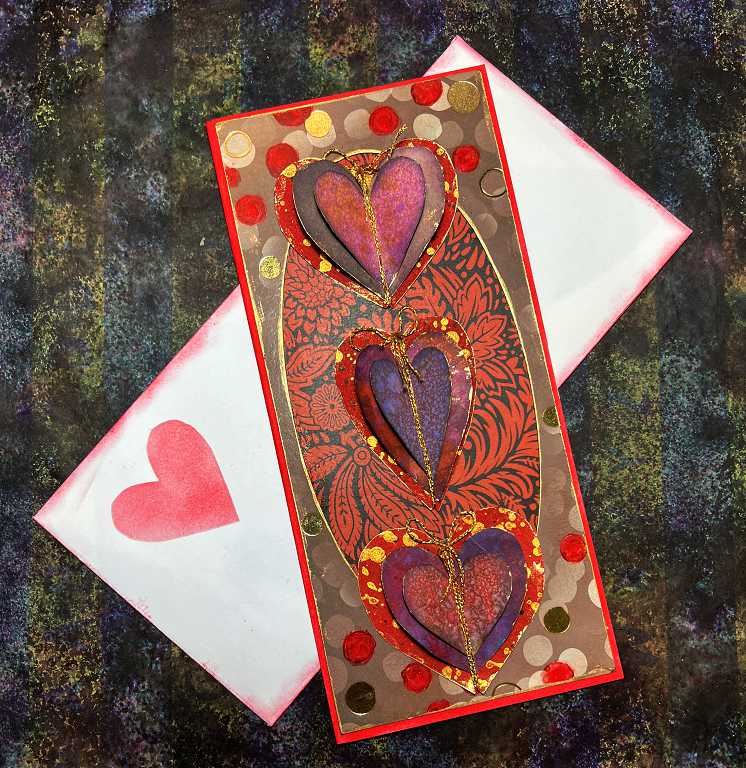
The completed card
The finished card, with the three hearts stuck in place. the red ones are completely stuck down, which is why I didn’t paint their backs with gold.
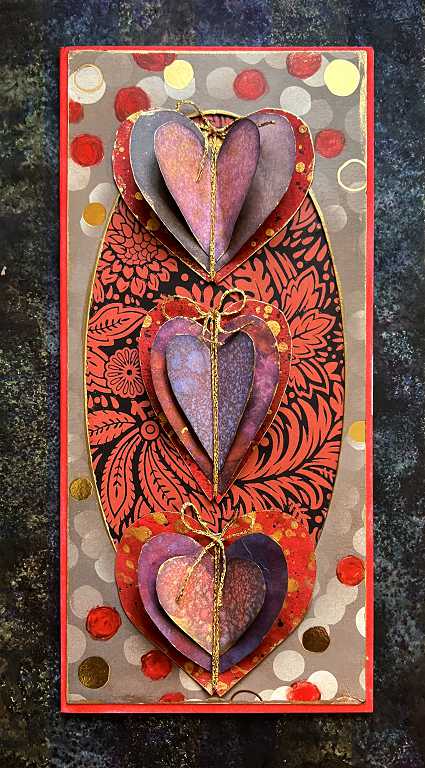
Detail shots of the three hearts.
From the side, showing the 3-D-ness of the hearts.

The inside of the card. I took the pieces of card from which I’d cut the hearts, and used some of them as stencils, applying Festive Berries Distress Ink with a blending brush, varying the inensity of the application for a 3-D random effect.
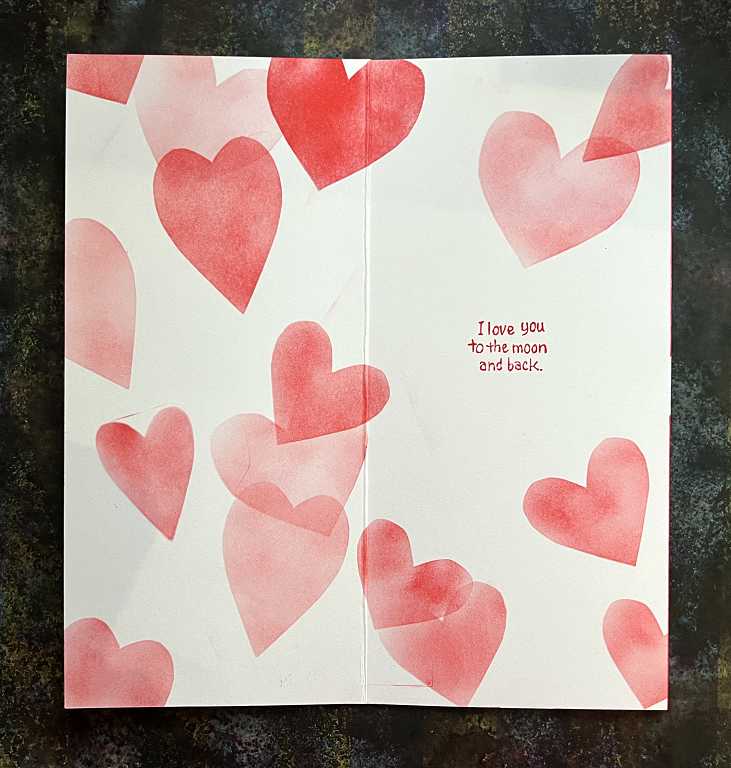
The back of the card, with three more stencilled hearts.
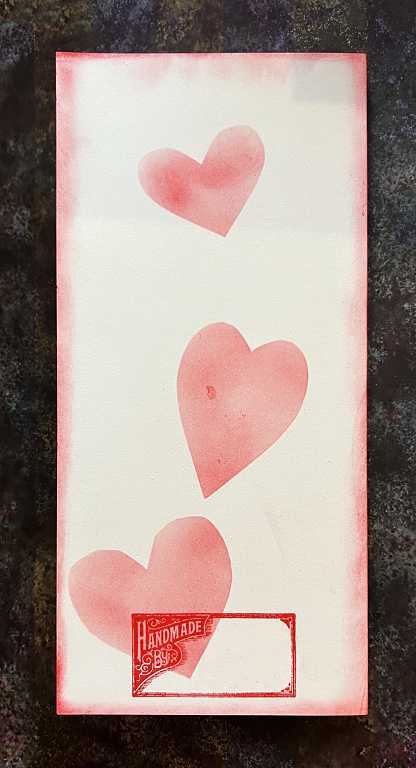
The completed card with its envelope.
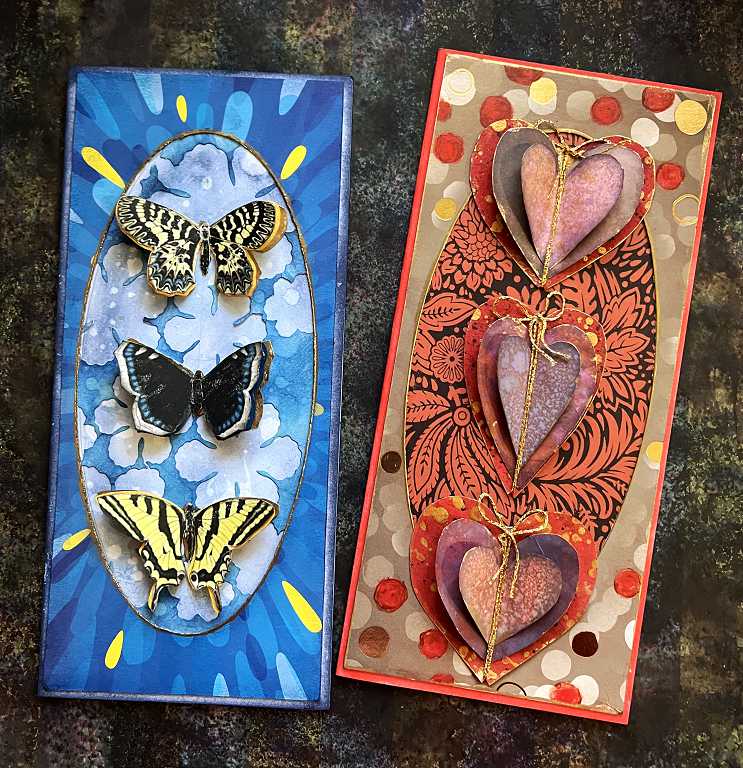
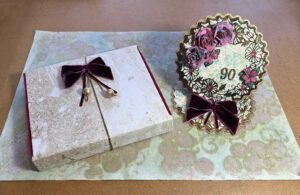
The two tissue box cards together.
Making the envelopes
Of course, these are not standard-sized cards, so I had to make envelopes from them. Rather than using my envelope punch board and creating a traditional envelope, I decided to make a wallet-type envelope, and designed a template for this, which I can use for further cards in the future.
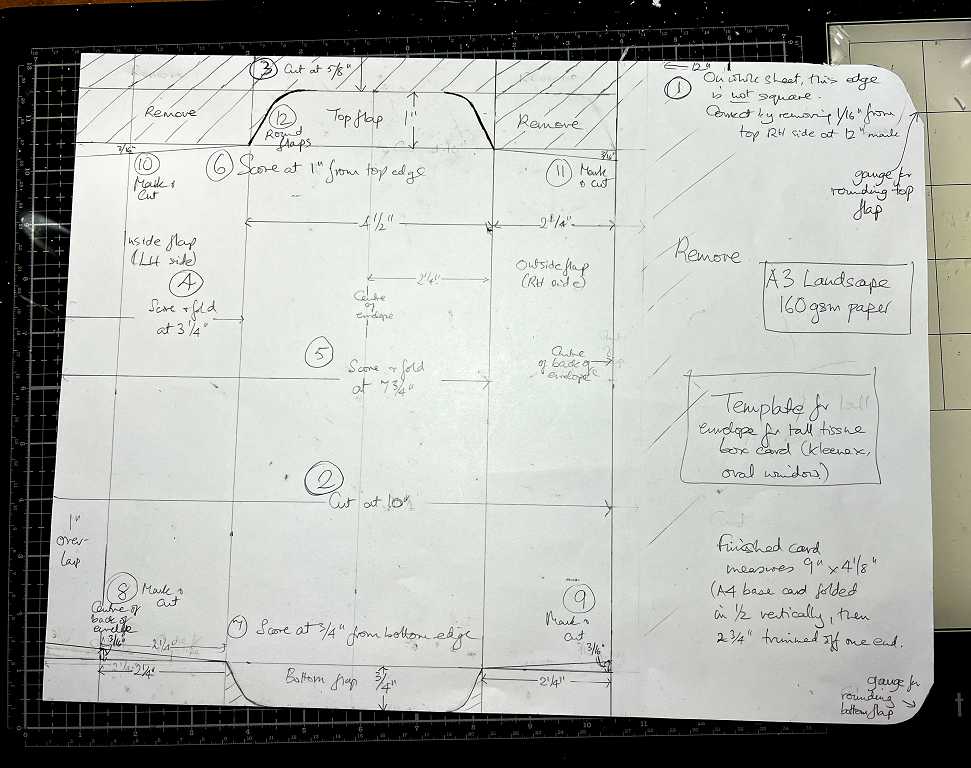
The template incorporates folding and cutting line guides, and indicates the order of work. On the right hand side, I have cut gauges for tracing around, to make the rounded shape of the envelope flaps, top and bottom. The template is flipped over for the other side of each flap.
This all took ages and it wasn’t helped by the fact that the A3 paper I have has not been cut exactly square, which caused problems with my first attempt. I have made a note to square it up before beginning. It’s only out by 1/16 inch which seems trivial, but my eye can pick out this discrepancy and the folds weren’t coming out right.
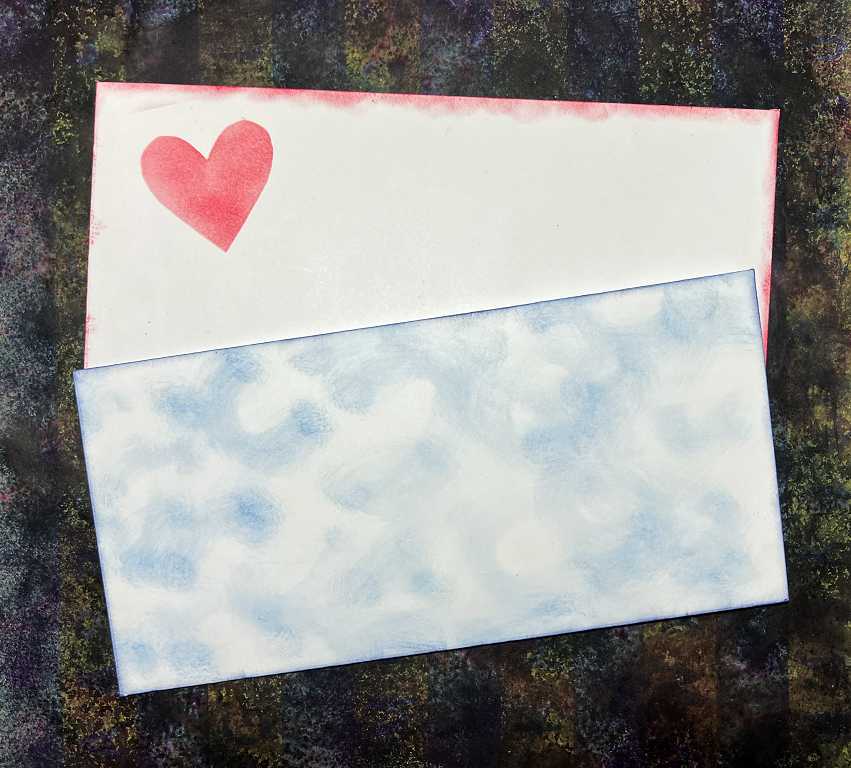
The two envelopes I made from this template, for my two tissue box cards.
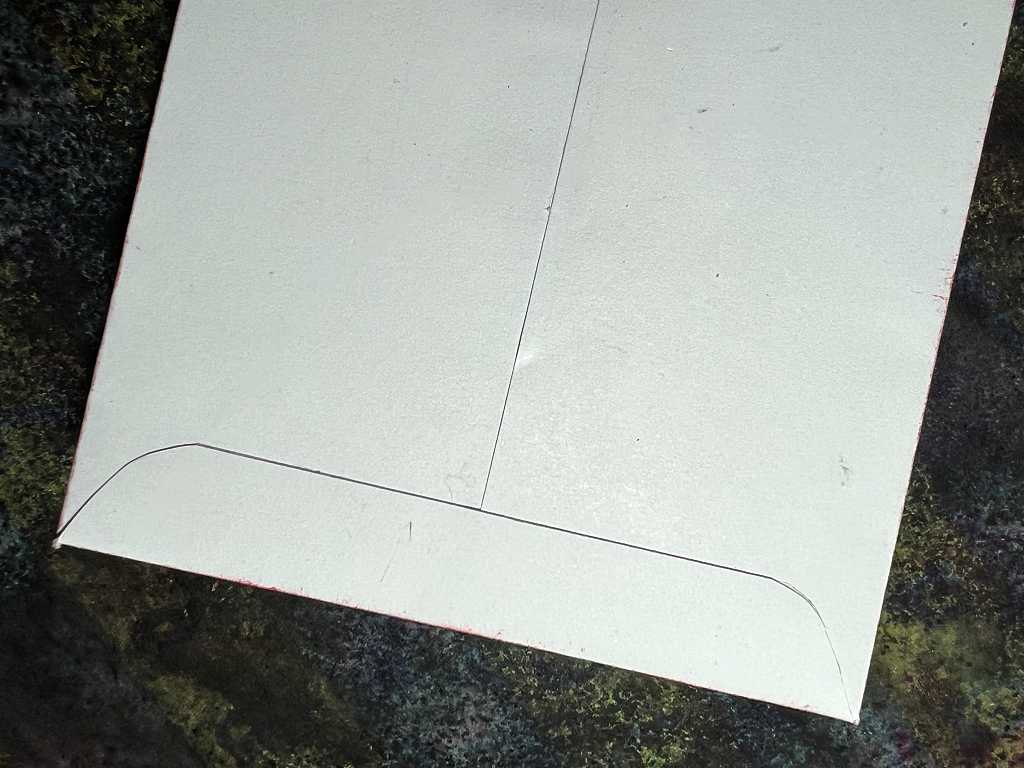
The envelope back. There is a seam down the centre, which is rather hard to see on this photo.

This shows up better on this detail shot of the bottom of the envelope.
I am very pleased with how this turned out, and the the extra time spent on creating the template was a good investment. I can alter the height and width if I wish. I used 160 gsm A3 paper to make these envelopes – I have a pack of 80 gsm but I have found this to be too flimsy for envelopes.
If you have made it this far, I hope you have enjoyed seeing the process of the construction of two 3-D cards made from trash! Not too much altering of the tissue box lids, and using up quite a few card scraps from my scrap box. Way to go!
Ingenious and so different!! I bet he loved them! What beautiful design you decorated them with too. Loved them.