JUNK JOURNAL – MAKE A JOYFUL NOISE PART 24
Starting the final embellishments
Now that the book is bound, all that remains is to add some final embellishments. I began with the fold-out envelopey thing in the second signature. I originally intended filling the two triangular pockets with smaller tags and ephemera, but I began on a separate element. This didn’t seem to fit anywhere in the book so it ended up in this pocket!
A pocket and a tag
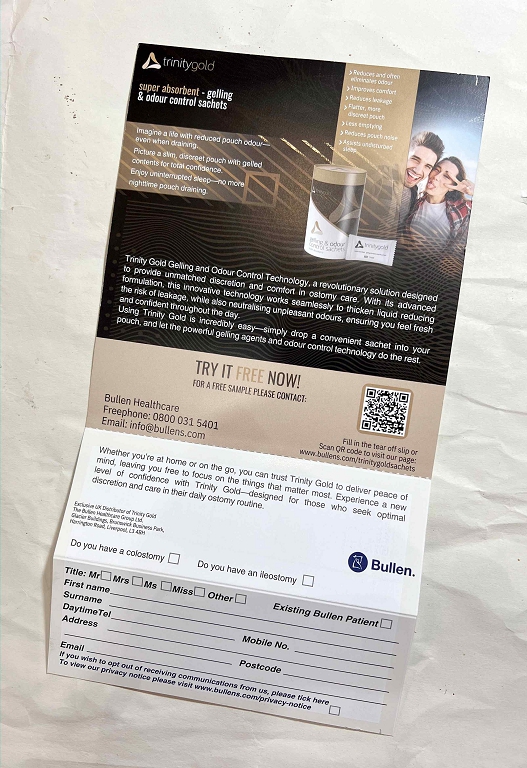
What started it off was a folded advertisement which came in the mail. It had some interesting folds and was made of quite substantial card. Such items always get a second glance before eitiher being thrown in the bin or rescued for the studio. I decided to cover it and make an interesting embellisment out of it.
As usual, it didn’t turn out exactly as anticipated! Still, I was pleased with the result in the end.
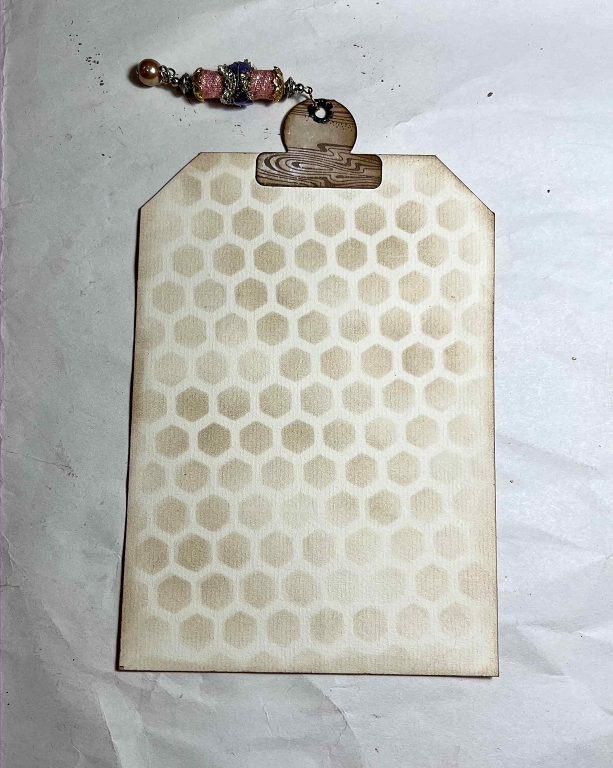
Making a tag
I decided this would be a pocket containing a tag. In my stash I found a nice piece of card with some interesting decoration which had come with some writing paper. I cut off the corners and inked the edges, and then made a topper for it.
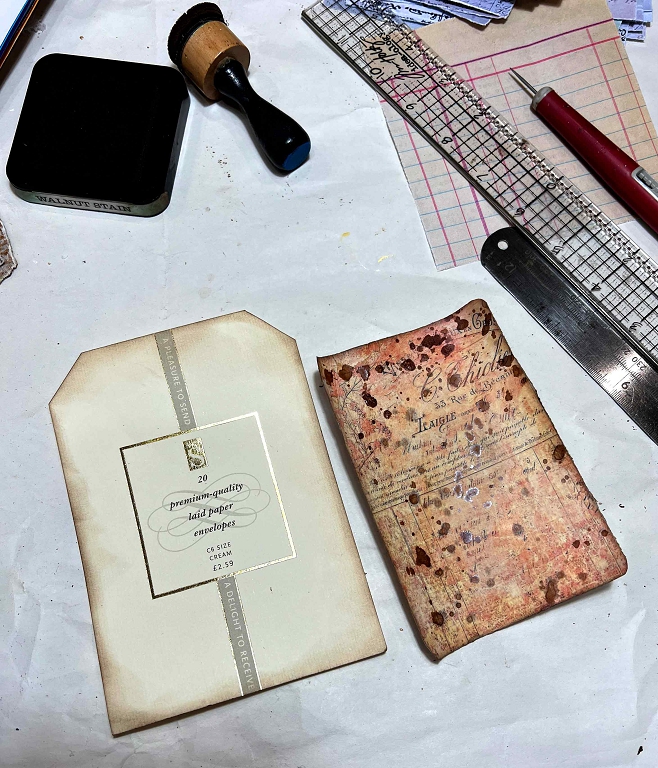
This was a piece of a digital printable download which I’d tea-dyed at some point. I spattered it with rust water (my new favourite grungifying stuff!) and inked the edges. After glueing it down onto the tag, I topped it off with a tab from my stash which already had an eyelet, and added one of my sparkly ribbon beads.
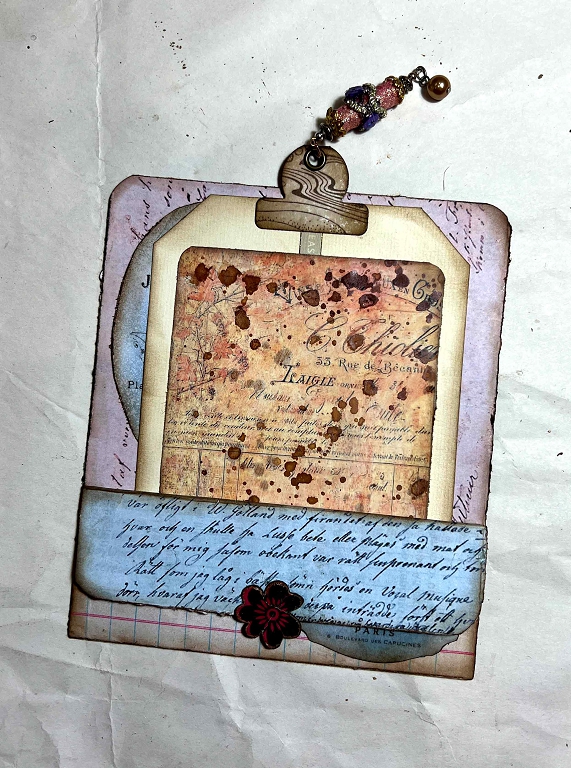
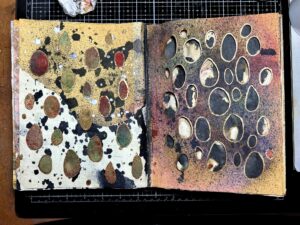
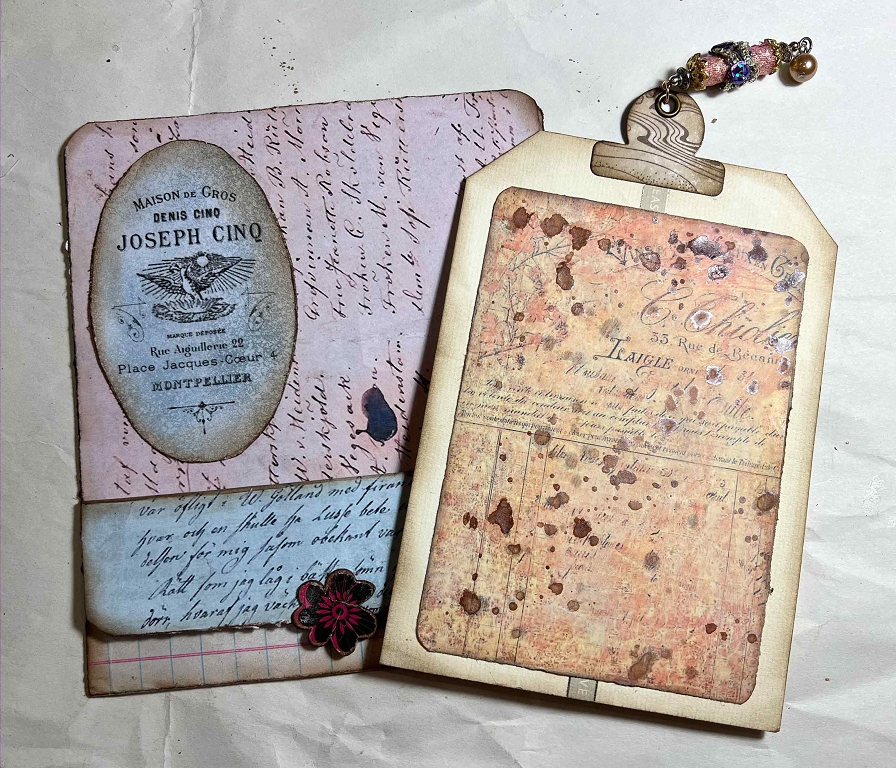
The pocket
I covered the advertising card with various digital printouts by Carlo Pavan which I purchased this week. I didn’t photograph the various stages because I got on a roll and just pressed on! I glued the sides of the larger fold to the base, forming the pocket. I left the smaller folded down part free, and closed it with a magnet. I added a card flower front and back to act as a pull to lift the flap.
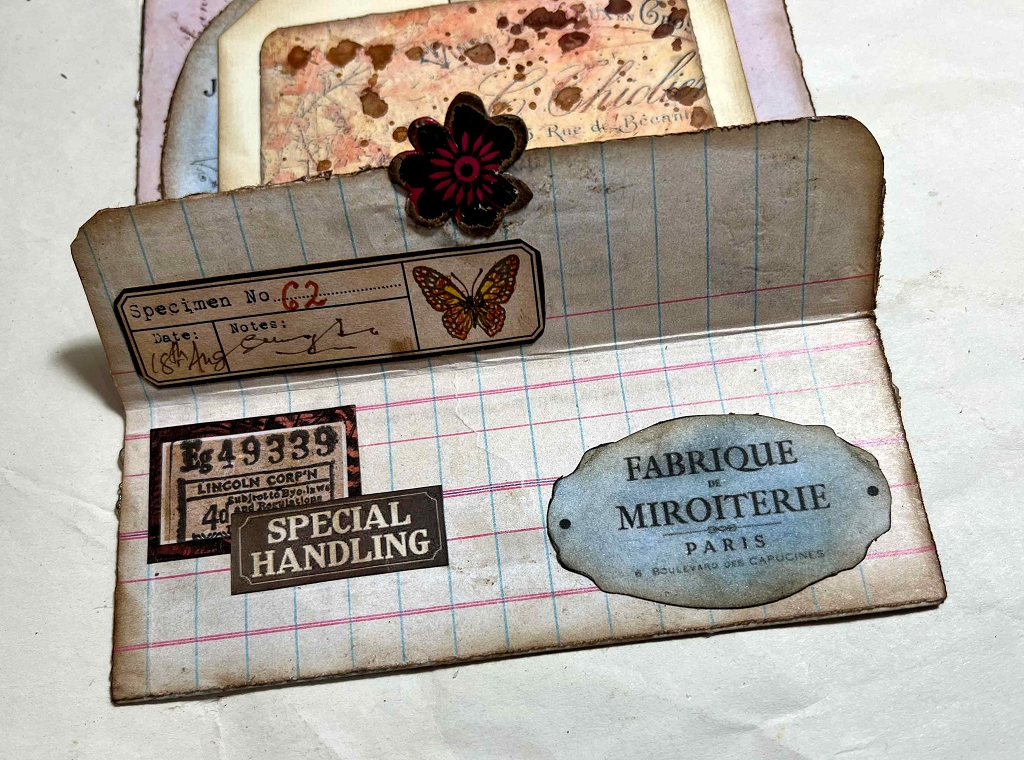
I decorated the various parts of the pocket with miscellaneous labels and ephemera for interest.
This is the reverse side of the pocket. I originally planned to leave this undecorated as it was going to be stuck down somewhere, but I couldn’t find anywhere to put it. As a floating pocket, it needed the back decorated as well. I used another digital print from the collection, spattered it with more rust water and inked the edges. To finish it, I rounded the corners at the top.
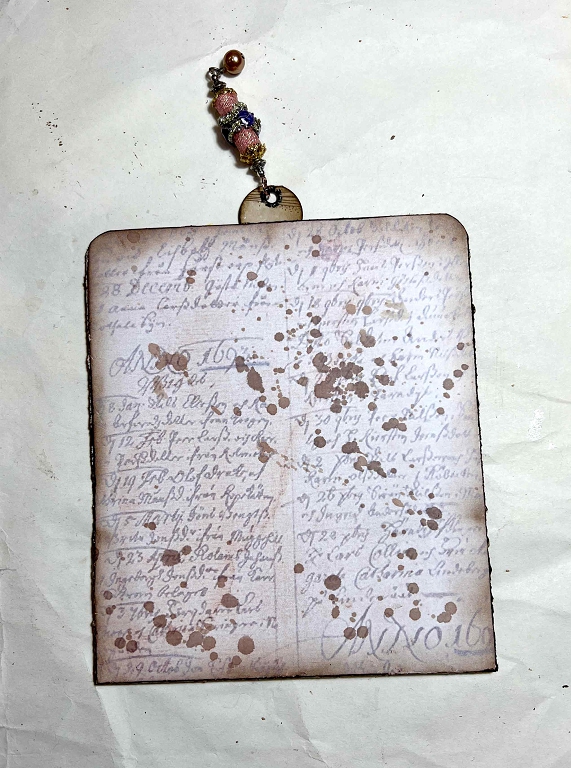
This is the back of the tag. Just some simple stencilling with Distress Ink.
Adding the element to the book
Here is the completed pocket in place in the album.
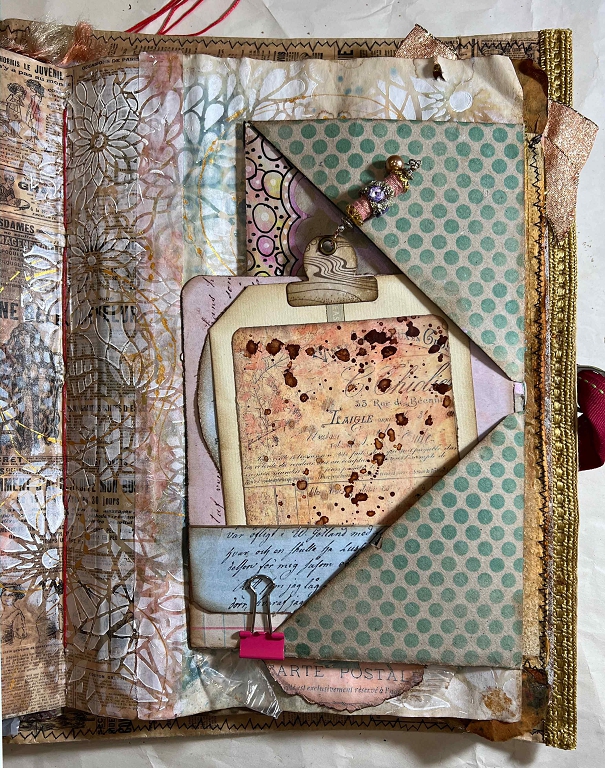
I added a small pink bulldog clip to secure it in place and prevent it from falling out.
Embellishing the fold-out envelopey thingy
This definitely needed an extra something. One thing about this whole project is that it has been a marvellous stash-busting effort! I’ve been given a lot of stuff over the years, some of which I probably would never have thought of buying, but occasionally these bits and pieces come into their own. The little shiny frame stick-on and the butterfly were a case in point. These have been lurking in my rarely touched “Embellishments” box for too long! It’s not a box I often think of getting out and I really had no idea what was in there. I made the antennae for the butterfly out of flower stamen parts and inked in its body with a black Sharpie. This butterfly is made of some sort of delicate translucent fabric-like paper – I have no idea what this stuff is. I used two layers to give it a bit more presence.
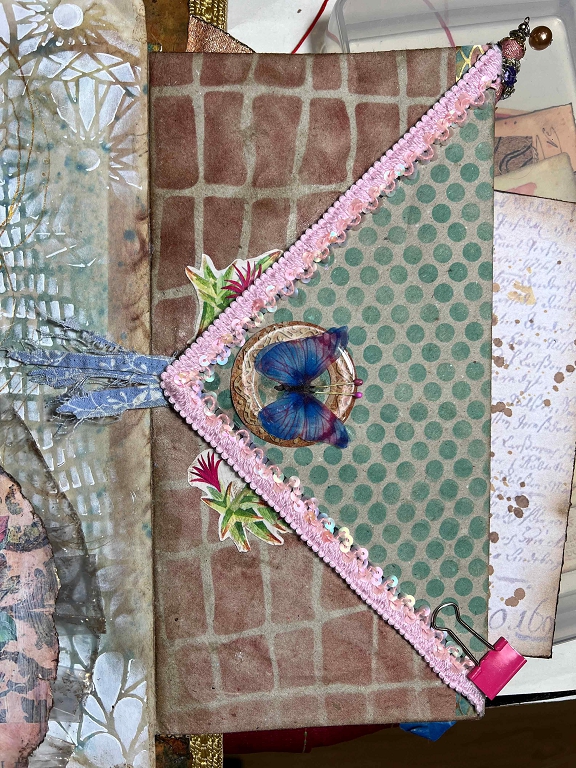
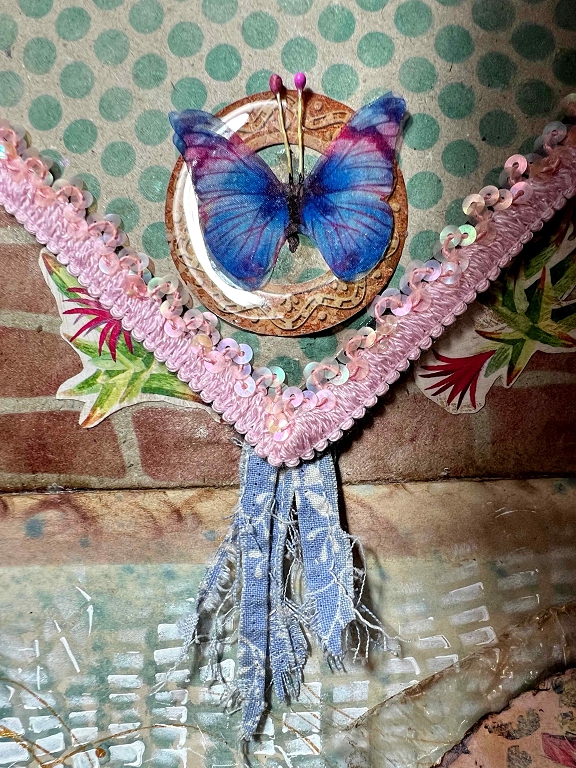
As a pull to lift the flap, I made a shabby tassel. I recently unpicked some lace from this fabric which had been cut off the edge of something. It was rather messy and I wanted to rescue the lace for other purposes. When I’d finished unpicking the fabric, I was about to throw it away when I realised that it could actually be used, perhaps for tag toppers etc. I cut a few lengths and distressed them further, and glued them to the underside of the flap with fabric adhesive.
Lifting the flap
To cover the ends of the fabric scraps which I’d glued on, I made a double-layered flower. I stamped two different sizes of flower from a large rubber stamp set I have of stylised flowers onto a scrap of card, and added turquoise Distress Ink with a blending tool. I cut them out with two different sized circle punches. They covered the fabric ends perfectly. I wish I’d thought of adding a magnet before glueing everything down but by the time I thought of it, the glue was set.
To embellish the inside of the flap, I used a flower cut out from my recent fussy cutting sessions from second-hand books and dulled down the stark white a bit with some Distress Ink. I deliberately allowed some of this to show when the flap was closed.
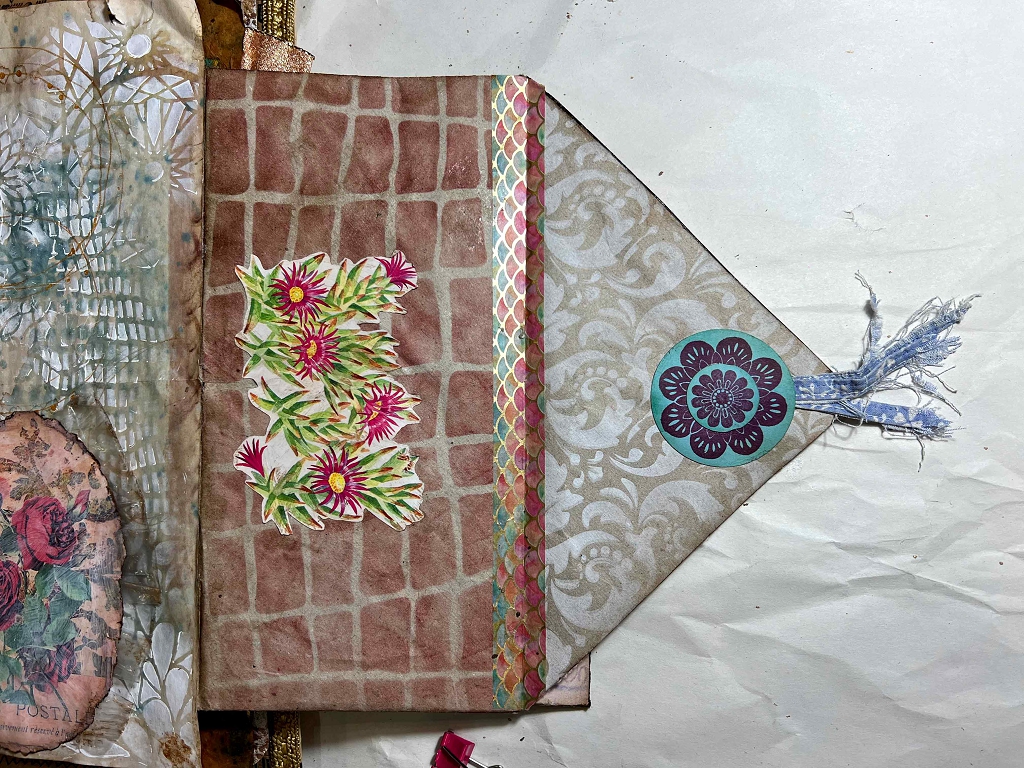
I think this completed that particular page quite nicely. I was pleased with how the colours co-ordinated, and the fact that I was able to use scraps that I was on the point of throwing away. Everything is useable! It was also a great opportunity to use some embellishments I’d forgotten about because I never thought I’d use them. Everything gets a chance to be used eventually!