CLUSTERS AND ALTERED PAPERS
I am currently working on producing some embellishments for my “Make a Joyful Noise” junk journal as it approaches completion. Rather than making one-offs, it makes more sense to bulk-create, and generate some ready-made stash for future projects in the process.
I recently made some butterfly clusters, following Luise Heinzl’s tutorial, and decided to make some more varied clusters.
Clusters are basically small scraps of paper and other materials, layered up and glued or sewn together, usually with some sort of focal point on top. They can be as varied as you want – the only thing limiting you is your imagination! They are also a brilliant way of using up all those thousands of scraps we all generate. Nothing is too small to be considered!
A neighbour recently gave me another bundle of stuff she no longer wants. They included some really tiny scraps, only a couple of inches across. These were the most gorgeous fabrics – gold, lurex, sparkly… some with sequins. Some of these found their way into this current batch of clusters. The whole bundle contained a wealth of materials for the hungry creative soul!
Altering papers
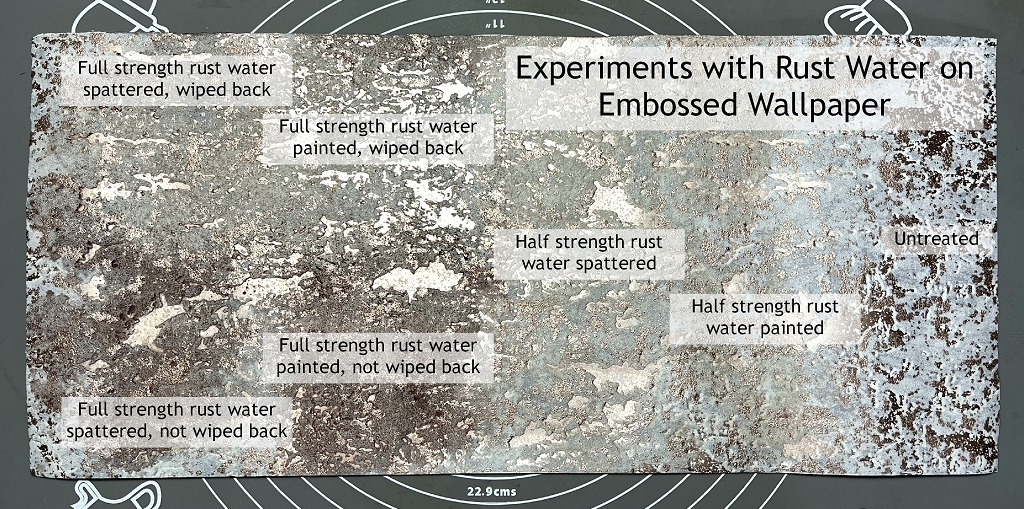
Rust-spattered wallpaper
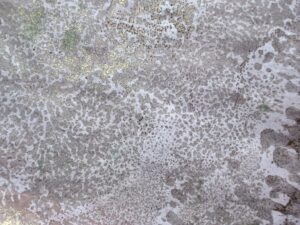
For the junk journal, I altered some wallpaper I got in a charity shop recently. I spattered it with rust water and loved the result for the album’s end-papers. Before I made the final piece for the book, I did some experiments on another piece, which I then decided to use for other things.
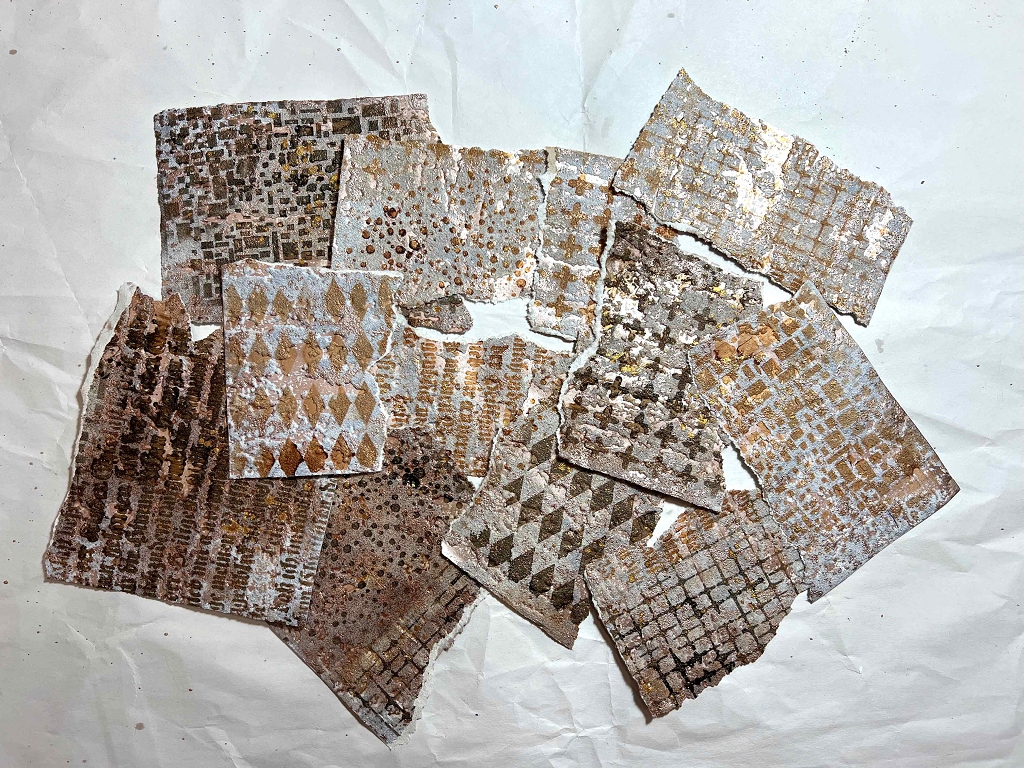
I stencilled over this sheet with a variety of sencils, using burnt umber acrylic paint on the lighter end of the paper, and Arteza Fancy Black acrylic paint at the other end. This paint is gorgeous – a combination of black and dark brown with a metallic tinge.
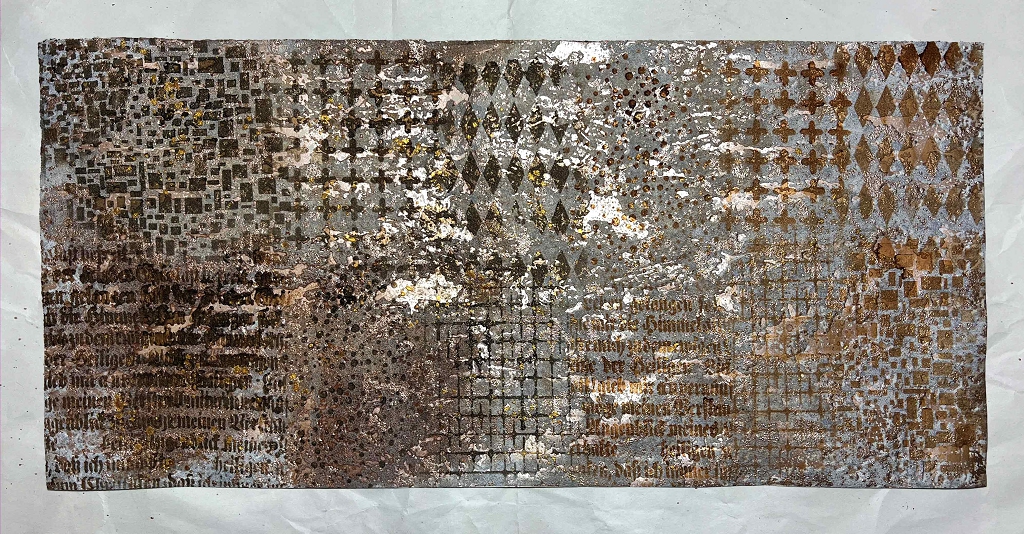
I tore this sheet up into useable pieces.
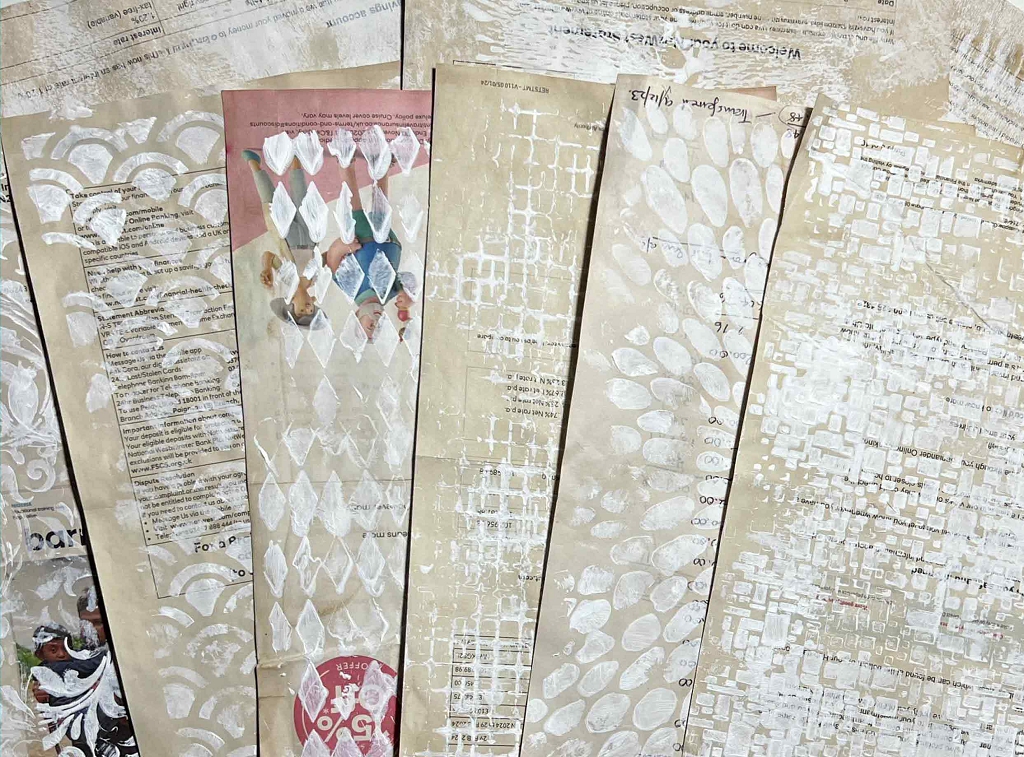
Rescued scrap paper
I recently had a bit of a clear-out in the office and was going to shred a lot of papers of a personal and financial nature but decided to recycle them for art instead. I already have a box of such papers which will eventually be pulped down to make hand-made paper but I had other ideas for this batch. I tea-dyed them and then stencilled over them with gesso, attempting to obliterate anything of a sensitive nature where possible. I also added some junk mail for a bit of colour. The result is quite interesting.
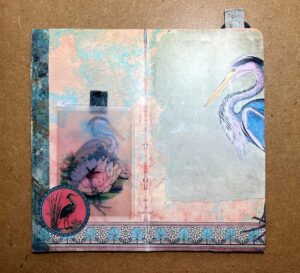
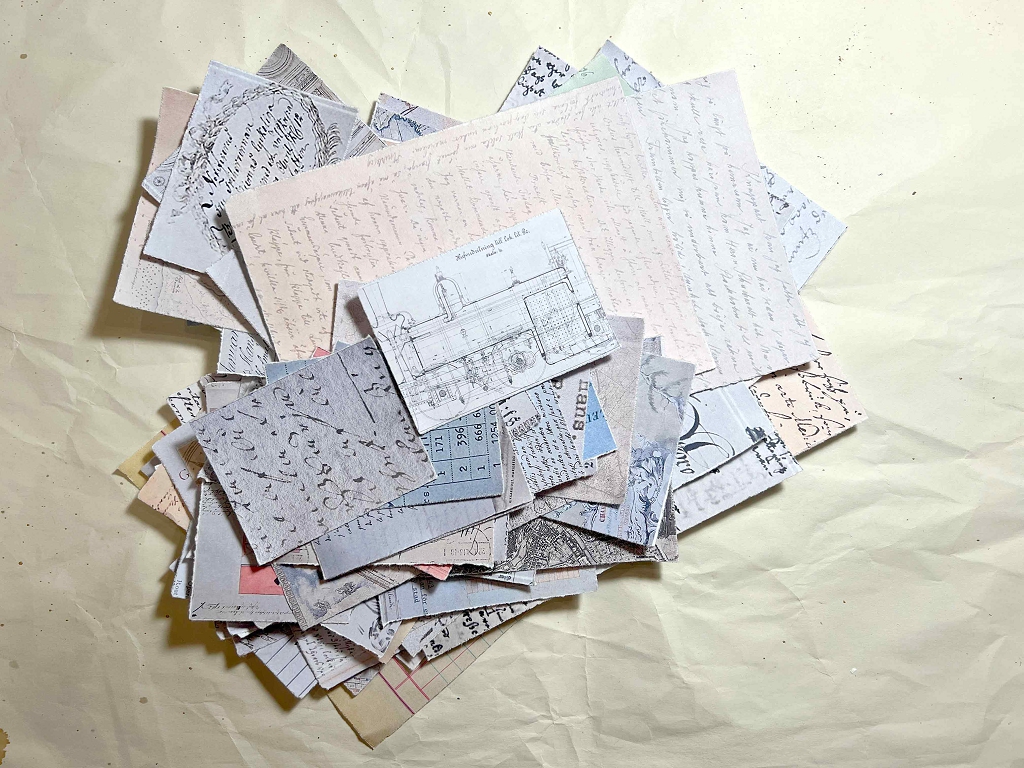
This week I purchased a collection of vintage digital printables by Carlo Pavan, and tore these up against a metal ruler (this gives a softer edge than a paper trimmer or scissors).
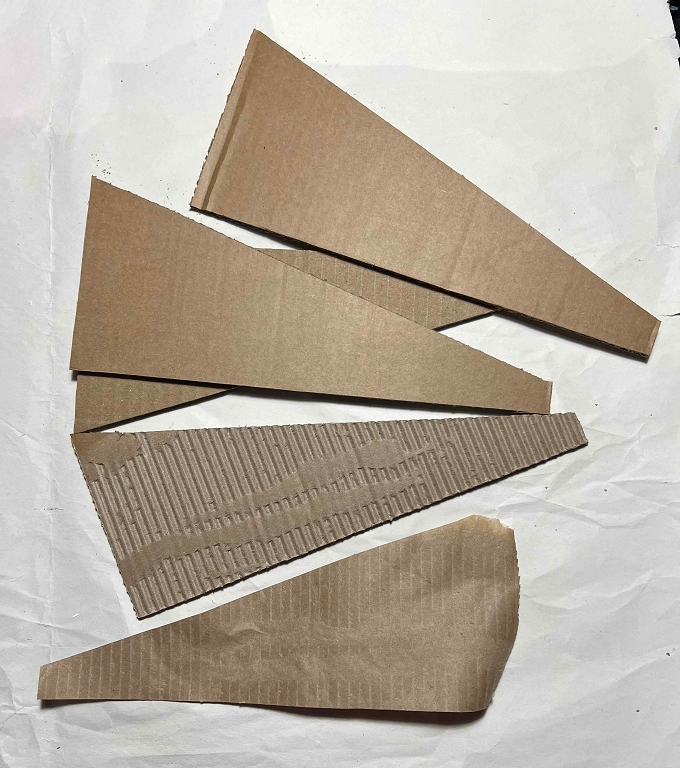
I also had some nice pieces of double corrugated cardboard packaging in the post. This peels off nicely to produce some interesting papers.
Tearing and inking
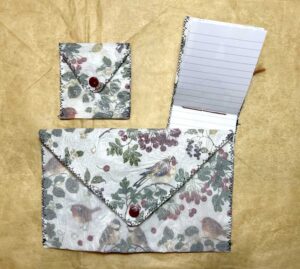
I tore up all these papers with nice rough uneven edges which I inked. I added some other bits and pieces too – some envelope paper with the printed designs on the inside which are supposed to stop you being able to read the contents of the envelope. They come in various designs and colours (mostly blue) and they make interesting collage papers and backgrounds.
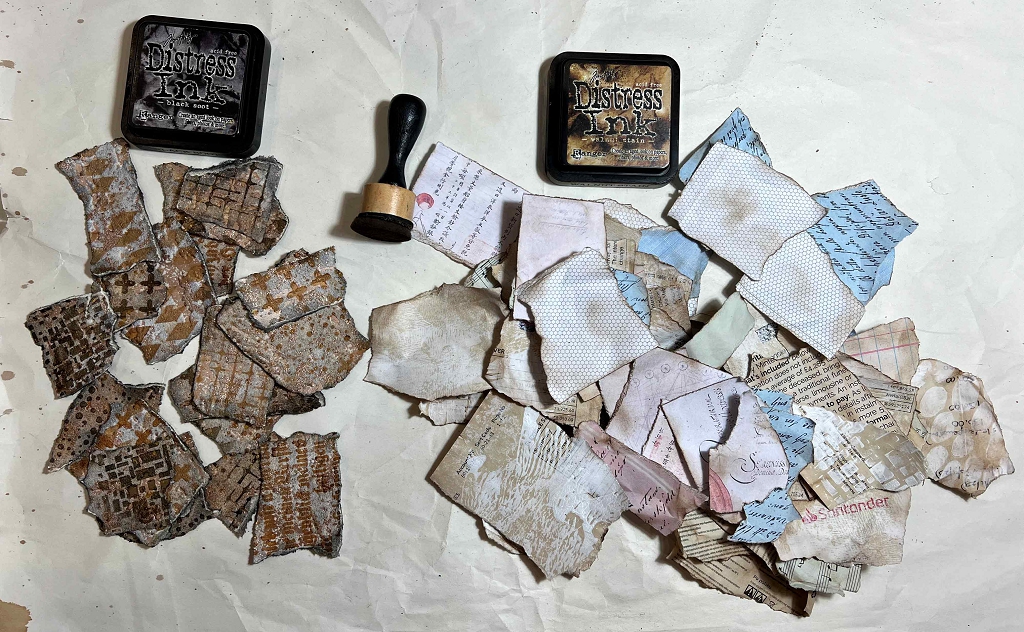
This makes a nice collection of collage fragments. I made far more than I had time or inclination to use in this session, but I’ve stashed them away for future use.
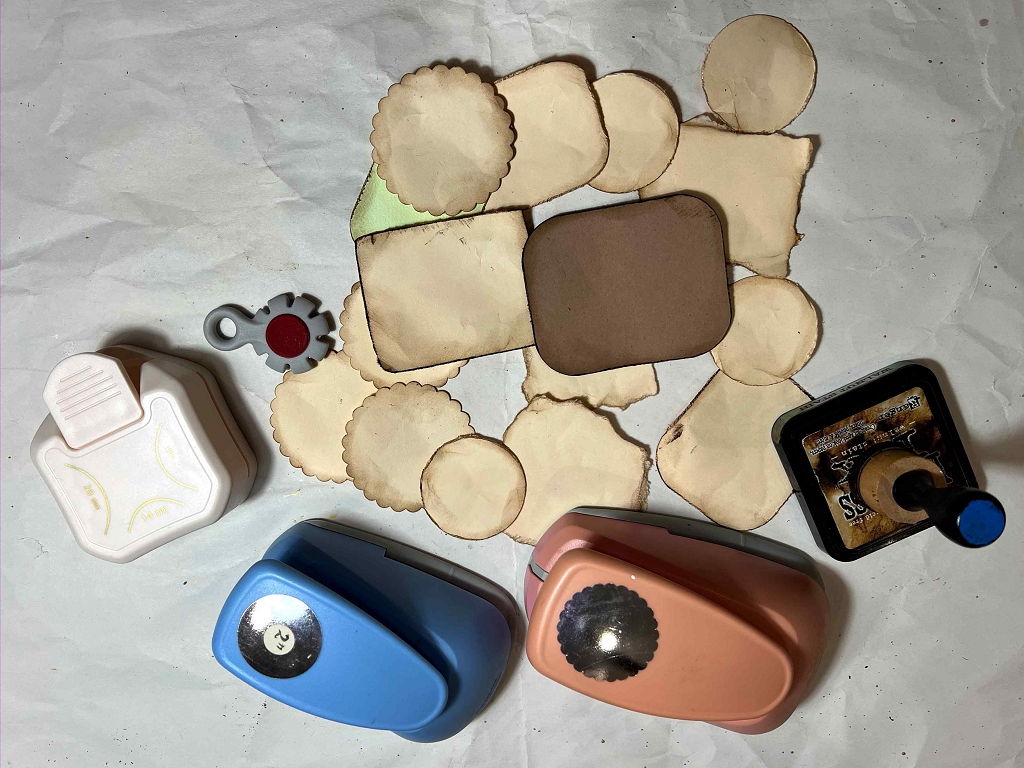
Base pieces
Scrap busting time! I chose some mostly cream coloured card scraps to make the base layer for my clusters. I cut or tore some in more or less rectangular shapes, and punched out some others with two different circle punches. I rounded the corners of the square ones with a corner-rounder punch and roughed up the edges of all the pieces with my distressing tool, and finally inked the edges.
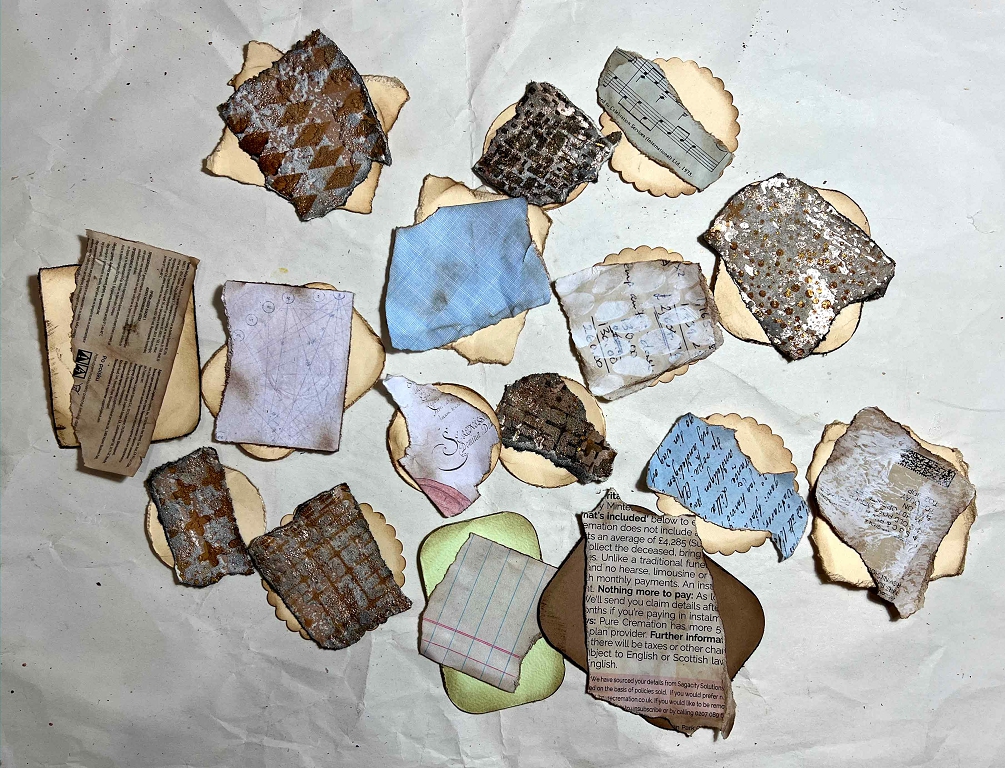
Layering time!
There are no rules. Just go with the flow and don’t overthink things. The idea is to add lots of variety, using different papers, textures, fabrics, lace…
Layer 1 – papers.
Layer 2 – lace. I dragged out a selection from my lace stash, some of which I tea-dyed several years ago with fruit “tea” which mysteriously turned grey on exposure to the air! I liked the results, though.
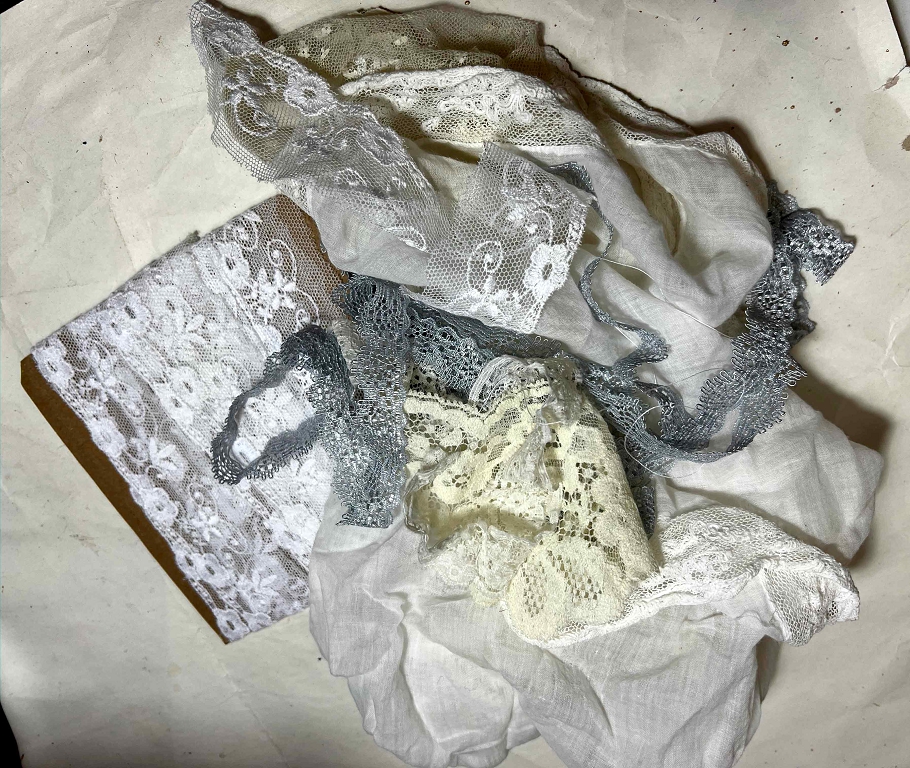
For the clusters, it’s nice to make the ends of the lace as uneven as possible, and to fray and distress them. I glued them down with fabric adhesive.
Layer 3 – more paper. The colours are becoming more subtle and interesting.
Layer 4 – more paper. You can see that these pieces are smaller. With each layer, I have tried not to obscure the layers underneath completely, but arranged the pieces at different angles and different distances from the centre in some cases.
Layer 5 – embellishments. The real fun begins!
Stash-busting time again. I found plenty of random embellishments in my long-neglected embellishments box, including butterflies and a hummingbird amongst other things. I also added some fabric trims. Finally I added bits and pieces underneath the base layer, cut larger – pieces of mesh, interesting fabrics etc. You can see that I have also added eyelets to many of the clusters.
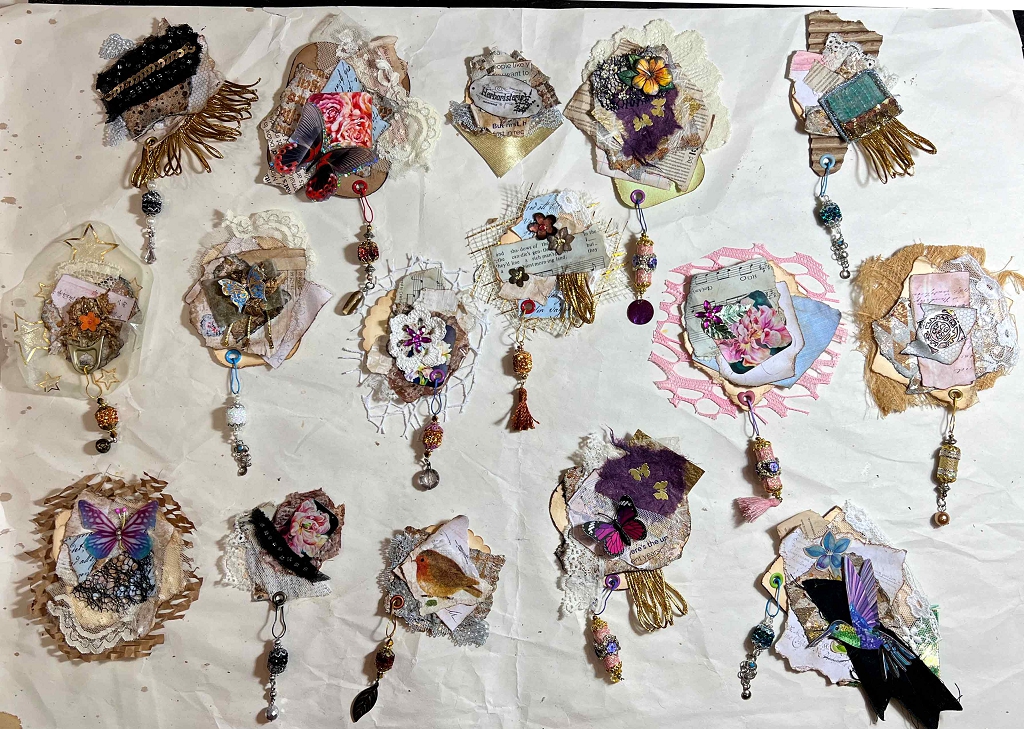
Danglies
For this project I used my sparkly ribbon beads exclusively, attaching them with bulb pins in co-ordinating colours. This is not necessarily permanent. When I use the clusters, I shall most likely dispense with the bulb pins and attach any embellishments with a jump ring. It all depends where they end up going.
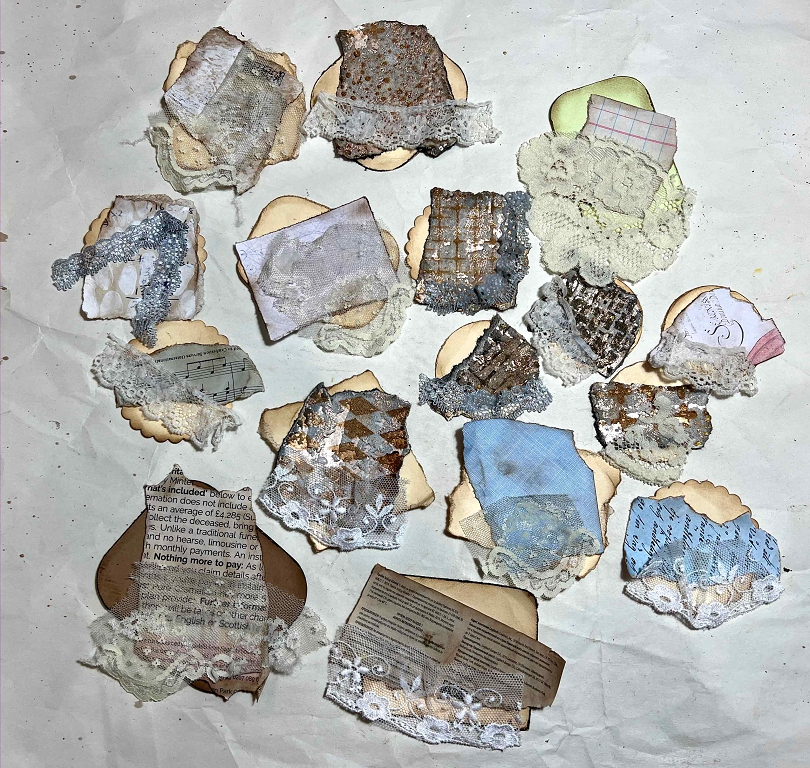
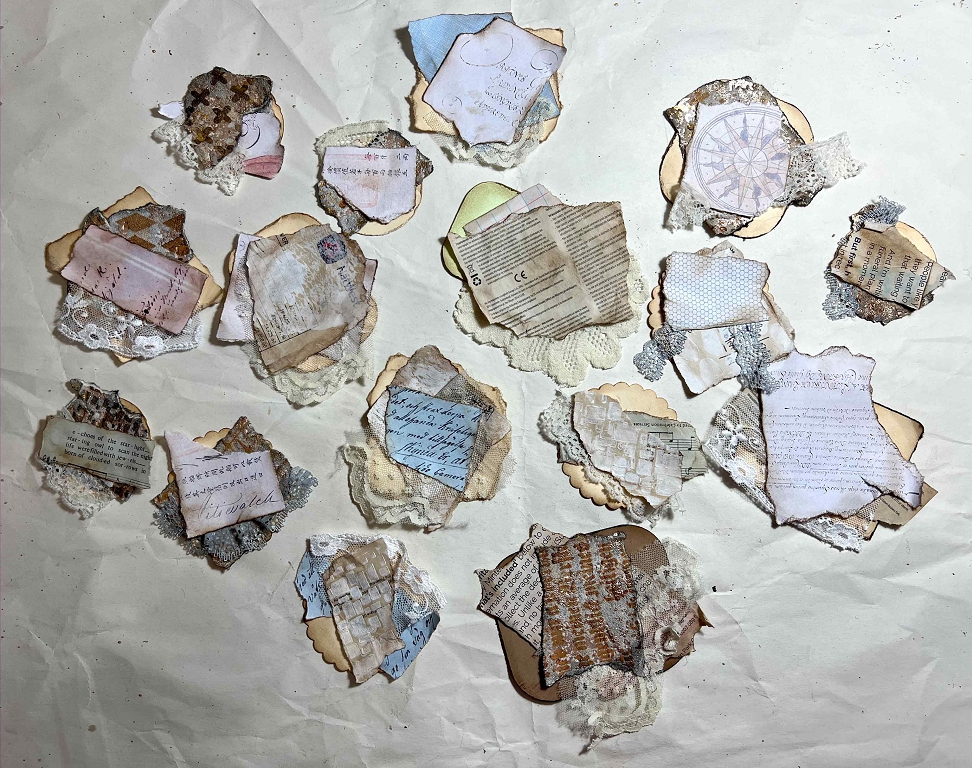
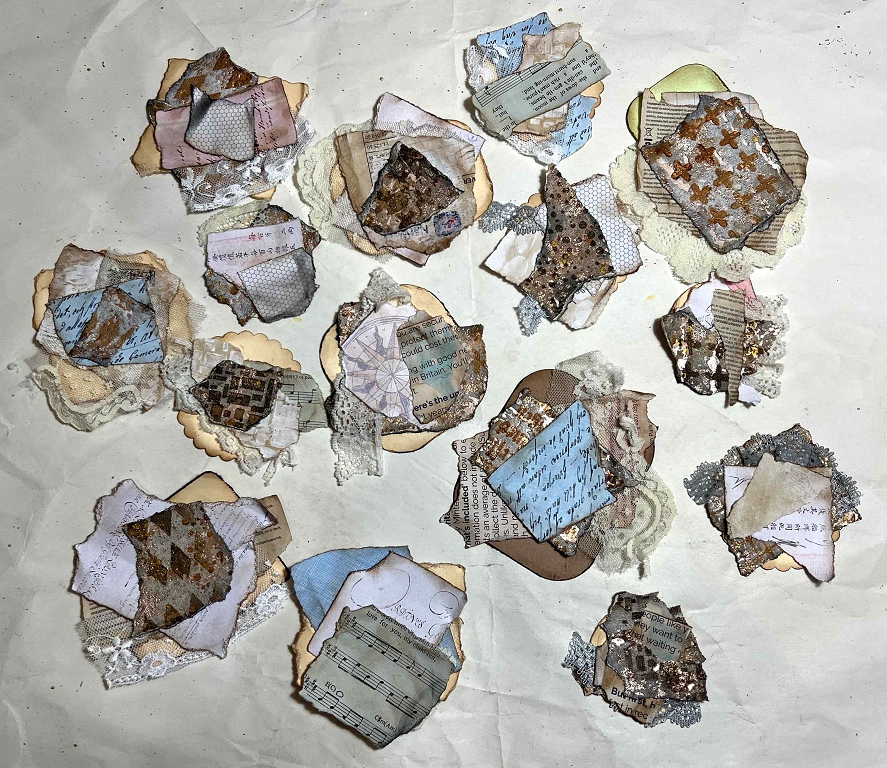
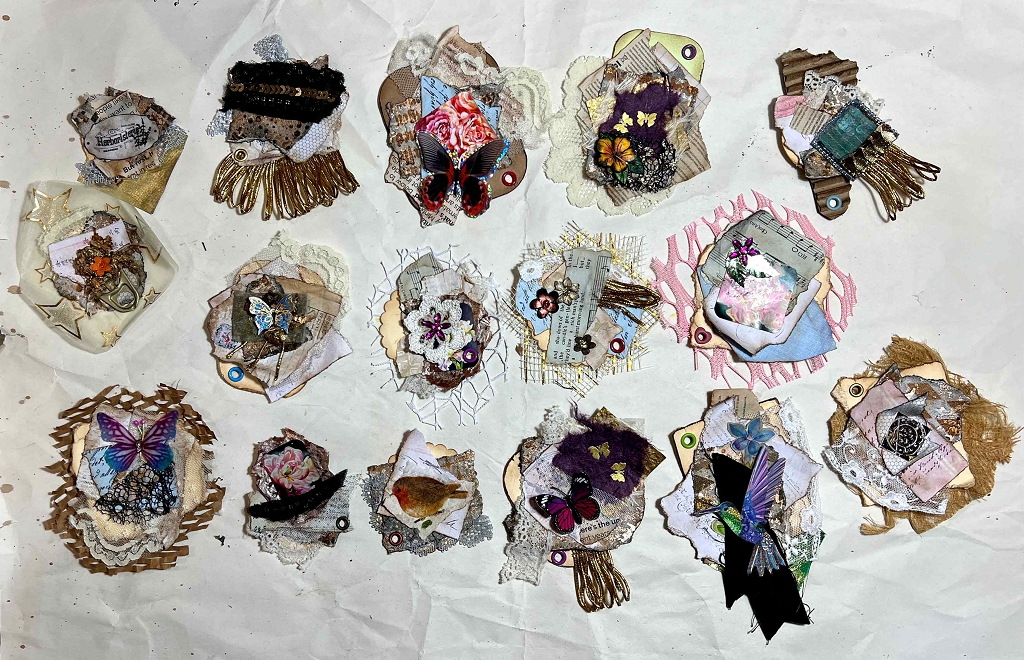
Detail shots
The clusters are quite small, and the above photos don’t really show all the details. I have therefore photographed them in pairs, close-up, and will explain some of the materials I used in each one.
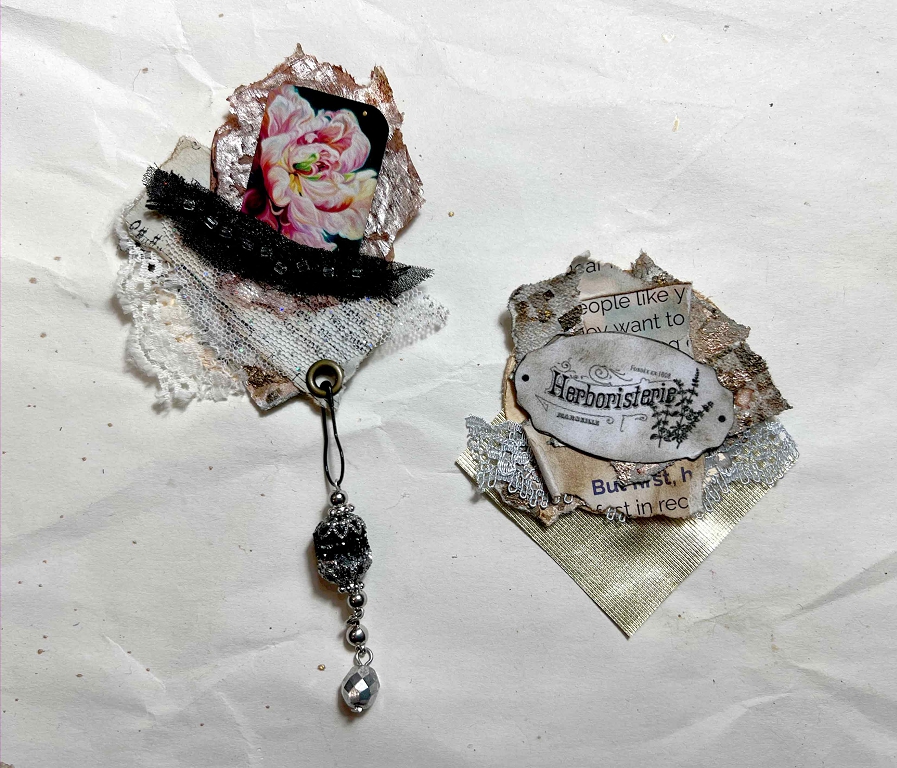
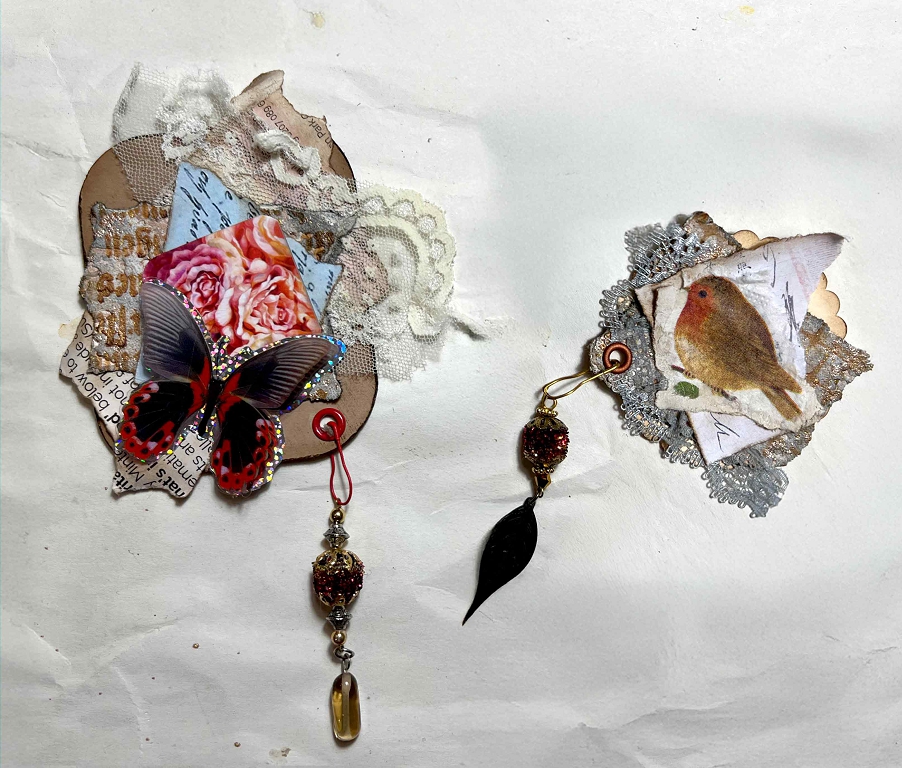
1st pair
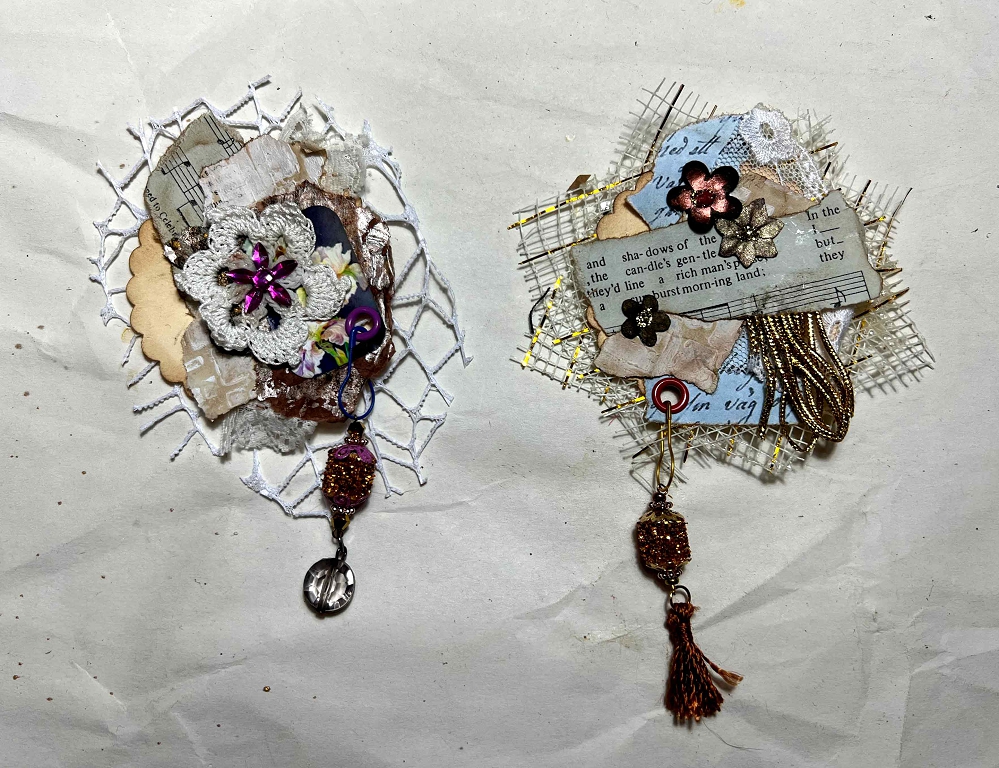
The one on the left is topped with a crochet flower with a gem flower glued in the centre. I have glued a piece of white plastic mesh under the base layer.
The one on the right has three small paper flowers from my stash – cut with the cutting machine and hand-inked and embossed, with glitter glue centres. Tucked under the music fragment is a tiny offcut of the gold fringe which I used in the junk journal project. Under the base layer, I layered up two squares of the open white and gold plastic mesh I bought recently, mostly with a view to unravelling it and using the fibres. It frays extremely easily, so once this cluster was complete, I turned it over and sprayed the back heavily with spray adhesive which seems to have fixed most of it.
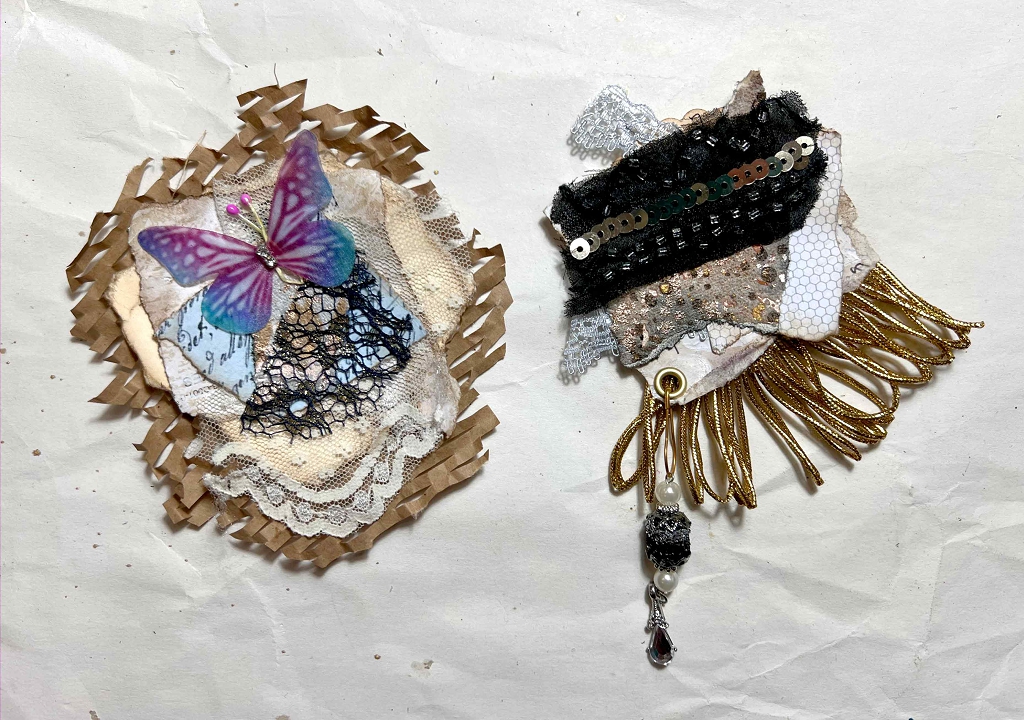
2nd pair
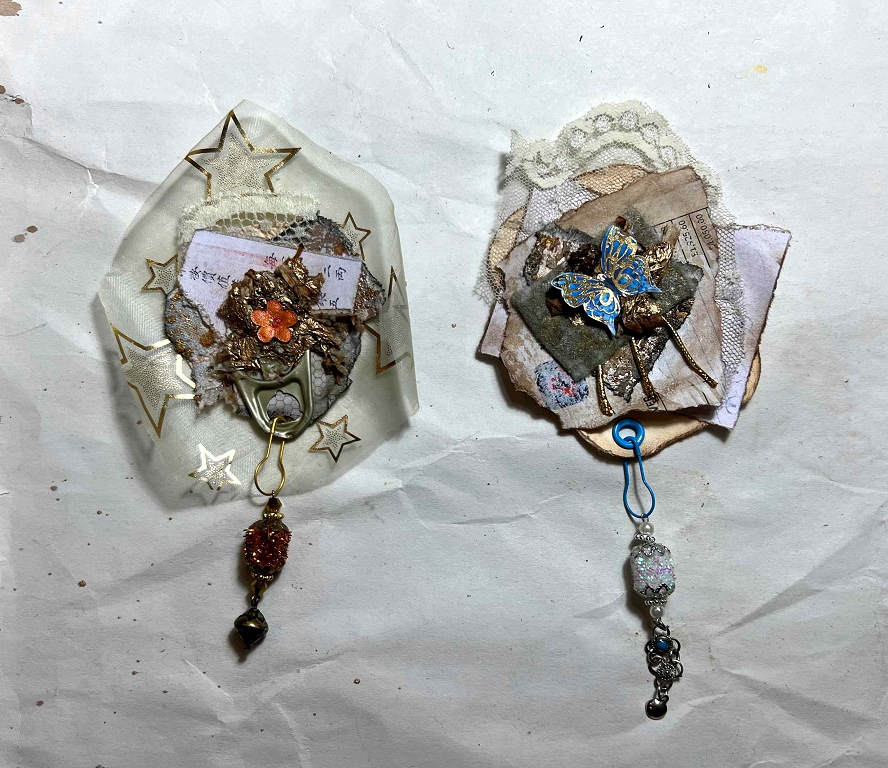
Working on various projects recently, I kept mopping up and wiping my hands with a piece of kitchen paper which eventually started to disintegrate, but I hesitated to throw it out because it looked interesting. I tore off fragments of this for several of the clusters and glued them down in the centre. I dabbed them with gold acrylic paint and added further embellishments to the centre. The one on the left has a piece of this with another of the tiny paper flowers, glued down over a ring pull which also serves as the attachment for the dangly. I backed this one with a fragment cut from a piece of one of the lovely fabrics in my recent gift bundle – organza decorated with gold stars. The one on the right has three strands of the gold fringing glued under a piece of rectangular felt which had been used on my alcohol ink blending tool – nothing earth shattering as far as colour is concerned, but a bit of added texture. The butterfly was one of a set in an as-yet unopened pack of stick-on butterflies someone had given me once, made of acetate, I think.
3rd pair
The one on the left is embellished with a thumbnail from an artist’s flyer, backed with a fragment of gold gel-printed tissue paper to make it stand out a bit better from the underlying layers. Across the bottom is a tiny fragment of black organza fabric decorated with tiny beads, from my gift bundle. There is no added layer under the base. The one on the right doesn’t have a dangly, and is based on one of the small circular base pieces. Stuck on the back is one of those tiny square fragments of gorgeous fabrics in my gift bundle. It is gold, with a fused white backing – it feels pretty plasticky and not the sort of fabric I’d want to wear, but ideal for this sort of thing! The top embellishment is a label from a vintage bundle, inked to age it.
4th pair
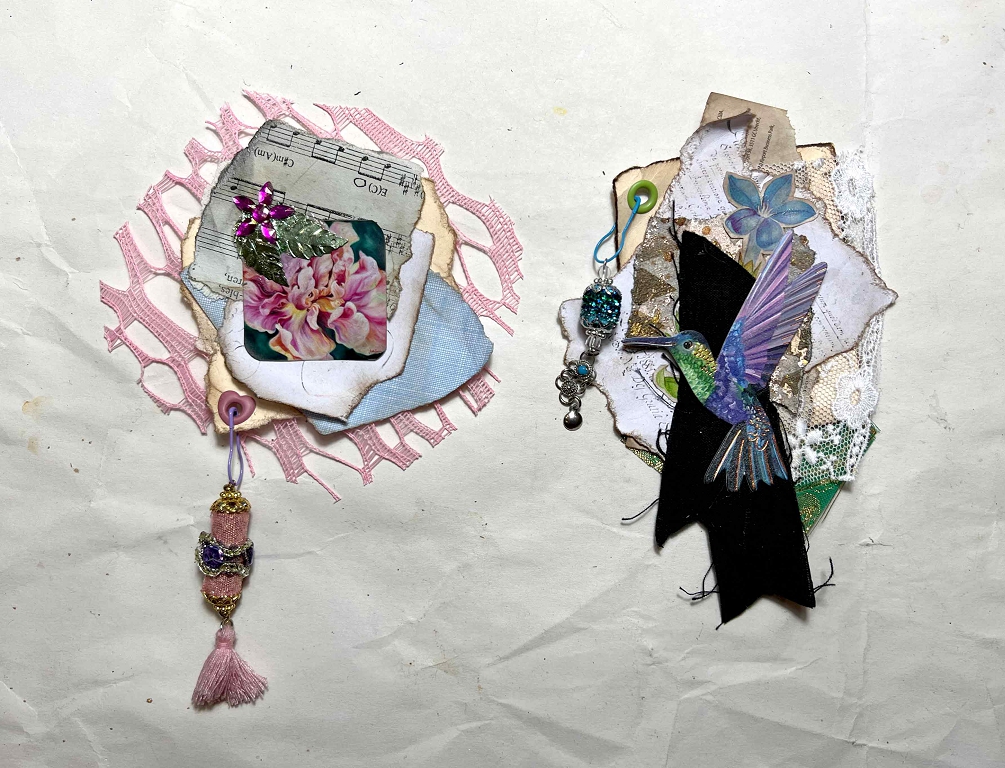
The one on the left has another thumbnail from the artist’s flyer, embellished with another gem flower and some green metal leaves, both from the embellishments box. I didn’t think I’d ever use those leaves as they don’t fit in with most of the things I do, but one never knows (which is why I never throw anything away!).This cluster is backed with a piece of pink plastic mesh. The one on the right has the hummingbird embellishment, which I stuck down over a piece of folded frayed black fabric to make it stand out from the cluster. Underneath is a mostly-obscured fussy-cut flower. There is a tiny fragment of green lurex fabric poking out underneath, also from the gift bundle.
5th pair
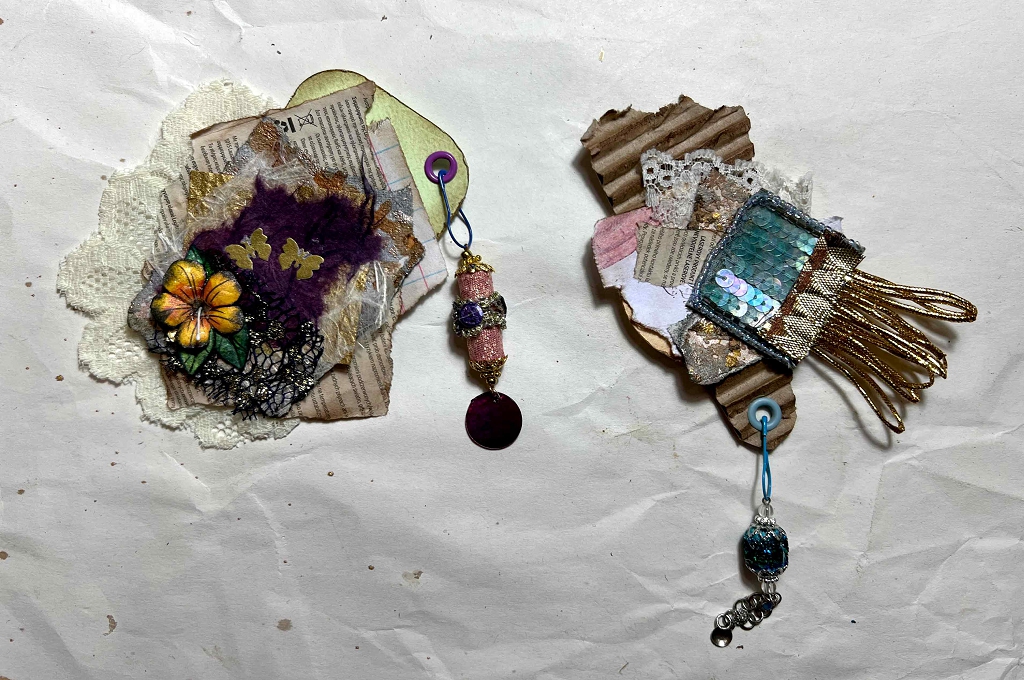
The one on the left has another of the tiny fabric fragments – a fine mesh with gold sparkles. On top is one of my own hand-made paper flowers, and to the right is a fragment which doesn’t show up as much as I’d like. It is a layered piece with gold, and purple (which looks black) and two tiny gold butterflies. Many years ago we attended a wedding, and afterwards the bride gave me all the spare stationery, which was made of hand-made paper with these little clusters on the front. Ideal for this kind of project. There’s no additional layer under the base. The second one has a piece of the corrugated cardboard which I inked over the top to emphasise the ridges. On top is a tiny square decorated with beads and sequins from the gift bundle. The bottom edge was raw, so I covered it with a fragment of the brown and gold ribbon I used on one of the pages in the junk journal project, glueing a fragment of the gold fringe underneath.
6th pair
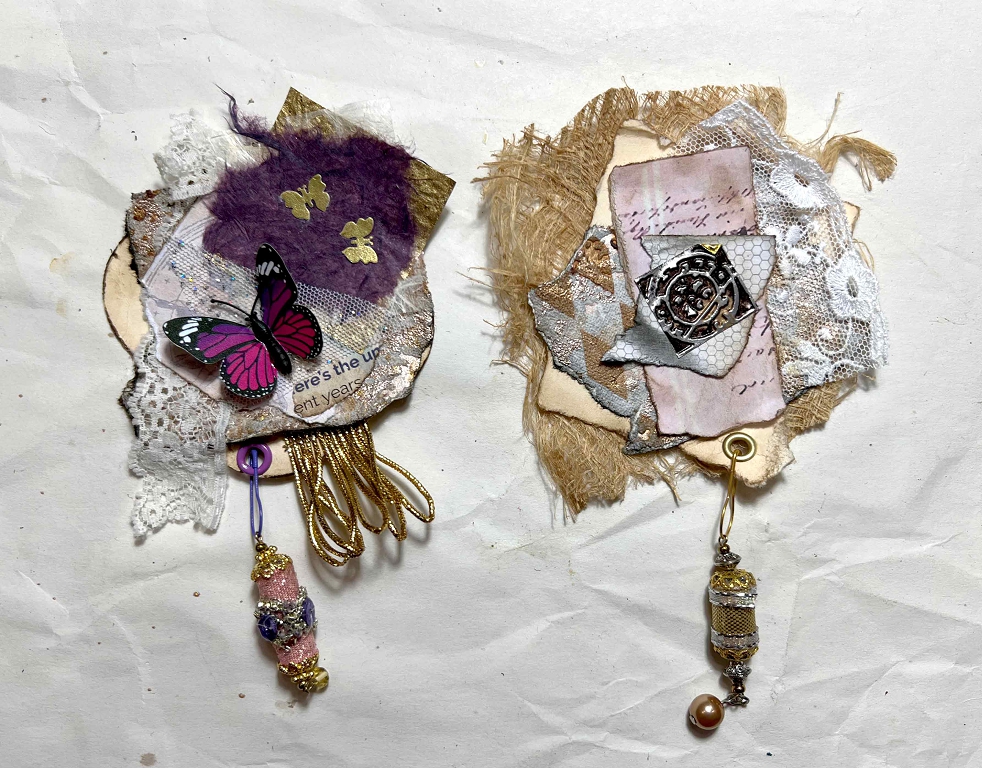
The one on the left has another of the wedding stationery embellishments which shows up better in this photo. Another acetate butterfly from the set mentioned above, and a fragment of fine white mesh fabric with gold sparkles, like the black one above – also from the gift bundle. I added another bit of the gold fringe underneath. No underlying layer on this one. The one on the right is topped with a tiny fragment cut from a piece of metal I’ve had in my stash for years, not knowing what to do with it. It was a piece I embossed with a Tim Holtz embossing folder with different designs arranged in a grid. I coloured it with brown alcohol ink and then rubbed away the colour on the raised parts with fine sandpaper. Underneath is a piece of beige patterned envelope paper with an unusual honeycomb pattern. The cluster is backed with a piece of what I think is mulberry fibre – something that has been in my stash for years, which I think I may have picked up at a craft show.
7th pair
Another of the acetate butterflies tops the first one, with another thumbnail from the artist’s flyer. No backing layer on either of these clusters. The one on the right is quite small and just has one of my fussy-cut birds. They don’t all have to be uber-fancy!
8th pair
Another butterfly on the left-hand cluster. This is one of a pack I have in my embellishments box, made of a sort of papery translucent fabric. They have a little jewelled body and I made some antennae from stamens for making paper flowers. There is also another tiny fragment of interesting fabric from the gift pack – a fine black mesh. I backed this one with a piece of paper packaging mesh. The one on the right has the rest of the black fabric fragment with beads and sequins, from which I cut the tiny piece on one of the clusters above. Again, I have added some of the gold fringe to this one.
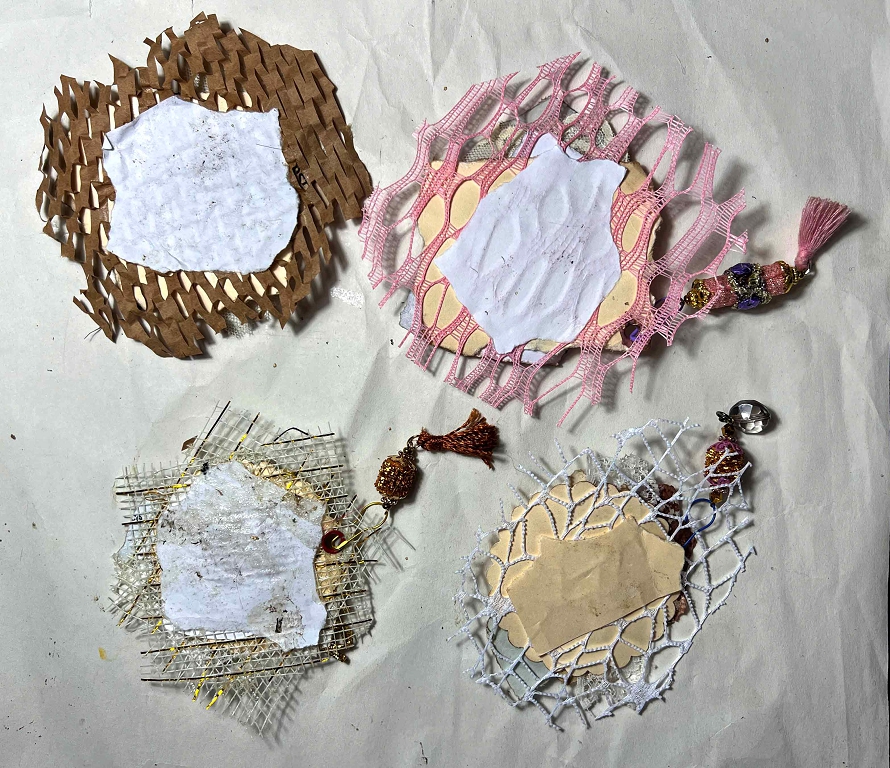
Sticking on the backing mesh
The meshes that I used to back several of the clusters are extremely difficult to glue, especially the plastic mesh which is really resistant to anything you try and do with it! I came up with the solution of tearing a fragment of paper smaller than the base, and glueing this over the mesh, so that it was sandwiched between the two. The glue sticks the two paper layers together through the holes in the mesh and keeps it in place. It works a treat.
I now have sixteen ready-made cluster embellishments for projects, with more to come when the urge hits me again. This is a great project to do in a single session, or more – you can do as much as you like, and have fun mixing and matching scraps of this and that. It would probably be an excellent thing to do when Mr. Creative Mojo decides to take a vacation and leaves you high and dry, wondering what to make!