FUSSY CUTTING DIGITALS
I have recently downloaded quite a few digital kits for printing, mostly freebies from very generous artists who often create these to celebrate milestones in YouTube subscriber numbers, or for their birthdays and so on. I have also purchased a few kits. These are always very reasonably priced. Once you’ve got them, you can print them out as often as you like. They are a very useful resource for mixed media and album making.
I normally print them out on 160 gsm printer card which is a good compromise – it is substantial enough for pockets and page tabs and so on, but not too bulky for albums. It is also suitable for album pages. The laser prints take inking and distressing pretty well, too, although the paper wouldn’t take too much in the way of wet media. The ephemera you can cut out are excellent for embellishing pages and other album elements.
Fussy cutting
Fussy cutting is what we call cutting things out by hand – usually images, labels, tickets and other ephemera. It is pretty labour intensive but the more you practise, the faster you get. You get the best results by turning the paper, not the scissors.
Scissors
Up until now I have always used two favourite pairs of scissors for fussy cutting – a large pair with long blades for longer, straighter edges, and a pair of fine curved nail scissors for detailed work. However, when doing a long session, I have found my hands get quite painful and tired. I recently saw Luise Heinzl on YouTube, talking about fussy cutting, and she uses a small pair of Tim Holtz/Tonic Studios spring-loaded snips. These looked excellent so I bought a pair and it has revolutionised my fussy cutting!
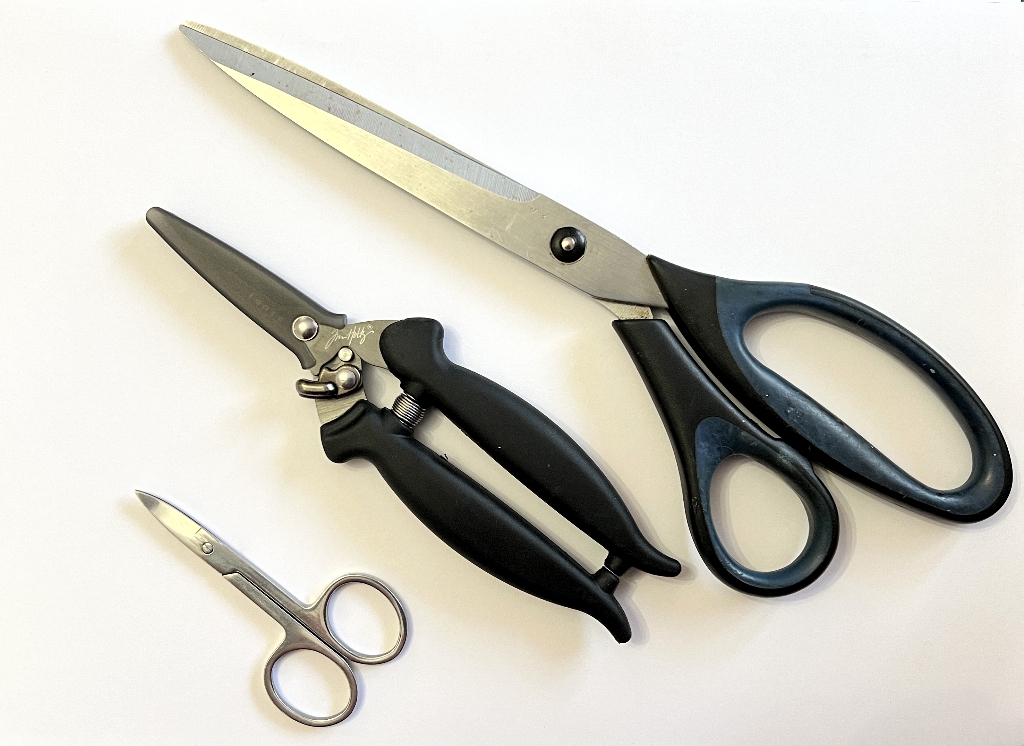
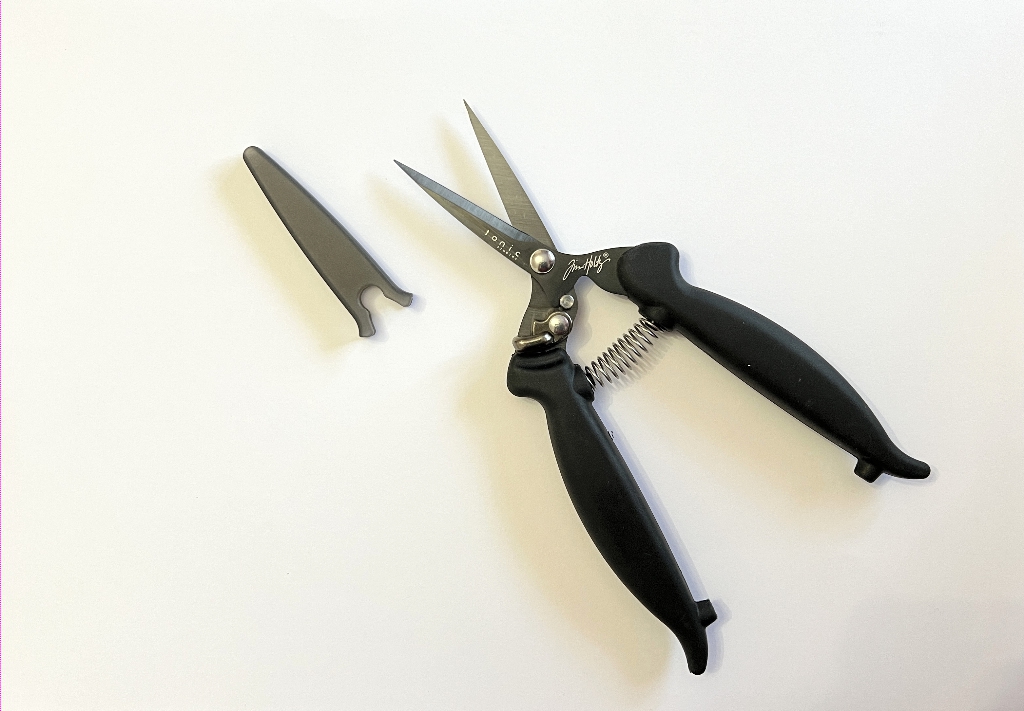
These snips are very sharp, with sharp points. Like garden secateurs, they have a locking device to keep them closed, and they also come with a plastic sheath to cover the blades when not in use. Remarkably, they come with a second spring with higher tension, and you can install this if you want to exercise more pressure in use. For me, I like the ease of use with the finer spring that it came installed with. It’s a nice touch, though. The handles are covered with soft rubber so they are very comfortable to use, and a lot of the work is taken out by the fact that they spring open on their own. Tonic Studios also make a larger version with longer blades, but I am happy with my regular large pair as there isn’t usually that much to cut at that size.
Here’s my setup, as I was working on it in the sitting room.
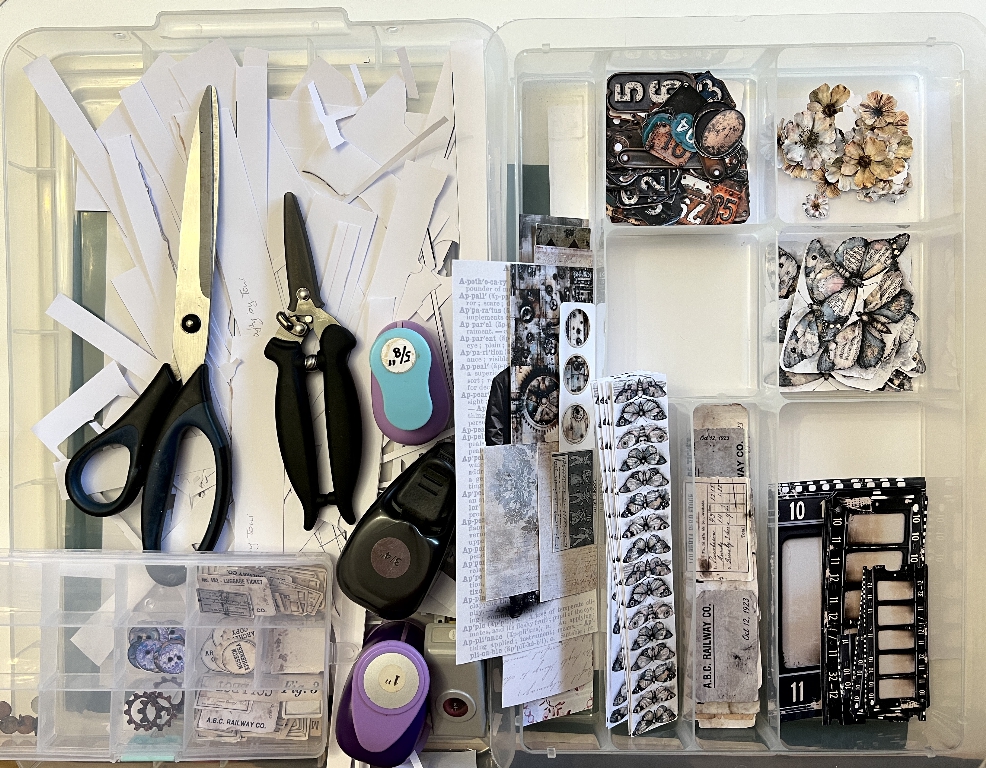
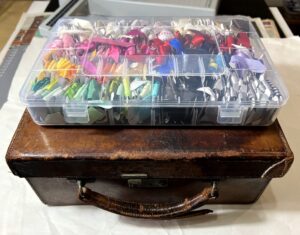
I’ve got two plastic trays. The one on the right has divisions in it, and is designed to fit inside a Really Useful Box (yes, that’s the real trade name!). On the left is the equivalent sized lid of a RUB. You can also see, bottom left, one of the small storage boxes I bought the other day in Newton Abbot. I brought down some of my circle punches from the studio as well.

Lots of offcuts! Some of the strips are definitely useable. We all end up with tons of strips – every project generates more!
Sorting my fussy cuts into different categories in the tray, ready for more permanent storage upstairs in the studio.
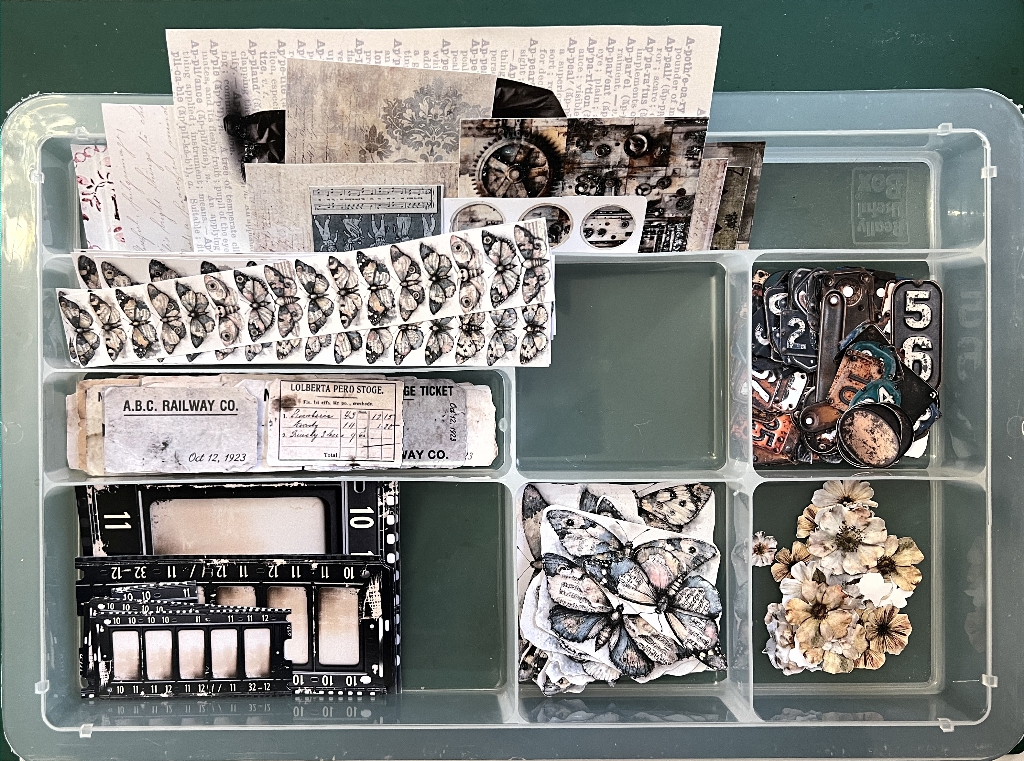
There are digitals from various sources here. The butterflies are from Tracy of Art House Whimsy, the metallic numbers are from Luise Heinzl, and the vintage photo frames are from Margareth of Seven Plaza. This is the only sheet from that kit that I have printed on normal paper. I shall print a lot more on the laser printer-friendly self-adhesive transparent sticker paper I have now got. Not sure of the sources of the rest – a mixture! They can all be inked and distressed as required.
These are the smaller ones, most of which are from Toni of Crafty by Toni. A huge freebie kit consisting of loads of fabulous labels and tickets. There are also buttons and gear wheels but I can’t remember where they came from.
At bottom left you can see some of the tiny discs from the necklace I bought the other day in Newton Abbot. I gave up trying to demolish that necklace in the rather poor lighting in the sitting room. I’ve got a magnifying goose-neck lamp and will continue with its help.
The little buttons are gorgeous – marbled paper. You can layer them up with more card to make them quite thick, and sew them on your album projects like real buttons!
Punch woes
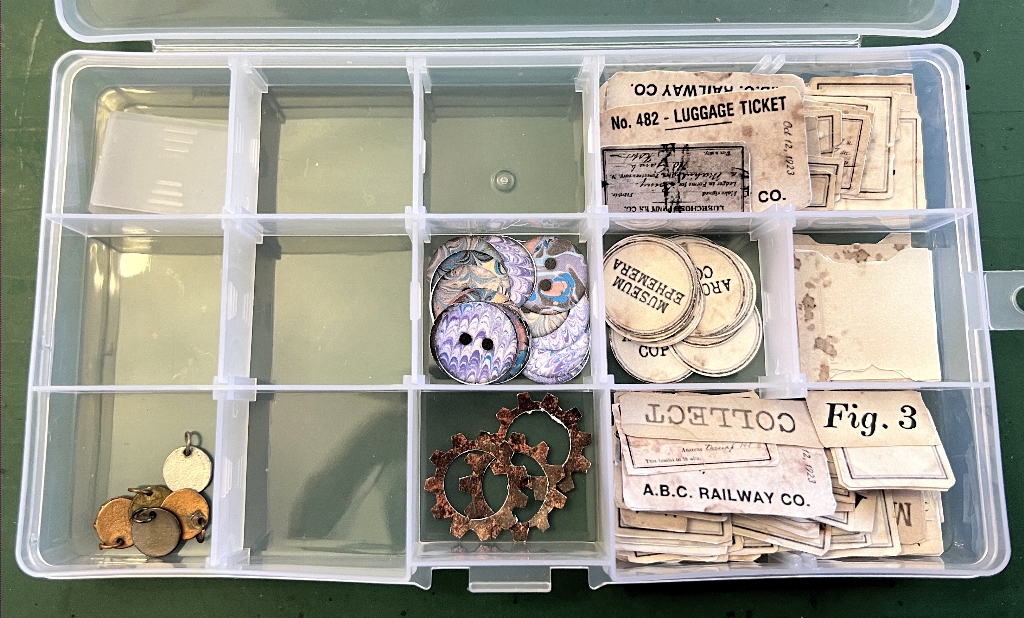
Here are some of the gear wheels waiting to be cut.
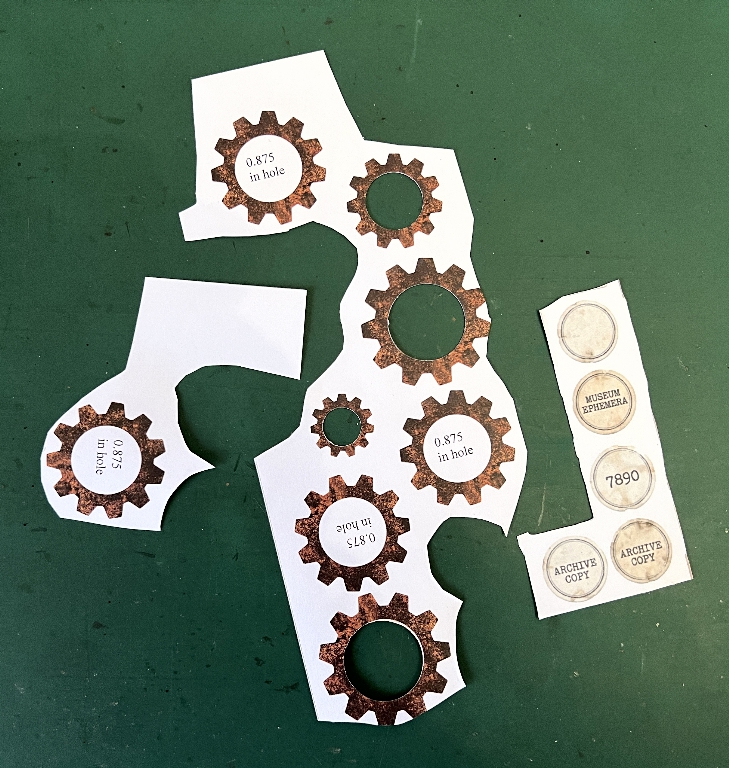
I have quite a number of circle punches going up from 1/4 in to 2 inches but I was missing a 7/8 in one. It is virtually impossible to cut a perfect circle by hand, especially a small one in the centre of a gear wheel. I ordered a 7/8 in one from Amazon recently. It was one of only two, and I chose it because it was the cheaper one but it was a mistake. All my other circle punches are designed so that they will hang on a rail above my desk but this one would not – I thought it wouldn’t matter given that it was quite a bit cheaper than the other one. This size of punch seems to be rare, and a lot more expensive than other sizes for some reason.
This punch came from Japan. When it arrived, there was a delightful little pink origami crane that the seller had made as a gift – such a nice touch! However, I found the punch to be quite impossible to use. It required enormous pressure even with no paper, and it needed both my hands to do it, which meant it would be impossible to line up my paper to cut the whole exactly where I wanted. When I tried with paper, I couldn’t close it at all. I immediately submitted a request to Amazon for a return, and wished I’d bitten the bullet and bought the more expensive one in the first place!
I was issued a refund straight away, and a note to say that there was no need to return the item, which saved a lot of hassle. Too much bother for them to send it back to Japan, I suppose! Anyway, I have the other one on order now, but I have to wait till next month for its arrival.
In the picture above, you can see that I have not gone ahead and fussy cut the outlines of the gear wheels. This is because you need enough paper around the hole you want to cut, so that you’ve got something to hold onto while you line up the punch. You can see that I have already cut some 1 in and (I think) 5/8 in ones. You can see a few completed ones in the box of small fussy cuts above.
Negative spaces – positive plans!
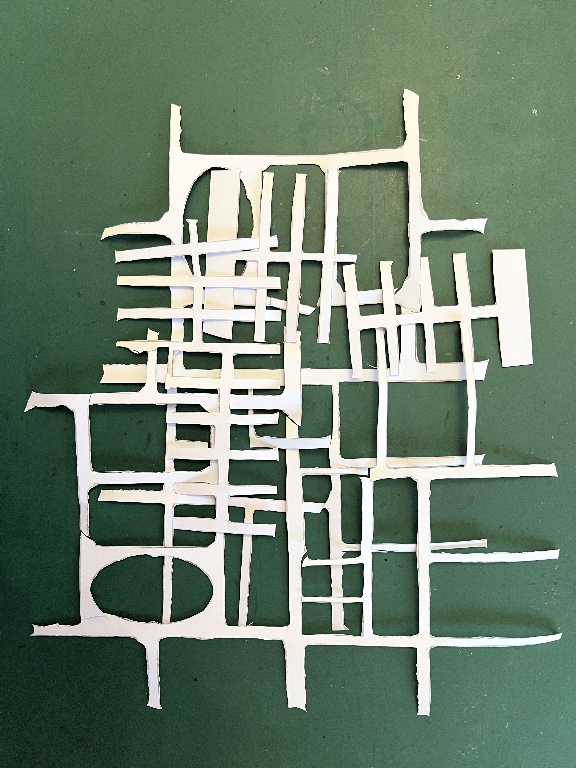
As I was cutting out Toni’s labels (many of which already have distressed edges) it struck me that the negative spaces left could be interesting to use. Once I realised this, I planned my order of cutting strategically, to take account of it, and preserve as much as possible of the pieces left. The above photo shows a collection of them layered on top of one another. I am thinking of sticking them together in a similar fashion and spraying them with tea or ink, over another piece of paper so that a) they will be coloured and b) they will act as a stencil at the same time. Finally c) they can be collaged! Waste not, want not. They make interesting shapes and quite a pleasing design.
A vintage catalogue
The other day my hubby got this vintage model railway catalogue from a junk shop or somewhere. It is in Dutch, and dates from 1935-36. The pages are genuinely aged, very yellowed and brittle, and damaged around the edges. Genuine grunge! Deeelicious. Unfortunately he wasn’t prepared to let me have it (shame!) but I photographed several pages and cut them out.

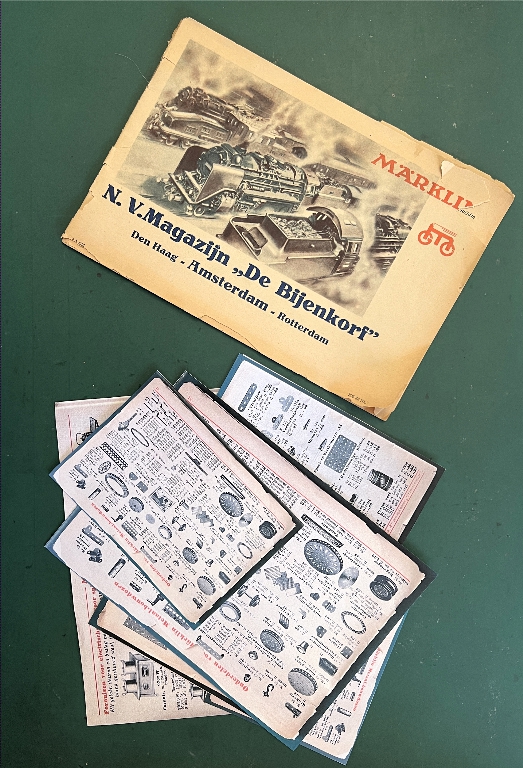
It was only later, when I put my printouts next to the original, that I realised how much paler and more pink they are. It doesn’t matter, though, because they can be inked and distressed. I now have the digitals and can print them out as much as I want, and at whatever size I need, too. I can always go back and adjust the colour balance of the photos to get them back more to the original if I want. You can see in the photo above that the top one is a smaller version of the page underneath. I can use an entire sheet as a background, or cut/tear them up for separate elements. The little images will be lovely stand-alones too, either for use in clusters, or with UV resin, and for making charms. Loads of potential!
Fussy cutting is fun. You end up with loads of elements to dig into and use in projects. A while back I did a mass of flowers, animals and birds from second hand British flora and fauna books and have already started using these. We received two copies of the spring catalogue from Otter Nurseries yesterday (junk mail) and I’ve already got these in the studio to cut up – some great flower images in them. Sorry, recycle bin – you’ve been deprived of lunch yet again…