DIY WASHI TAPE – FINALISING THE CANDY STRIPE PROJECT
A quick addendum to my previous posts about this DIY washi tape.
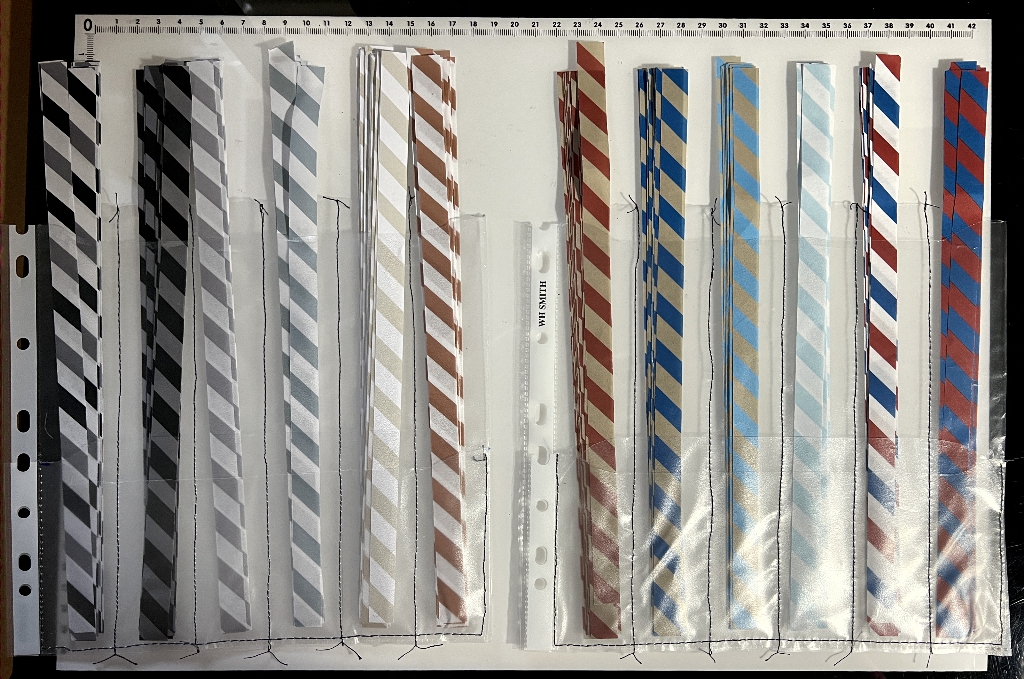
Cutting the strips
After thinking about this further, I managed to cut the strips using my guillotine. With the faulty-printed edge on the right, I lined up the other edge to the 7 inch mark, and proceeded to cut in half-inch increments until I came to the final inch. I couldn’t cut this in half on the guillotine because it left too little to get hold of to keep it in place, but I was able to cut the inch into two halves using the ruler and knife. I had hoped to be able to cut several sheets at once, but after my first attempt I gave up because the paper is so thin, and slightly shiny and slippery, and it was impossible to keep the sheets lined up accurately. In the end I did them one sheet at a time, but it was still considerably quicker than cutting every strip individually with the ruler and knife.
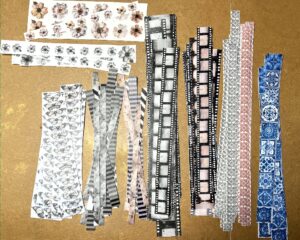
Here are the finished strips, ready to be stored away, stacked up neatly by colour.

Making the pouches
Once I’d made the first pouch, the rest were very easy to complete. I cut them out and then took them to the sewing machine. To help keep the two sections in place, I used small clips, and after I had sewn the lines in the centre, the pieces were held in place sufficiently well not to need the clips, and I was then able to sew the outside lines as well.
What took the most time was tying off the ends of the sewing. I didn’t want it unravelling. I didn’t do the usual reverse stitching because I didn’t want to introduce more needle holes in the plastic than were necessary. I was already using the longest stitch available on my baby Brother machine (which isn’t actually very long) to keep the holes to a minimum. I was afraid of the plastic ripping between the stitches if they were too close.
On the video, she used white thread for her sewing, but I couldn’t be bothered to rethread the machine so I used the brown that was already on there. You don’t notice it too much when the paper strips are in place, and after all, it’s just storage, not a work of art!
Storing the washi strips
Once the pouches were all stitched, I put the washi strips into the sections. They look absolutely great!
Of course at this stage, there aren’t any medium or short lengths to go in the bottom pockets, but these will be used in due course.
I shall be making more pouches with wider sections for my other paper strips that won’t fit in these pouches. This storage system really rocks! No more hassles!
Storing the pouches
For now, I have rolled up the pouches and put them back in the original paper strips box, along with the empty pouches. I shall probably continue to keep them in there for now, but get them out and stand them in a jar when I’m working on a project.
I have plans for making more washi strips with this gorgeous paper. I have a lot of digital downloads from the Graphics Fairy Premium Membership site and in their “pdf printables” section of each themed bundle, there are often sheets of washi tape to print. I also want to try painting on the paper with watercolour, and doing stamping, tea staining, rust water and other media, and I am keen to learn how to make repeating patterns on the Krita image editing software on the computer. So many possibilities! I know from experience and seeing the work of others that laser prints sand really well to give that worn vintage look, and I know I will be able to ink or tea-stain my candy-stripe washis if I want to tone down the stark white.
I am delighted with the result of this project, and have gained confidence with my printer too. I’ve always been a bit scared to put unusual papers through it but these papers (the washi paper and also the transparent sticker paper) are designed for laser printers and work very well. I tried the sticker paper today and it was fantastic – on the heavy glossy paper setting it printed like a dream, and I can’t even scrape off the toner with my fingernail. More on this in a later post!