A COUPLE OF CARDS
May is a busy month for my hubby and me. His birthday is on the 19th and mine is on the 30th, and in between, on the 24th, is our wedding anniversary and the kitties’ birthday. This year they are six! I can’t believe we’ve had them that long – it seems like only a year or two ago that we brought them home, cute little babbies of 9 weeks.
Card making isn’t really my favourite pastime but needs must! I always try to make something special for my hubby, though.
My hubby’s birthday card
For his birthday this year I decided to celebrate his love of metal detecting. He belongs to a club and regularly goes out with them, often arranging venues for them on local farms. We have a standing joke – each time he goes out, I say, “Find me a Saxon hoard this time.” I really fancy one of those heavy gold torcs they used to wear. He says that if he found one, he’d have to turn it in to the museum and I wouldn’t be allowed to keep it, but I said that if he and the farmer whose land the hoard had been found on were as richly rewarded as those involved in the Staffordshire Hoard (now in the British Museum), he could afford to have a solid gold replica made for me, surely?
Each time he goes out, he finds very little. Apparently Devon isn’t the best place for metal detecting. He finds a few interesting coins, and bit of horse harness and the occasional shoe buckle, and of course modern coins and ring-pulls from drinks cans but so far no gold! His friend (now sadly died) found a lot of Roman coins in a field not far from here, and contacted the authorities about it, and for a number of years an official dig was conducted on the land with archaeologists from the university, and my hubby was a volunteer – the dig was featured in the first series of “Digging for Britain” and you can see him working away in the background! Subsequently he was set to work on the spoil heaps with his metal detector to pick out anything the archaeologists had missed. He’s very interested in history and archaeology and I’ve had some fun making him metal detecting themed cards in the past.
This year I did a bit of photoshopping on a free image I found online of a row of Saxon warriors looking very fierce with their swords and spears. I gave one of them a metal detector and added the legend with a play on words, “The Saxon Horde.” I added a background of some runes.
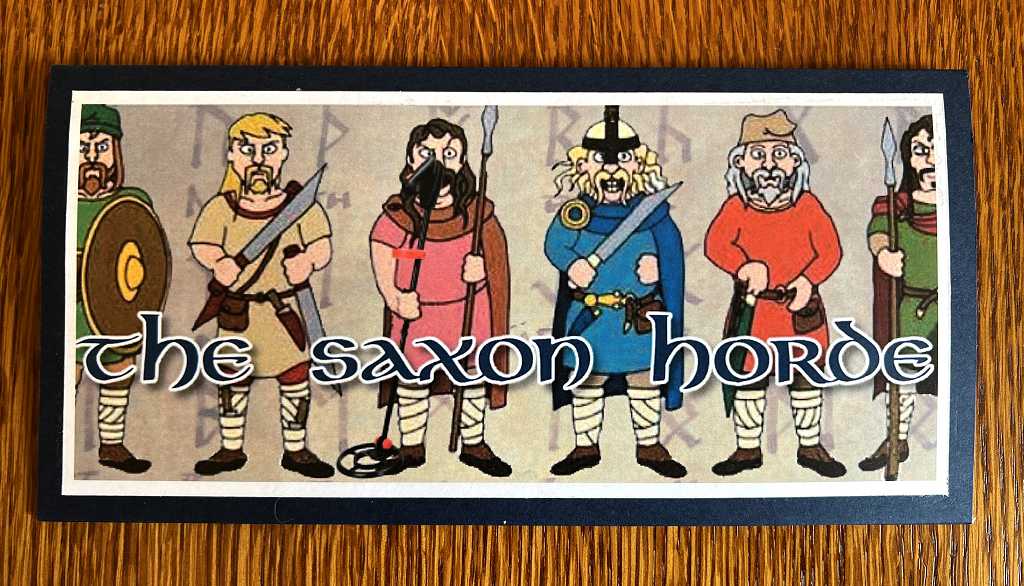
I printed the image on white card and cut it out leaving a narrow white border. I matted it onto a navy card base and added a white lining which I also printed on my new laser printer.
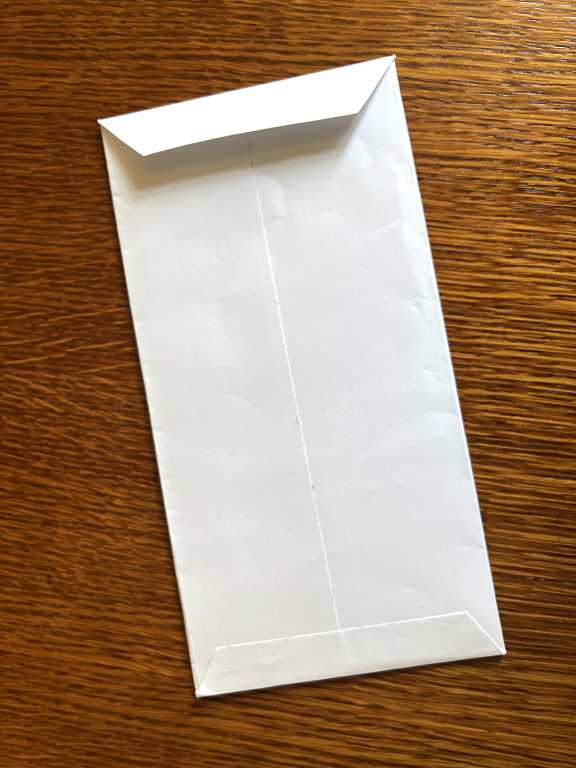
I made a simple custom envelope cut from a piece of heavy A3 white printer paper. My envelope punch board wouldn’t make an envelope long enough for this tent-fold card, so I cut a piece of the paper a little wider than double the height of the card, folded it around the card, and created a seam along the centre back. I trimmed the top and bottom and folded them over, again using the card as a guide, trimming off the corners and cutting away the excess paper from behind, and glued the whole thing together, cutting away the opening under the flap a little, to make it easier to extract the card.
Wedding anniversary card
Made in the nick of time – yesterday afternoon, to be exact! Today is our 37th wedding anniversary. It had been on my mind for days and I had been so busy and then so tired, and couldn’t seem to get down to it. I was also completely lacking in inspiration. I went back through my “inspirational graphics” folder on the computer (high time I looked at that again as it’s full of images saved over many years, most of which I have forgotten about!) and found a picture of some embellished tags. I thought it would be fun to make a tag and adhere it to a card base as a topper.
The whole thing came together quite quickly and I was pleased with how the different materials and techniques co-ordinated with one another.

I began with the embellishments for the tag and gradually worked downwards through the layers until the card was complete! A somewhat backwards way of working but it did work!
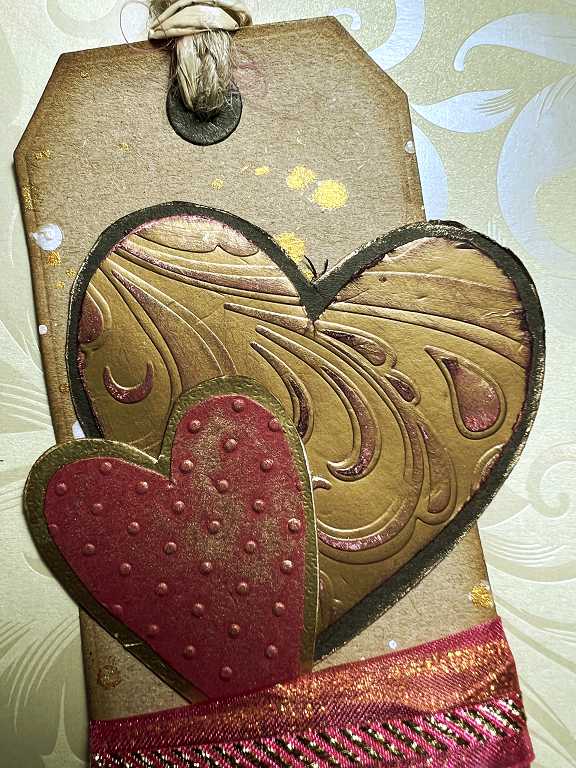
I made the large heart first, cutting it from a scrap of matte gold card and running it through a Tim Holtz/Sizzix 3-D embossing folder. I sanded the surface and edges lightly, and applied some Aged Mahogany Distress Ink, which stuck to the roughened surface but was resisted by the slightly shiny surface of the rest of the card. I mounted it on a scrap of dark brown card which I cut away to form a narrow border, and I edged this with gold gilding wax.
The smaller heart was cut from a scrap of dark red card which I ran through my Cuttlebug with the very first embossing folder I ever bought, all those years ago – “French Dots.” Remember that one? It’s actually very useful for adding a bit of simple texture! I rubbed a little gold gilding wax over the surface and then mounted it on a scrap of the gold card.
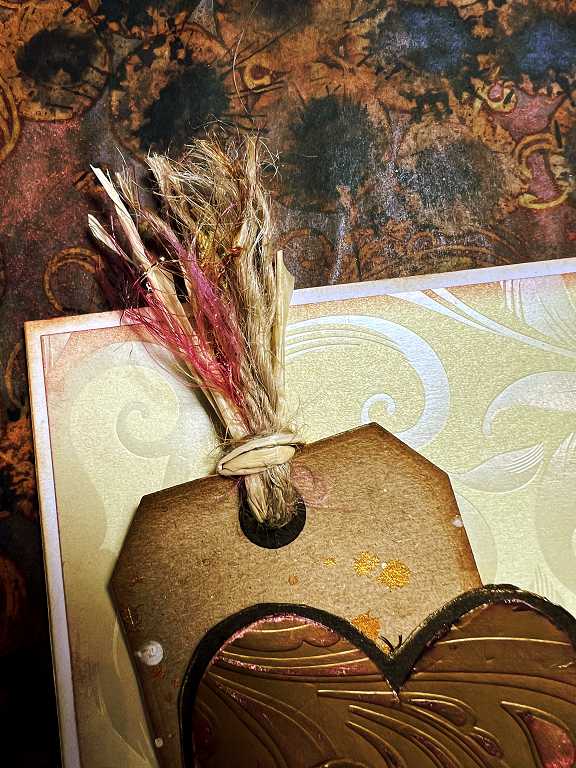
I cut the tag itself with a simple tag die which had a hole reinforcement in the set, which I cut from a scrap of dark brown card, and which I stuck to the tag after punching a hole. The tag, made from a scrap of kraft card, was inked around the edges with Aged Mahogany Distress Ink and spattered with white Indian ink and Seth Apter’s Gold Mine spray ink.
I stuck the hearts down and then had a good rummage in my ribbons box (actually one of my vintage leather suitcases) and found a wide organza ribbon in a pinkish red with gold borders, and a scrap of rather screwed up gold metallic ribbon. I folded the organza ribbon around this in as random a manner as I could, and glued it down on the back of the tag.
I stamped the 3 and 7 onto a scrap of dark red card, using Ground Espresso Archival ink. I have a set of random alphabet letter and number stamps that are quite grungey. I used a very small acrylic block to stamp each individually, and then stamped over the top with some gold. I deliberately didn’t use the stamping platform as I wanted the gold to be offset slightly. Unfortunately the photo doesn’t show this gold up very well, but it’s there. I trimmed the card down so tht the numbers were separated and mounted each one onto scraps of the 3-D embossed gold card I used for the large heart, and stuck them down, tucking them under the edge of the ribbon.
Again, digging around in my boxes, I found some neutral coloured raffia, a scrap of jute string, and I cut off a short length of fluffy pinkish red yarn with gold threads in it, and pushed these through the hole in the top of the tag (hard to do as the hole was rather small, but with the help of tweezers I managed in the end). With this finishing touch done, the tag was ready to be mounted on a card.
I had a rummage in my stacks of thicker card-base-weight card and found an A4 pack of sturdy fancy embossed cardstock (Papermania, I think) which has been in my stash, untouched, for years! Right at the back I found the piece with the swirls that was absolutely perfect for the card mat, so I trimmed it to size and inked the edges with Vintage Photo Distress Ink. The white card base was much too stark, so I distressed the edges, inside and out, all around, with Aged Mahogany Distress Ink, to soften this a bit. The tag was then ready to glue down and I assembled the card.
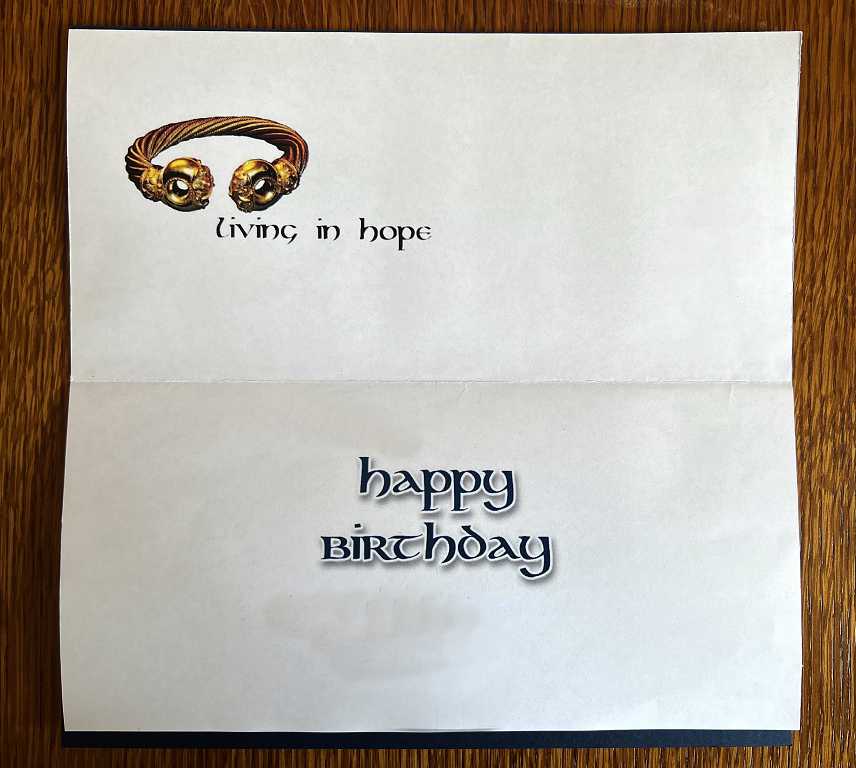
I stamped the sentiment inside, using the same method with an acrylic block, stamping first with Aged Mahogany and then deliberately offsetting a second printing with the gold ink pad. I also gently applied a little Antique Linen Distress Ink over the entirety of the inside of the card to soften the stark whiteness, using a soft blending brush. It’s very subtle and not really noticeable, but it makes all the difference.
There are some ready made 7 x 5-in card blanks and envelopes in my stash that I made up some time ago. I added a bit of interest to the front of the envelope by distressing the edges to match the card, and using a couple of heart shapes as a mask to add some more inking, and the project was complete.
Here are some detailed shots of the card.
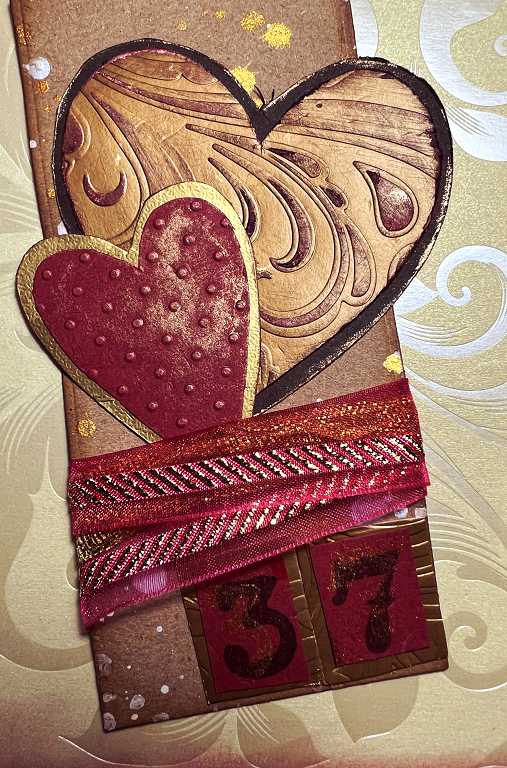
And a final look at the fnished card once more.
Quite satisfactory for a last-minute effort! It was made mostly from small scraps, and everything else was in my stash.
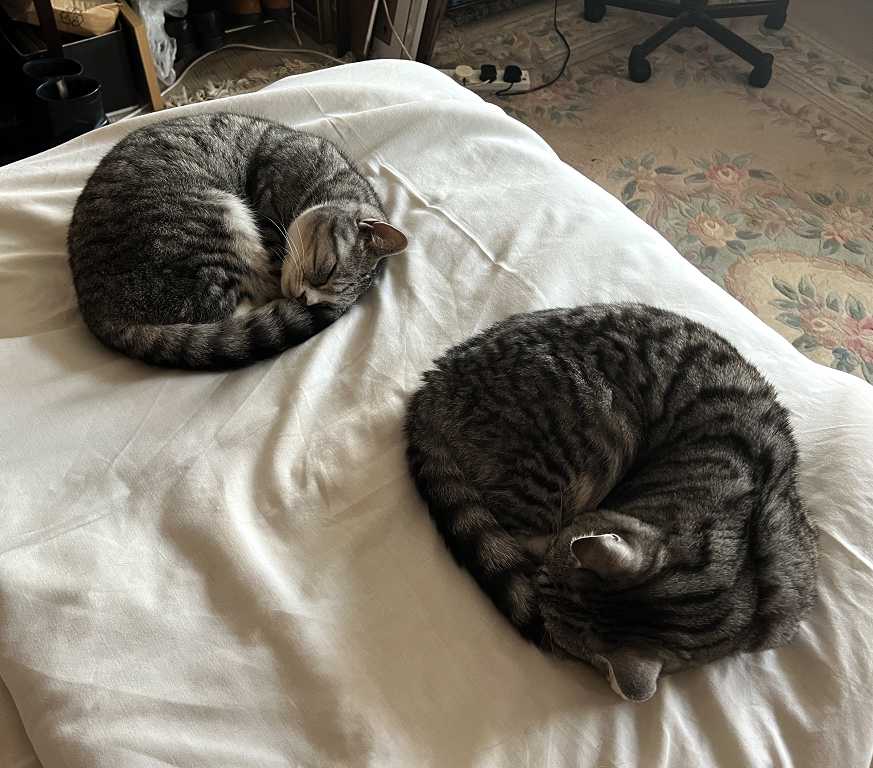
The kitties’ sixth birthday
Always easy to remember their birthday because it’s the same day as our wedding anniversary. I can’t believe they are now six years old! How time flies.
Here is how they chose to celebrate this momentous occasion.