ORIENTAL STYLE ALBUM – FIFTH PAGE – CIRCLES WITH CIRCLE TO SQUARE FOLD-OUT
The next page to come up in my Oriental style album was green, and both background papers featured circles, so I decided to run with this. Although the predominant colour is green, there are touches of dark red so I used red as an accent colour.
The spread incorporates a very nice interactive feature – not sure what to call this really, because it was adapted from a tutorial on the Graphics Fairy Premium Membership site for a delightful little circular mini-book in a tin. As you turn the pages, they open up to reveal a much larger square which is cleverly folded so that it vanishes inside the circle once the page is turned once more. Obviously I didn’t want to make a whole book for my album as it would have added too much bulk, so I decided to make just the covers and a single square to open out.
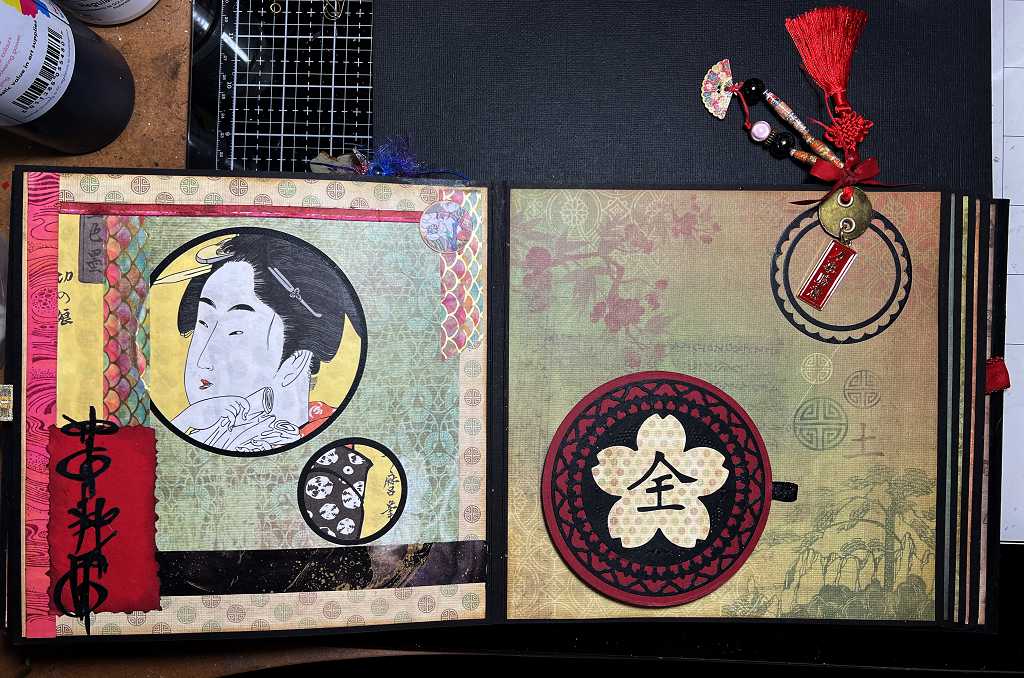
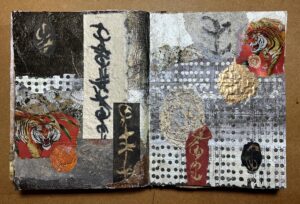
Here is the completed spread. The circle to square fold-out is at bottom right.
Starting with the left-hand page, let’s look at some details.

The background sheet is covered with circle motifs. As the right-hand page features a beautiful background paper that I didn’t want to cover with too many features, I decided to go to town a bit more on this left-hand page. I chose a picture of a Japanese lady from the Japanese paper pack that I’d bought at a craft show. The background is yellow and as it was, it dominated the page far too much. I found another sheet from the DCWV “The Far East” paper stack which had been cut down a bit, and used this as an overlay, cutting two holes with different sized circle dies. Behind these holes I glued two rings cut from black cardstock with further circle dies from the set, to make inserted frames, which really made a difference to how the underlying picture was featured. It was quite tricky lining everything up but well worth the trouble in the end.
Once the whole element was glued down, the edges were rather dull, and on the left-hand side there was a lot of yellow. I didn’t really want to cover all of this up or cut if off, because there was some nice calligraphy at the top left. The bottom left of the picture stuck out and had a bit of clothing from the figure which was very distracting. I covered the edges of the piece with various washi tapes, the scalloped one and the black one from a new set I got recently, and the red ones were some of my DIY washis. I particularly like the one on the left which was from my notorious horrible ancient paper stack, now fortunately mostly used up – there are some pages of push-outs at the back and I used a lot of these, and the waste strips between them, to ink and stamp to make more interesting strips, making them self-adhesive with double-sided tape on the back.
To cover the rather messy bottom left-hand corner of the image, I used my DIY deckle tearing ruler to make a small rectangle of dark red card, distressed around the edges with Black Soot Distress Ink, and glued this down, adding one of my faux oriental script cuts made on my electronic cutting machine, extending this over the top and bottom of the strip. To balance the design, at the top right-hand corner I added one of the small cut-out circles from the Graphics Fairy printouts I made.
Moving over to the right-hand page now.
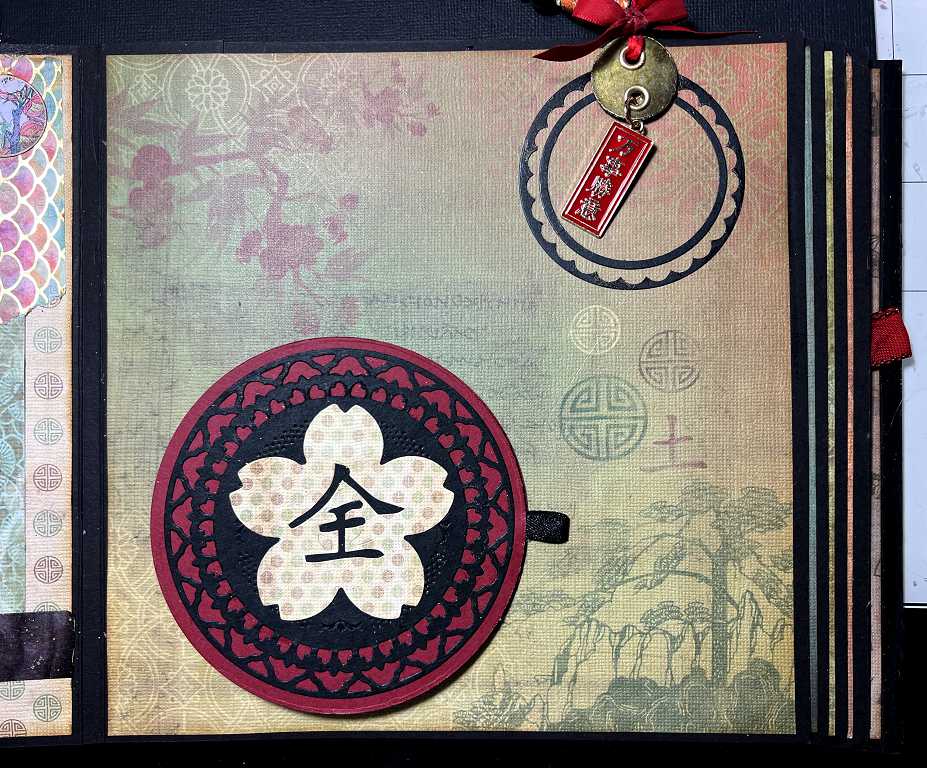
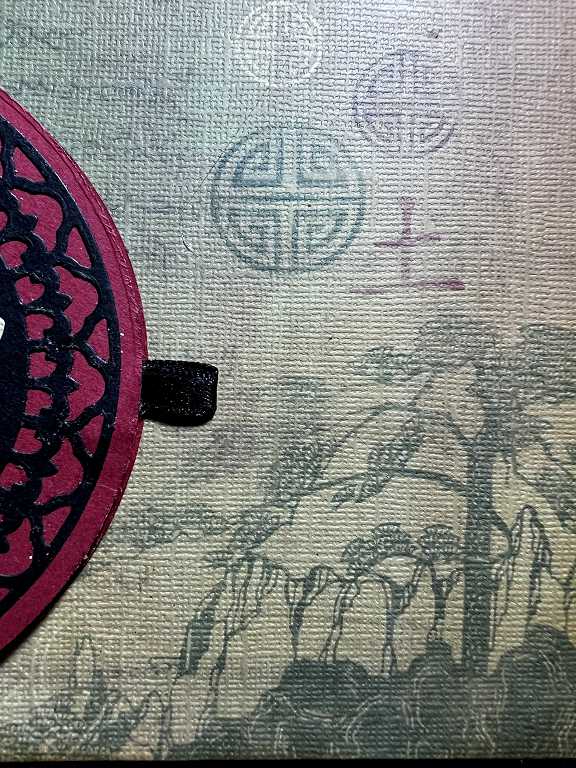
As you can see, this background paper is very attracive, and I didn’t want to cover over too much of it, so I chose plainer parts to place my embellishments.
The embellishment at top right.
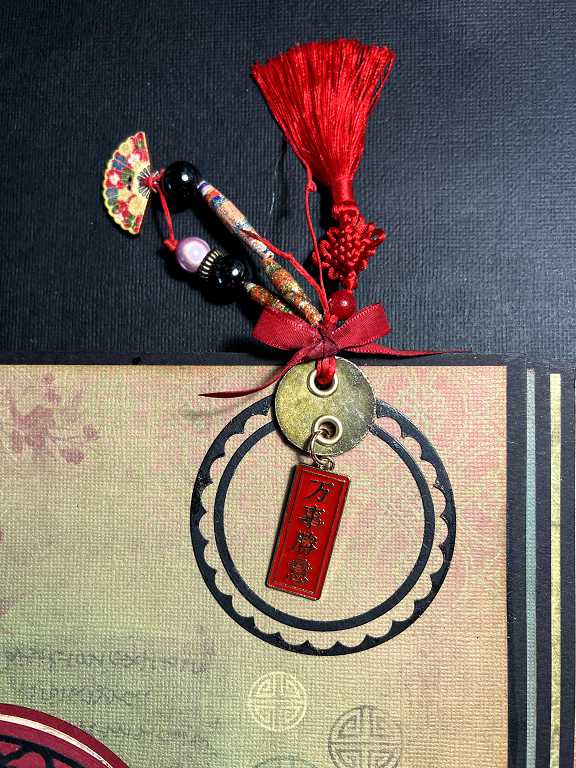
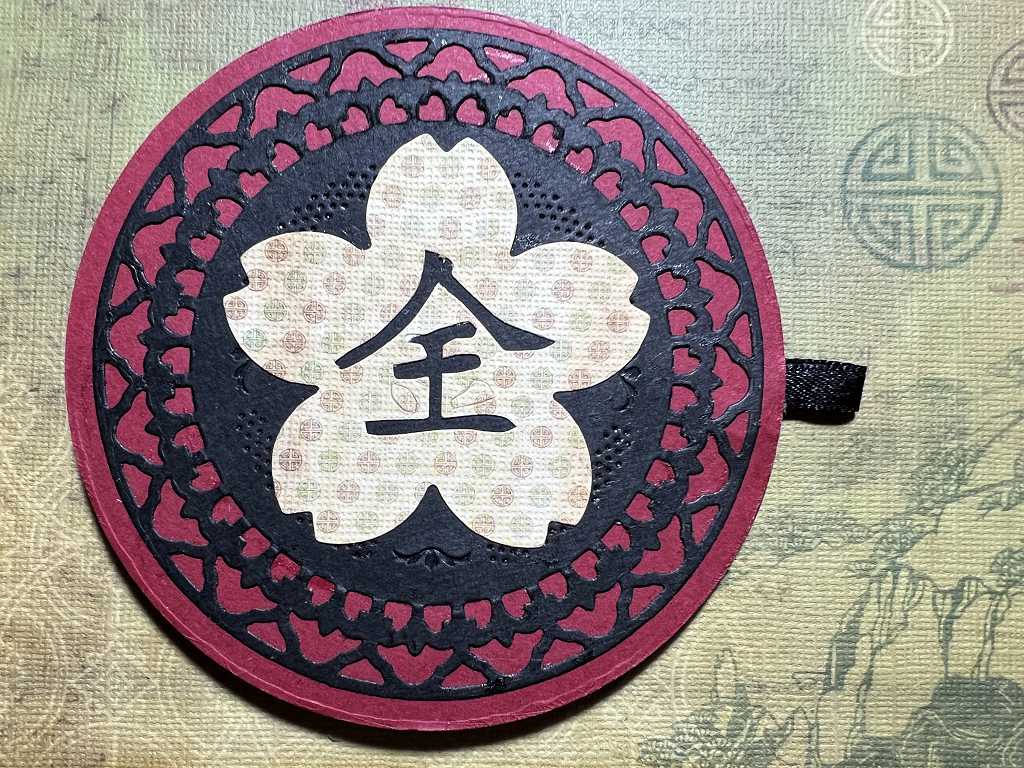
I had a couple of pieces of scrap black cardstock with holes from where I’d punched out some circles. For the scalloped outer one, I used a plain circle die to make a narrow ring out of it, and also cut the smaller circle with another die, to place inside it. This made a nice little frame wthout obscuring the background paper.
I made the disc from one of the plainer Graphics Fairy small circles which I inked with Forest Moss Distress Ink. I layered this with two further 1-inch circles punched from black cardstock to make it nice and sturdy and rubbed gilding wax around the edge. I then punched two holes and inserted gold eyelets, using my Crop-a-dile.
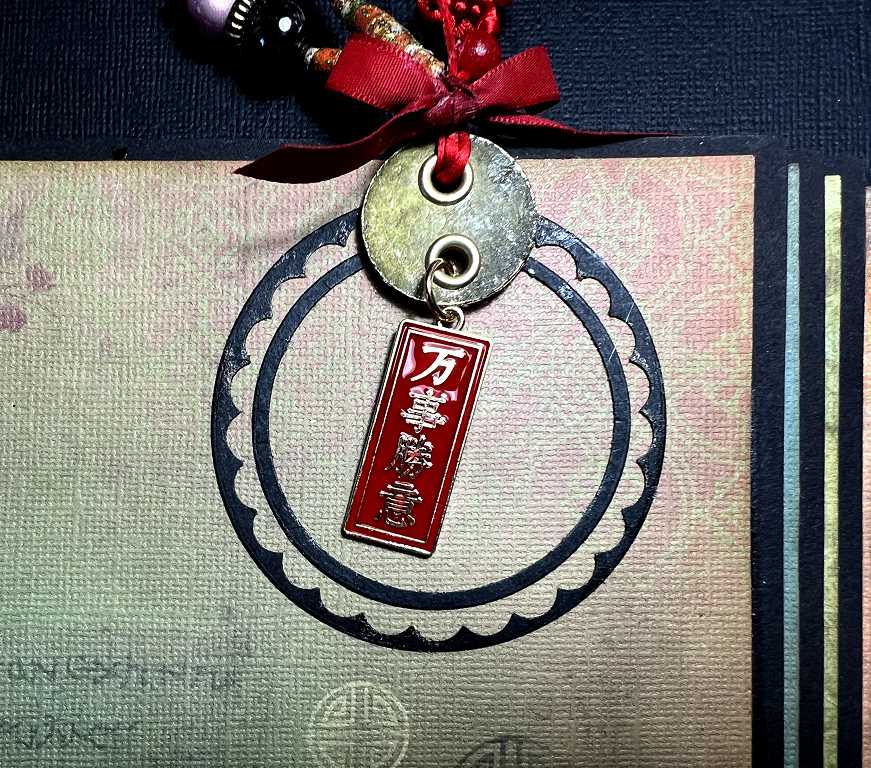
On Ebay recently I bought three identical keychains. Each one has a wealth of material to take apart! There are three red metal charms, a large split ring, a sprung clasp and various jump rings. I took one of the rectangular red enammelled charms with Chinese characters on it, and suspended it with its jump ring from the lower of the two eyelets, reserving the top eyelet for a tasselled embellishment to stick out beyond the top of the book.
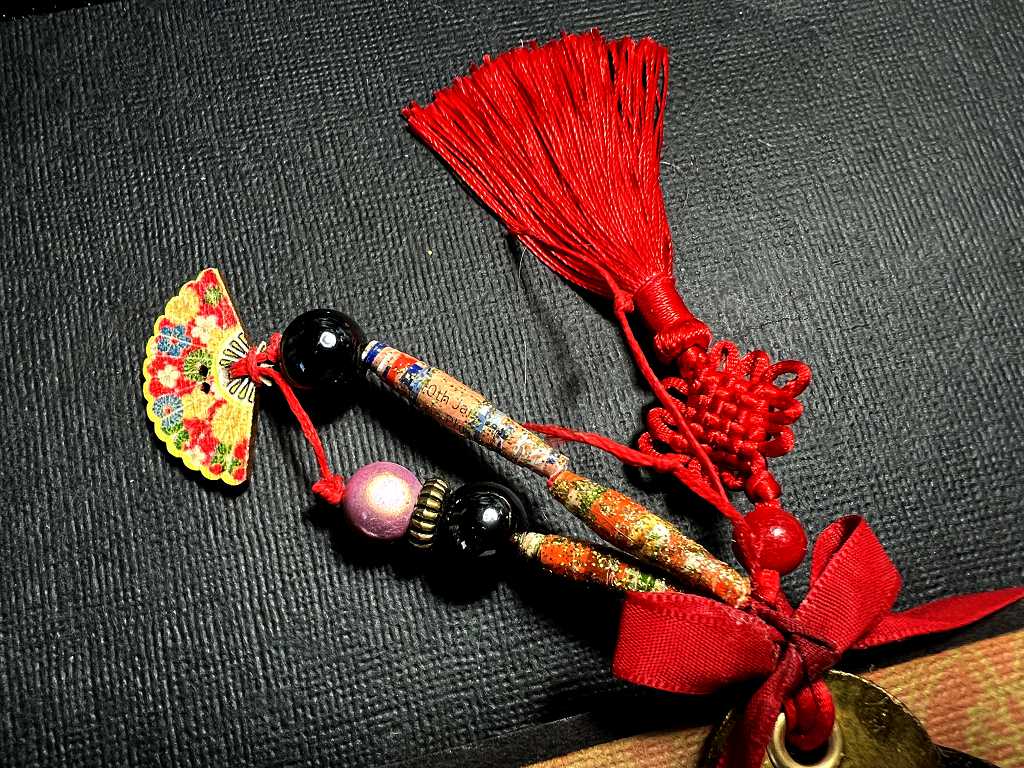
The charm attached to the top eyelet.
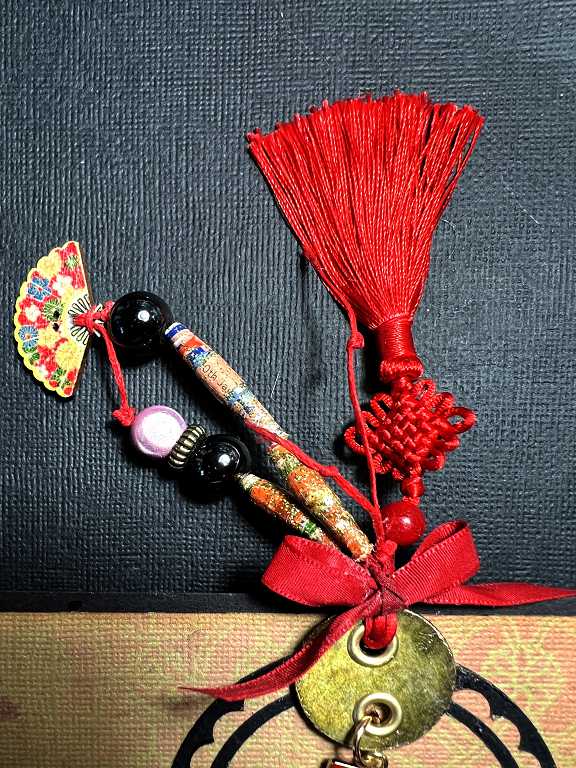
Lots of bits and pieces here! I bought several small Chinese tassels on Ebay recently for this project and used the red one for this embelishment. Also included are some beads from junk jewellery which I took apart, and three of my narrow hand-made beads made from magazine pages. These have been sealed with glaze mixed with gold sparkle glitter. Also attached is a small wooden fan. The whole attachment was secured with a red ribbon bow which I glued after tying it around, so that it would not slip undone. I may add a small gem or other embellishment over the knot as it’s a bit messy with glue.
When I made the turquoise spread with the complex pop-up, I arranged the tags on the left-hand page so that the smaller one with the embellishments sticking up beyond the top of the book was on the left. I have now swapped the tags around so that this smaller one is on the right. This means that when the book is closed, the top embellishments will not be in the same place.
A closer look at this embellishment.
I may end up painting or colouring the back of the little wooden fan with markers, because it is plain, and it is going to show.
A detail showing the beautiful background paper.
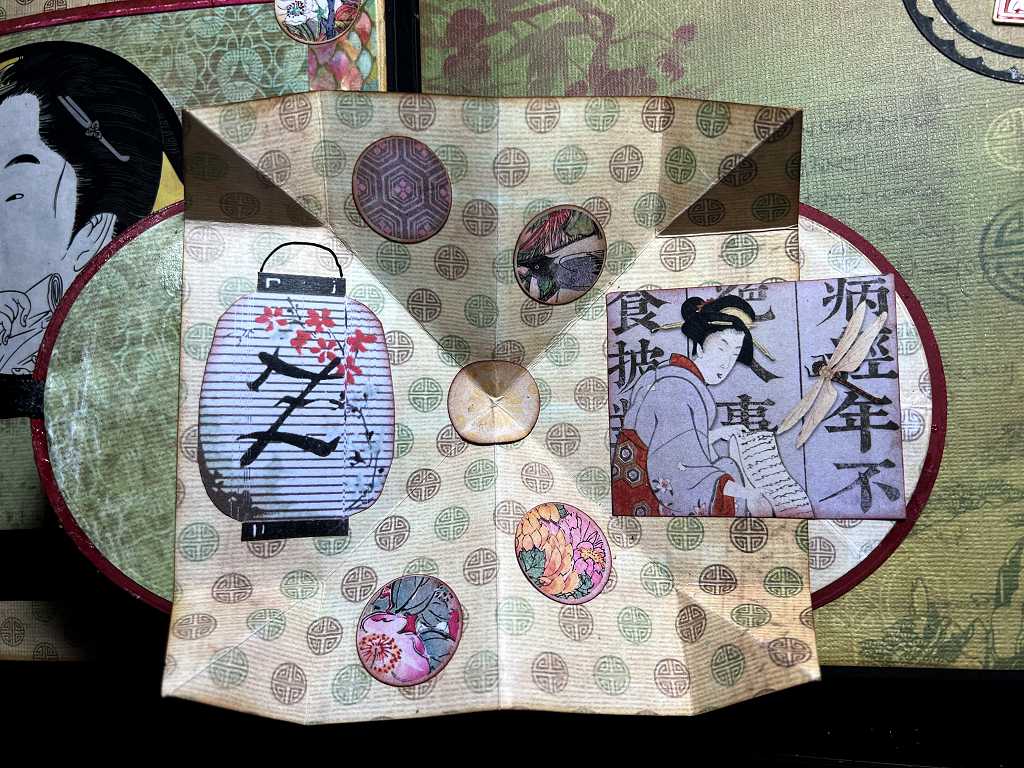
Now for the circle to square fold-out embellishment. First, some details about the cover.
I cut two circles from dark red card, using one of my circle dies, and then another from black cardstock with a die from a fancy circle die set from Spellbinders. I embossed the centre of this with an embossing die from a set also from Spellbinders – the first time I’ve used this. The results were somewhat underwhelming! I initially tried to highlight the embossed side with gilding wax but when I managed to get the gilding wax on the background as well, I decided to abandon that idea and simply turned the piece over and used the debossed side. In the centre is an embellishment from the set which goes with the DCWV “The Far East” paper stack. The pattern is a smaller version of the print on the paper which I used for the left-hand page of the spread.
I cut two more circles from the paper stack, slightly smaller than the dark red ones, and stuck these on the insides of the red circles, to embellish and strengthen them, and to leave a nice little dark red border.
When assembling the piece, I inserted magnets between the layers of the front and back covers, and also a little ribbon tag to open the piece.

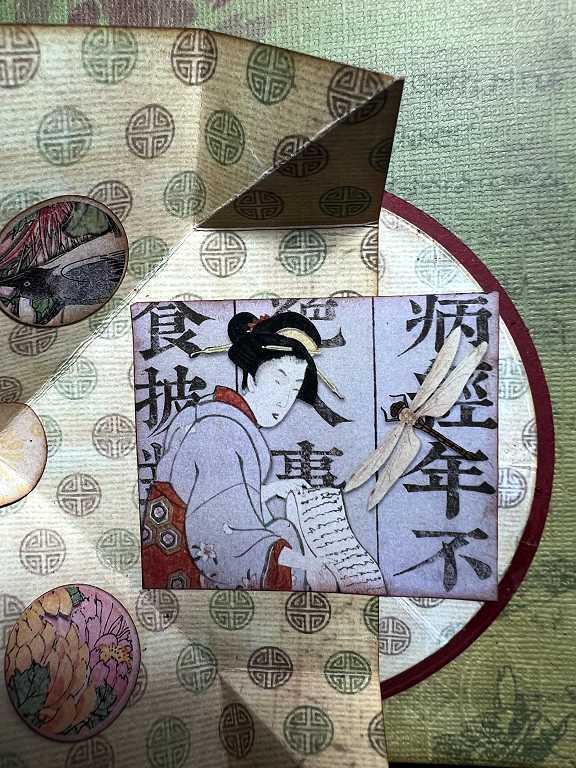
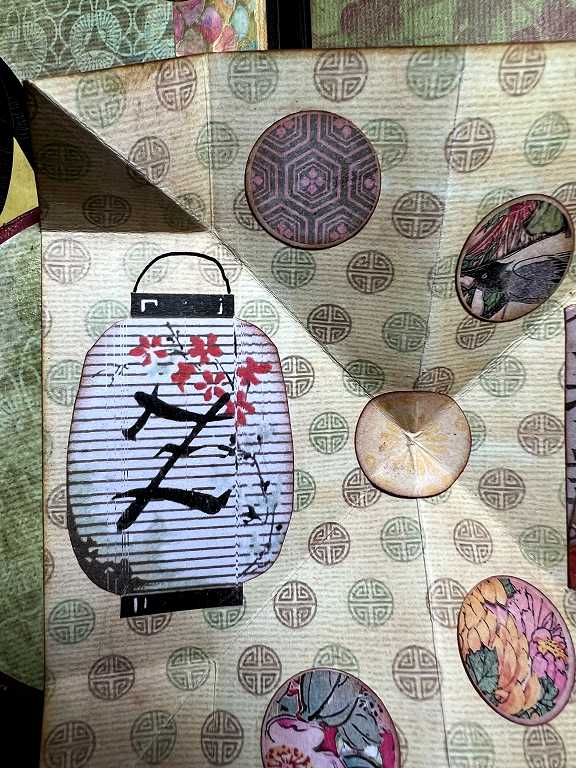
The circle to square fold-out in the open position. You can see all the fold lines. I have glued down various small elements from the Graphics Fairy collection.
The right-hand side.
The left-hand side.
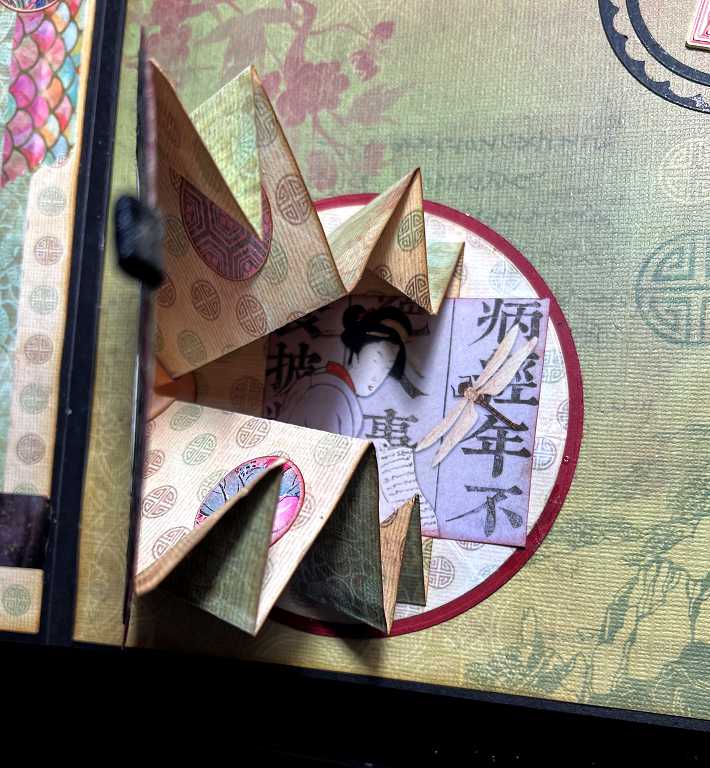
To create this folded square piece, I scanned and printed two of the papers from the stack so that the resulting piece of card was double-sided. I used 260 gsm white printer card for this. I thought that sticking two layers of the original together would be far too thick, and very difficult to fold.
The final photo shows the piece in the half-closed position, indicating how the folding mechanism works.
Here is the completed spread once more.
Finally, the video of the spread.
Beautiful Shoshi – and I absolutely LOVE the embellishment!! That tiny fan is exquisite and I laughed when you mentioned the Crop-a-dile!!!! Love it! Well done, it’s all stunning and VERY Oriental!