
A TINY FOLIO FROM A BISCUIT PACKET
I think this is the first time I have ever produced an album or folio in a single day! I spent all afternoon and most of the evening yesterday, working on this project, and it was a joy to produce. It is very small, measuring about 6 x 3 1/2 inches – smaller than my phone!
From this:
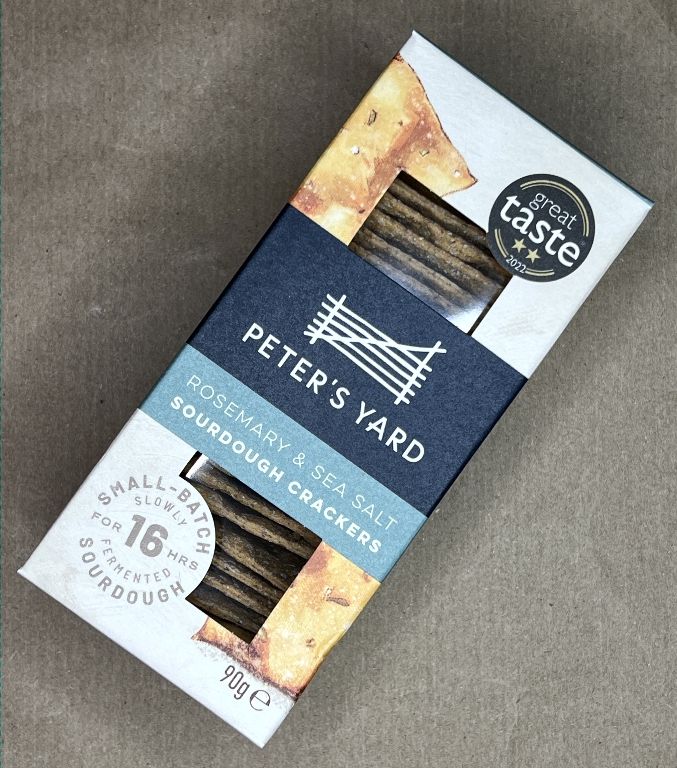
to this.
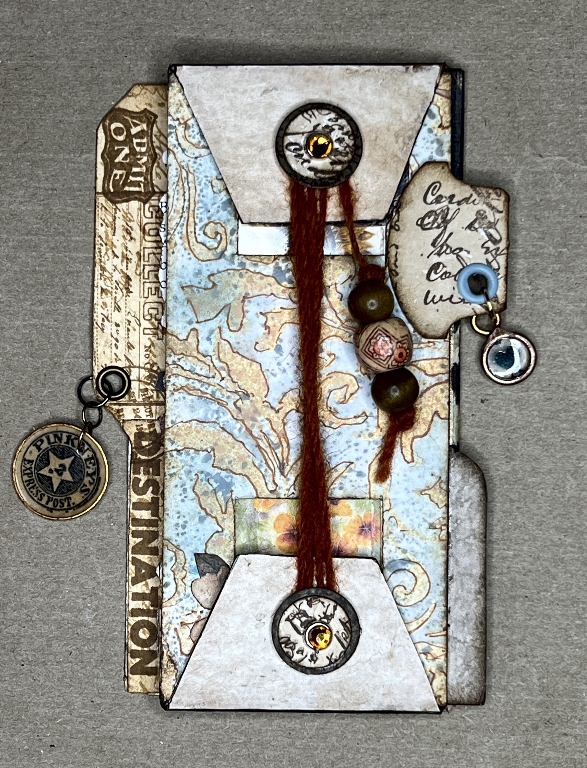
I always examine every piece of trash before it hits the recycling bin, to see if I can transform it into Art. There is a limit to how much I can save, though, as one can quickly become overwhelmed by food packaging, envelopes, Amazon packaging, gift wrapping paper, old greetings cards and so on… A lot of this stuff is made of really good quality card that you can spend a lot on from art suppliers. Things that always require extra scrutiny are food boxes with windows in them. There is so much potential in these!
First steps
The first thing to do is to disassemble the box, and decide what bits you want to keep, and which to throw away. Some of the flaps can be transformed into pockets, for instance.
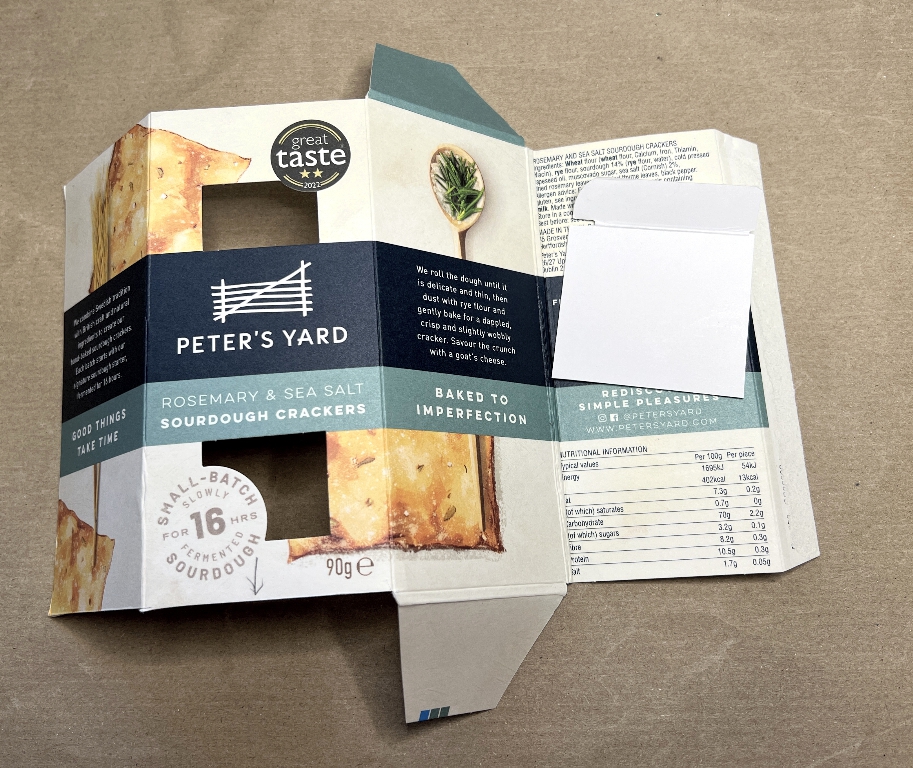
In this case I retained the flaps which had formed part of the construction of the box, and one flap that I would turn into a pocket. You can see that there are two small windows in the front of the box, both rectangular but with a partial circle covering the window. I trimmed the remaining attached flaps so that they were symmetrical, and would form the eventual closure of the folio. The flap that I cut off had one curved corner and one straight one on the folded part, and I made use of this. On the right is the strip that glued the box into its tube shape. I retained this and added a full-height page tab. The flap on the left would be folded back under the front and glued down once the front cover was embellished. You can see that what remains forms a “Z” fold and I kept to this format.
Covering any pieces that had folds in them strengthened them and made them usable. When making a folio, I will often add another score line alongside the original one, forming a 1/8-inch gusset to allow for the covering papers and any embellishments and insertions which would otherwise prevent the folio from closing properly. You can see this on the flaps in the above photo.
I have a large collection of different papers, some purchased as scrap-booking paper pads, some printed digital downloads, and a lot that I have produced myself by making masterboards, gel printing, tea and coffee dyeing, etc. I also have a poly-wallet absolutely stuffed full of scraps of various sizes. Every project generates more scraps, however much you try and use them up! Even the tiniest pieces can be useful. I have many strips cut from the edges of gel prints where the printing is irregular. These often have fabulous texture, and with a bit of inking to cover up any stark white areas, they are so useful in embellishments.
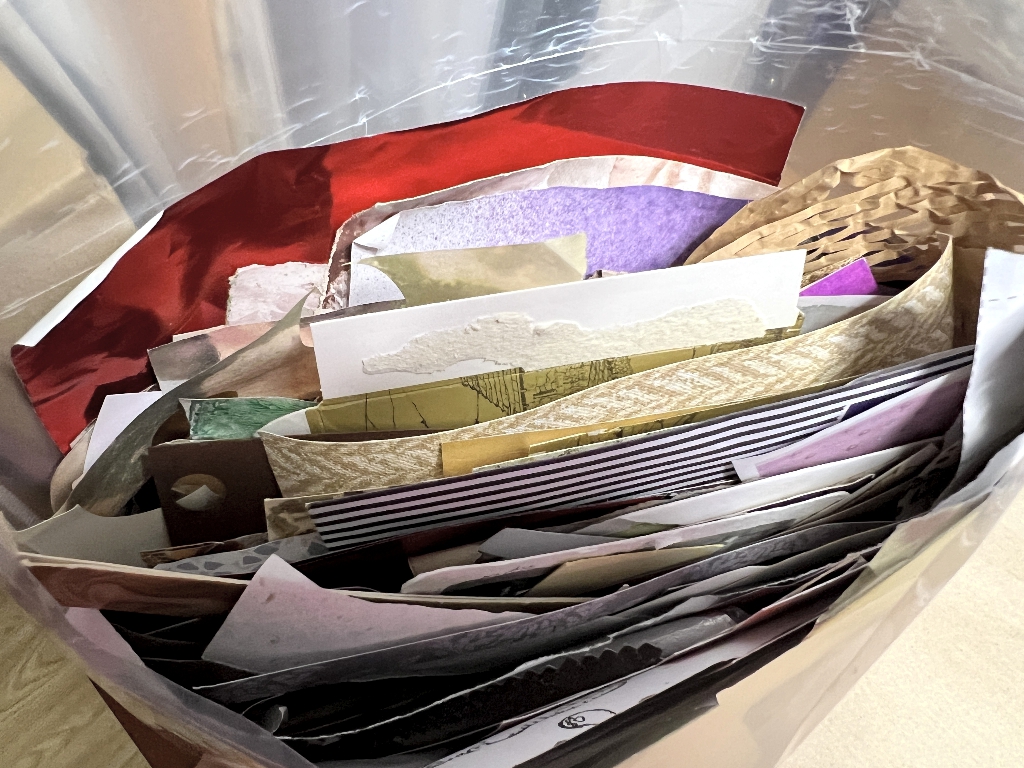
Most of the small scraps have gone down to the bottom of this folder. It’s now getting a bit difficult to close!
This collection of scraps doesn’t include the plain card offcut strips and other bits and pieces which live in a 9-litre Really Useful Box. Fabulous for making pockets, strengthening things, making tags… Not much gets thrown away.
I did not photograph every stage of the construction of the folio, but I can now show you each part of the finished result.
The front cover
You can see the two flaps which form the closure. I made two little discs of stacked card and attached them to the flaps with jewelled brads. The red jute twine wraps around them to close the front of the folio, embellished with some beads. The tab at the bottom right of the folio is the flap that I cut off the box, and you can see the curved edge at the top. This forms a pocket on the inside. I made a full-height page tab to go on the left, which is embellished with stamping and inking. As with the small whale-tail tab on the right, both of these tabs have eyelets and charms. I made both of these charms when I first started working with UV resin.
Here are a couple of detail shots of the closure.
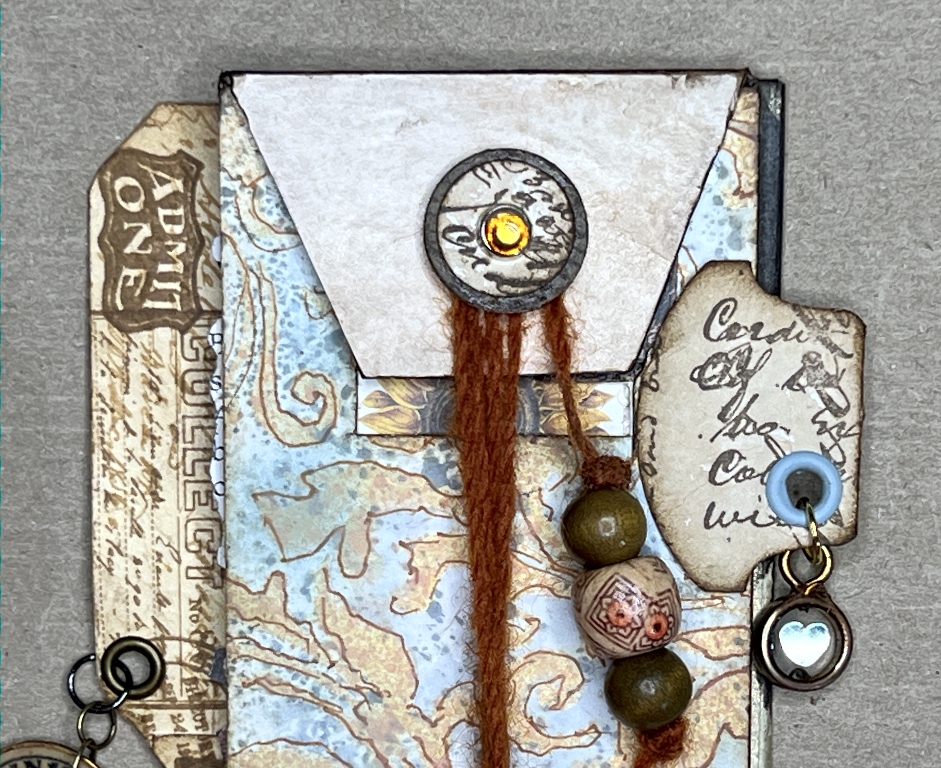
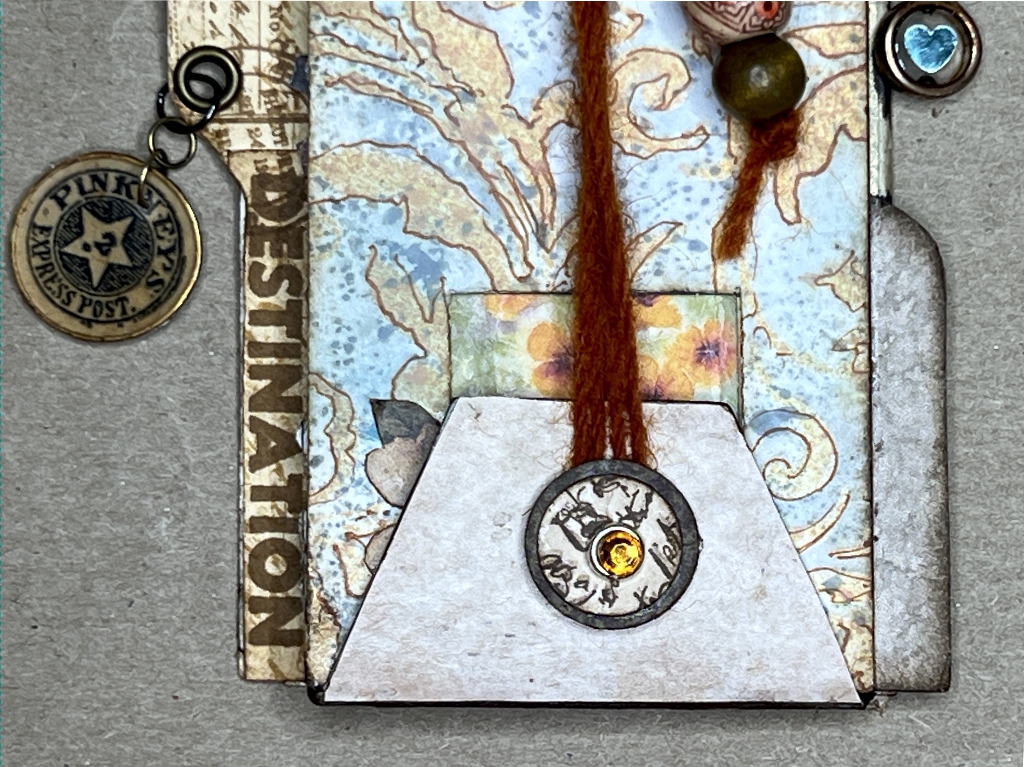
Opening this closure, you can see the front cover.
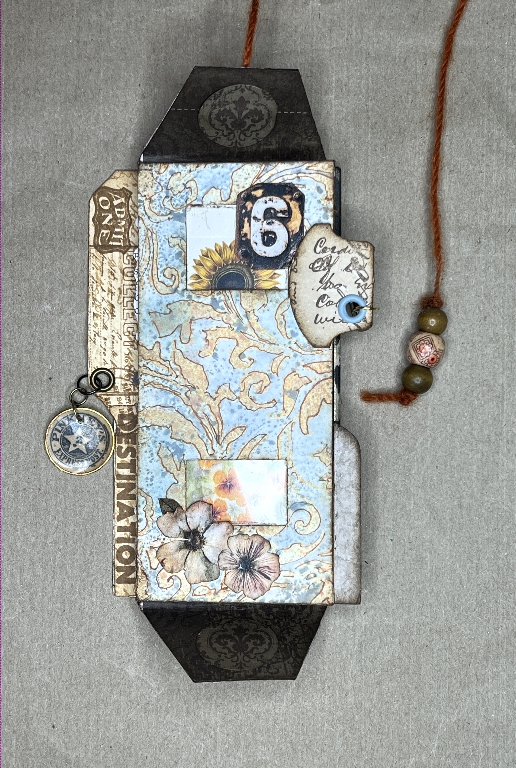
I went through my box of old greetings cards and chose a couple of floral images to put behind the windows. Both windows also have acetate attached from behind, with double-sided tape. A few collaged embellishments added. The flaps form the continuous background of the panel underneath.
The background paper is some stencilling I did at some point, and then outlined the shapes with a fine ink pen. I used my light panel to trace around where the windows are, and then cut them out with a sharp knife and a ruler.
(While making this folio, I inadvertently used my plastic ruler to cut against instead of my normal metal one, and ruined it!! Duh. I’ve just bought a really sharp craft knife with an extendable blade that you break off when it gets blunt, and advance the next one. I cut the ruler in half and now have a 6-inch ruler but eccentrically, it goes from 6 to 12 inches!! Awaiting a new one from Amazon.)
Inside the folio – front
There is a choice which way you open this folio, and there is no right or wrong. For clarity, I have called this side the front.
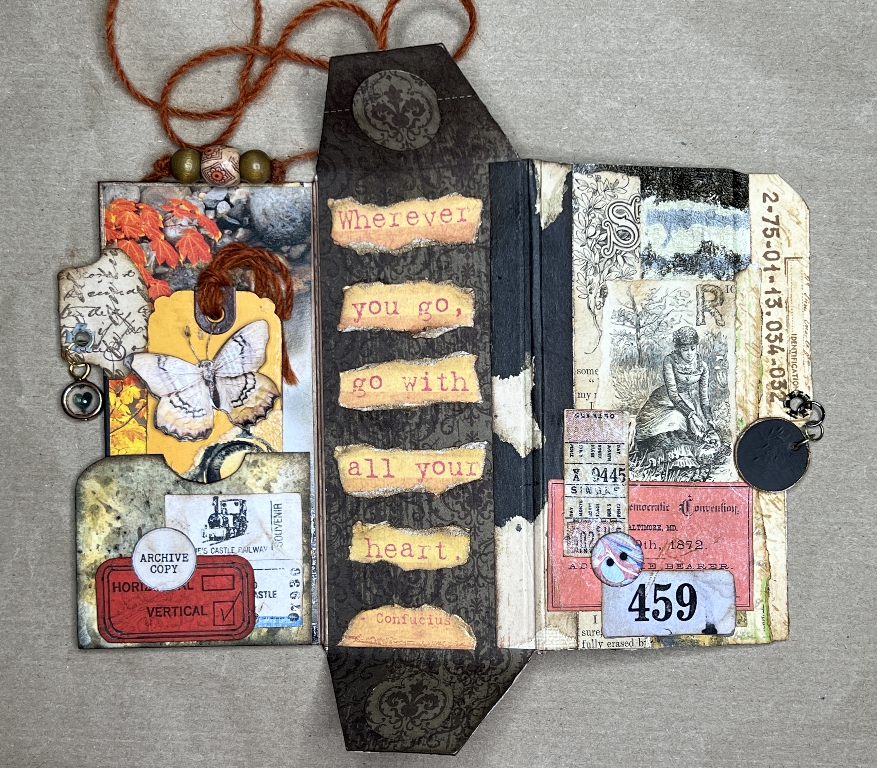
You can see how all the tabs work, with the one at the bottom of the left-hand panel forming the pocket, and showing its curved edge on the left and its straight edge on the right.
Before attaching this, I folded the panel over and glued it to the back of the front cover, which covers up the back of the windows. Between the panels you can see the double score line which enables the folio to close properly.
The left-hand panel
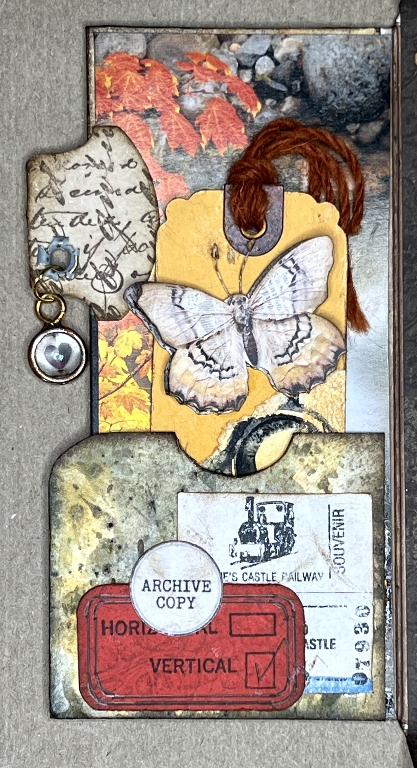
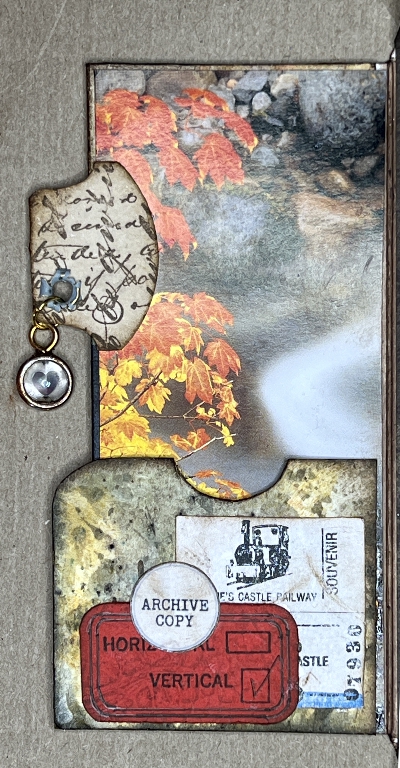
The background image is cut from a greetings card. The paper covering the pocket is a scrap from one of my mixed media papers. It has been around for a long time and I can’t remember how I made it. I added a little yellow ink so that it co-ordinated with the project, inked the edges and cut a finger notch with a circle punch.
You can see the full background image once the tag is removed from the pocket.
The tag
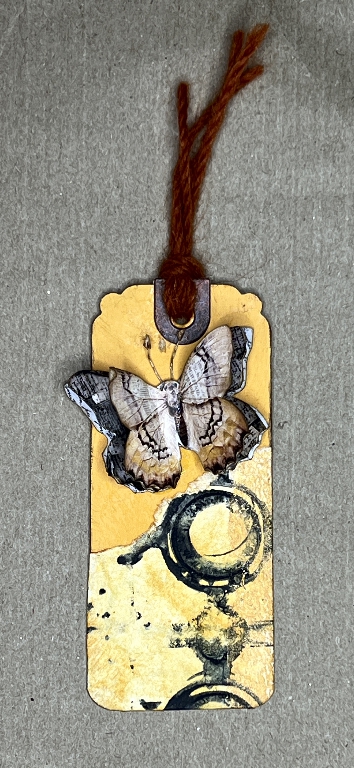
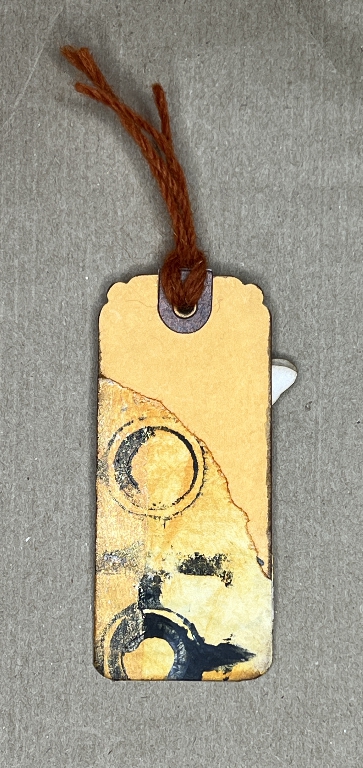
I found an orange tag in my tags box and trimmed the width so that it would fit in the pocket, and used a fancy corner punch to embellish the top, and rounded the corners at the bottom. This is quite a substantial tag, orange on both sides, and with a printed logo at the bottom. I sanded the shiny surface a bit and added a little ink, and inked the edges to distress it. I covered the printing front and back with a scrap from the edge of a gel print. This gorgeous pattern was created with a plastic bath mat and the circles were the suction cups! This is one of my favourite texture makers for gel printing. It was pretty rough and I inked the white part with yellow ink. Now it takes its proper place as Art, having escaped the prison of the scraps folder, and has begun a thoroughly rehabilitated life.
The addition of one of Luise Heinzl’s layered butterflies (printed digital download), one of my die-cut hole reinforcers and some more of the red jute twine, completes the front of the tag.
The back of the tag.
The centre panel
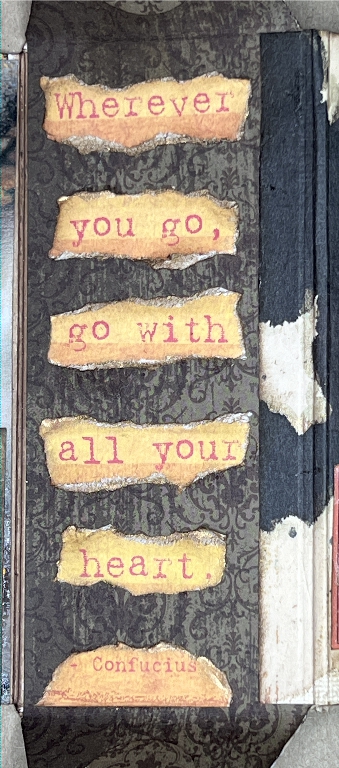
An offcut of some scrap-booking paper that’s been in my stash for many years forms the background. The text was torn from a strip from scrap-booking paper from a pad I bought decades ago and never used – I’m really not into that sort of work, and most of the paper has been altered and repurposed. I thought this text was lovely, and it set the tone for the whole folio which (as always) took on a life of its own, and became a sort of travel or journey-themed folio. I inked the torn edges of the pieces, and then added a little gold gilding wax before glueing them down.
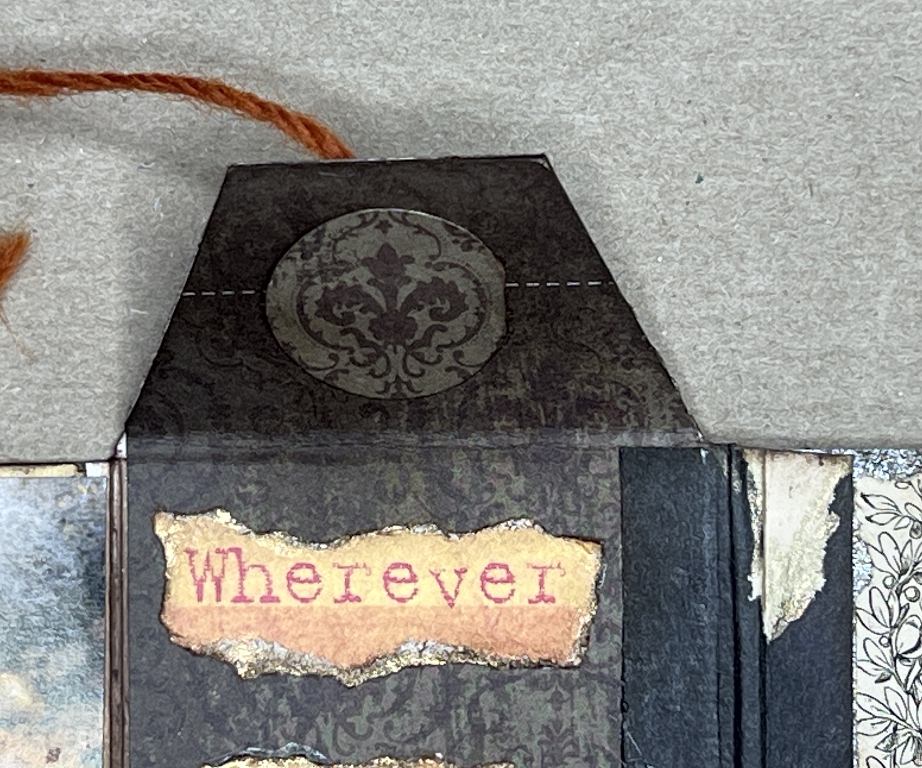
Here is a detail of the inside of the panel. In order to find a piece large enough to cover the whole panel plus the flaps, I had to utilise the top edge of the paper which has perforations to enable you to tear it from the pad. Not too noticeable really. The circles were cut with as 1-inch circle punch from a lighter area of the background paper, and glued down to cover the legs of the brads which are part of the closure on the front.
The right-hand panel
This also forms the back of the folio. I have photographed it here with the folio closed. The tri-fold folio opens with a “Z” formation rather than the two outer flaps overlapping over the centre panel.
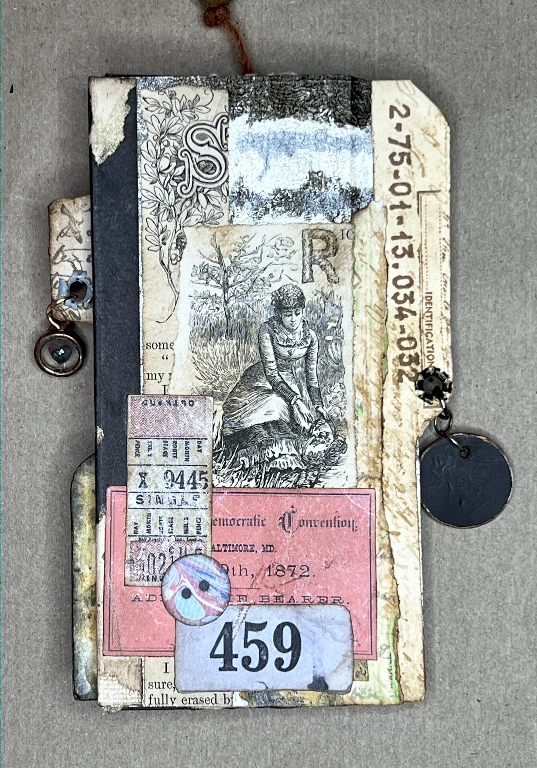
Plenty of scraps form the background, and the focal point is another image from one of my antique books, along with some of its text on the left.
Inside the folio – back
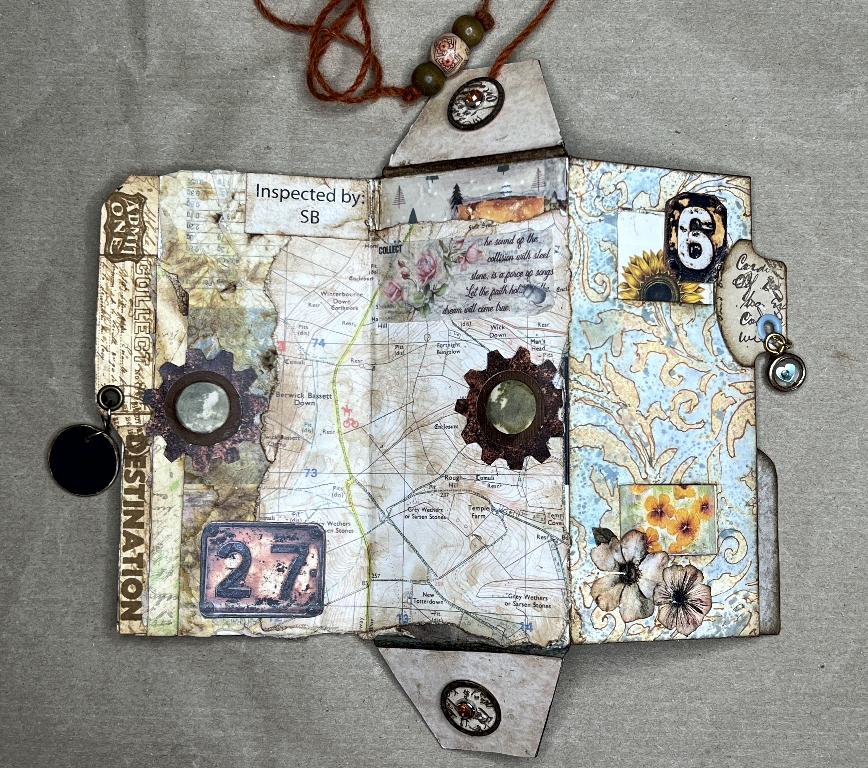
Unfolding the folio the other way, you can see that the right-hand panel is the front cover.
Since this had morphed itself into a journey-themed folio, I decided to use a map for the background. I tore this from a guide book I bought in a charity shop, and distressed it by tea-dyeing it and inking the edges. Embellishments are digital downloads, washi tape, and scraps. The “Inspected by” ticket was one of several that fell out of the packaging of the new bras that I got recently from the Breast Unit! Rather than throwing them away, they went into my labels stash. I distressed this one and stuck it down.
The magnets
Making albums and folios can take a lot of planning in advance, which I’m not very good at doing, because I sort of make it up as I go along! This is why they always come out differently from how I think they will. In this case, using the “Z” format, I did not consider that the closure on the front would not keep the back closed! I did think of wrapping the red string around the whole folio before fastening it around the brads, but this made the string too short and the beads were not hanging in the right place. It would have been extremely difficult if not impossible to remove the string from the top brad as it is tied fast. So – magnets to the rescue!
Of course, not having planned this in advance, they had to be stuck on the surface and then covered with additional paper. I glued each magnet down and covered it with a larger disc of paper, squashing the edges down around the edge of the magnets. I cut a ring of dark brown card using two different sized circle punches to cover this rather untidy edge, and finished them off with a couple of digital printouts of gear wheels! The closure works pretty well, and the sound of the magnets clicking together is always strangely enjoyable!
The left-hand panel
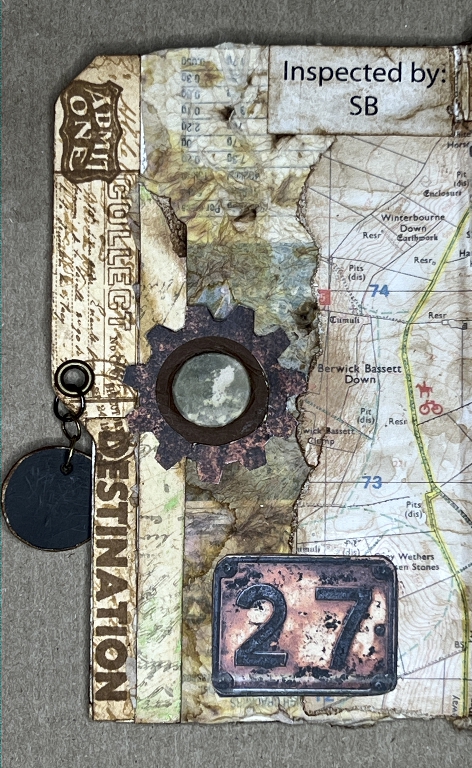
I’m really pleased with how the distressed map turned out. When I got the guidebook home I had doubts regarding its limited usefulness as it was all far too bright and clean, but it is amazing what a bit of tea and ink will do to age a paper! The torn edges also enhance this effect. Another of Luise Heinzl’s faux metal numbers to go with the one on the front cover. Random letters and numbers on a collage really add something. They don’t need to mean anything! It’s all texture and layering and what-not.
The background paper to the left of the map is a single layer of kitchen paper that I’d used to mop up with. It was very damaged and fragile, but I scrunched it up a bit and after rubbing glue stick all over the folio panel, stuck it down. It is somewhat translucent, and the underlying printing on the biscuit packet simply adds more texture. You don’t have to cover everything up – you can make use of it as a feature. The fact that the folio is formed from the upside down packet helps too, because you are not tempted to read any slightly visible text.
The centre panel
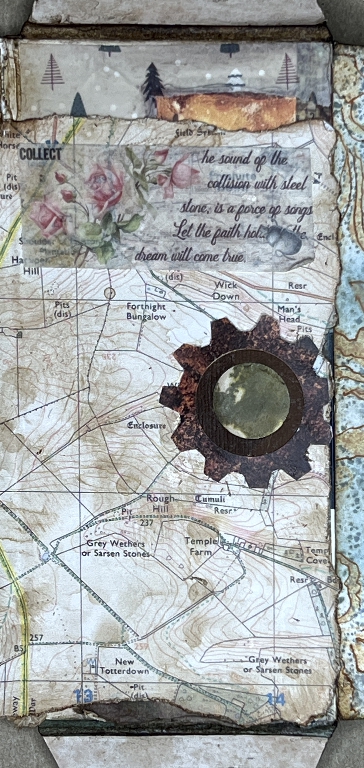
I trimmed the washi tape with the trees on it so that it exposed the patch of orange underneath – part of the printing on the original packet. As an afterthought, I also added the little piece of floral washi tape underneath – I found this stuck by accident on the back of something and thought it would be a shame to throw it away. It just adds another subtle layer of texture.
Not much more to say about that panel really.
Conclusion
I shall be making a video in due course which will show the folio in action. I am so pleased with how this tiny mini-folio turned out! It just goes to show that you can make art out of the humblest materials, and the longer you do this sort of thing, the more scraps and offcuts you have to deal with for the next project!














Exquisite! Just seen the video on Insta – amazing what you have created out of biscuit packet – a sheer work of art in your very own unique style and craftsmanship (or whould i say craftsmanship?!) Superb.