CICADA WING PAPER – TRANSPARENCY EXPERIMENTS
Shoshi has got her white coat on again, in full Mad Scientist mode. Time for some more scientific experiments!
Initial thoughts and problems encountered
I have already established that clear heat-embossing works beautifully to make cicada wing paper really transparent, but it is inconvenient and time-consuming, and the embossed layer adds some thickness. It is also extremely shiny. I wanted to find out which of my other media produced the best transparency when applied to this paper. The results in real life were fairly easy to distinguish, but photographing them proved more difficult. After some photo editing and radically increasing the contrast, I got some half-way reasonable images. It was hard to tell how well it worked by just laying the sample on top of the background, because this light paper is not 100 percent flat, and the effect is most visible where it is actually in contact with the background.
Sticking down thin paper
I thought the best way to do it would be to stick the samples down. I was not sure whether whatever I used to glue them down would affect the transparency or not. In the end I decided that glue stick was probably the best bet, thinking this would probably have the least effect on the transparency. When you are sticking down any thin or flimsy paper, it is best to apply the glue to the background surface and then lay the piece down, as it is difficult applying glue to thin paper and once the glue is on, it is very difficult to handle. Then lay some paper over the top and rub and press firmly. You can use a credit card, working outwards from the centre, to make sure you get rid of any air bubbles.
After photographing the individual samples laid separately on book page and then on black card, I glued them all down onto a sheet of white paper, with strips of book page and black card underneath to show the transparency of each one as it would appear in use.
Whether or not a sample could be made transparent by the addition of media once it was stuck down remains to be seen. It may need to be done first, and left to dry before sticking down on a page. More experimentation needs to be done.
Once more I struggled to get the photo to show up well, but greatly increasing the contrast seemed to help. This is not perfect, but it gives the general idea. The two on the right show up worst. (I didn’t bother to include the Liquitex Matte Medium as it did not show any transparency. The numbers on this chart are therefore 1 out, i.e. 2 in the list below is now 1 on the chart.)
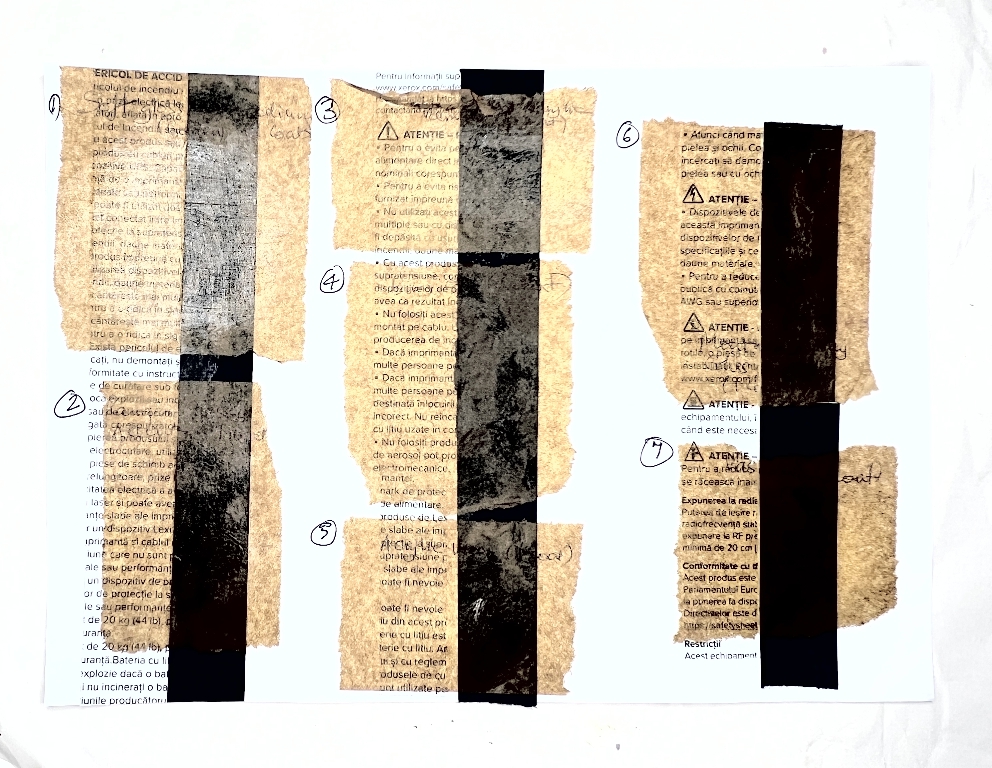
Here are the samples in order. I laid them on a piece of book page, and then on a strip of black card.
1. Liquitex Matte Medium, 2 coats
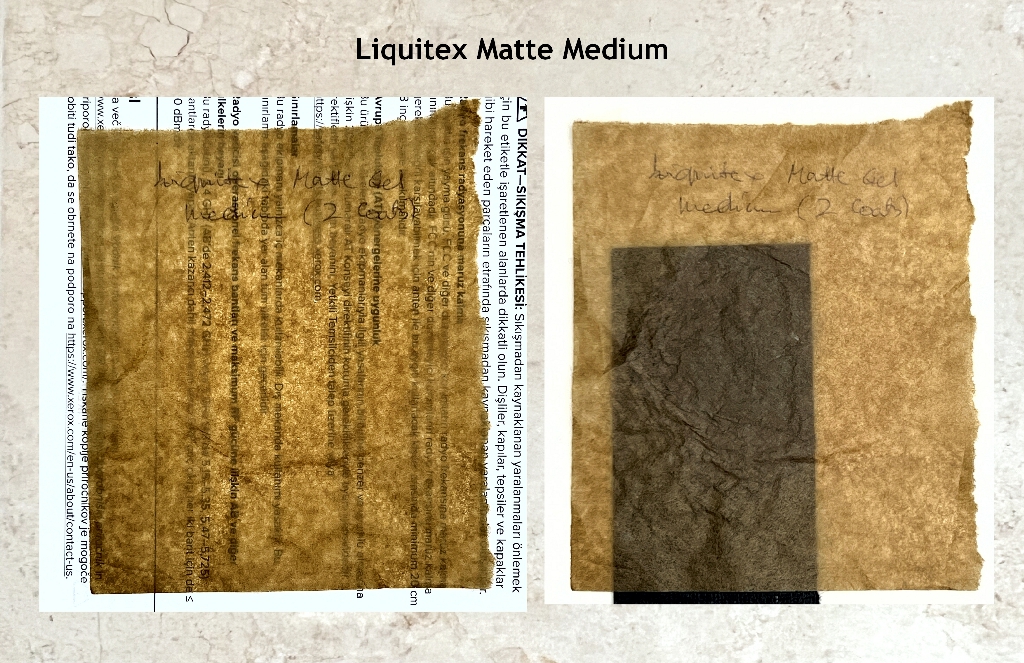
There seemed to very little effect from this medium. It may have strengthened it a bit, and would probably make it less absorbent, but for transparency purposes it is useless.
When I was writing on some cicada wing paper with a Sharpie pen the other day, the ink bled right through onto the white melamine surface I was working on, and I had to use isopropyl alcohol to clean it off. I tried drawing a line with the same pen over the Liquitex Matte Medium sample, beginning and ending with the edges where there was no medium and going across the centre where there was, and when I lifted it up, the ink had bled through as expected at the edges, but none had bled through where the medium was. This is very useful to know. If transparency is not required, but a sealed surface is, then perhaps this is the way to go.
2. Golden Soft Gloss Gel Medium, 2 coats
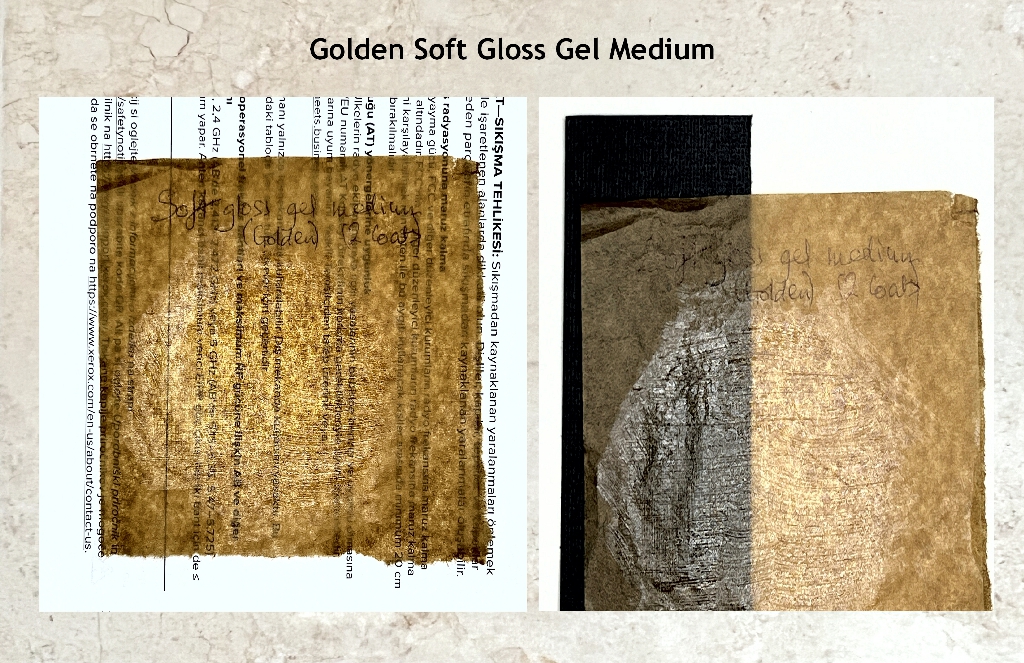
Of all the media, I think this was the best. The surface is shiny, and it appears to be very transparent. It is also easy to apply and reasonably quick to dry, especially with the aid of the heat tool.
3. Ranger Glossy Accents, 1 coat
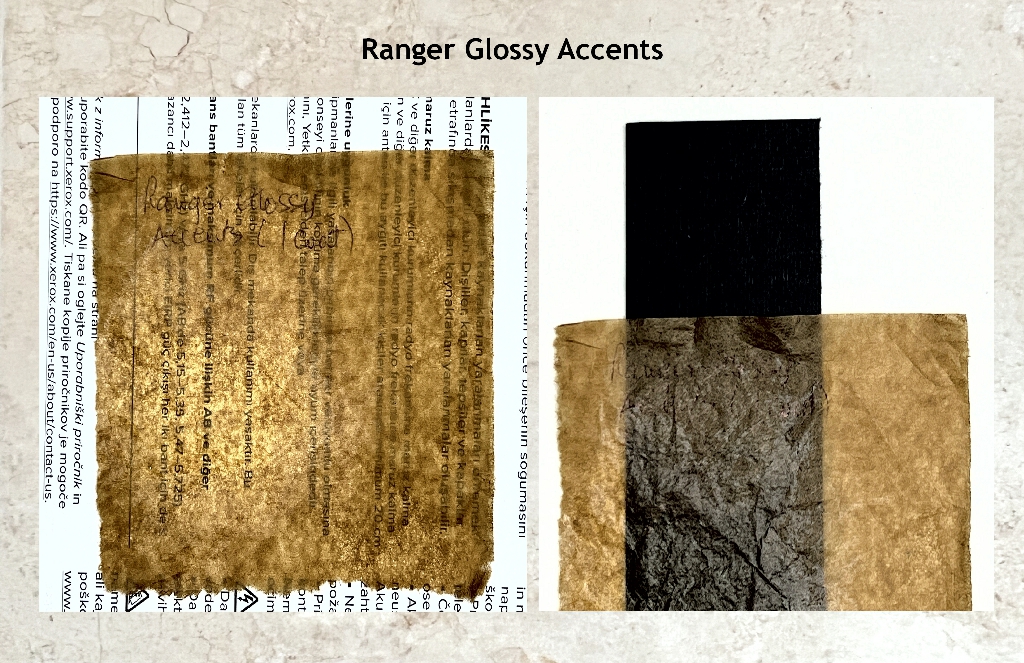
This is a great material for adding glossy accents (duh – does what it says on the tin!) to a page in a controlled fashion, and it also acts as a powerful glue, which will even work with metal. It takes quite a long time to dry, and it is fairly expensive. For these reasons, even though the transparency results were pretty good, it is probably not the medium of choice, unless one wanted a small, targeted and accurately defined area of transparency.
4. Golden Acrylic Gloss Varnish, 1 coat
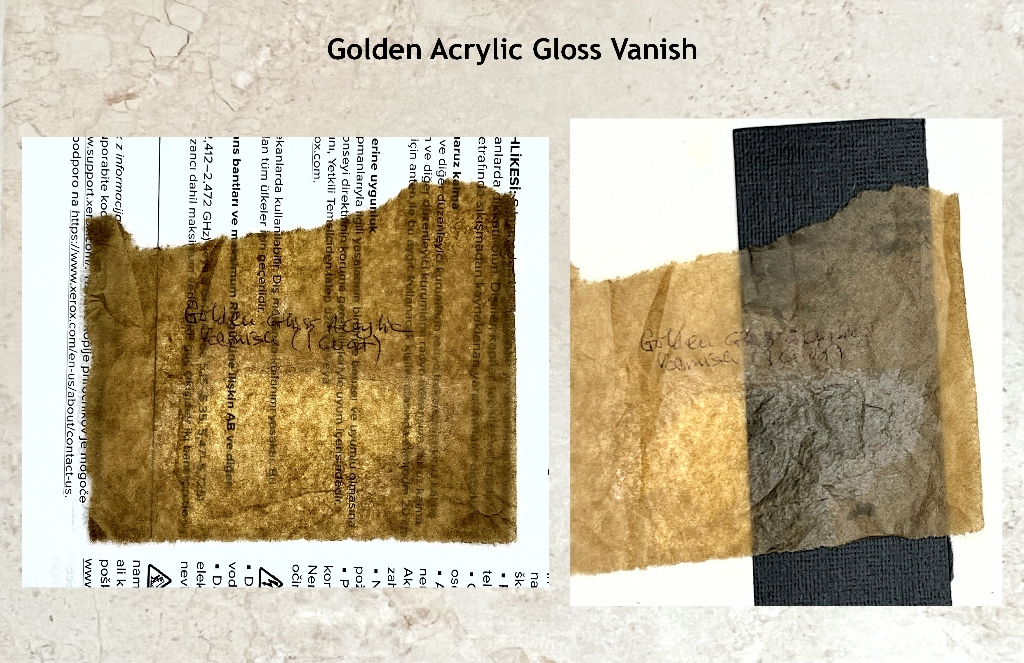
Very good results. Like the Golden Soft Gloss Gel Medium, this is easy to apply with a brush, straight from the bottle. It is a milky liquid which dries clear and glossy.
5. Baby oil, one coat
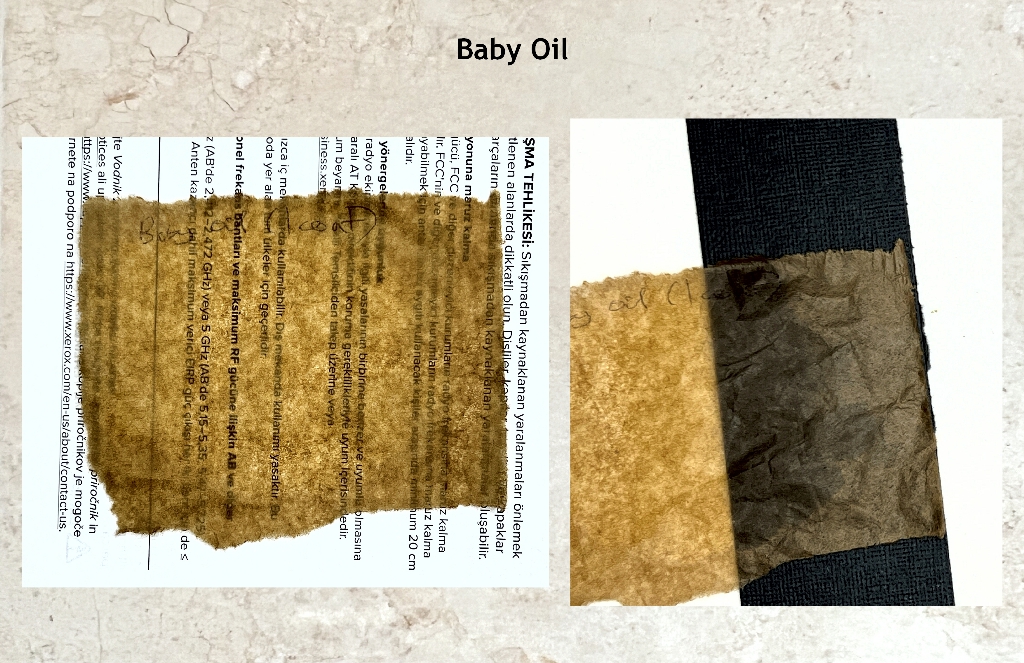
Pretty good results again. You can apply this with a brush, or rub it on with your finger and then buff it with a piece of kitchen paper or soft cloth. Whenever you add oil to paper, the greasy feel will eventually disappear as the oil evaporates, but the transparency remains. I have not tried adding wet media over this so don’t know how well it would work. Baby oil is odourless and colourless, and is cheap and easy to obtain.
6. Acrylic Wax, 1 coat
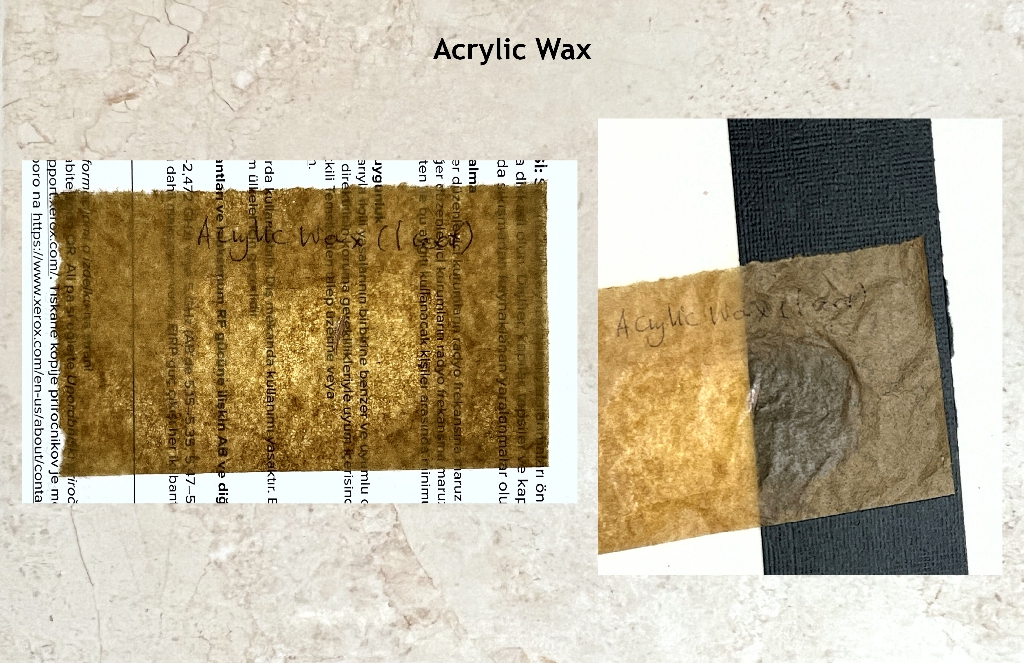
Very satisfactory results. Like the varnish, this is a liquid in a bottle, about the consistency of single cream. You can apply it in the same way. Acrylic wax may not be so easy to obtain as other media. I bought my bottle at a craft show several years ago.
7. Montana Spray Gloss Varnish
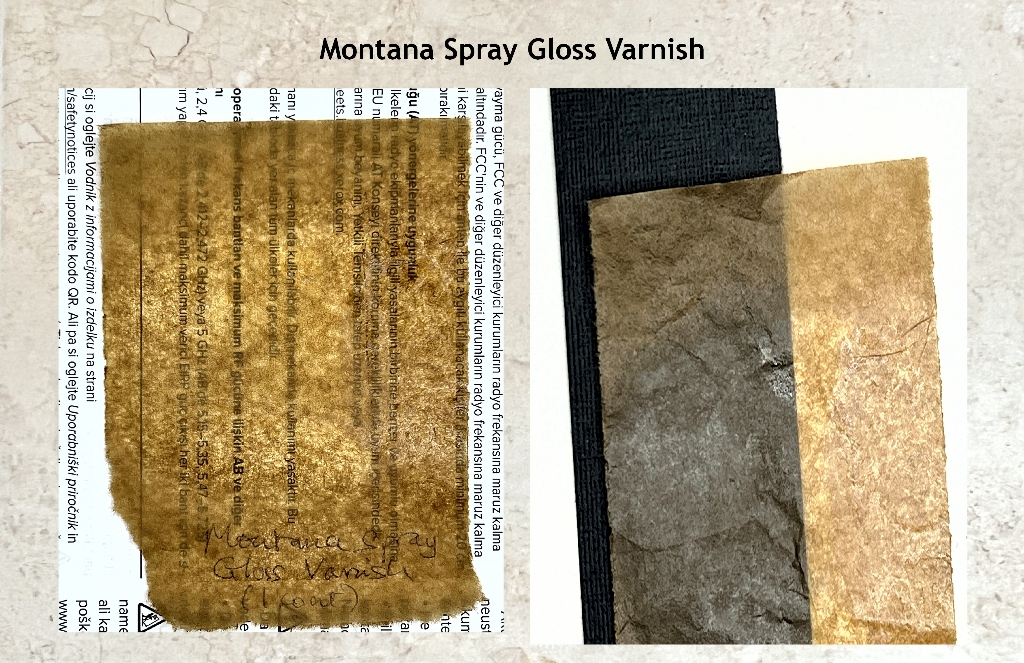
Very good results from this, but it has several disadvantages. Its application is much more difficult to control, being a spray. It takes a little while to dry, and it also stinks to high heaven! The smell goes away once it’s dry, though. This is a very powerful varnish that can even be used out of doors, and I used it recently to seal the surface of my hubby’s lap tray which had got worn and damaged. It is just a printed photograph stuck onto the surface and not very hard wearing. I touched up all the areas of the picture that had been damaged, using acrylic paint and a fine brush, and sealed it with several coats of this varnish. I did it several weeks ago and it still seems to be holding up very well. Although the results were great in this experiment, it’s not the best in use, unless perhaps one wanted to make a whole sheet of the cicada wing paper transparent (worth bearing in mind for the future).
8. Vaseline, 1 coat
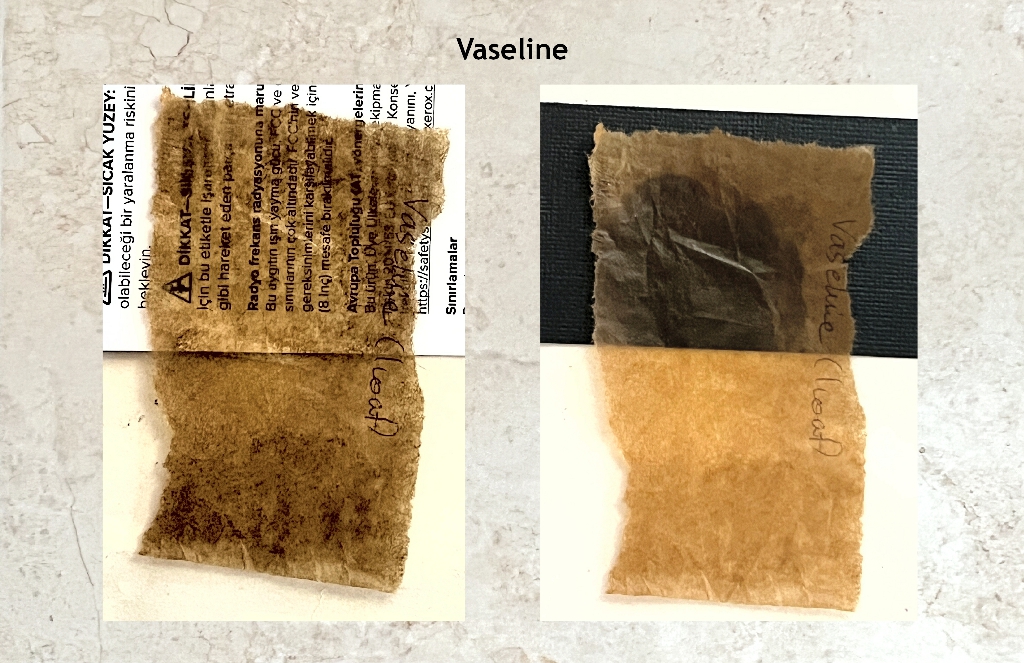
Excellent results. Again, I am not sure how well wet media would work on this surface, though.
The verdict
It appears that gloss media work best to achieve transparency. The Liquitex matte medium made no difference. The best result was the Golden Soft Gloss Gel Medium, closely followed by Vaseline, the Golden Acrylic Gloss Varnish and the Acrylic Wax. The baby oil gave medium-to-good results and the others will probably remain on the shelf because of inconvenience, uncontrolled delivery, smell or expense. The Golden Soft Gloss Gel Medium does, of course, create a very shiny surface but I can live with that. The Vaseline gives good transparency without the gloss. Glueing the samples down gives better results than simply laying them down, because they then have full contact with the base layer underneath.
If I can achieve a good result through this process, I think this paper will be very useful for layering. The best results in the photos seem to be over the black card, so if I use this technique in any projects, I shall aim for a plain-ish dark background for the substrate. I think it could be particularly effective with stencilling.