RECYCLING AND COLLAGE
Today I felt the need to do some more collage. A few months ago I finished my Organic Journal and absolutely loved the latter pages which were all intuitive collage. I have got a lot of gel printed papers and special papers that I’ve made up myself, as well as a fairly substantial collection of scraps, so there’s always plenty of material to draw from.
Recycled bags
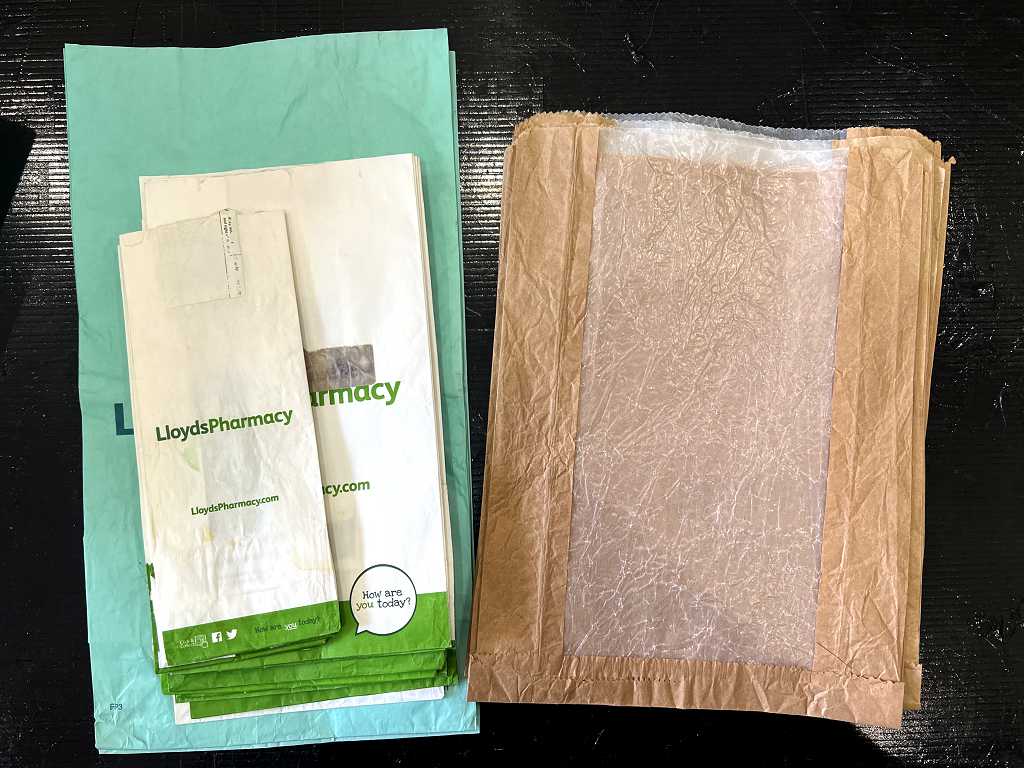
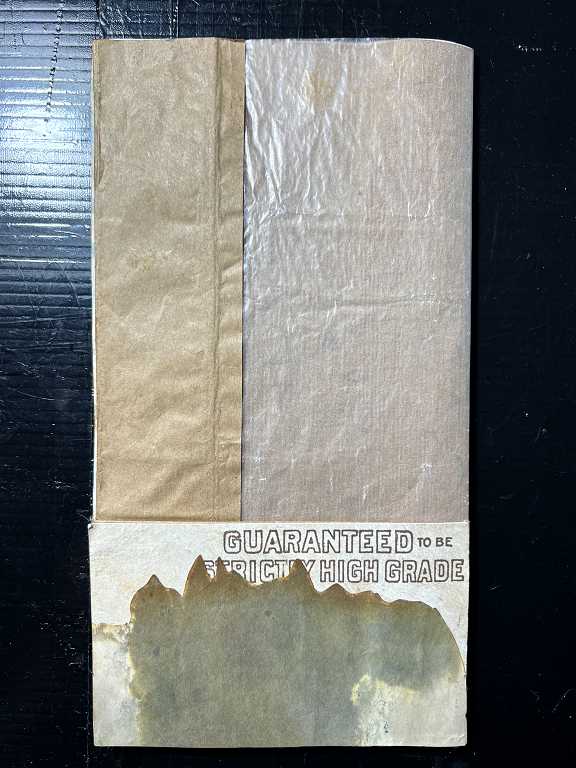
I saw a video on YouTube recently where someone was making journal pages from the bags in which you get your prescriptions from the pharmacy. I get my medication delivered by post these days, so in future I shall have to ask my hubby to save his bags, but in the meantime I knew I had a stash of them in the kitchen – I used to save them to keep mushrooms in in the fridge before I started wrapping them in flour sack cloths. When I dug out these bags (and there were quite a few), I also came across some thin brown paper bags with what looks like a glassine panel on the front; for a short while Tesco (my home delivery supermarket) used to put fruit and veg in these, in place of the earlier plastic bags, until they decided to ditch the use of the paper ones as well. I kept the undamaged ones, thinking I might find a use for them. The panel on the front is translucent and I thought I could make some booklets or tag pockets so that the contents would show through.
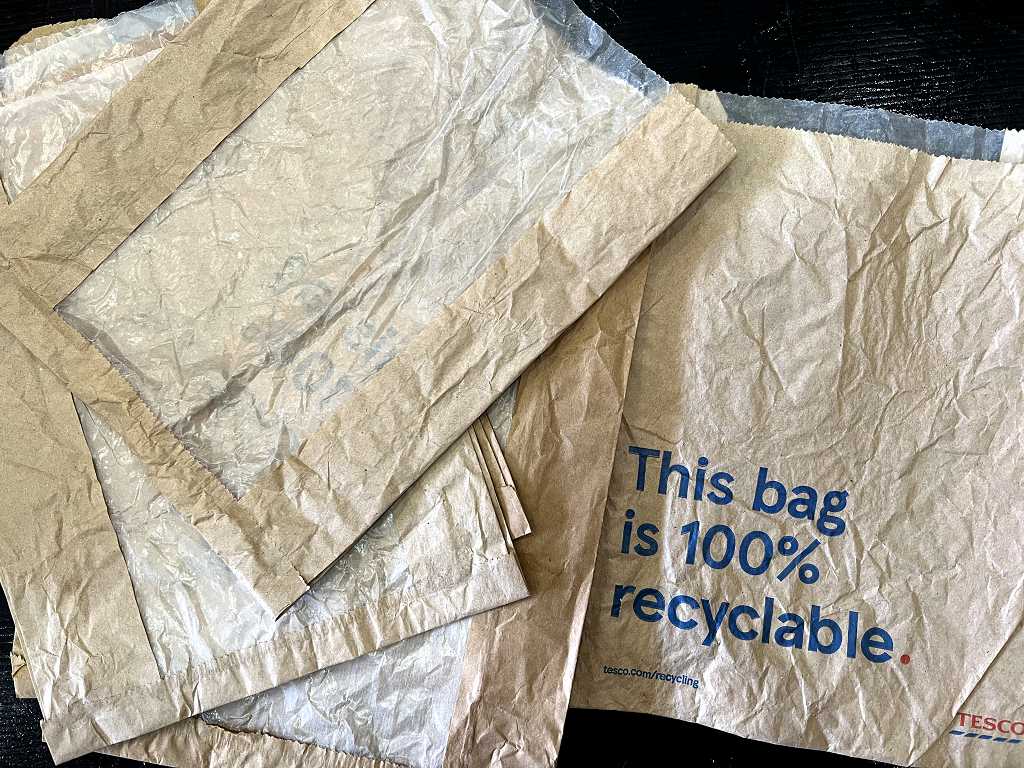
The only problem with them is that they are very thin and flimsy, but I thought that once I covered them, they would become more robust.
Here they are, together with the prescription bags, after I’d ironed them all. The brown bags are still a bit wrinkly but I think that just adds to their charm!
It took a bit of pondering to work out how to fold these bags into something useful.
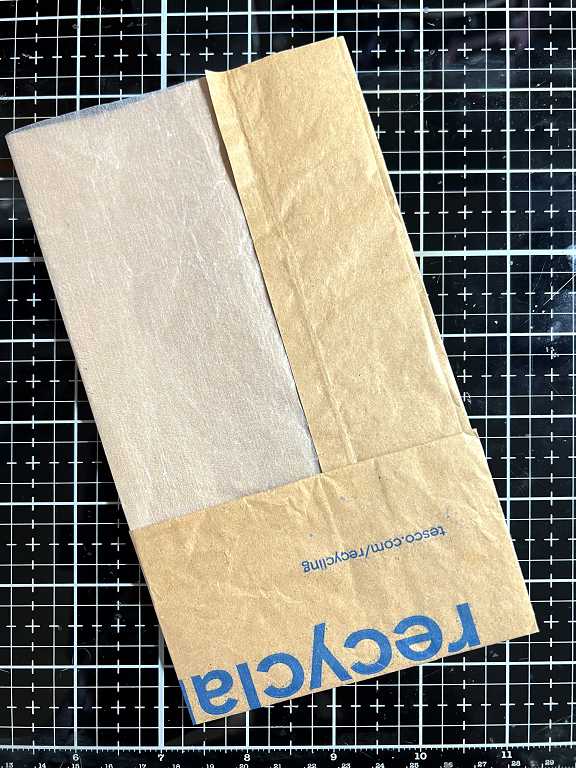
I trimmed off the irreglar top edge, and folded up the bottom to form a pocket, and then folded the whole thing in half lengthwise. This means that the translucent window appears on both sides, and reaches to the folded edge. This way I have ended up with a four-page folio that could be sewn into a signature, or used as a stand-alone item.
This is the result of the first page so far. Apart from adding a tag into the transparent pocket, and something in the bottom pocket, I don’t think there’s much more I want to add to this, but who knows?
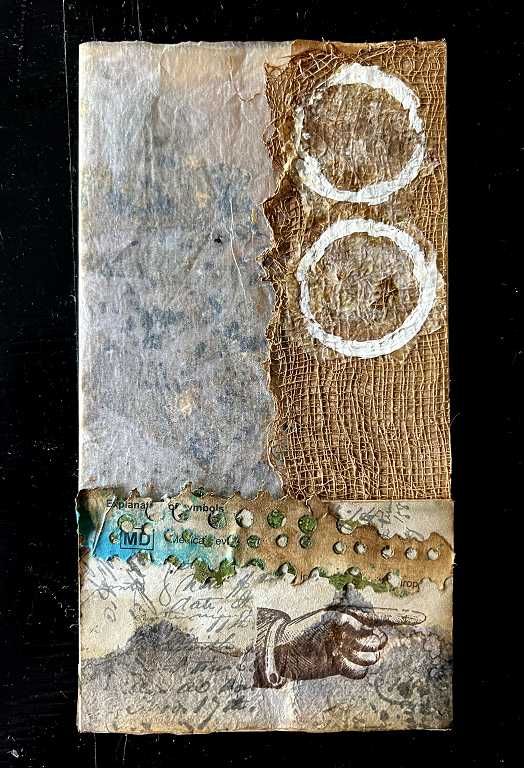
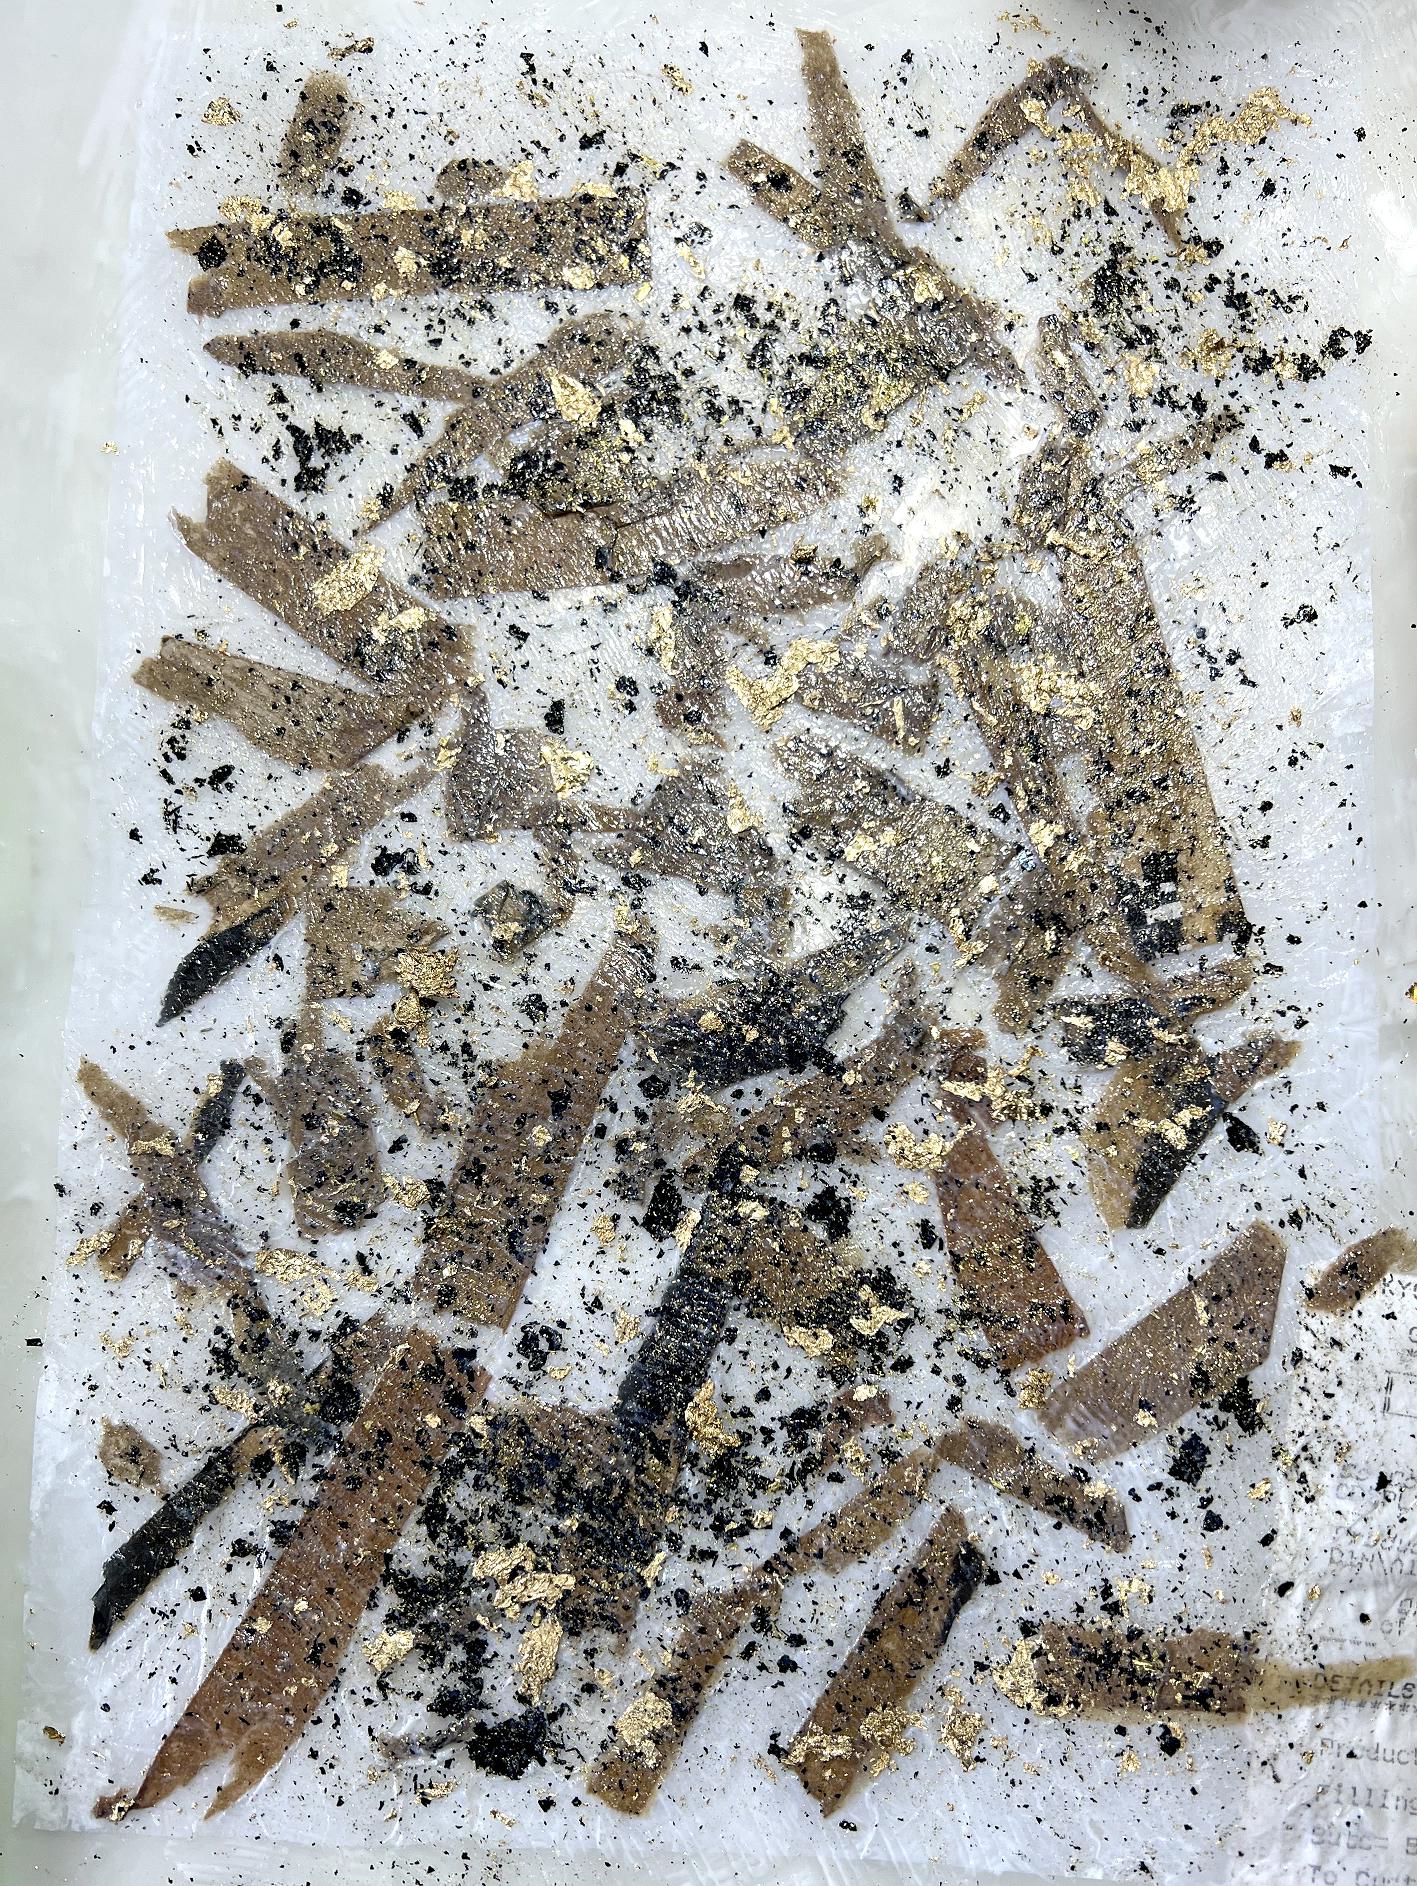
Unfortunately the camera hasn’t done it justice, not picking up shiny or shimmery stuff. I have lined the large pocket with some DIY shiny paper I made ages ago when I had a whole lot of paper fragments torn off some corrugated cardboard; rather than throwing them away, I created a skin with some acrylic polymer and tissue paper and added the scraps, and included some gilding flakes for a bit of bling.
I made some other “papers” around that time too, including a piece of mesh created by layering up pieces of scrim (bottom centre in the next photo).

I used a piece of this on the right-and side of this page, to the right of the glassine window, and overlaid this with a couple of my circles made by dipping a jar lid in some white acrylic paint and then printing it onto tissue paper. I added a little gold gilding wax to the mesh.
I covered the bottom pocket with some coffee dyed paper and some fragments of inked tissue, which I stamped with some Tim Holtz stamps, and finally overlaid a couple of fragments of my pierced medication leaflet papers along the edge of the pocket. This page looks a lot better in real life, believe me! I wish the camera would pick up the shiny and metallic elements better.
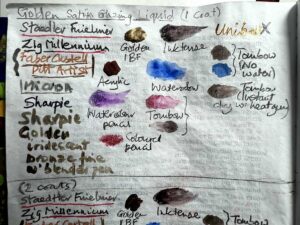
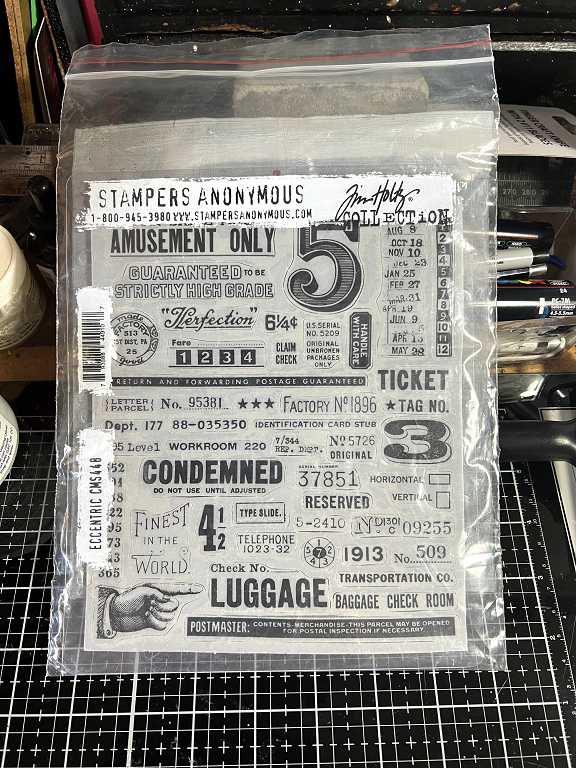
Talking of Tim Holtz stamps, the text on this project was from his “Ledger Script” collection, and some of the other stamping, including the pointing finger, from a new set that I bought last week, “Eccentric.” There are loads of high quality red rubber stamps in this collection which are going to be very useful, I know.
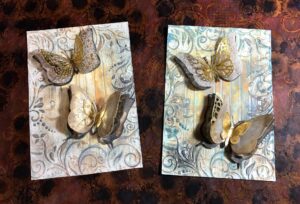
Opening the folded bag reveals the centre spread.
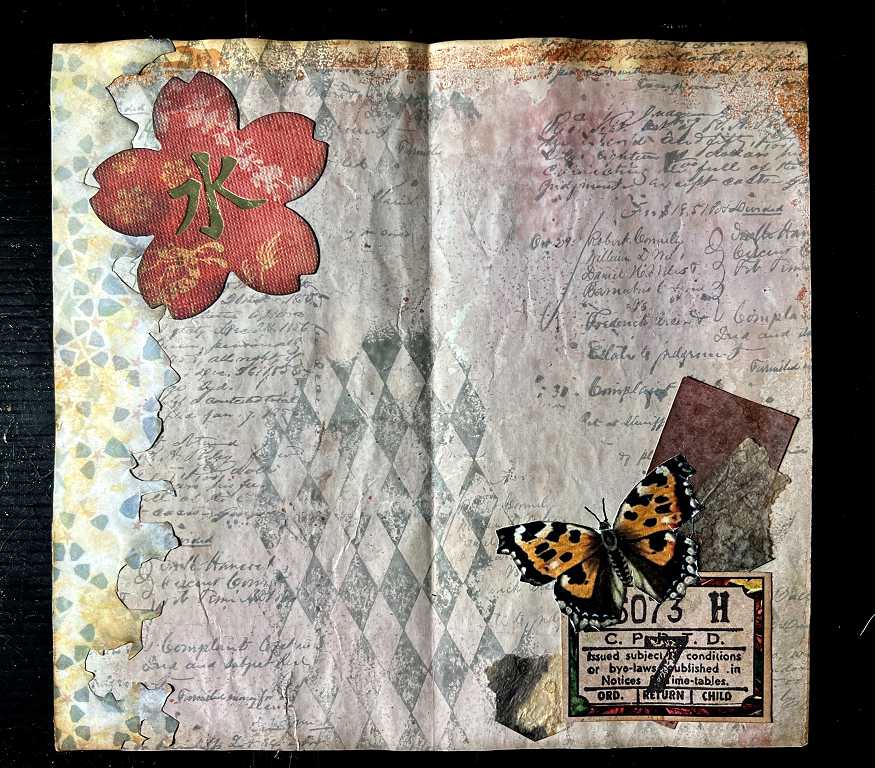
I covered this with a piece of my “Venetian walls” gel prints which I stamped. On the left-hand side is a paper I had printed from an image of some Moroccan tiles, when I was working on the Moroccan page in my altered book. I eventually decided not to use this particular paper so it went in my stash. I shall be returning to that altered book project in due course. I like to have several different things on the go so that my creative flow is kept fresh – if I make myself concentrate on one thing until it’s finished, it becomes more of a duty than a joy. Much better to set it aside for a while and return to it afresh. The downside to this approach, of course, is that one’s studio rapidly fills up with UFOs (UnFinished Objects). Ah well, c’est la vie.
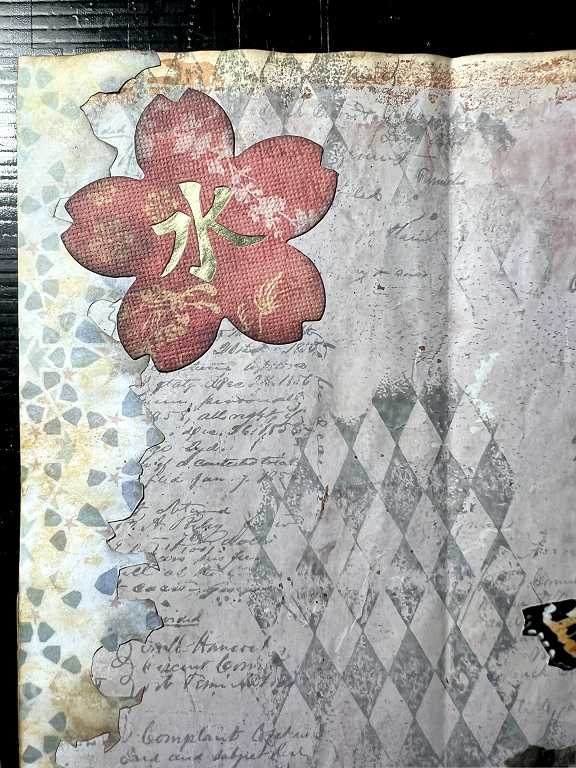
Anyway, after that mini-digression… to return to the matter in hand, part of that paper had been fussy cut so I cut off this edge to use as a border on the page, having added a little distress ink to age it a bit. I collaged one of the flowers from the DCWV “Far East” paper collection that I have been using in my Oriental-style album. I put a scrap of gold gift wrap behind the die-cut character.
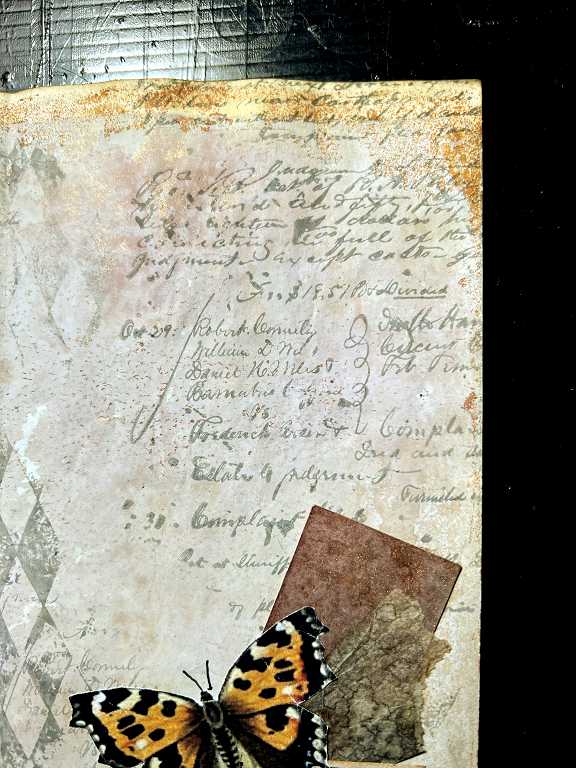
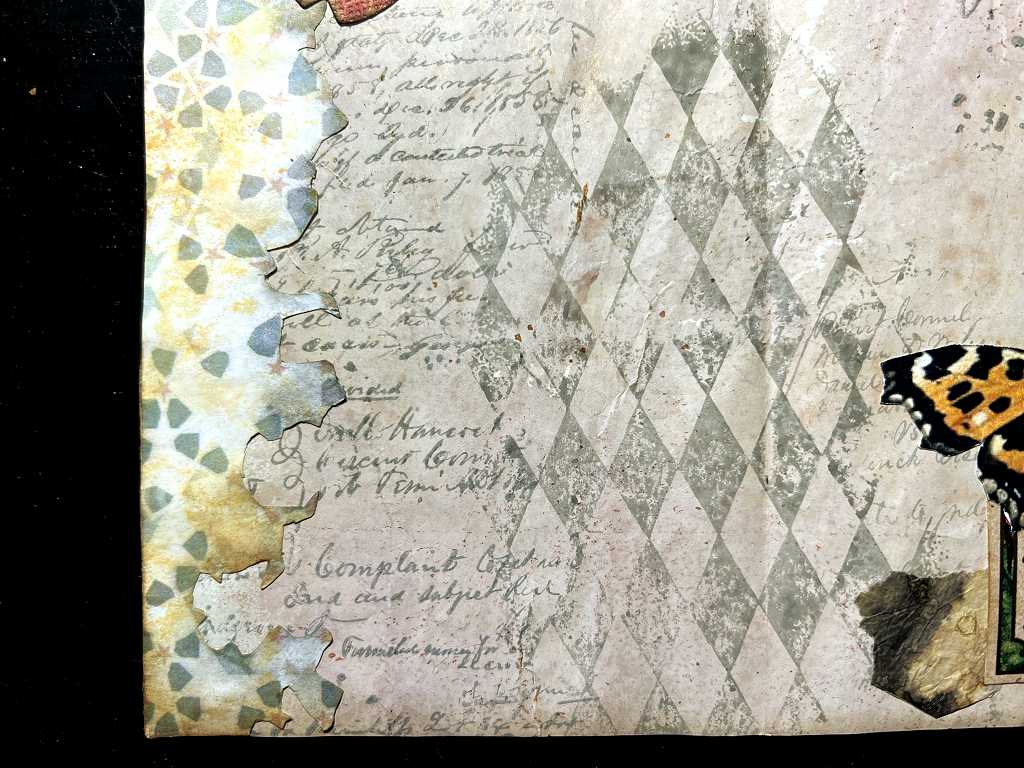
For the right-hand side of the spread I made a collage cluster from one of the tickets from the Graphics Fairy Premium Membership site which I recently stamped, some fragments of inked tissue and a butterfly, also from Graphics Fairy.

The dark rectangular piece at the top is actually quite shimmery. I managed to catch a bit of this in this photo:
![]()
A detail of the top of the page. I deliberately used the grungey edge of the Venetian Walls piece and cut the excess off from the bottom. The Tim Holtz stamping was done with Watering Can archival ink for a subtle effect.
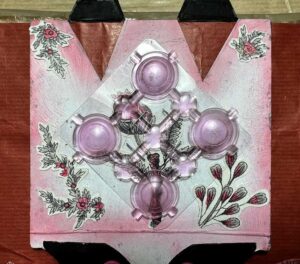
This is as far as I have got with the final page of the project. You can clearly see the glassine panel.
I stuck a piece of coffee-dyed paper over the bottom pocket and then stamped with some text from the “Eccentric” stamp set. The piece at the bottom was fussy cut from an inked scrap, and laid over the top, partially obscuring the stamping.
I am not sure what else will go on this page yet, but most likely more stuff from my scrap collection!
I have decided to make several of these folded bag pages and bind them into signatures to create a mini-album. I shall probably use some of my DIY papers inspired by the no-longer-available Graphics 45 “Olde Curiosity Shoppe” paper collection as I really love this vintage/curio/steampunk theme.
This piece, made from rather flimsy paper, has a lovely soft crinkly feel to it, even with the layers of collage. It has worked out better than I could have hoped, and I look forward to completing this folio, and making further ones from the recycled bags.