RECYCLED PAPER-GLASSINE BAGS ALBUM – BEGINNING THE THIRD FOLIO
Now that the first two folios of this recycled album are completed, it is time to begin on the third folio. I have decided on a steampunk theme for this one.
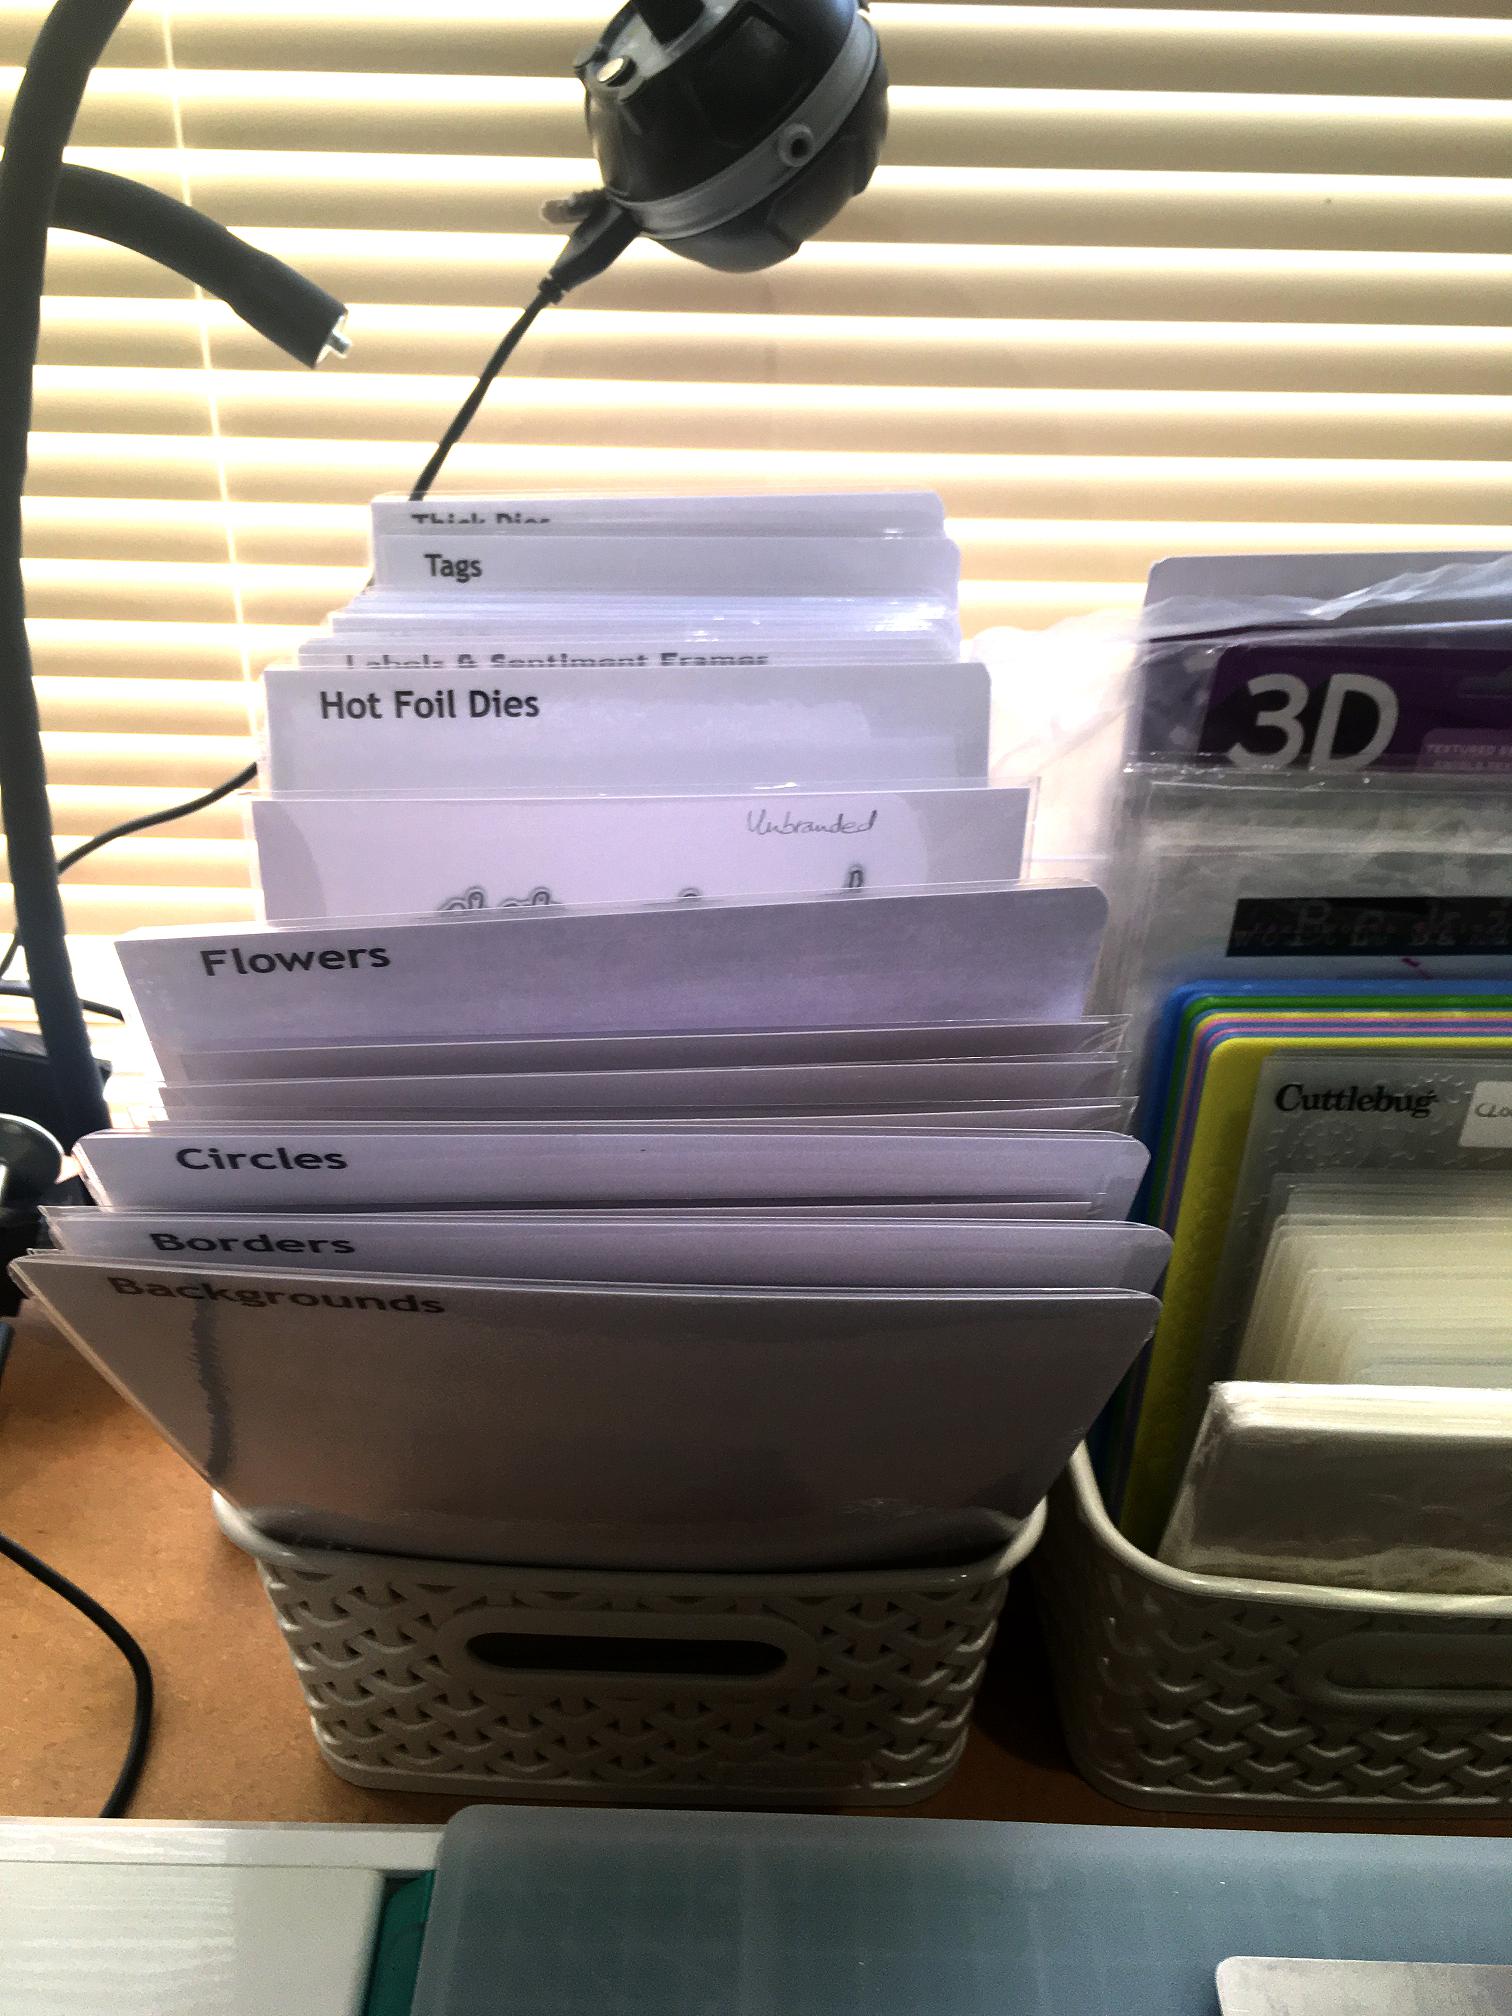
Organising my recent dies
I got some new dies recently from Ali Express and Ebay, and these were still hanging around in their original packaging, so they needed to be mounted into my die storage system.
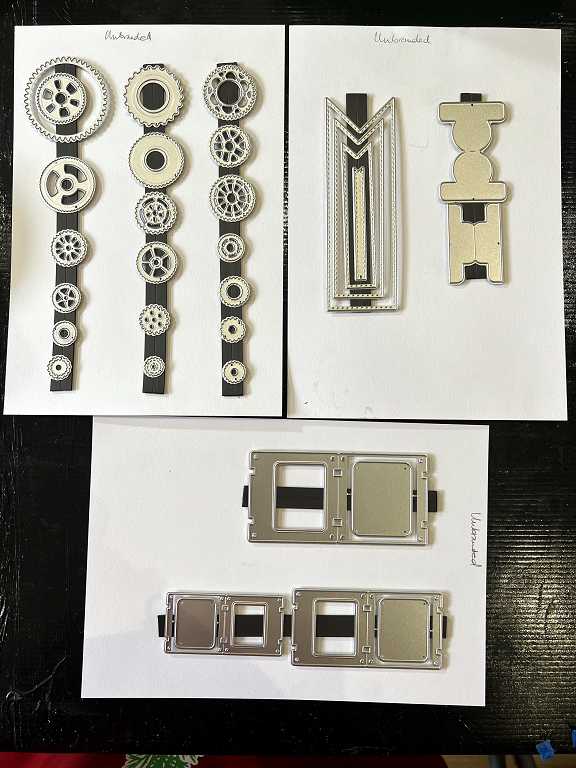
For this system, I cut thick white cardstock to size and stick down strips of magnetic tape, onto which I can mount the dies. This then goes into an Avery Elle pouch, and the pouches are stored in plastic baskets with laminated dividers between them, separating the dies into categories. If the die set is from a recognised brand, I cut the front of the packaging with the details, and slip this into the back of the pouch behind the thick card. A lot of my dies are from Ebay or Ali Express so for these, I just mark the top of the card “Unbranded.”
Page tab die cuts
I decided to use some of my recent scrap-busting coffee-dyed strips to make some page tabs, using the two different tab dies from the new die set.
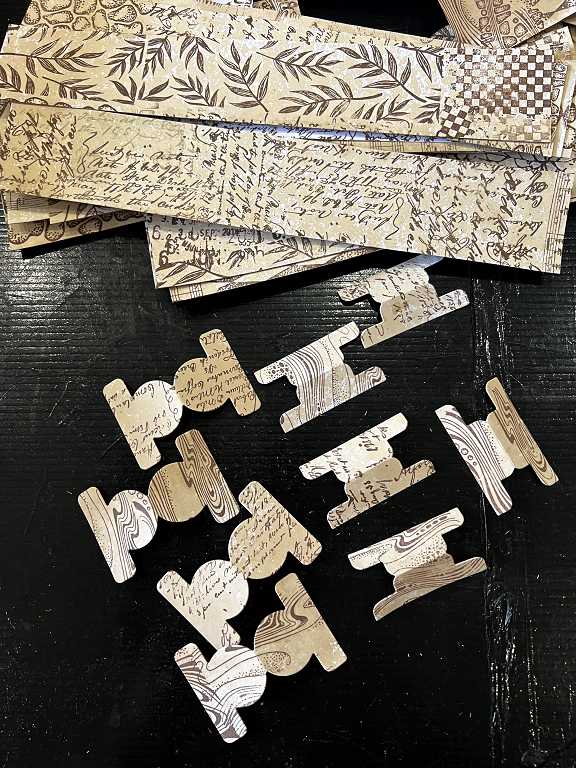
I folded them all in half and glued the top halves of each tab to hold them together, leaving the bottom parts free so that they can be slipped over either side of the page and glued in place. I inked the edges of all the tabs, and inserted an eyelet in the top of the ones with round tops, so that I can add charms or other embellishments.

I’m really pleased with how these turned out. I can make more in different styles without dies; just a simple square or rectangle, or a circle folded in half, work well, and I’ve seen instructions for making whale-tail tabs using a 2-inch circle punch, which I am keen to try. One idea I have used in the past which I really like is to cut two identical circles of whatever size you want, and stick them together onto the page so that one is on each side of the page, and the page comes up half way across the circle. This looks fine as it is, but if you then cut a half-circle notch in the pocket which is going to contain the tag, when you put the tag in the pocket, the circle tab fits neatly into the notch, which looks great, and it also locates the tag precisely in place in the pocket. You can use other shapes for this instead of circles, if you want, for example hexagons. I’ll be doing some of all of these ideas in due course, so watch this space.
Gears
I selected several different coloured scraps and cut lots of gears, randomly choosing the various gear dies and taping them down onto the scraps of card so that I could cut several at once. They came out great, using black, kraft and dull gold card.
Once they were cut, I added some Distress Stains. I’ve got loads of these in the old style bottles with the dabber on top, which you can no longer get – they aren’t as good as the newer sprays for most things, but for a lot of things I really like the dabber top. I chose the metallic Antiqued Bronze and Brushed Pewter ones, and dabbed the stains on fairly randomly and dried them with my heat tool.
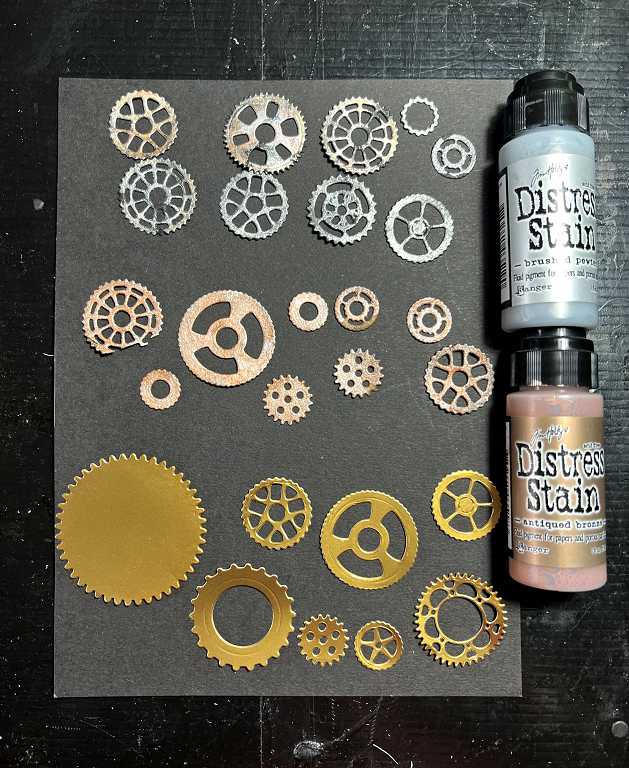
In the above photo, the ones a the top were cut from black card. I dabbed some of them with the Antique Bronze, leaving some black card exposed, and when they were dry, I went back over them with a little of the Brushed Pewter which gave them an antiqued look. The rest just had the Brushed Pewter.
The middle row were cut from kraft card scraps and these just had the Antiqued Bronze. You can see that I put one of the dies over the edge of the card by mistake so some of it is missing, but it doesn’t matter because I am going to layer them anyway.
The bottom row is the collection cut from the gold card – I think this was Easter egg packaging. I didn’t add anything to these.
I inked the black and kraft ones with some Walnut Stain Distress Ink around the edges but this didn’t work on the gold card which is too shiny so I left them for now – I might be able to distress them with some archival ink or perhaps some alcohol ink or a Sharpie pen, etc. if I think they look too clean and new!
Unfortunately the photo doesn’t show the metallic nature of the finished gears as well as in real life but you get the idea.
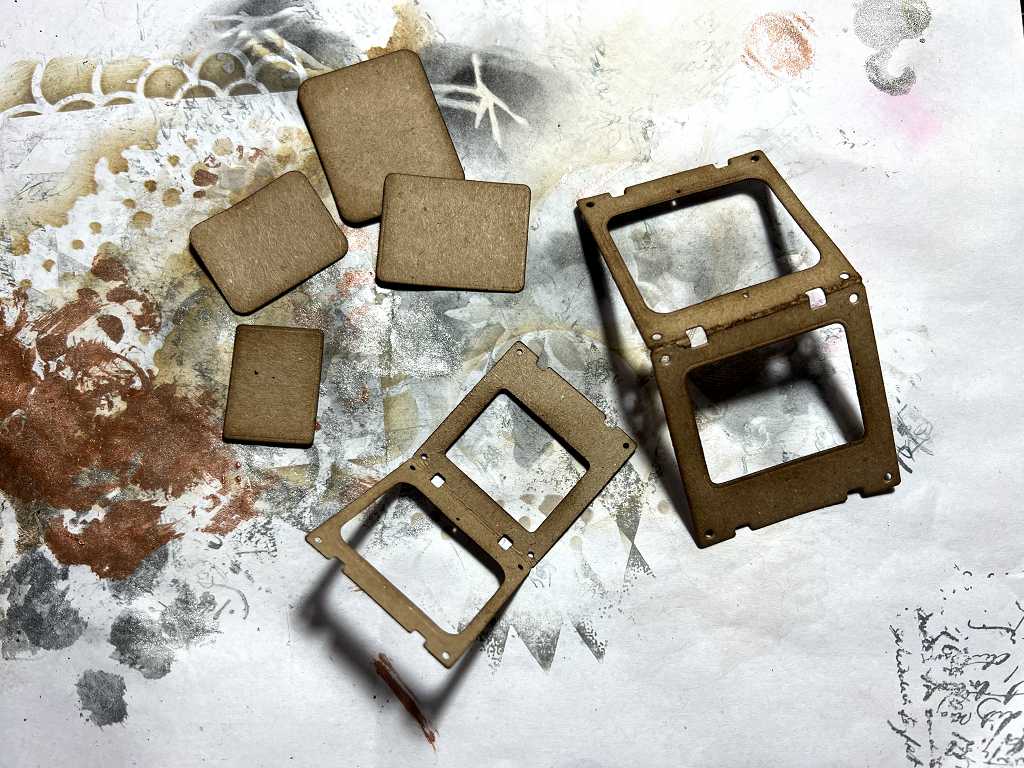
Specimen slides
I was thrilled to get this die set for cutting three different sizes of the specimen slides (at the bottom of the first photo above). I had seen various YouTube videos with instructions for making these without a die, and I may well do some in the future, but these were really inexpensive on Ali Express so I went for them (or it may have been Ebay – can’t remember, I’m afraid).
After cutting them, I distressed all the edges with Walnut Stain Distress Ink, and folded them in half. I have started saving the little plastic bags you get dies and things in, which have that irritating line of glue to close them. If I am continuing to use this original packaging to store whatever it is, I always cut the glued edge off because otherwise it sticks onto the thing every time you pull it in or out and it drives me nuts! Mostly, though, I decant stuff into zip-lock baggies which are a lot more convenient. The thin plastic these packs are made of, though, make good windows for small items where not a lot of rigidity is required, in which case you’d be better off using acetate. For these small specimen slides I thought they would be ideal. A dab of clear glue on either side of the image holds it in place (Collal All-Purpose glue is fantastic as it really doesn’t show) and you can glue the two layers of plastic together and then glue it inside the slide. When you fold the slide and glue it together, everything is neat and tidy. Alternatively, you can just insert an image into the slide without the transparent window.
Here are the slides I cut (just the two smaller ones as the big one is a bit too large for this current project), with the edges inked and ready for assembly. The small rectangles are the centres which the die also cut out. I’ve inked the edges of these too, ready for use elsewhere.
Each one has small holes at the corners through which you can insert a jump ring or bulb pin, either to attach the slide to a page, or to add charms or other elements.
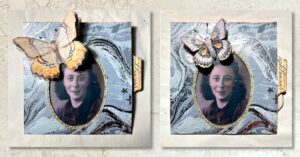
Someone recently came up with the idea of selling digital downloads of double-sided butterflies for use in this sort of slide, and as I reported in my previous post where I made a double-sided heron, I can do this easily with any image I choose. Printing them on copy paper is fine because you don’t want a lot of bulk.
I printed out some small images from the Graphics Fairy Premium Membership site in double-sided format to use in my slides. Here they are with some other miscellaneous ephemera and papers for the project.
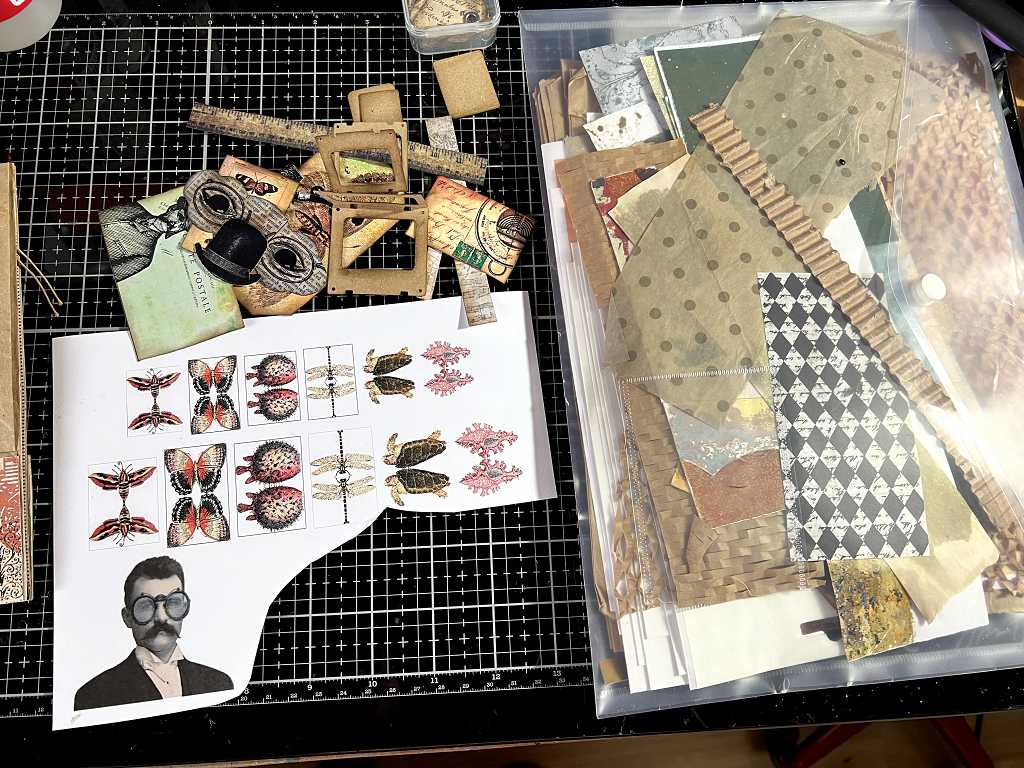
The bust of the gentleman printed at the bottom is for a tag on the back page of the folio – more about that later, but for now, I’ll explain how I made him.
I needed him to be a precise size, and the image from the Graphics Fairy Premium Membership site had him as part of a family group. I extracted him, and enlarged him so that his head was the exact size I wanted, which of course made the rest of him far too big to go on the page of my album, so he had to be reduced to a bust. He didn’t have any goggles, and I wanted to add these to match my steampunk theme, so I used a goggles image from one of the Graphics Fairy steampunk bundles, desaturated them and made the lenses translucent so that his eyes would be visible throug them. I saved the image as a png with transparent background and added this as a layer on top of our gentleman’s face, adjusting the size so that they fitted him nicely. He was then exported as a complete image.
After I cut him out, I added some Gossy Accents to the lenses.
You will meet up with him again in due course.
Working on the pages of the folio
I am not completing each page in turn, but moving between them as different ideas come up and materials come to hand.
The front page
On the first page, I cut a piece from one of my steampunk background sheets with the fancy border, which I made for the Curious Cabinets mini-album. I stuck this onto the bottom pocket of the page, formed by folding up the bottom of the paper bag.
Centrefold
The majority of this session was taken up with the centrefold. You can see a larger piece of the steampunk background paper in use here. To match the pink colour of the balloons, I chose an ordinary luggage label out of my stash, which happened to match nicely, and embellished it with an image. At this stage it still requires work.
I also stuck down a fragment of torn paper (I think this was from an old Tim Holtz paper stack), and half of an ornate clock face as tuck spots.
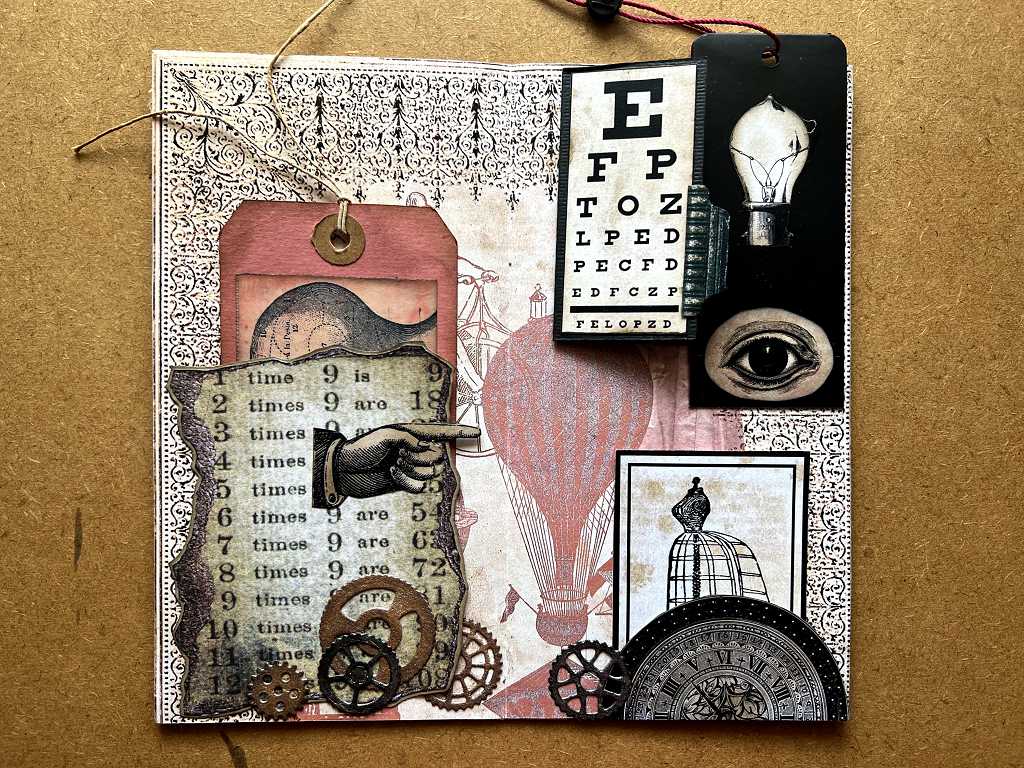
Some of my paper gears and a pointing hand completed this part. The finger of the hand, which extends beyond the edge of the tuck spot, is reinforced with black cardstock stuck on the back. The dress form image is another which I made for the Curious Cabinets album and didn’t use.
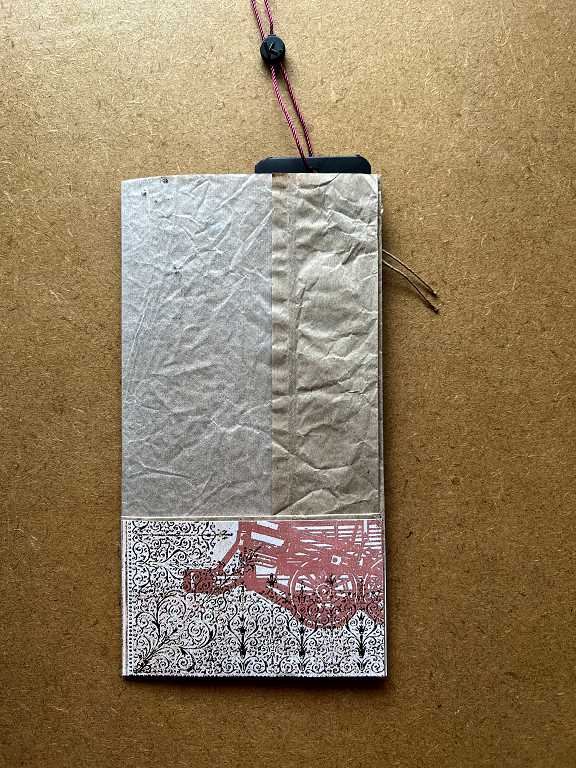
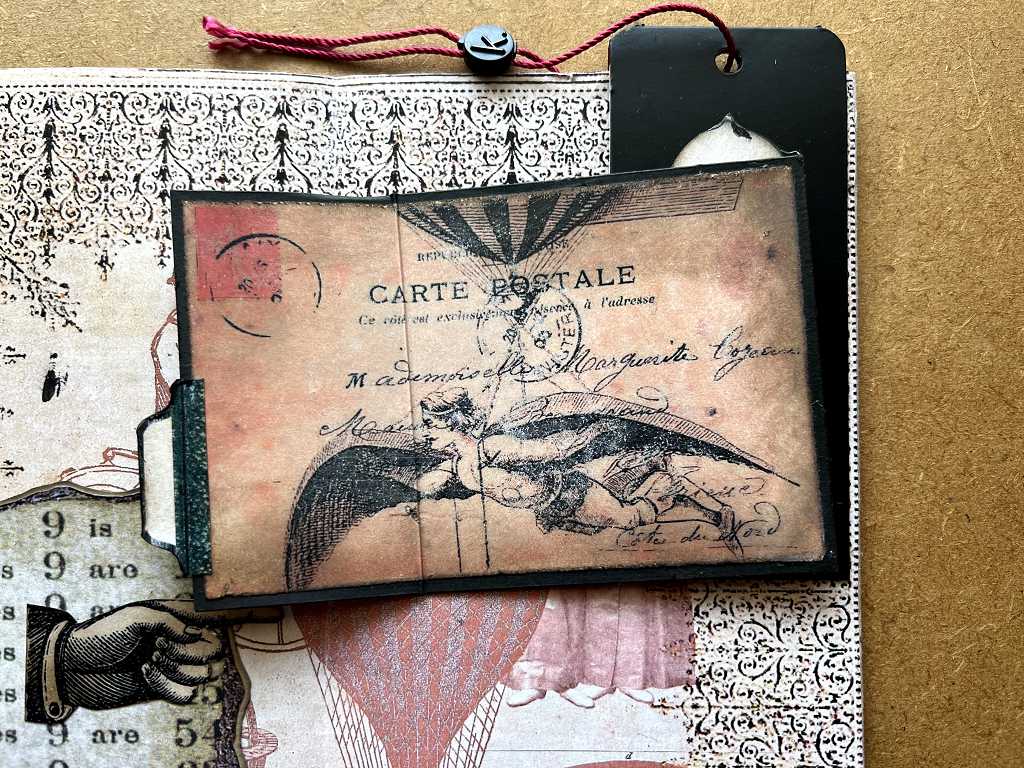
For the top right of the centrefold, I took a black clothing tag which feels like plastic. This was folded in half with a red cord through a hole in the top so I left this as-is, and rounded the corners. I stuck a couple of steampunk images onto this, and placed it over the top of the page and glued the right-hand and bottom edges down to form a tuck spot, into which I placed a folded tag – folded as it extended beyond the centre fold of the page, which needed to be able to close.
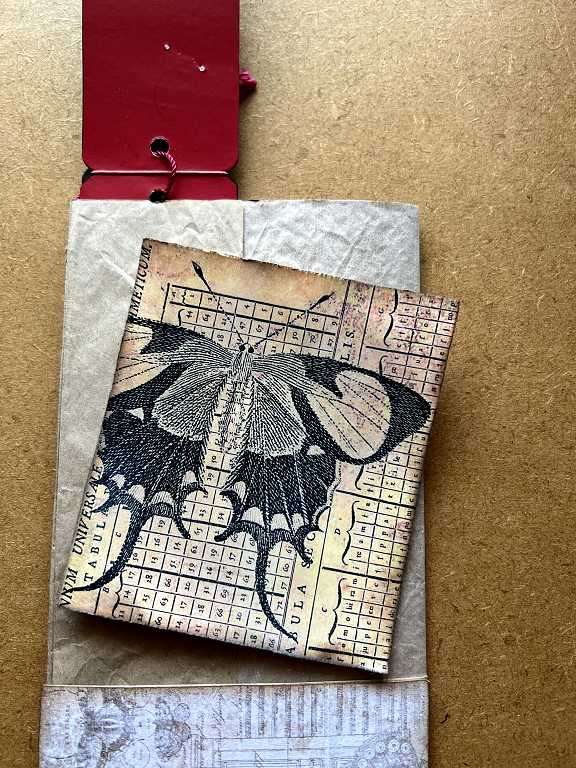
Removing the tags.
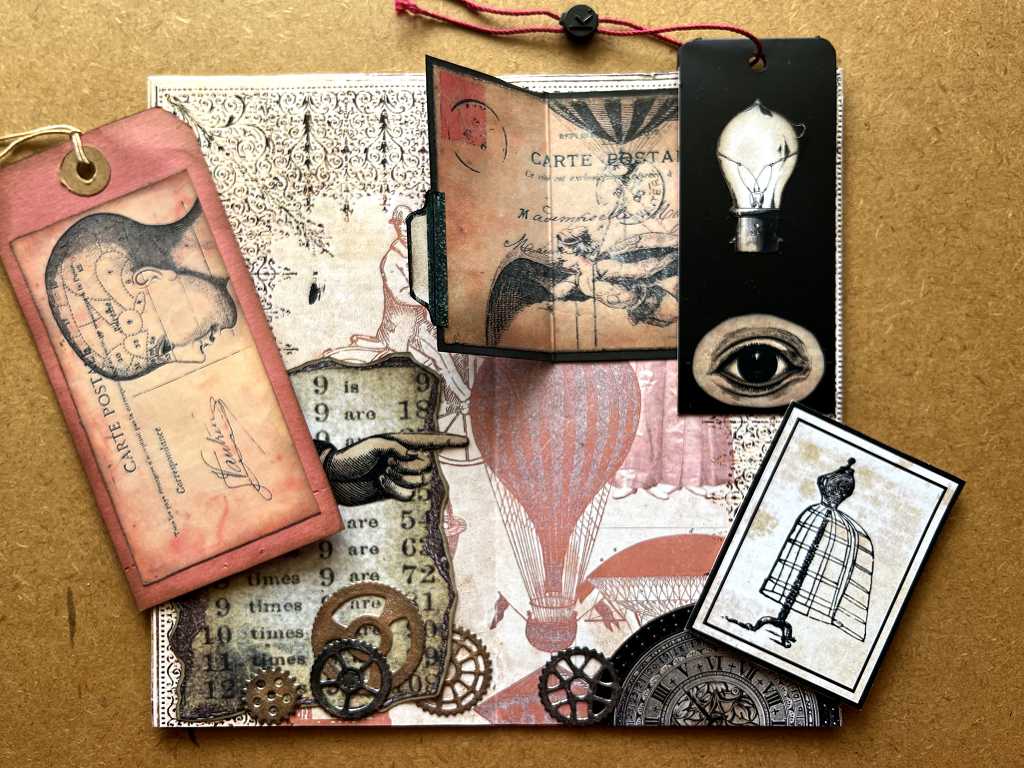
The tag at top-right opens up to reveal a small steampunk image.
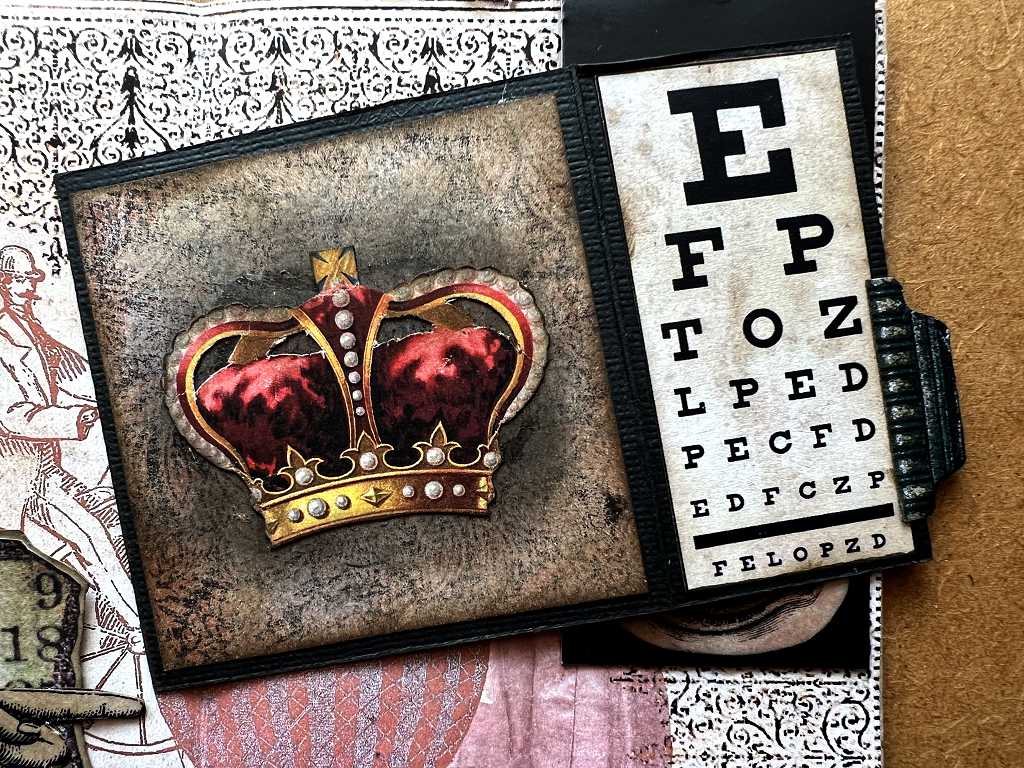
On the reverse, I fussy cut and applied a crown image onto one of my printed backgrounds that I made for the Curious Cabinets album. This was one where the laser printing was rubbing off (I hadn’t got my printer settings correct as the printer was very new at the time), so I sanded it and then added sone Distress Ink (Black Soot in the centre and Walnut Stain around the edges) – I think the result is splendidly grungey, and you can still see a bit of the pattern if you look closely. The eye chart, of course, is what shows when the tag is in situ behind the tuck spot and it’s folded over. I added a little page tab to the side of this, also from Graphics Fairy.
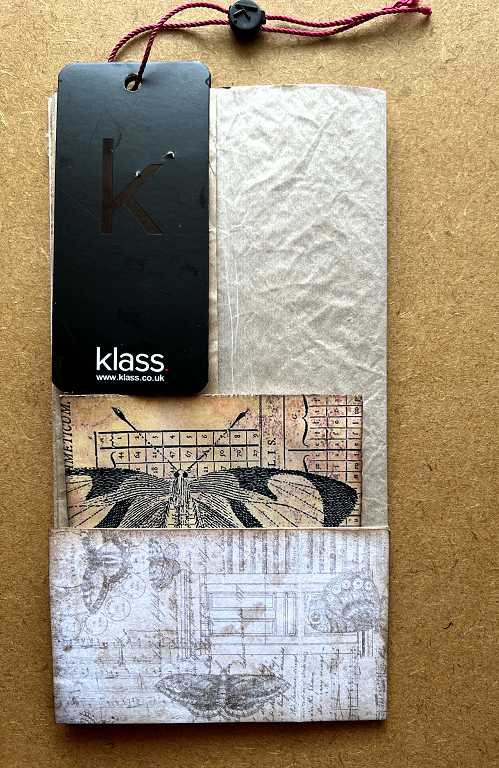
Beginning work on the back page
You can see that I have added some more printed background to the bottom pocket (this is from the Graphics Fairy). The square piece tucked into the pocket still requires work at this point.
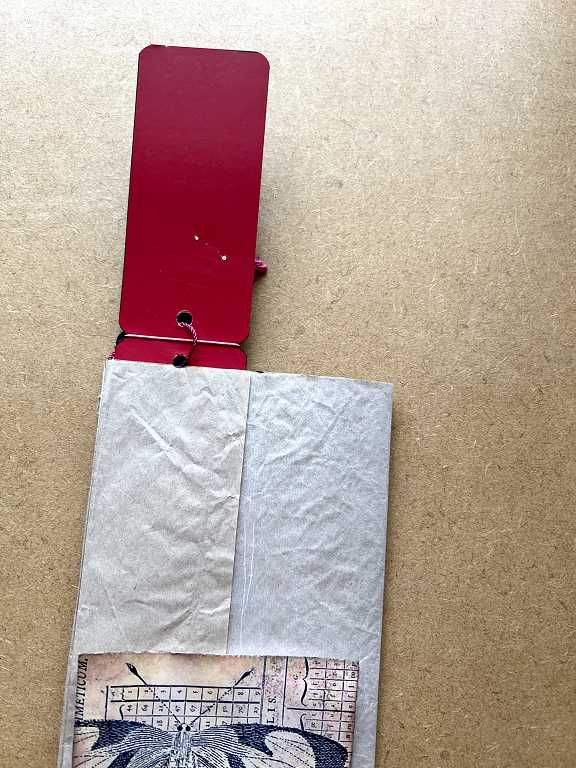
You can see the black clothing tag folded over the top of the page, complete with its red cord at the top. Lifting this tag up reveals that it is red inside, which perfectly matches the colouring of this folio.
The piece for the large tag to go in the bottom pocket. This was a Graphics Fairy image which I printed out and inked.
Since composing this post, I have done some more work on the project and will be blogging about this when I get time, and manage to take some photos. Last night I sat in the sitting room glueing the double-sided images together and fussy cutting them – this was a very fiddly job as they are extremely small! I made up the slides with the transparent plastic and set them aside. I also worked on the gentleman tag.
Today I have made further progress, mainly on the back page. This folio is coming together very nicely.