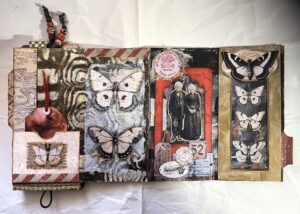
DEEP SADNESS, AND ORGANIC JOURNAL – FINAL PAGE: PRESSED FLOWERS

Today we mourn the death of our beloved Queen Elizabeth II who reigned for 70 years, longer than any British Monarch before her. I feel infinitely sad, as my life has almost exactly coincided with her reign. I was 3 days old when the Coronation took place, and my mother watched it on the TV in the maternity home. I am 69 years old and have never lived under any other monarch. This exceptional lady put duty and service before every other consideration, and witnessed immense changes in her realm and in society during her long reign. The country is in deep mourning as we accept the closing of an amazing era – “The second Elizabethan age,” as Sir Winston Churchill so aptly described it – and the departure of a much-loved and cherished Queen. I still can’t believe she has gone. We now have to face life under a King, which is going to take some getting used to, and it remains to be seen whether Charles III will measure up – his mother is a tough act to follow, and he has shown himself to be more passionate about globalism and other current and concerning trends than he is about national sovereignty, which I fear does not bode well for our nation, and he does not have an exemplary track record morally, in his personal life, either. We shall have to see whether he lives up to the quite moving words of his first address to the nation as King, especially regarding the issue of his religious views, which would appear to be in conflict with the Coronation Oath, to defend the Protestant Christian Faith. There was no doubt about the depth and strength of the Queen’s Christian faith which sustained and guided her throughout her long life.
She will be sadly missed.
At last I have settled down and done the final page in the Organic Journal.
Completion of the project
Selecting the papers.
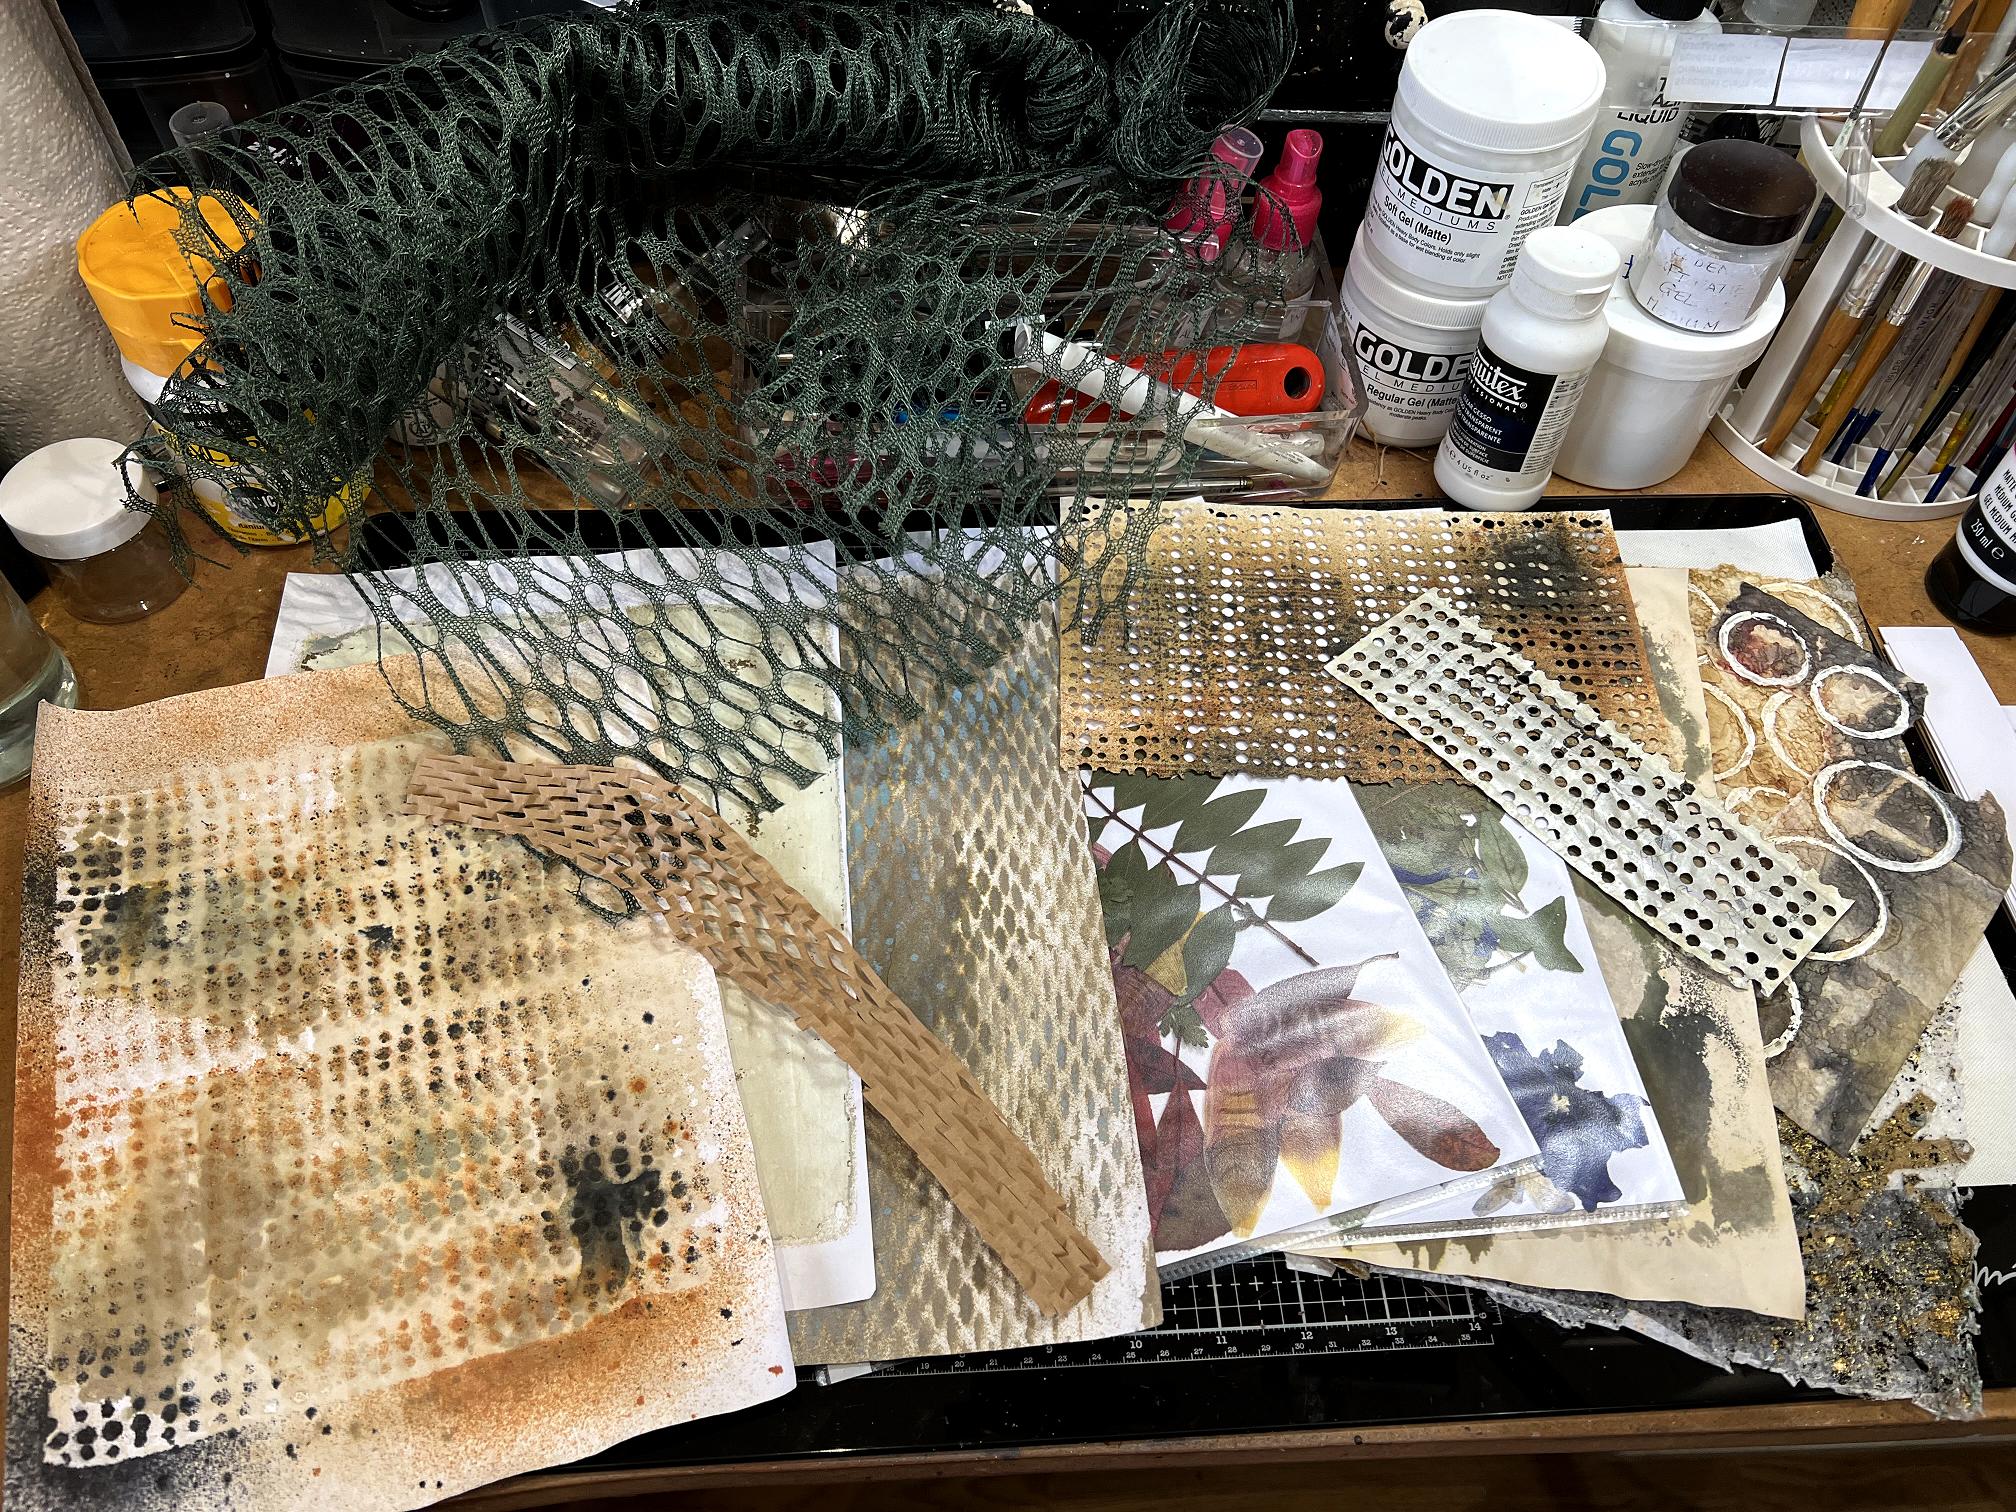
Again, same thing applies as with all the other pages – some papers were not used, and others were added.
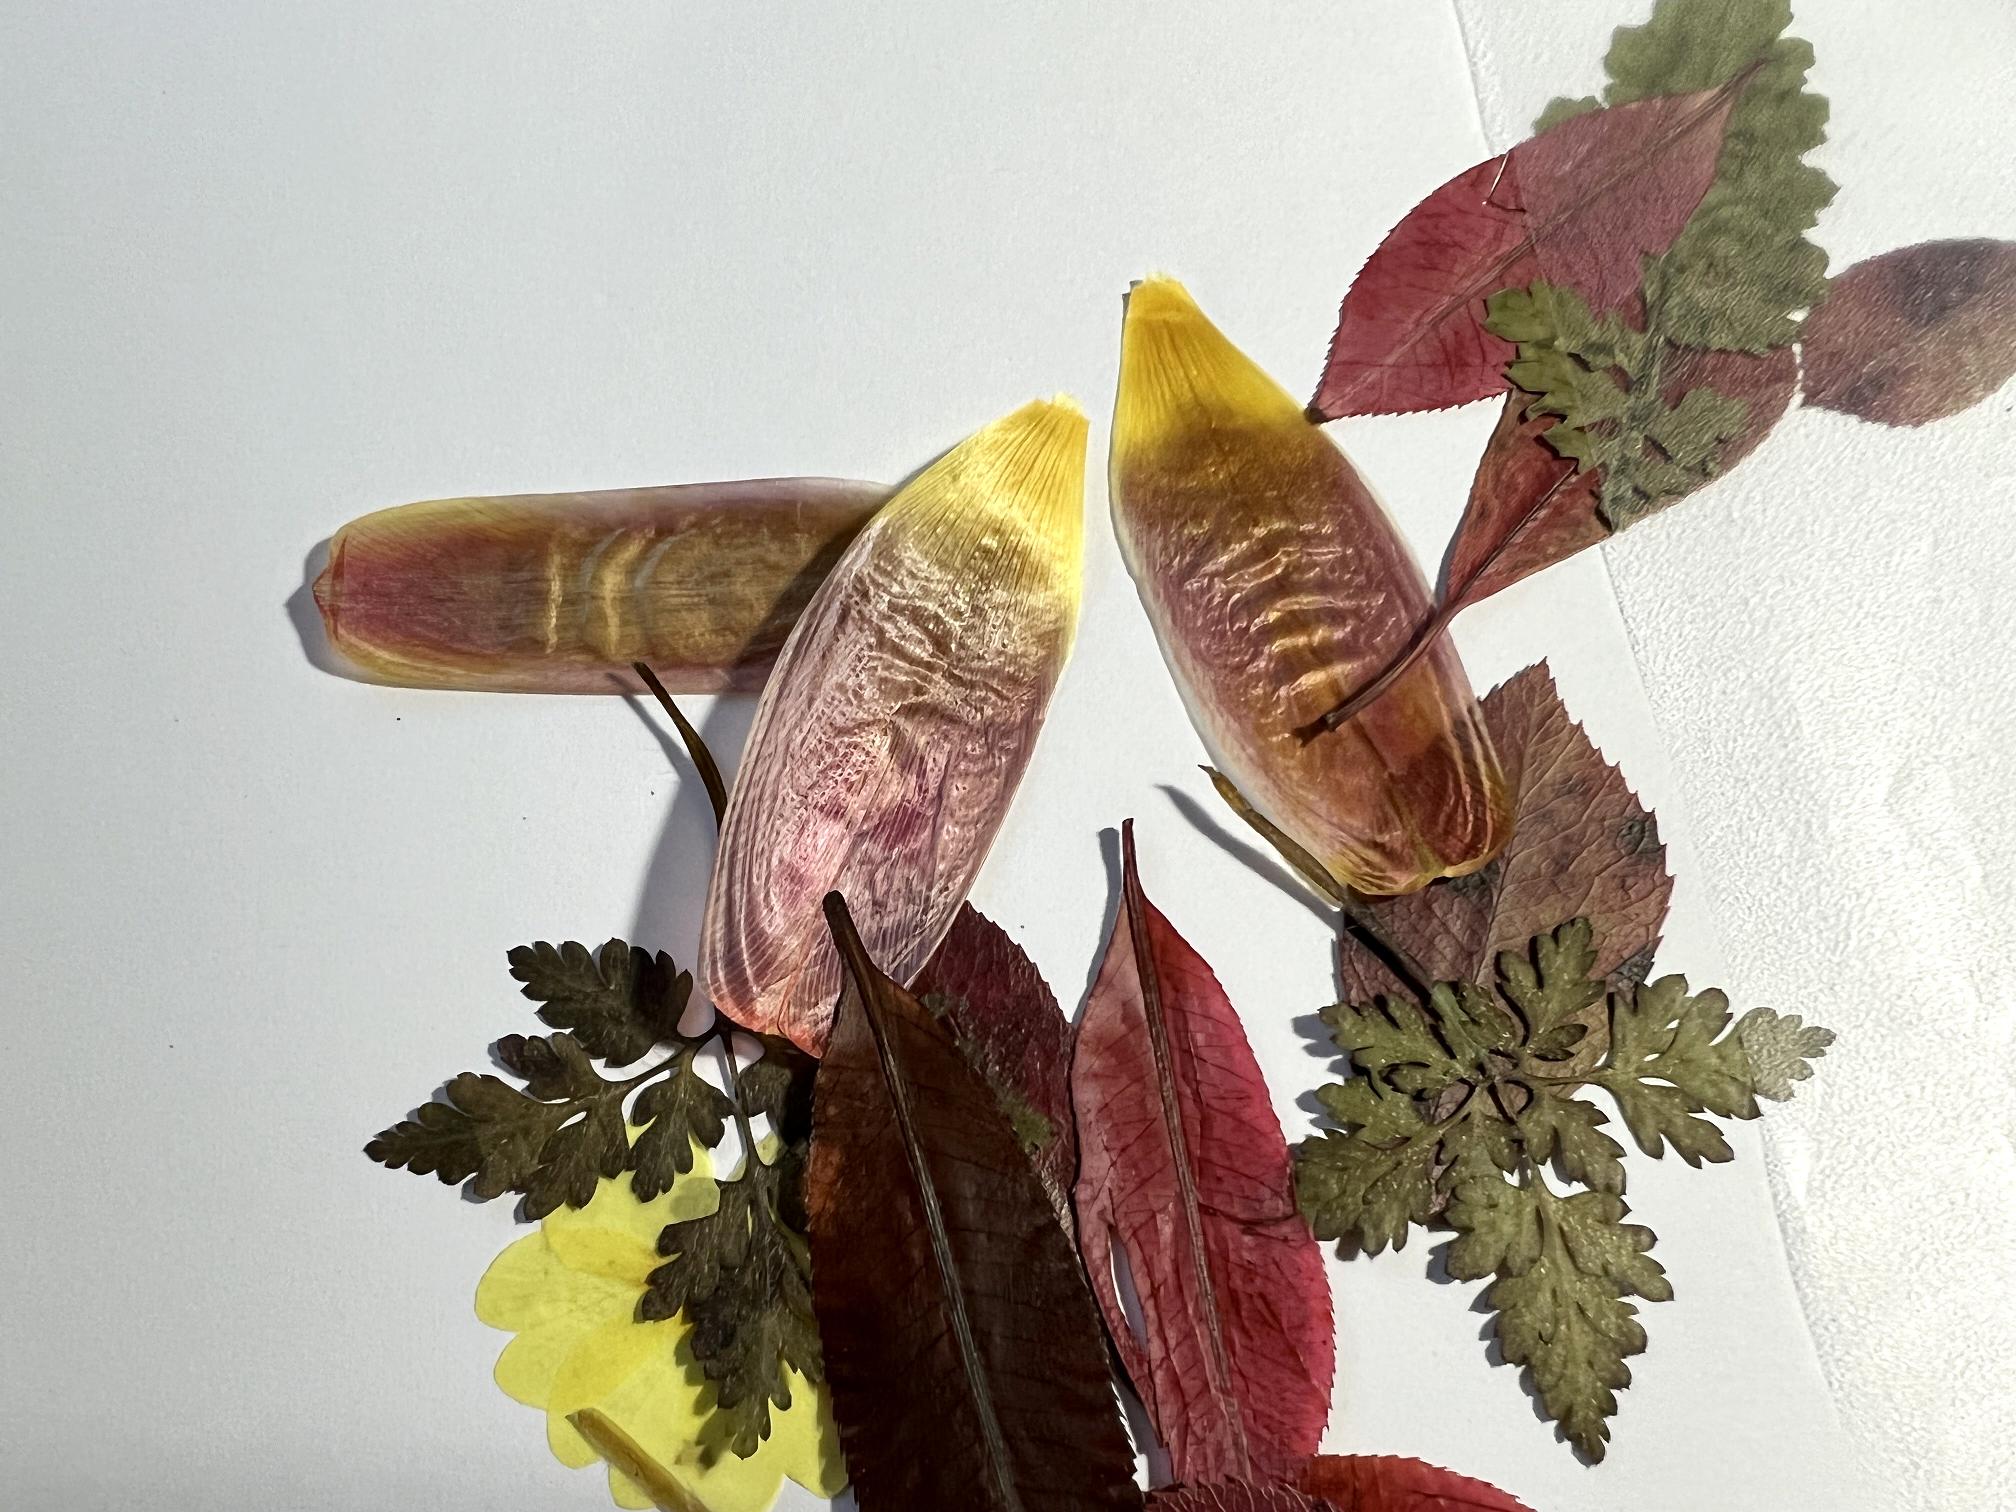
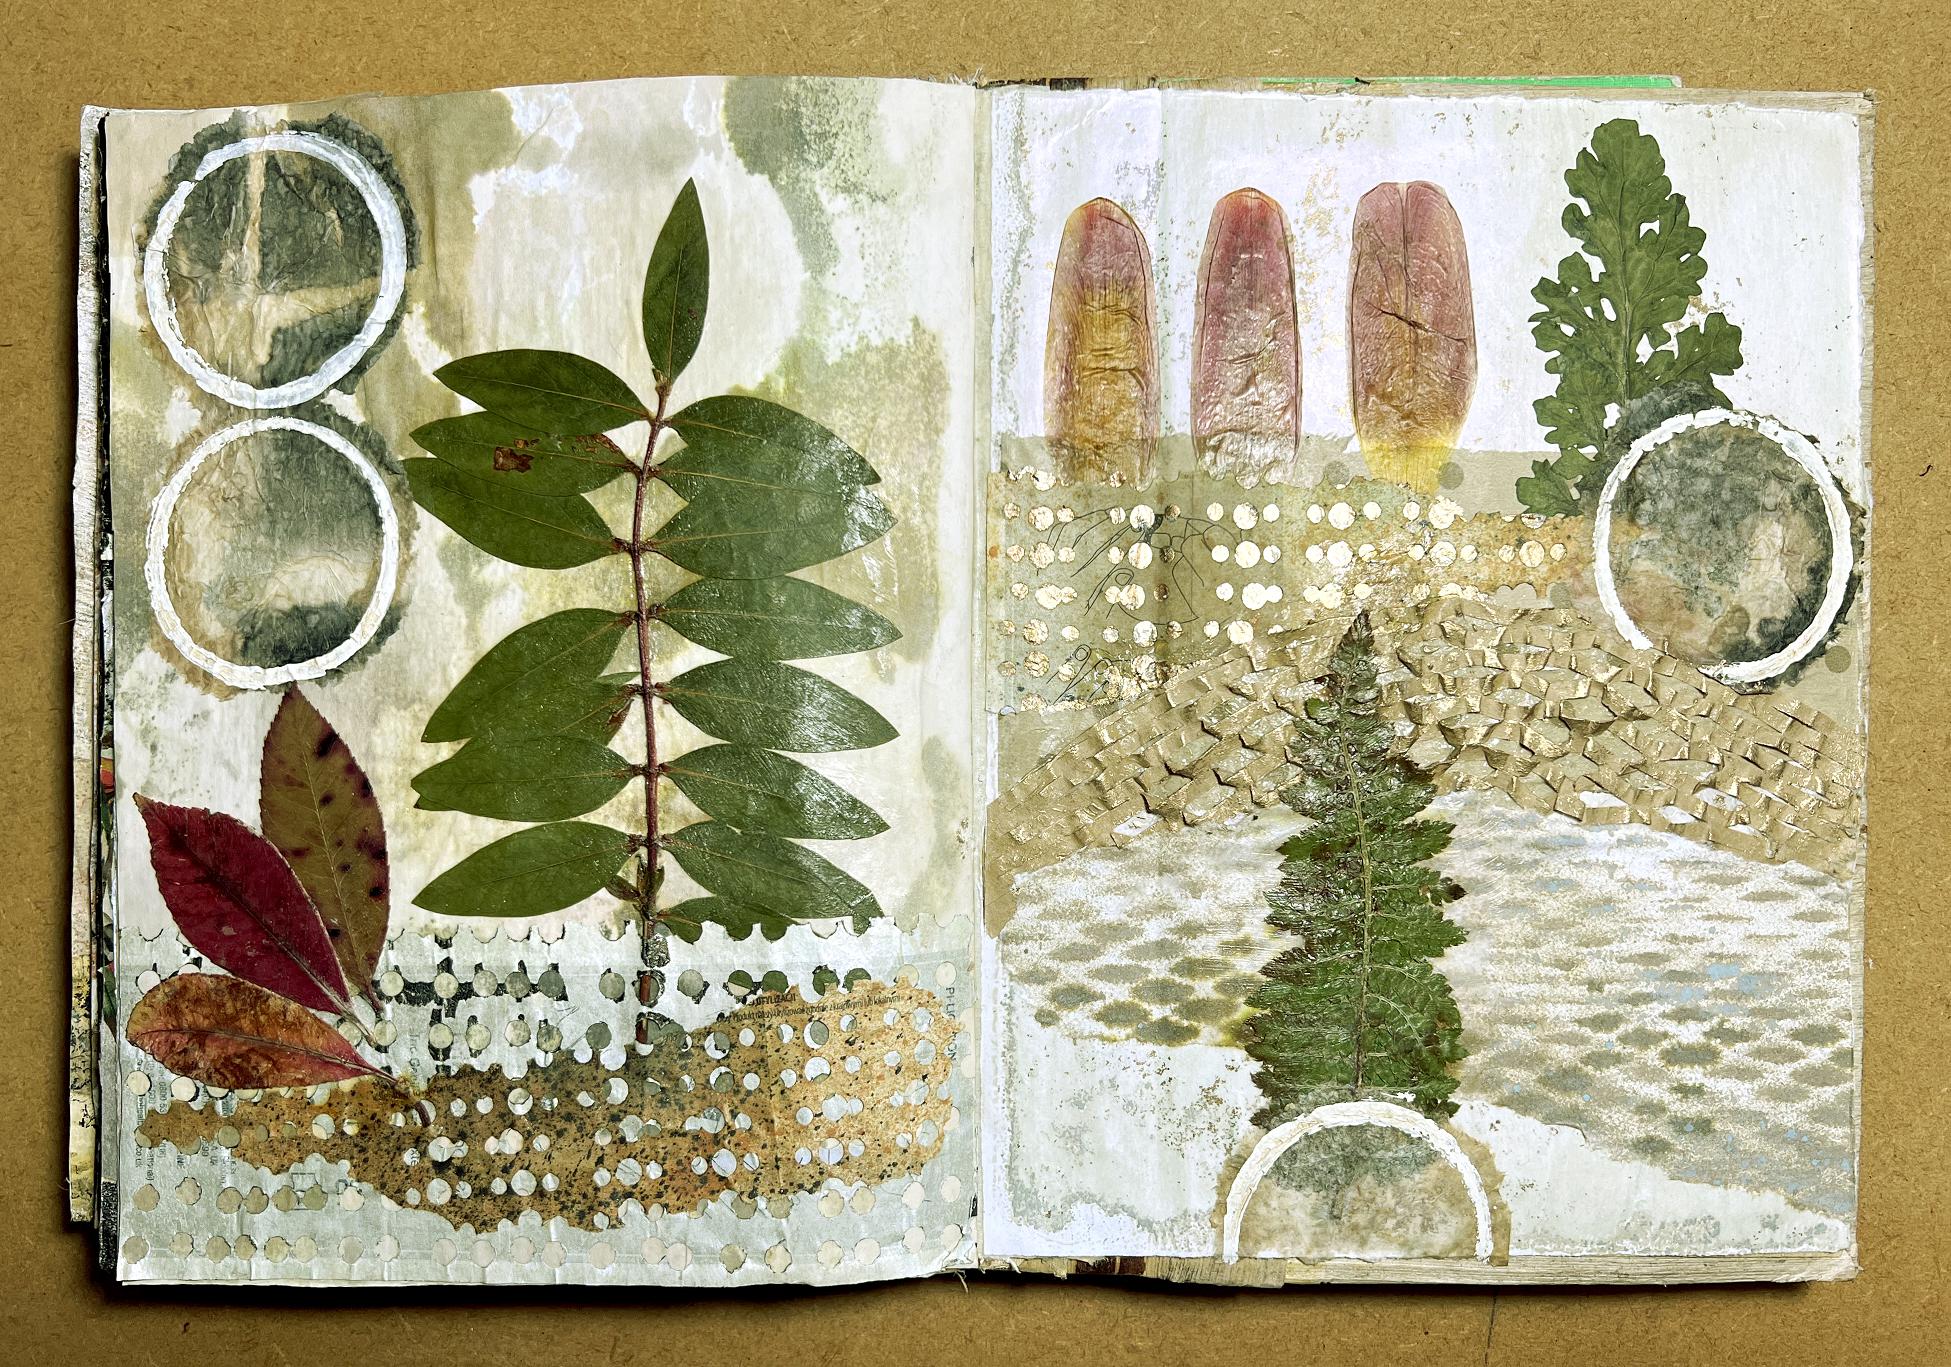
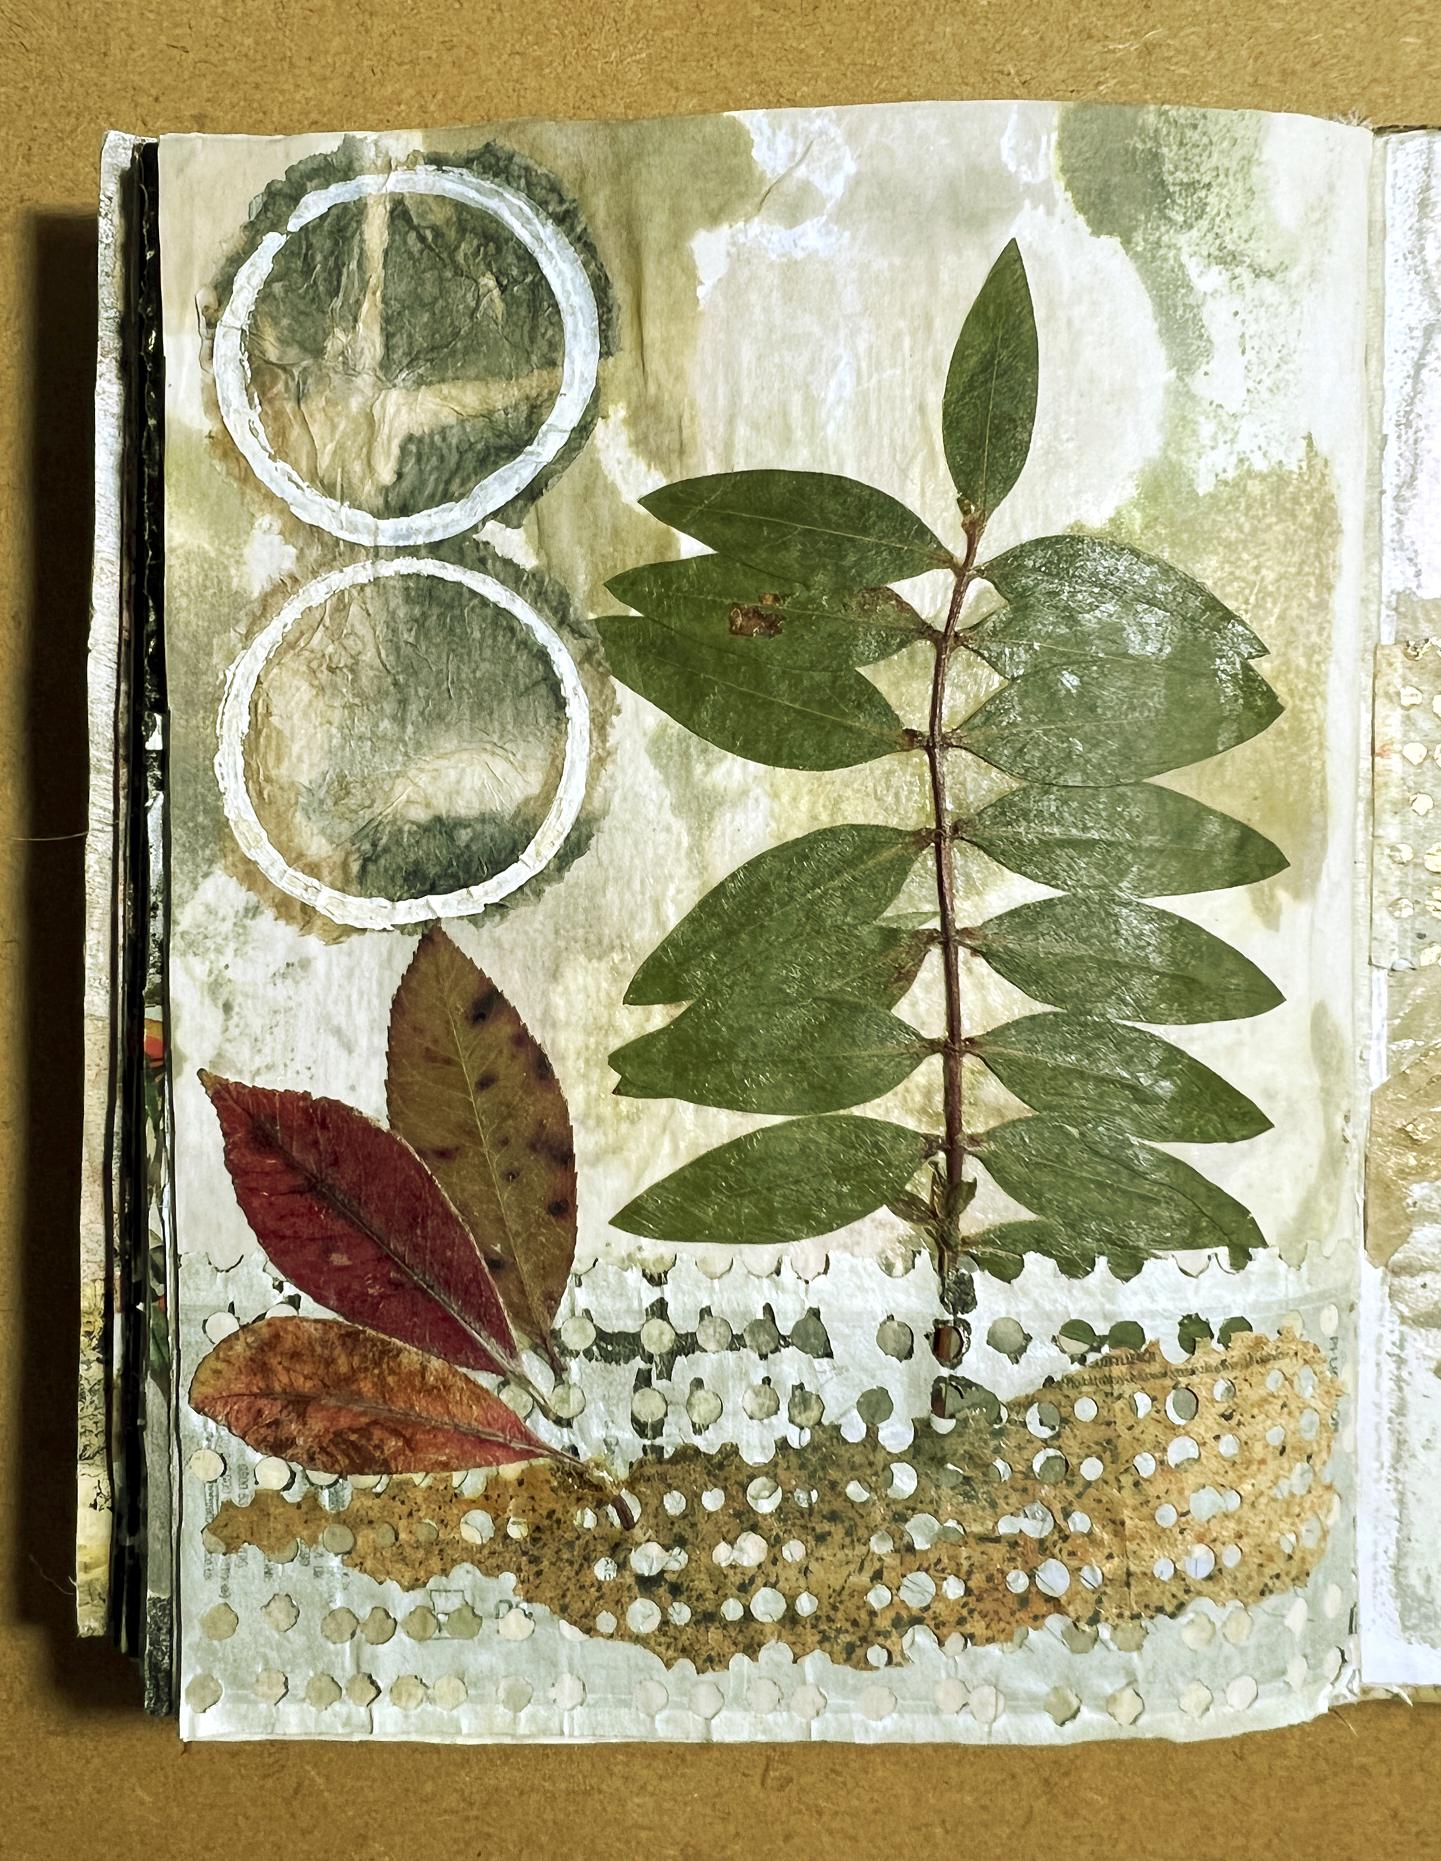
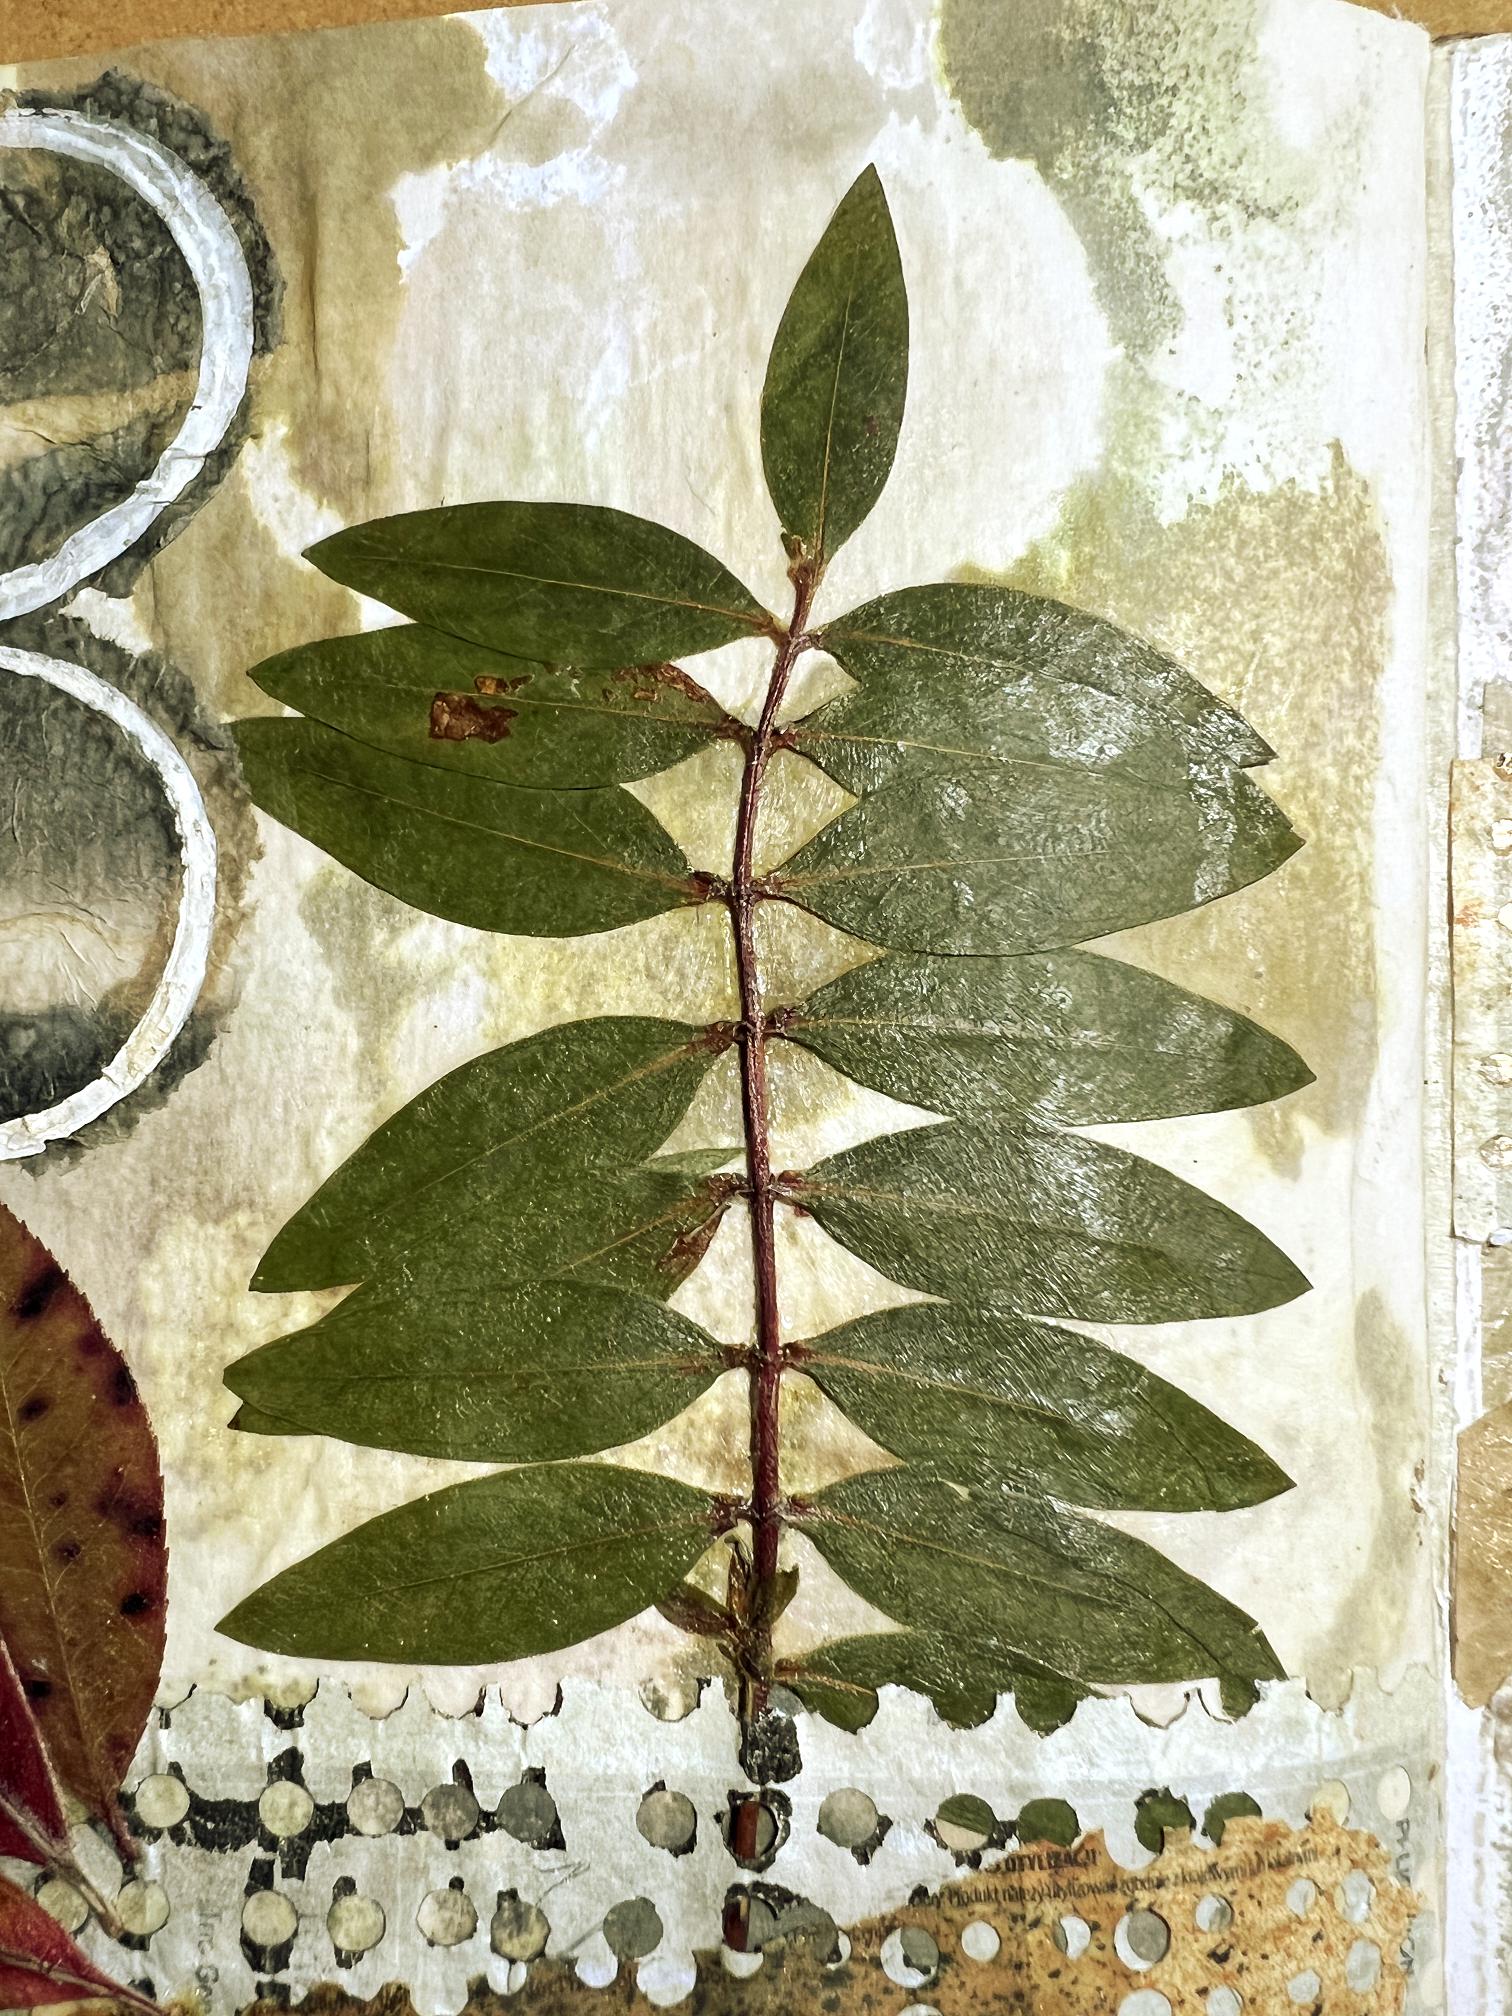
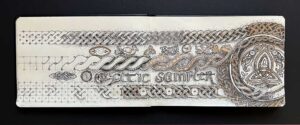
I have entitled this final page “Pressed Flowers” because it contains some flower petals and leaves that I picked from the garden back in the spring, and pressed.
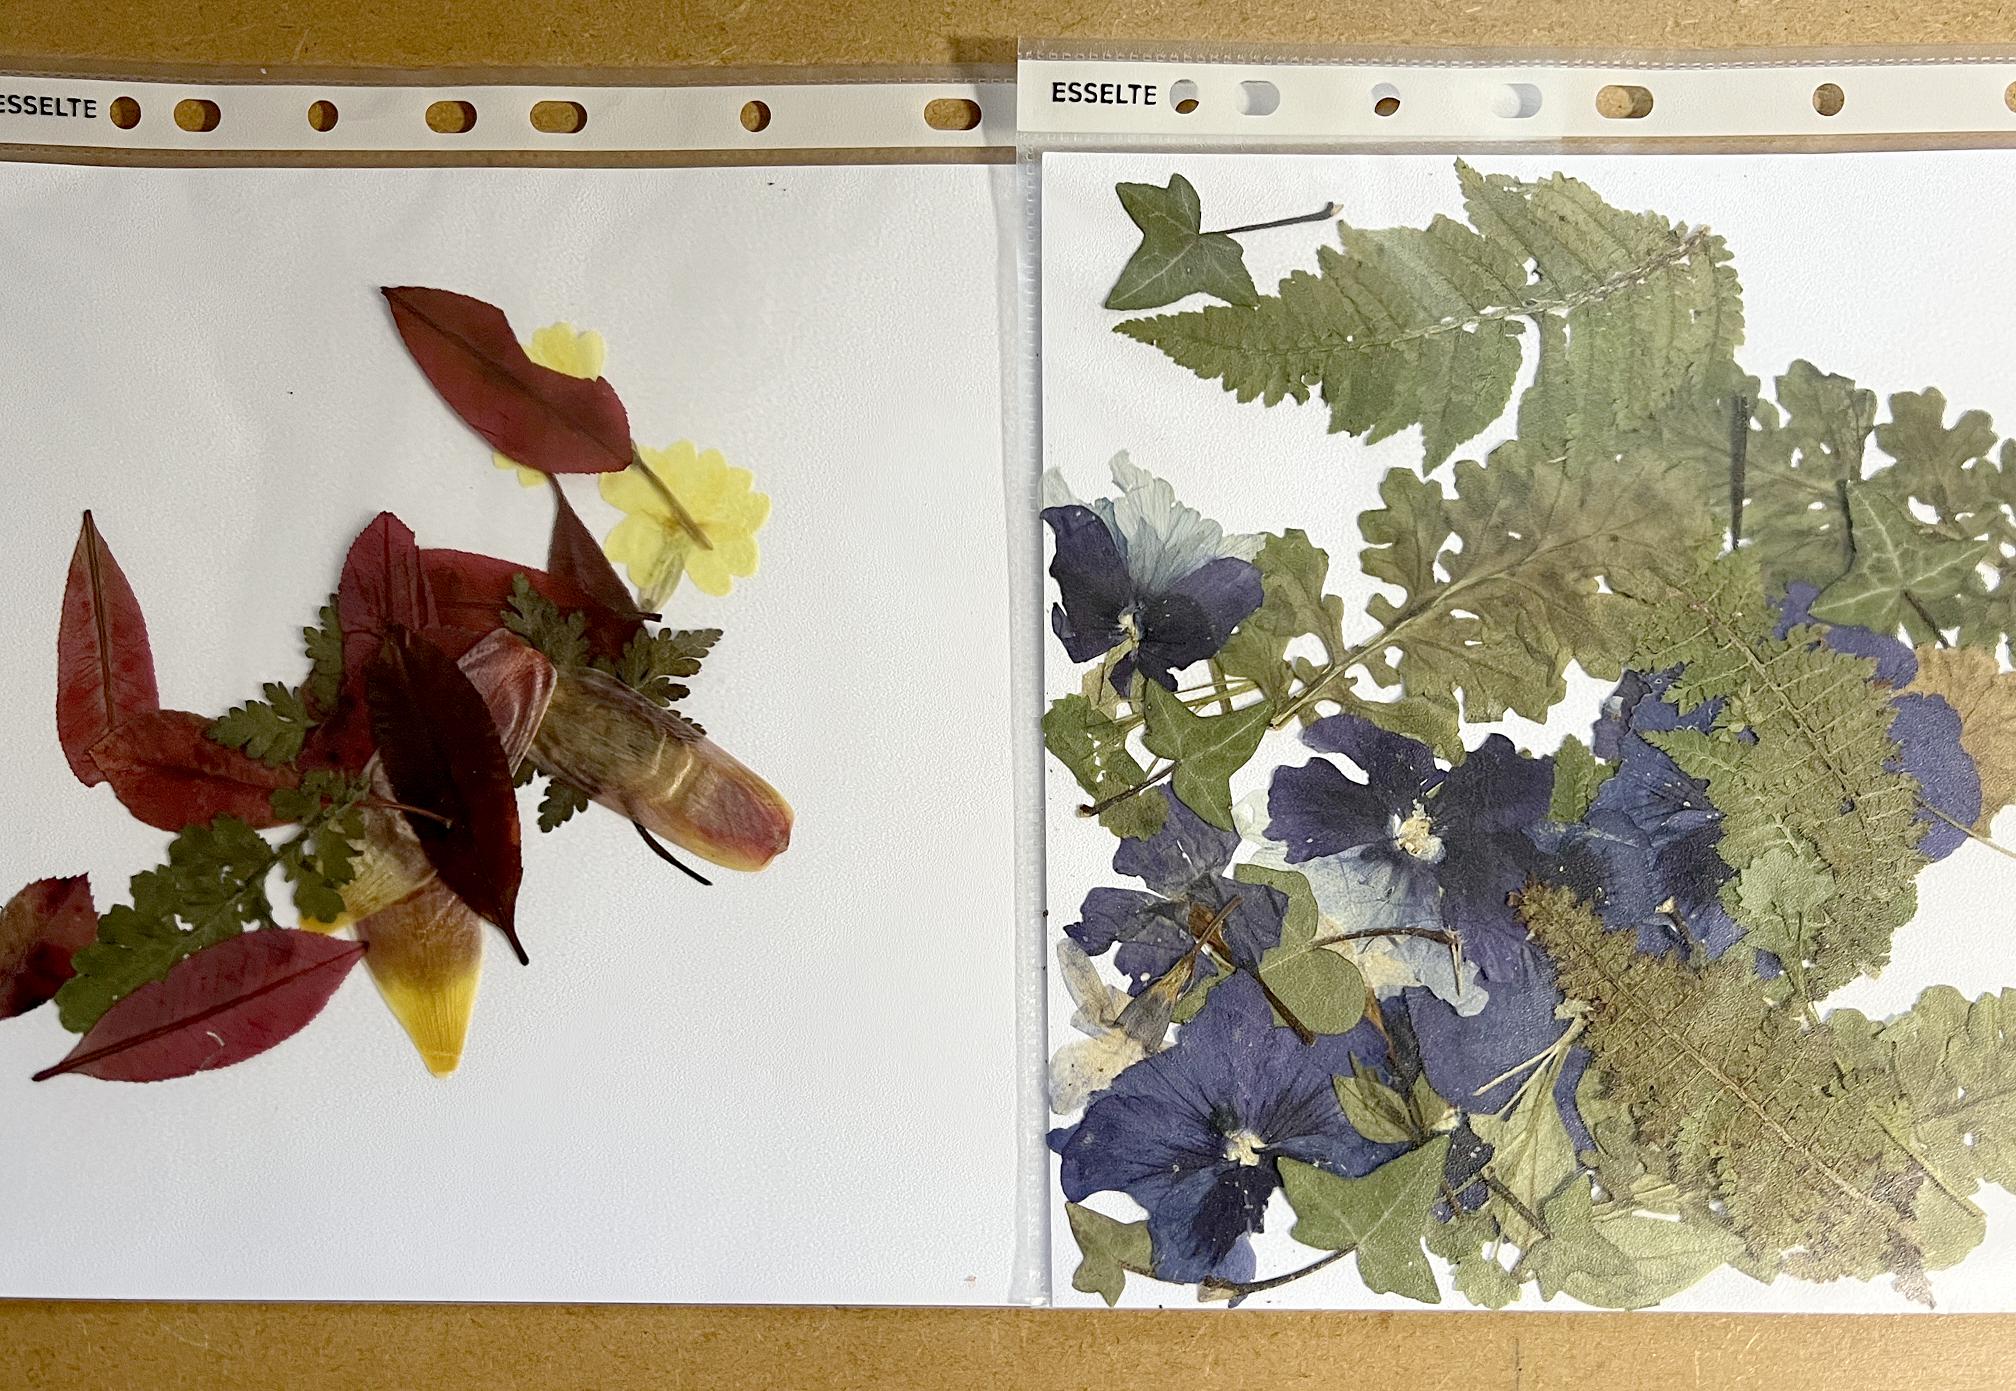
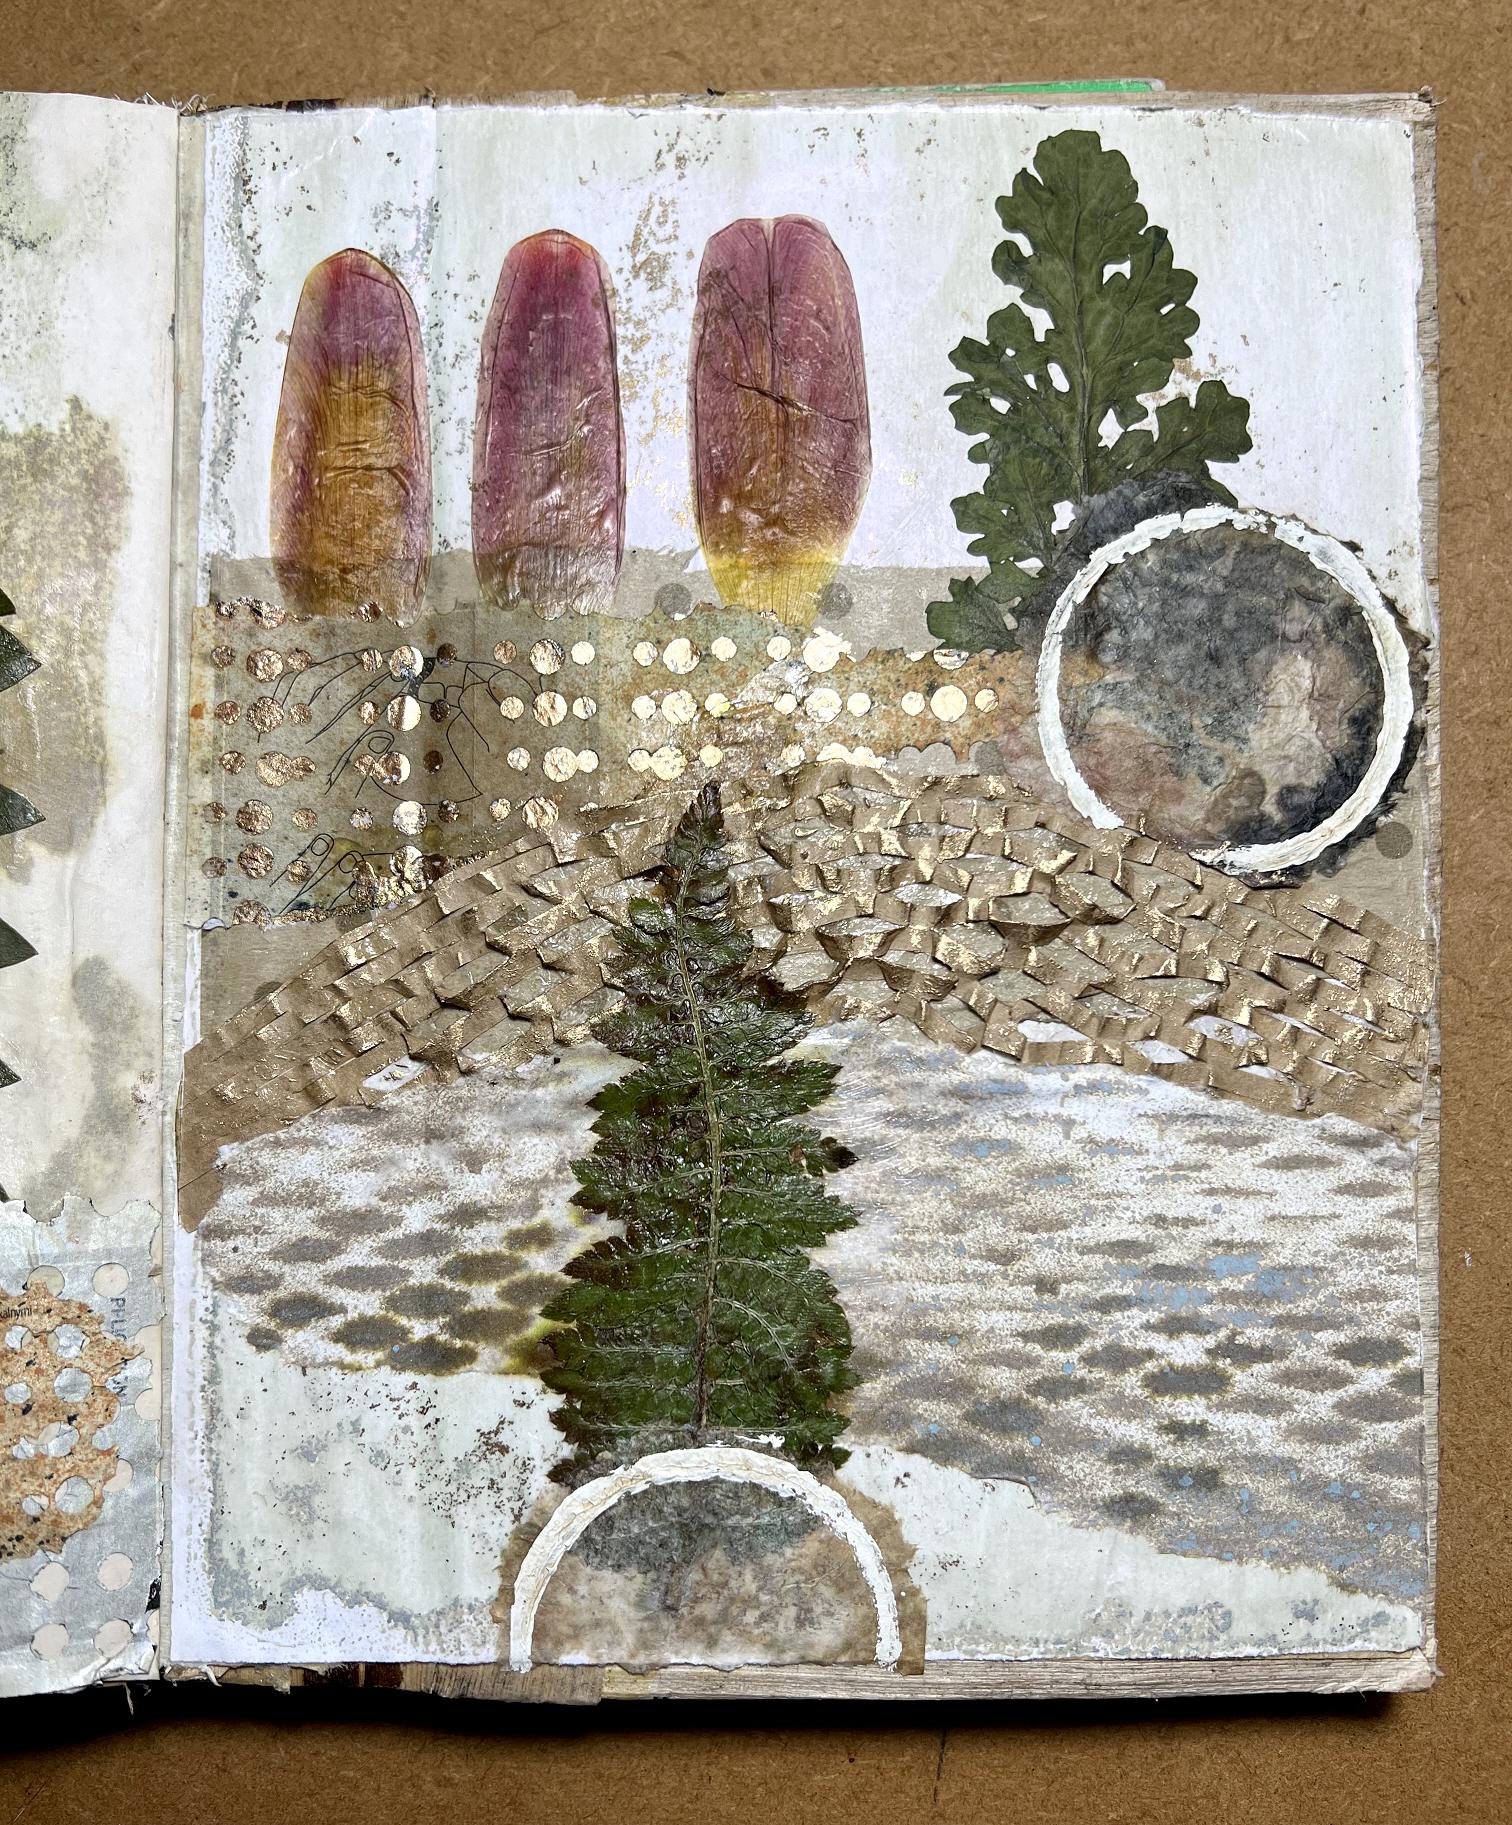
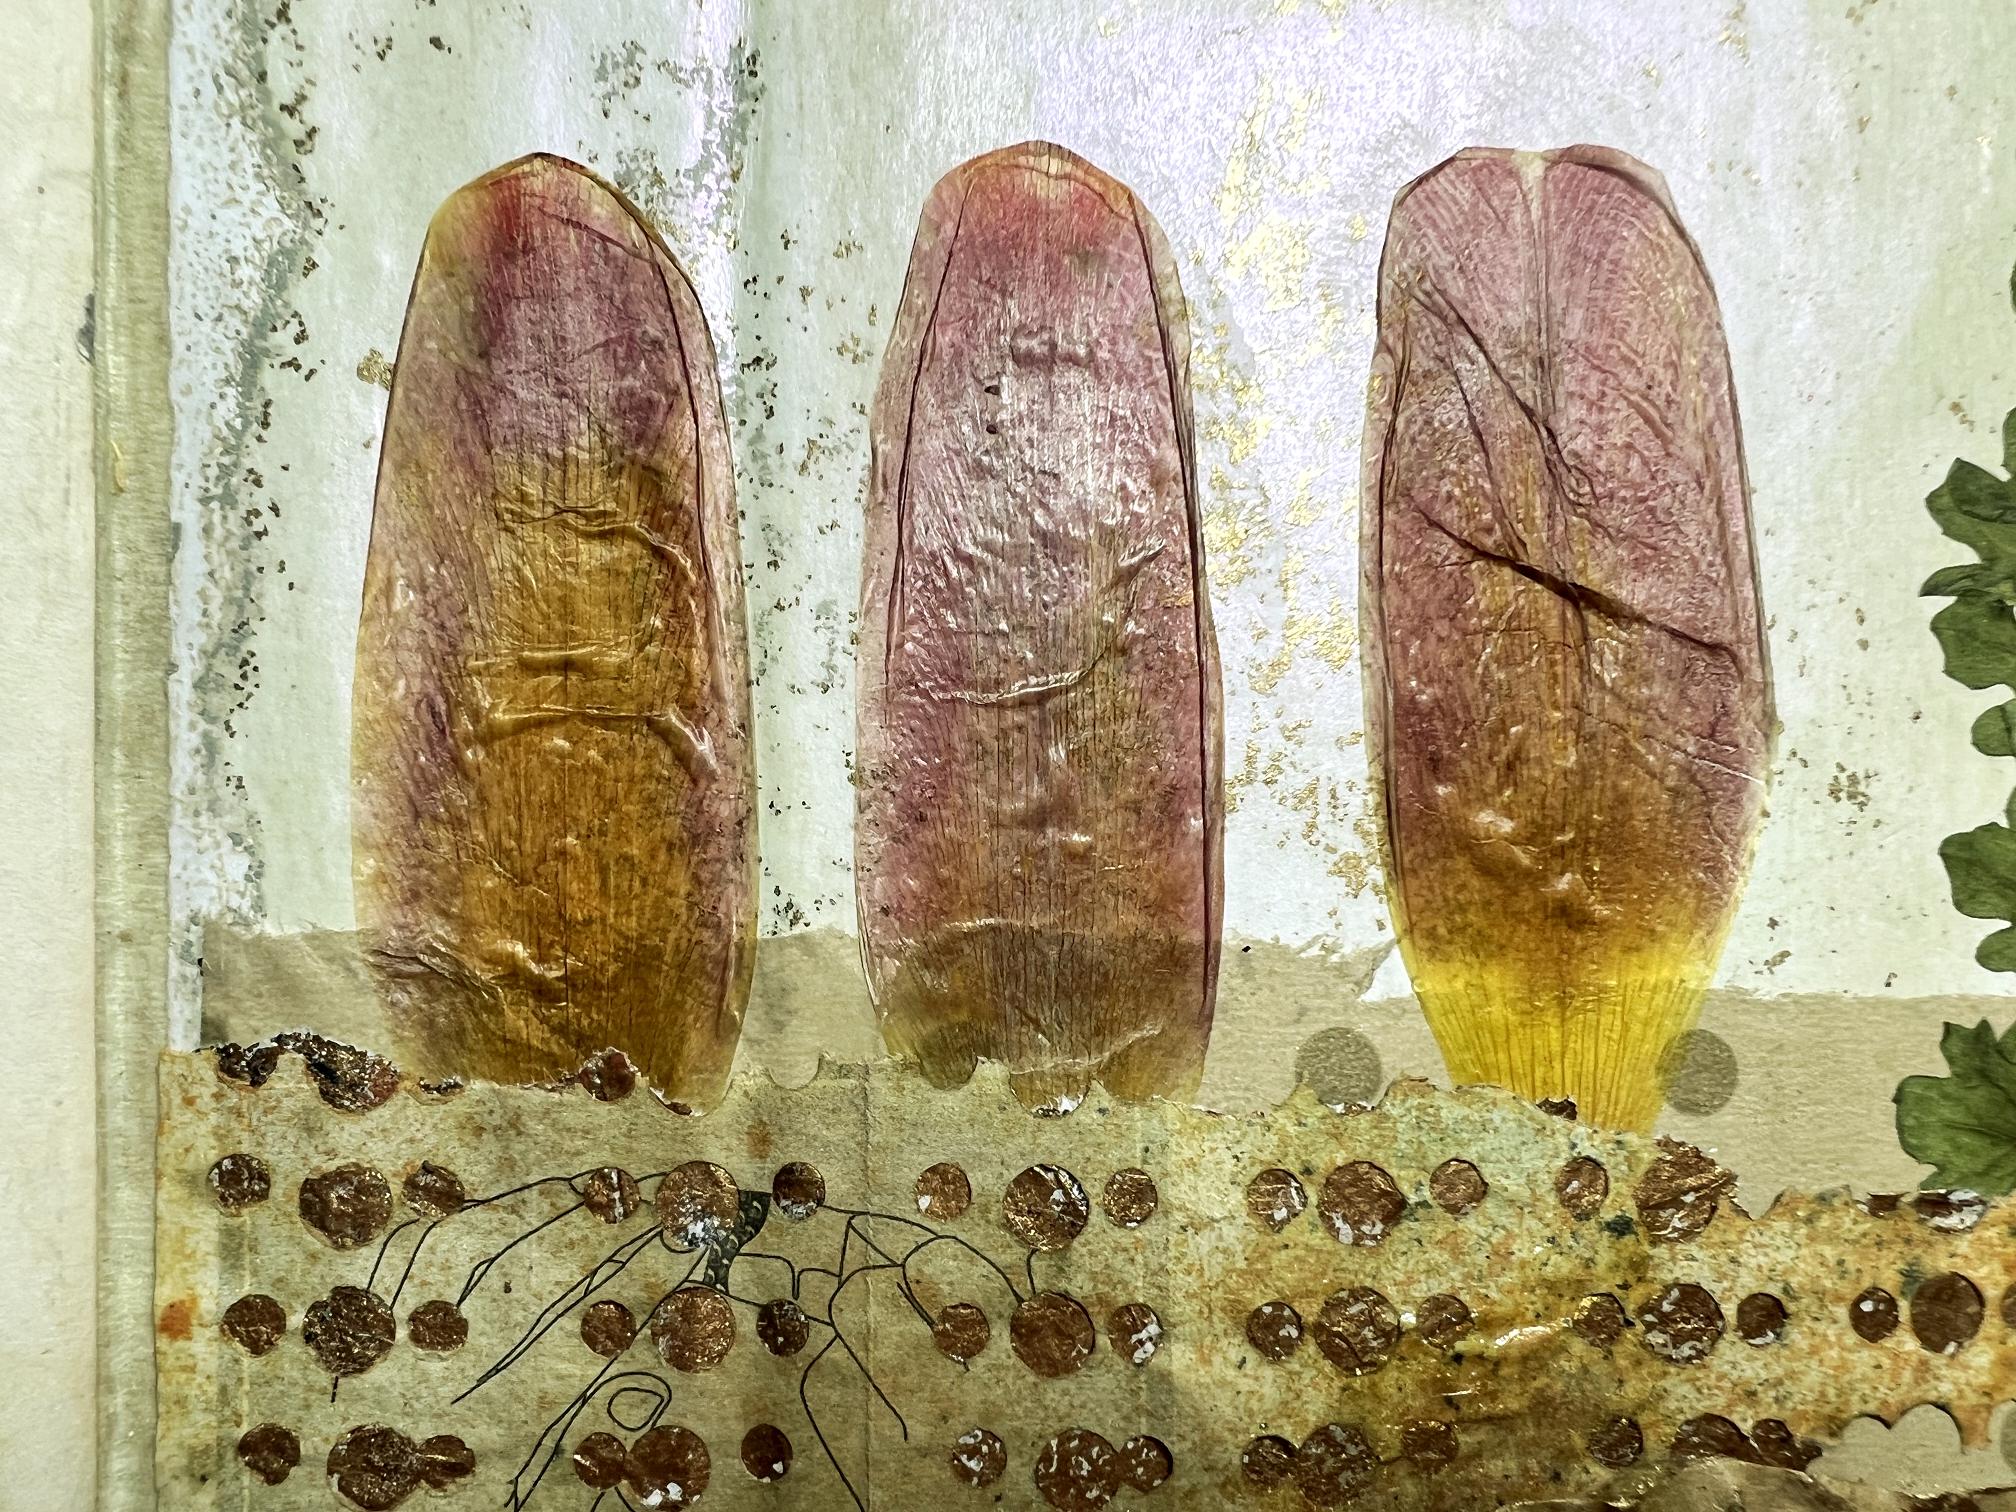
The yellow and pink petals are especially beautiful, and the photos don’t really do them justice, because they are somewhat iridescent. I knew I had to use these on this page. The leaves were very brittle and had to be handled with great care, especially when sticking them down with heavy body gel medium.
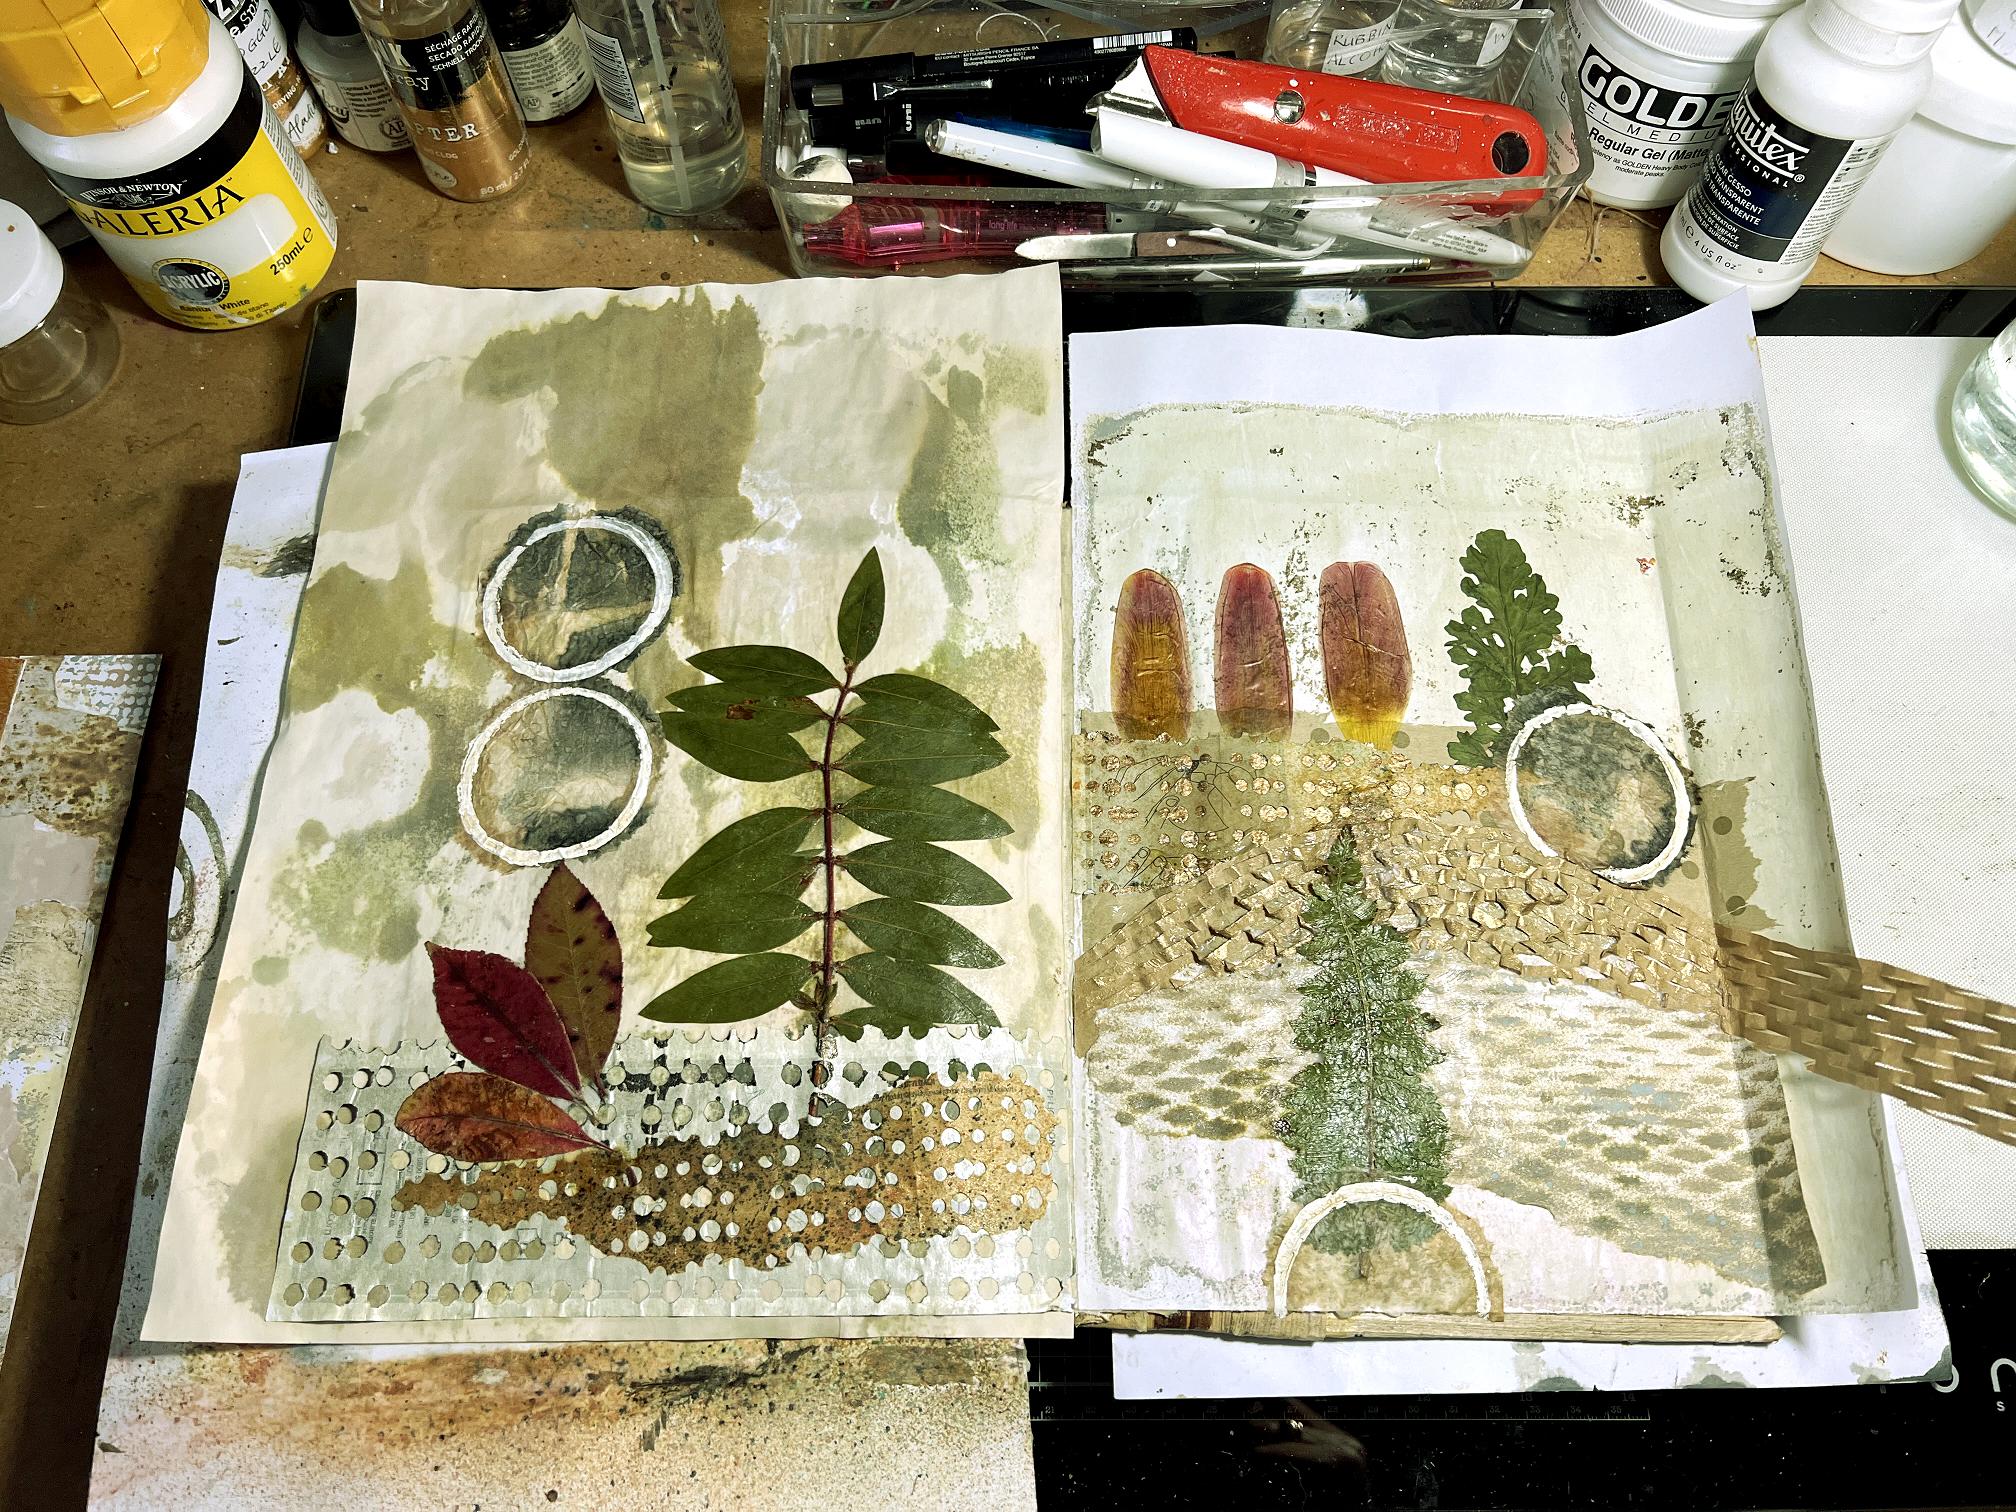
For the backgrounds, I chose two sheets with a greenish hue to them. The one on the left I had considered a bit of a reject. I think it was just mopping up Distress Spray Stains or something – I can’t actually remember how I did this one. I thought it would go well with the leaves.
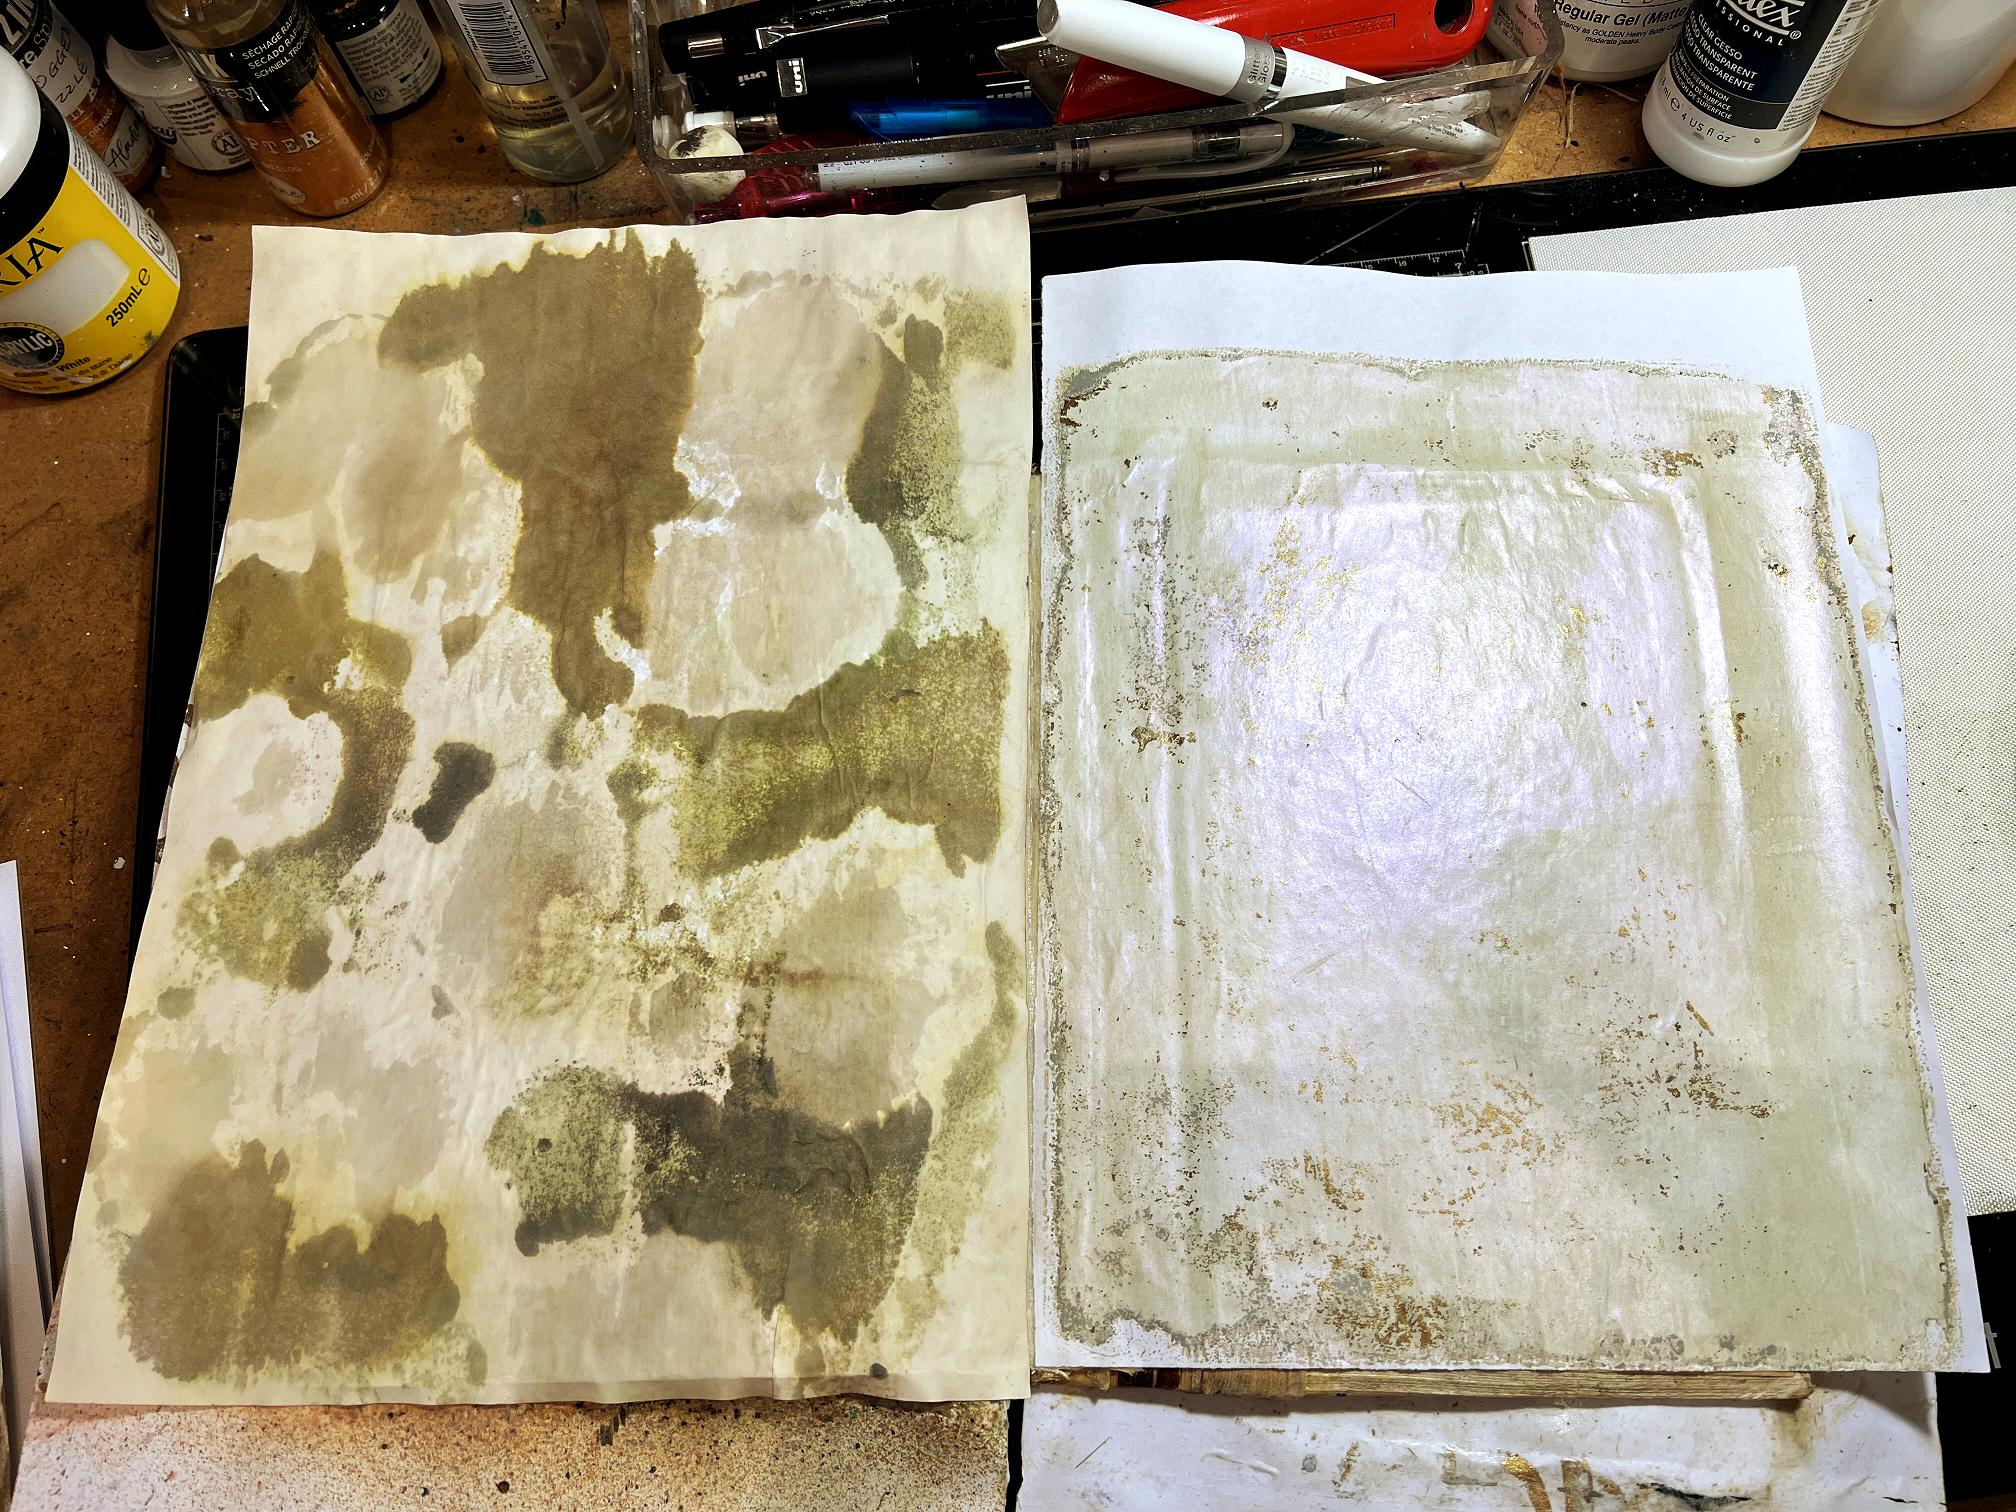
The background on the right is a gel print, probably to clean the plate. It has a gorgeous iridescent sheen which fortunately does show up a bit on the above photo. I trimmed off the white edges, and was keen to retain the gorgeous grungey corner at bottom left! I was careful not to cover this up as the collaging progressed. There are other marks on it where it has picked up residue from the gel plate.
At this stage the papers overhang the edges of the book and would get trimmed off at the end when everything was dry.
I made a quick mock-up of the various elements, to decide where I wanted to place everything. I took the photo as a reference, really.
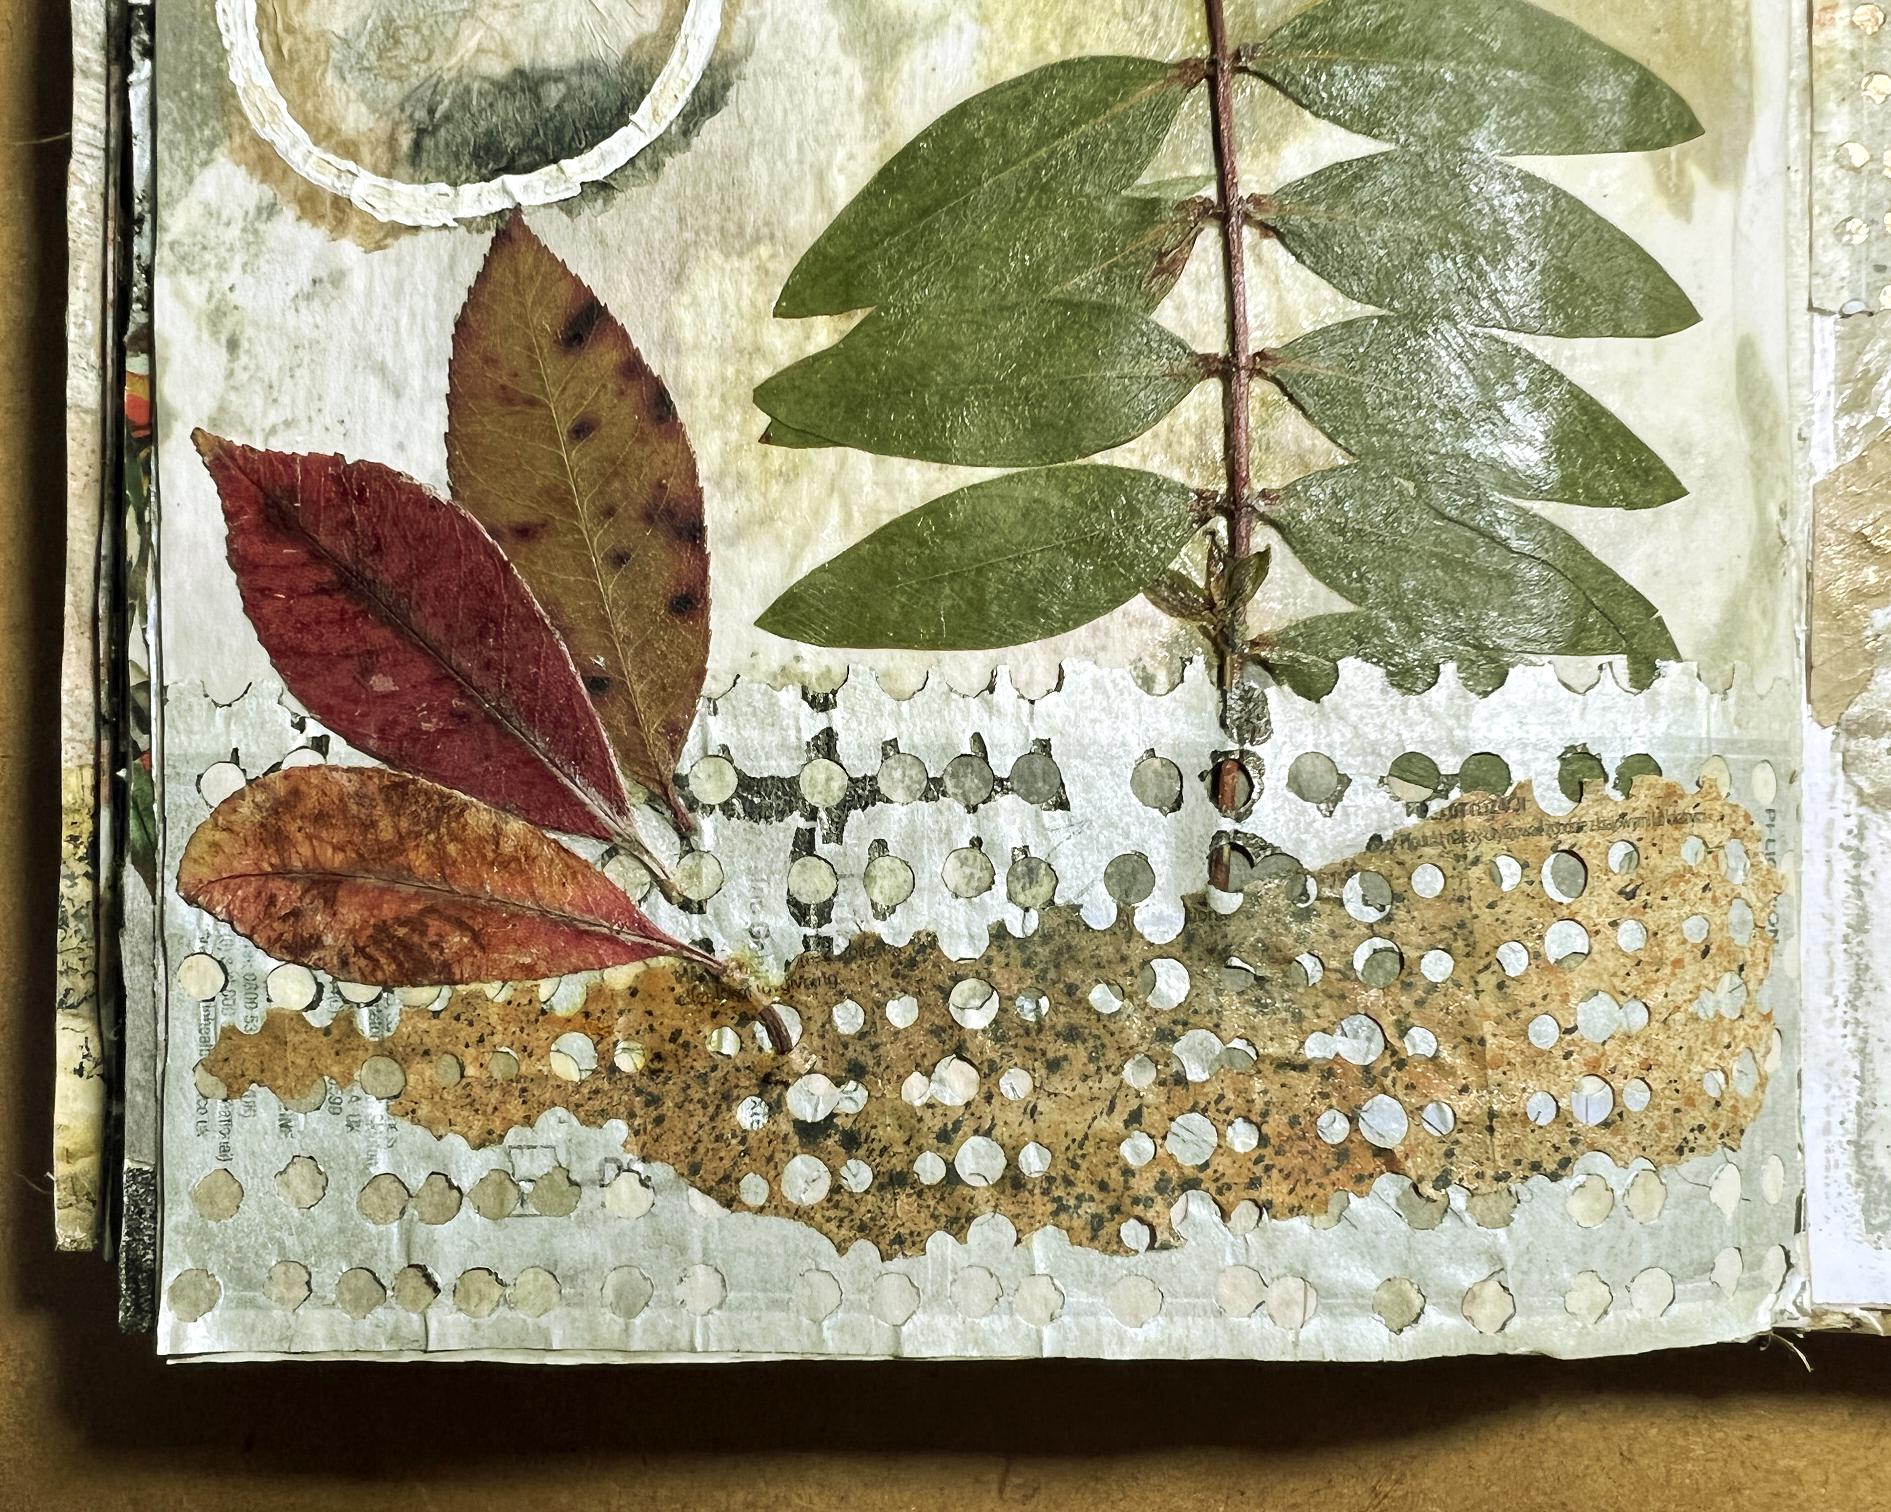
The brown spotty tissue paper was a sheet from a set of small pieces of tissue paper with different designs, that I bought some time ago on Ebay and hadn’t yet broken into.
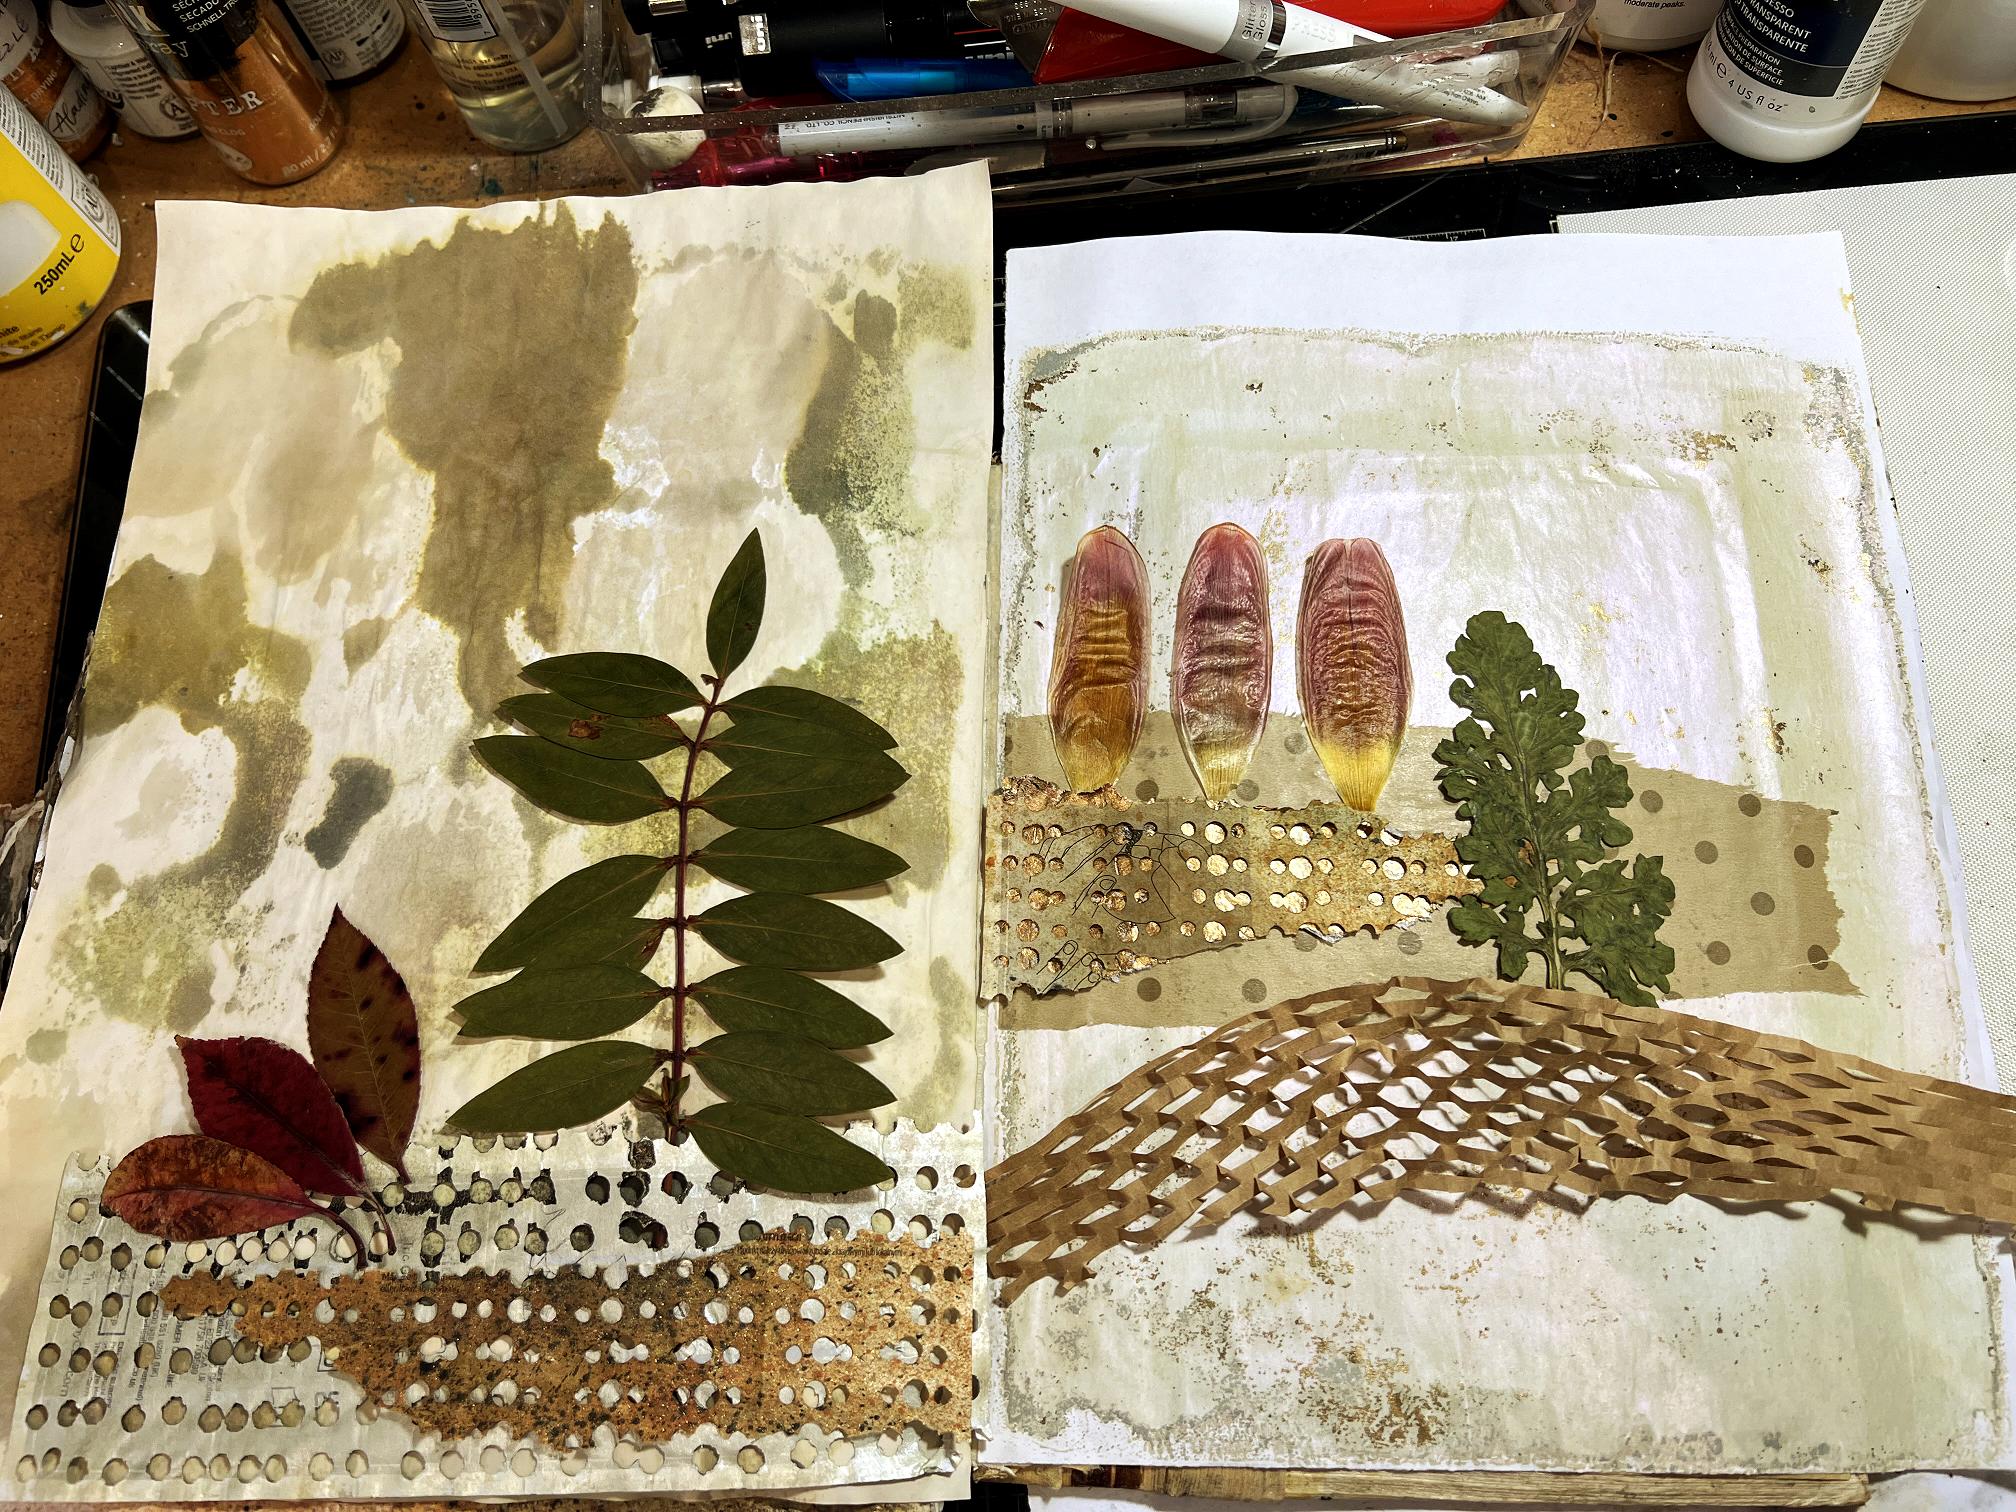
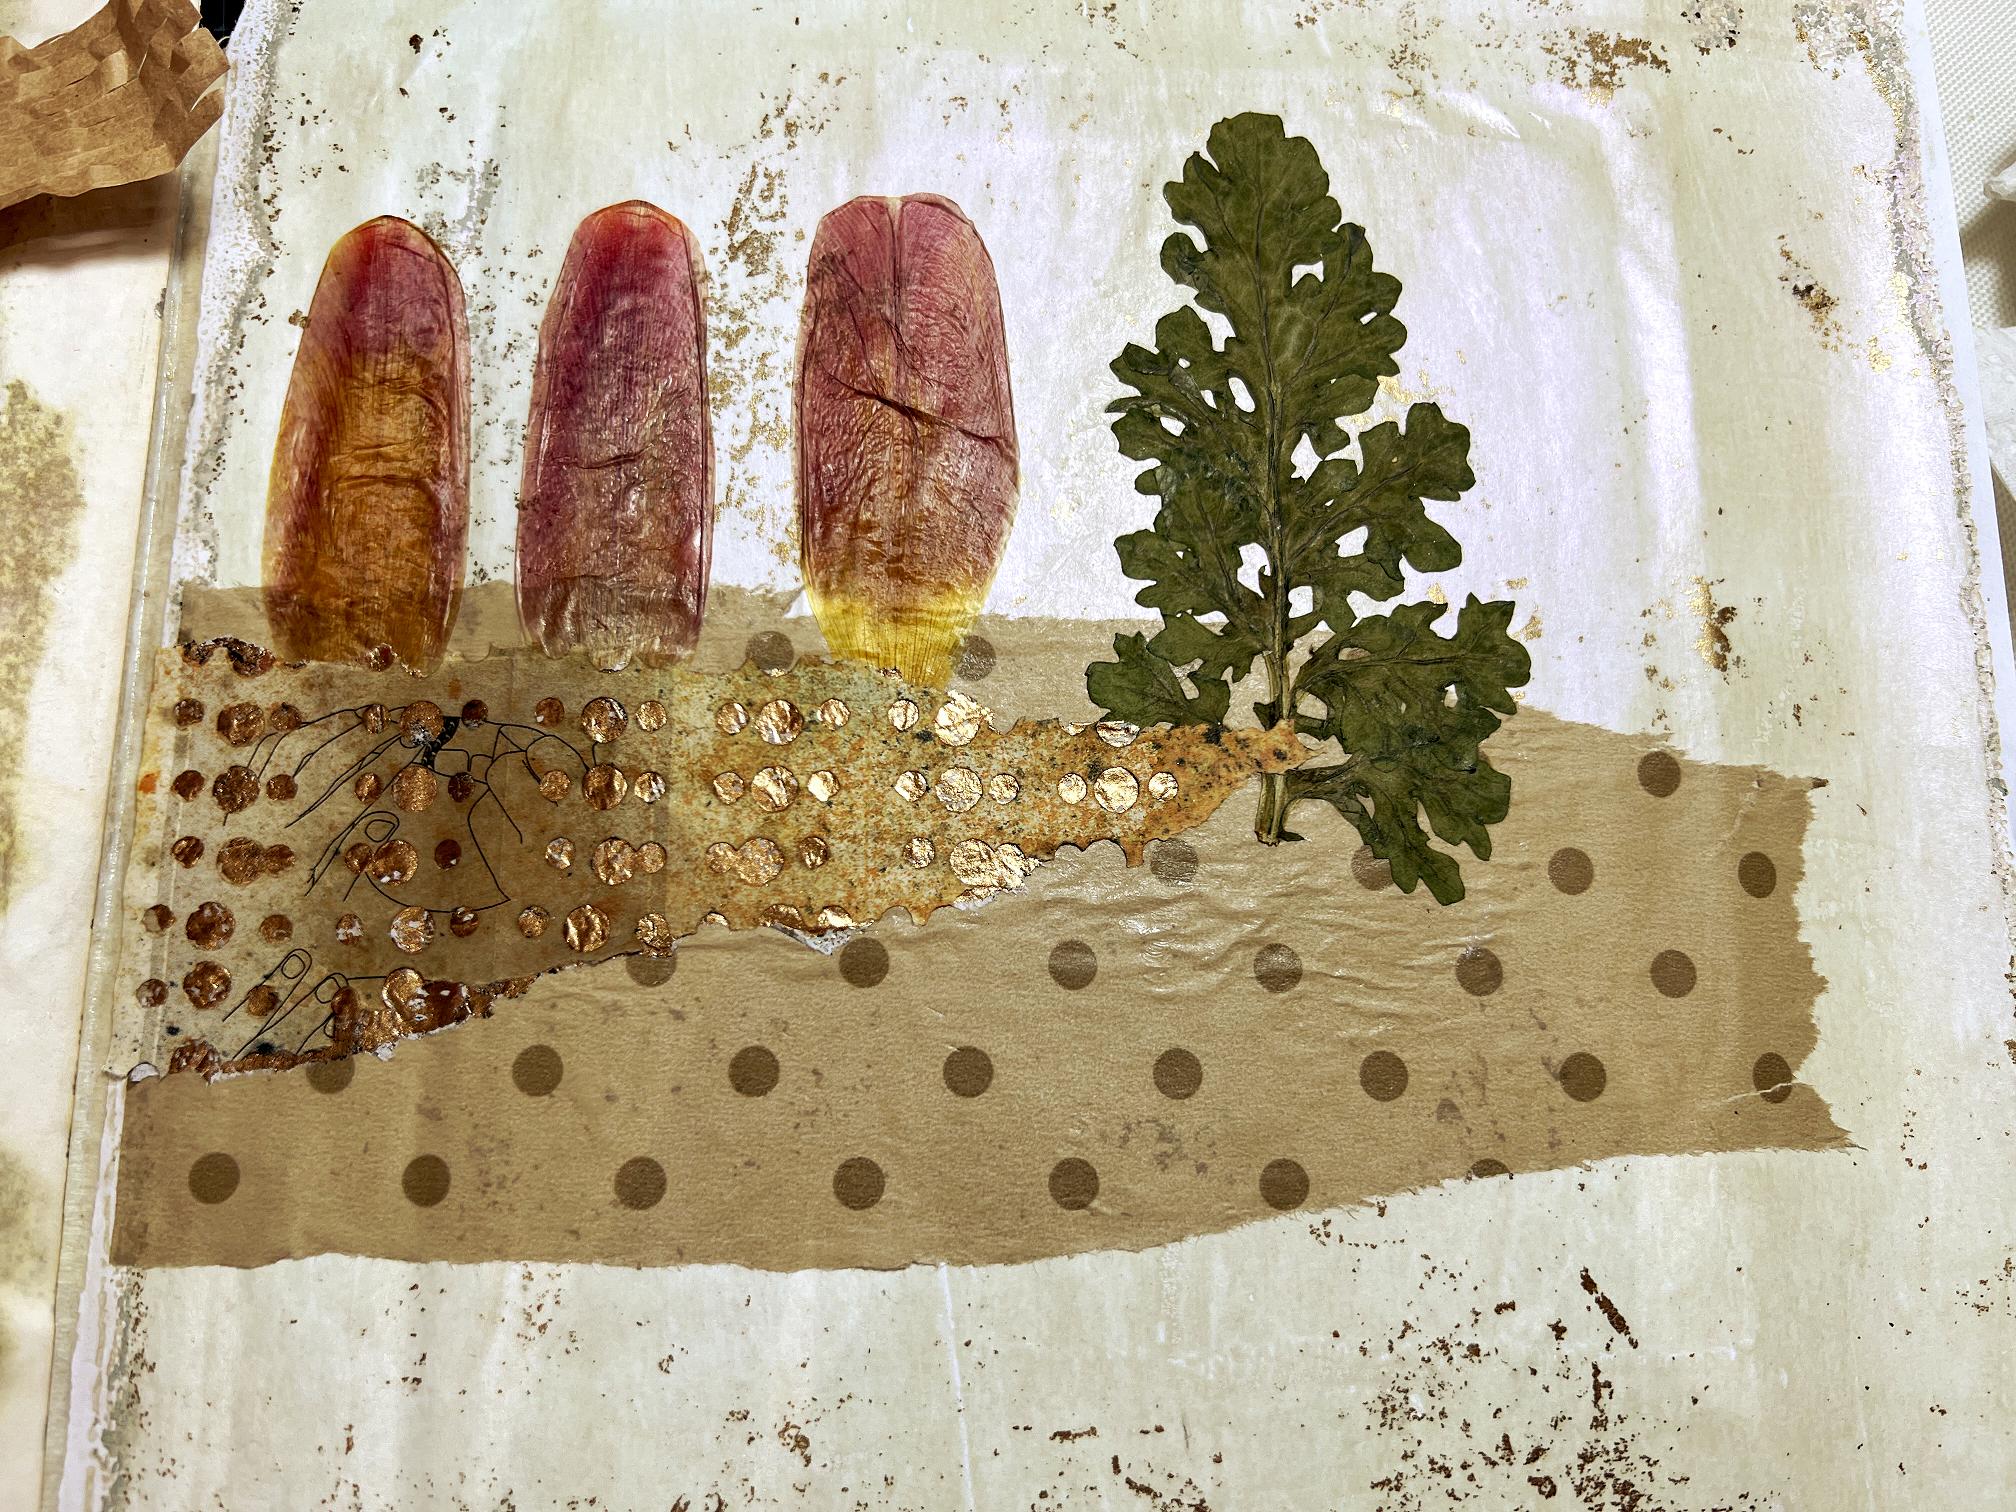
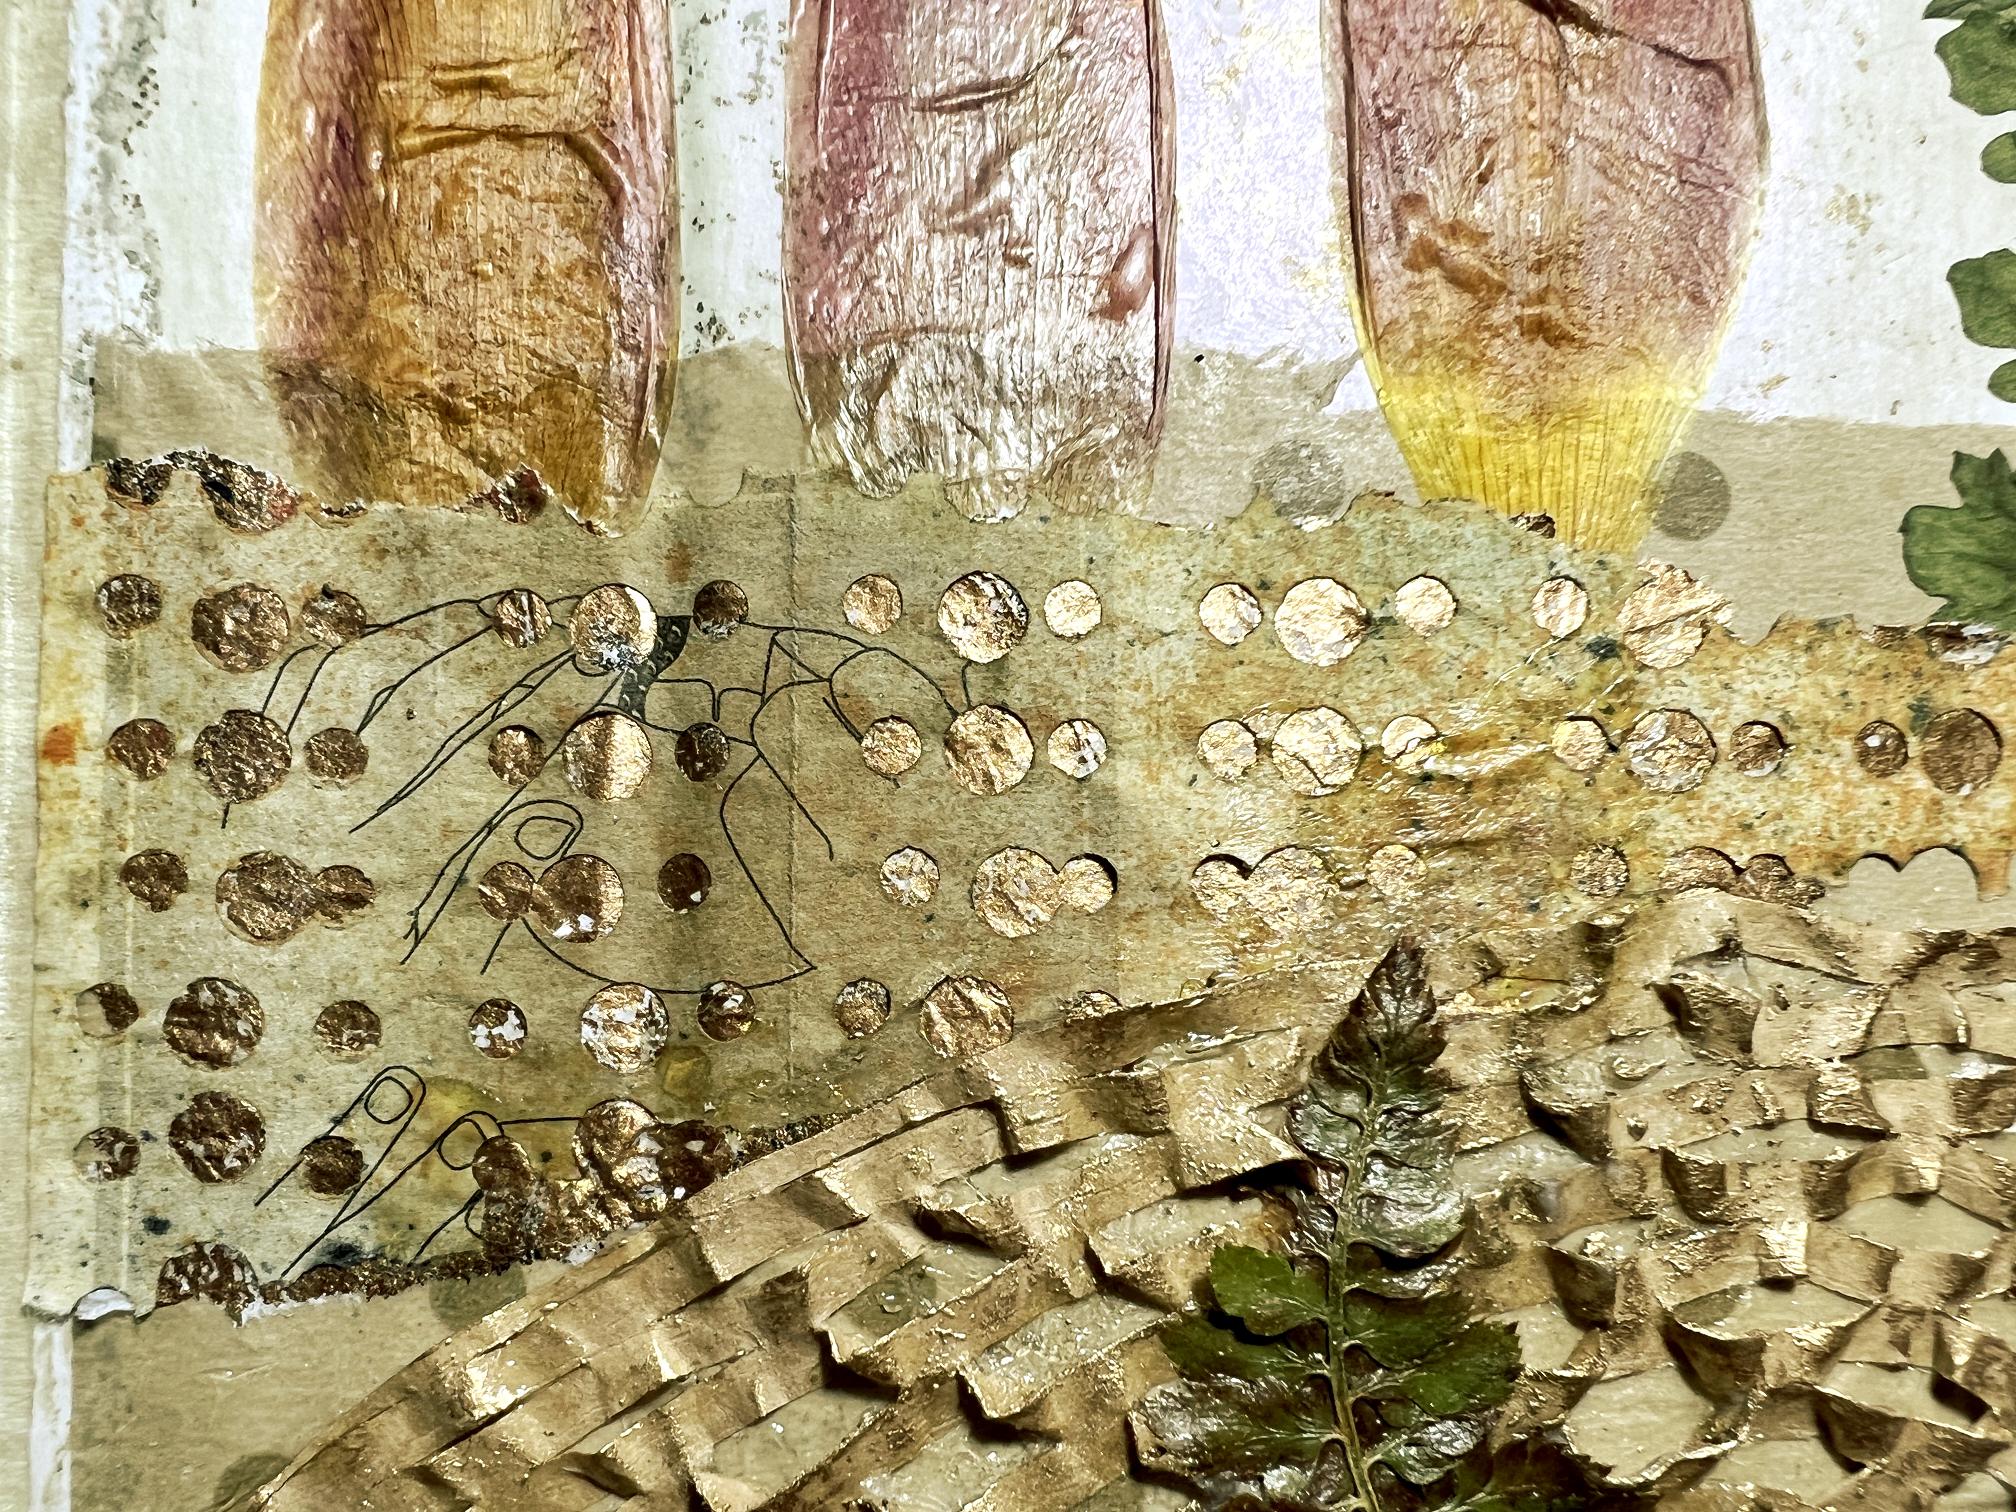
As you can see, I have made extensive use of my pierced papers in this project. See previous posts on how I made these, by using the Cropadile to punch rows of holes in parallel lines in the leaflets from medication packs – these come already concertina-folded! I laid down a piece of gold gel printed tissue under the top piece of pierced paper on the right-hand page, so that it would show through the holes.
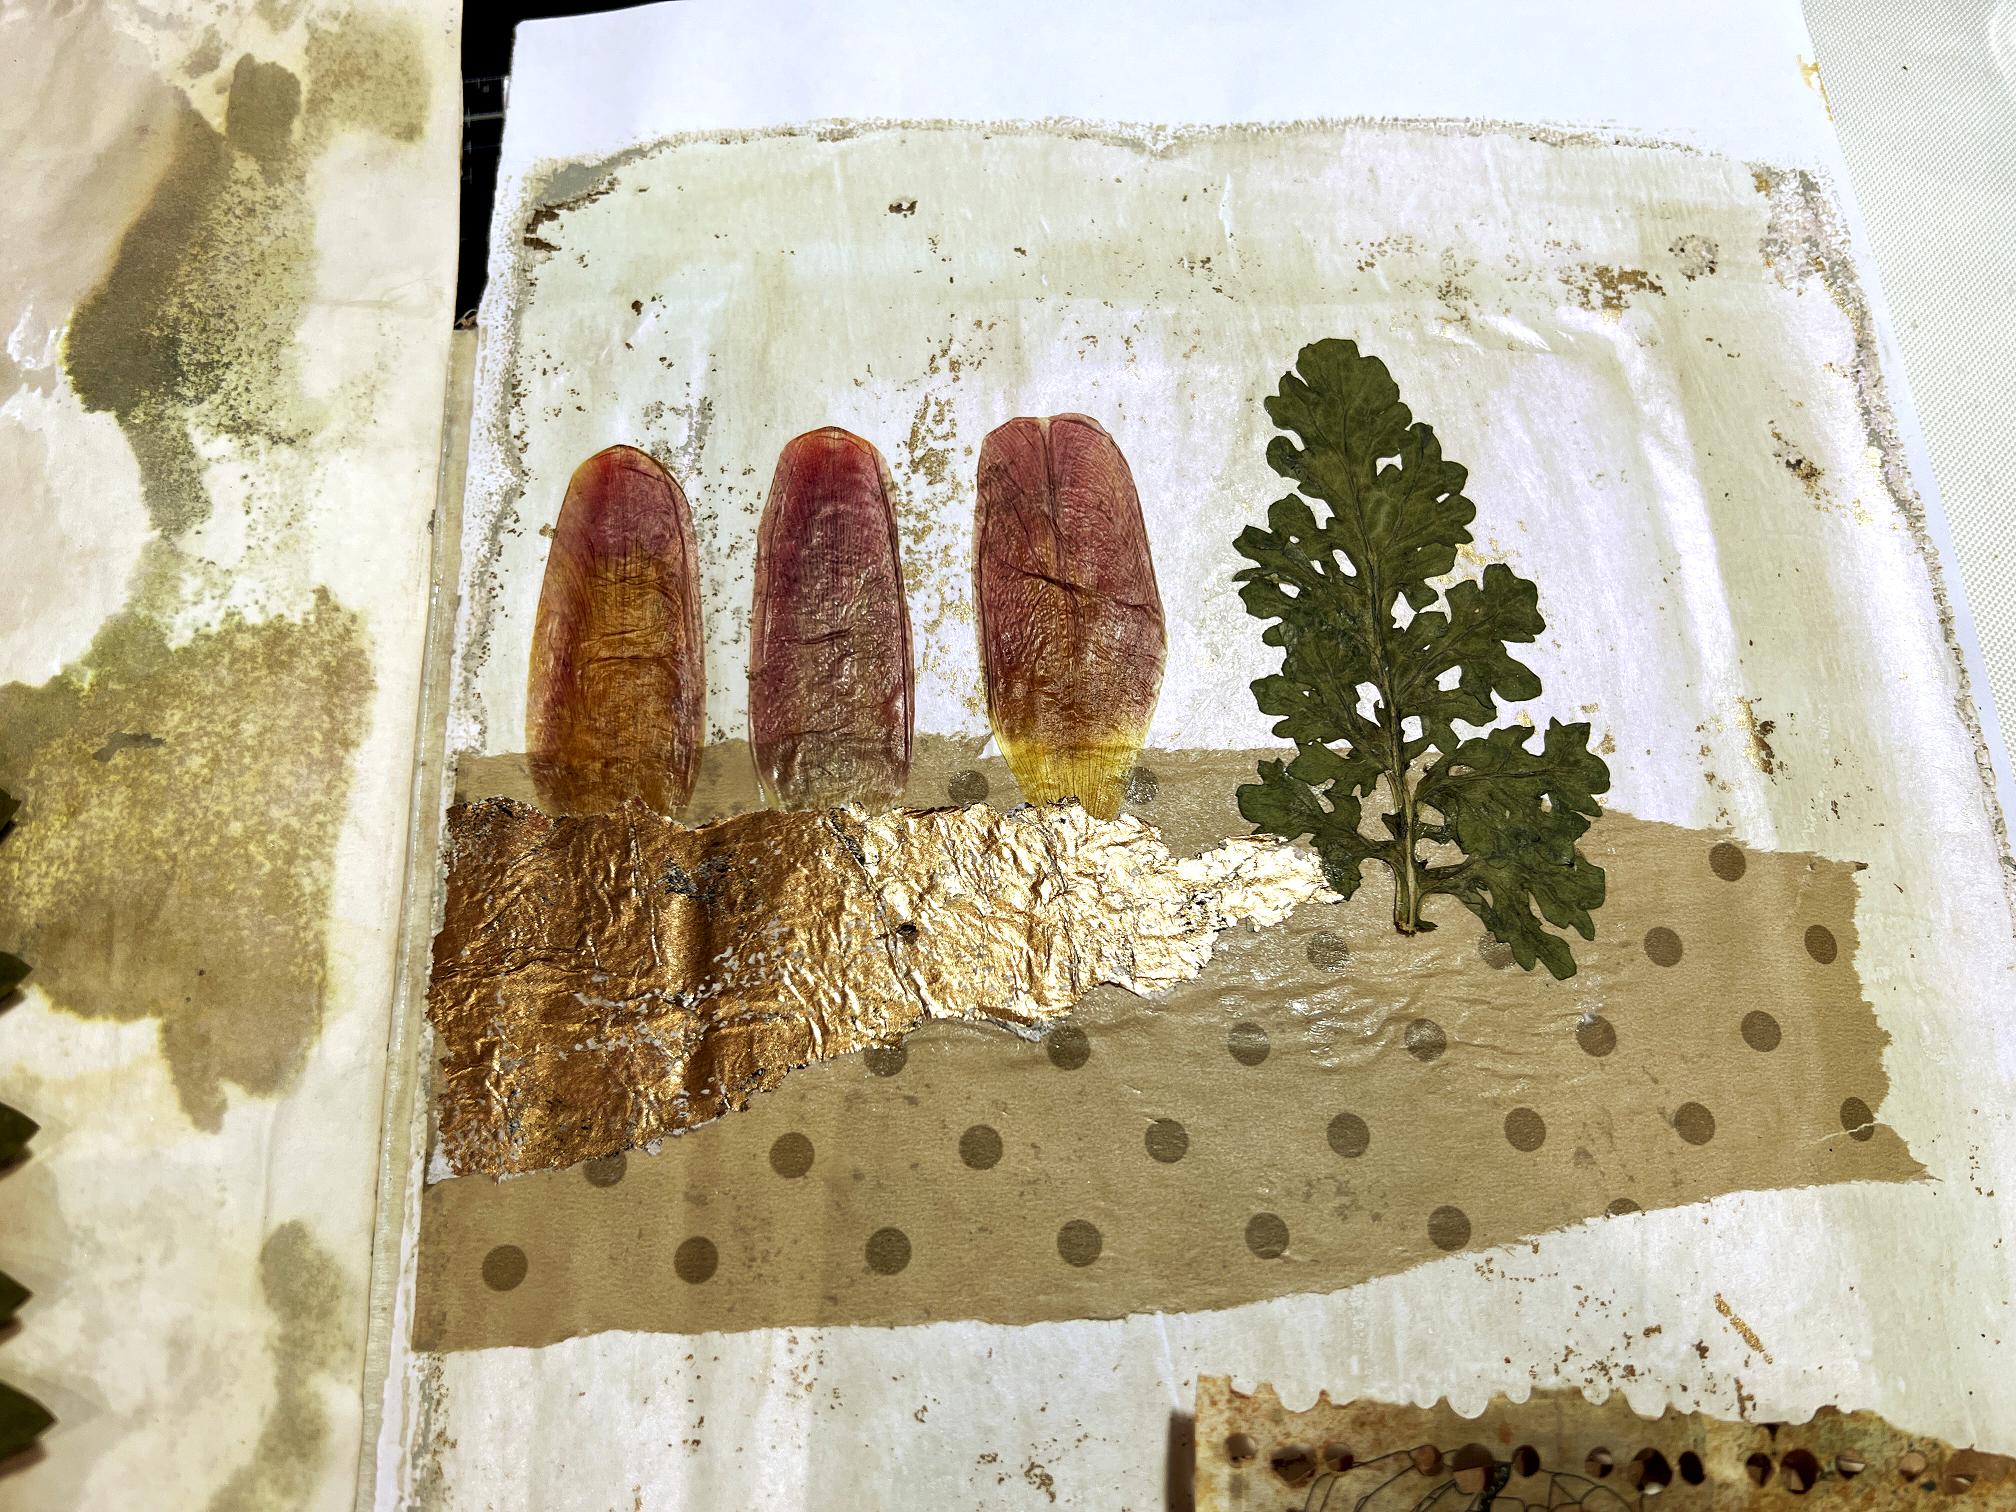
I wanted to create a layered effect, so I stuck down the leaf on the right before adding further elements.
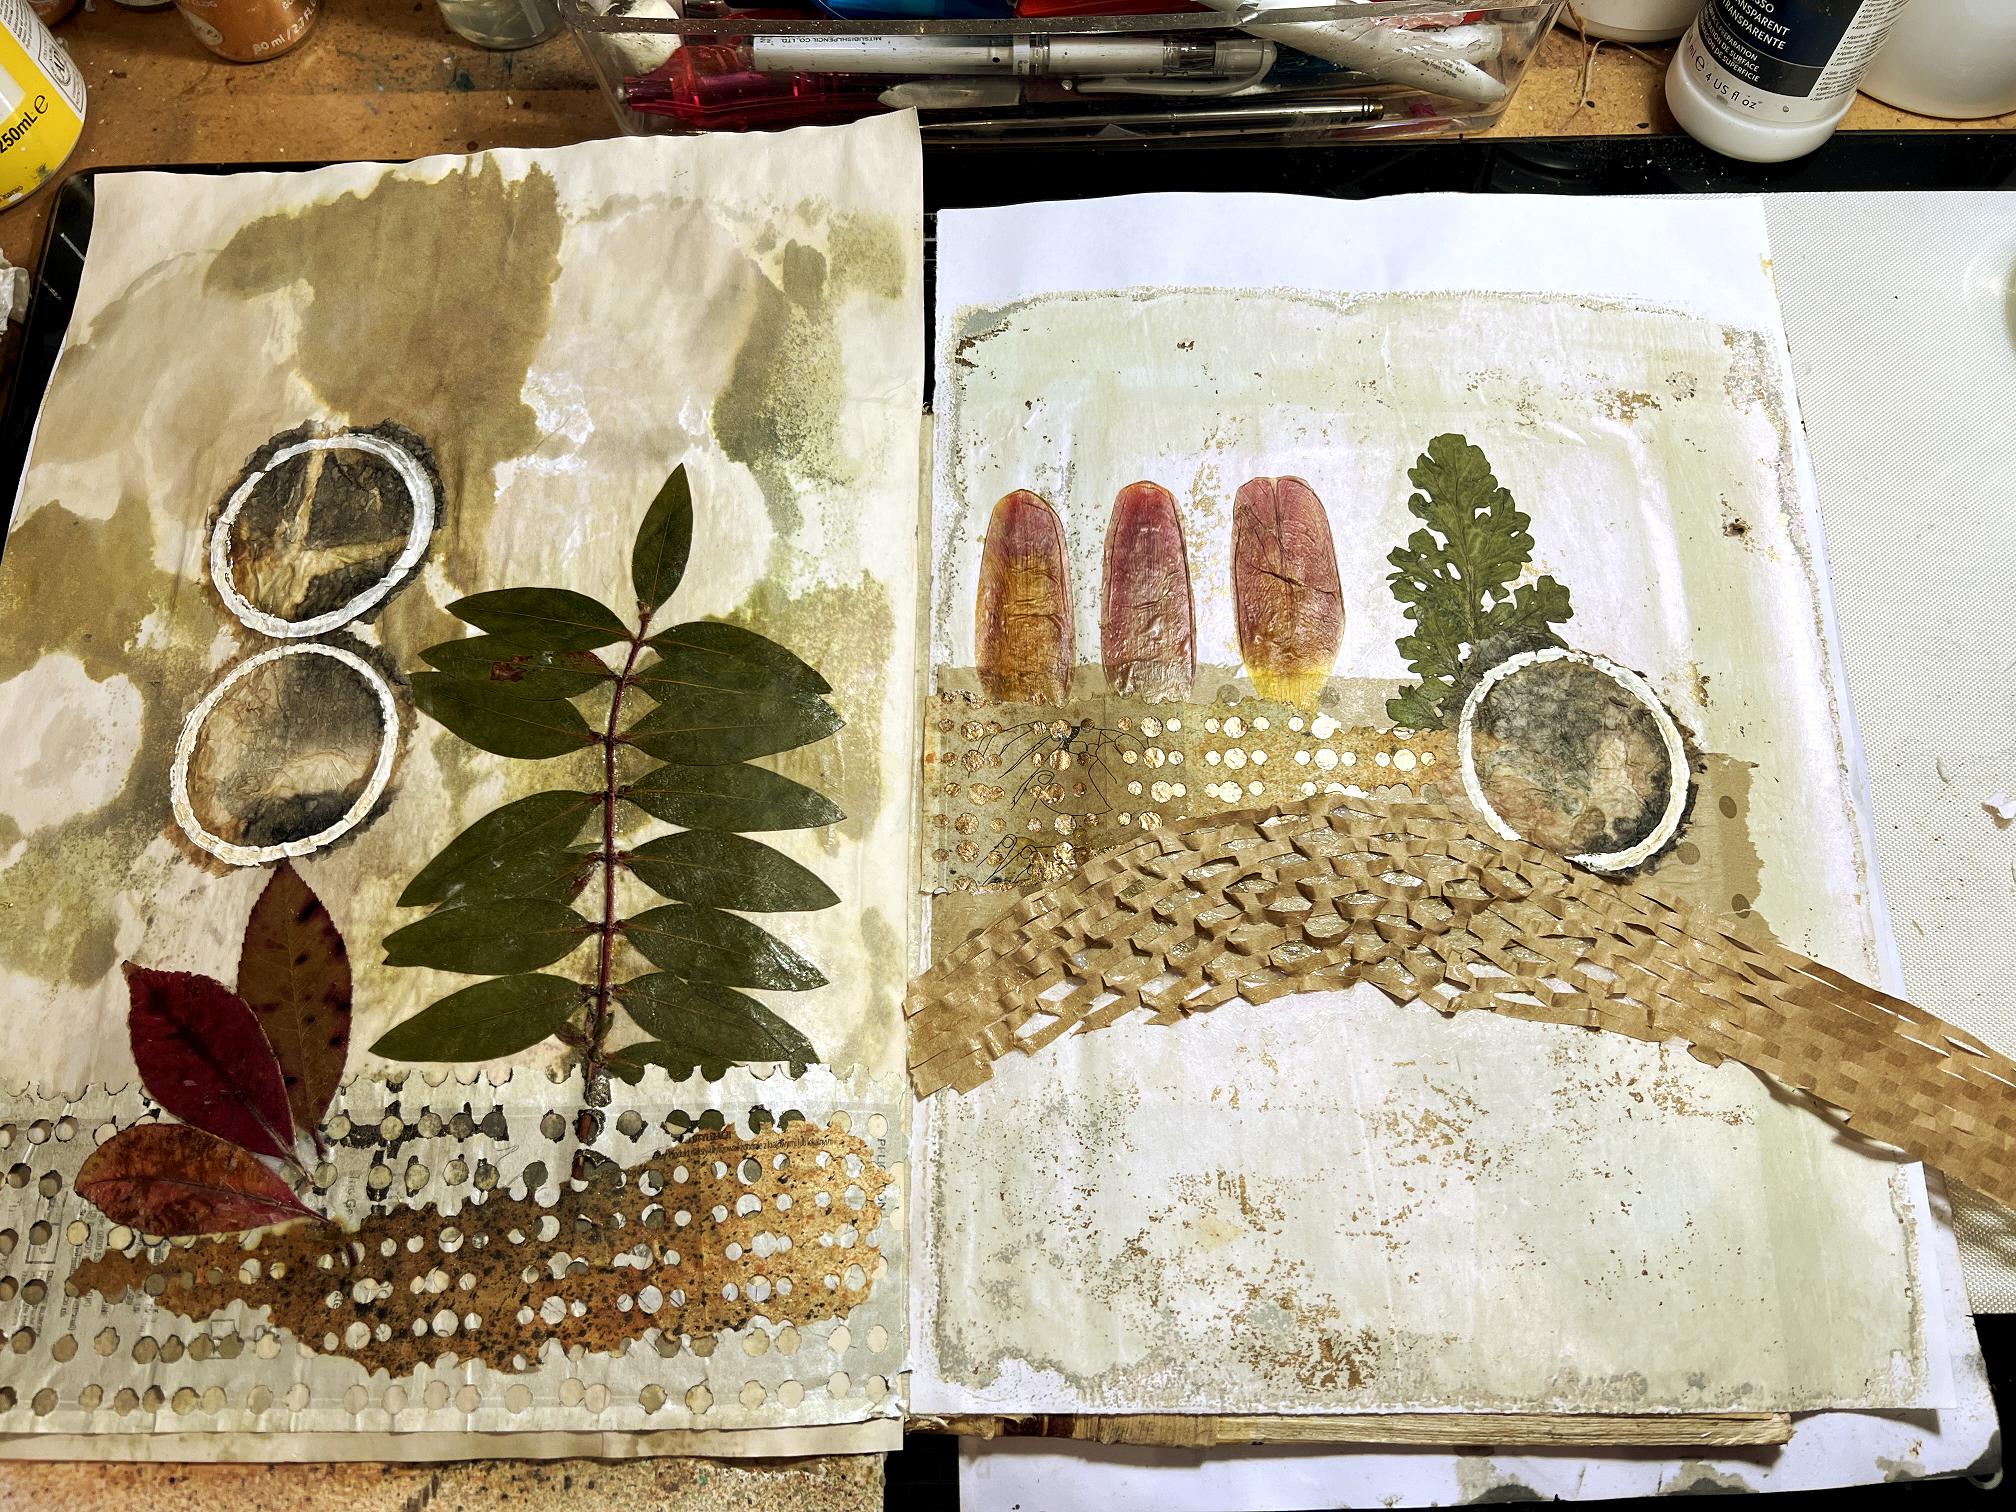
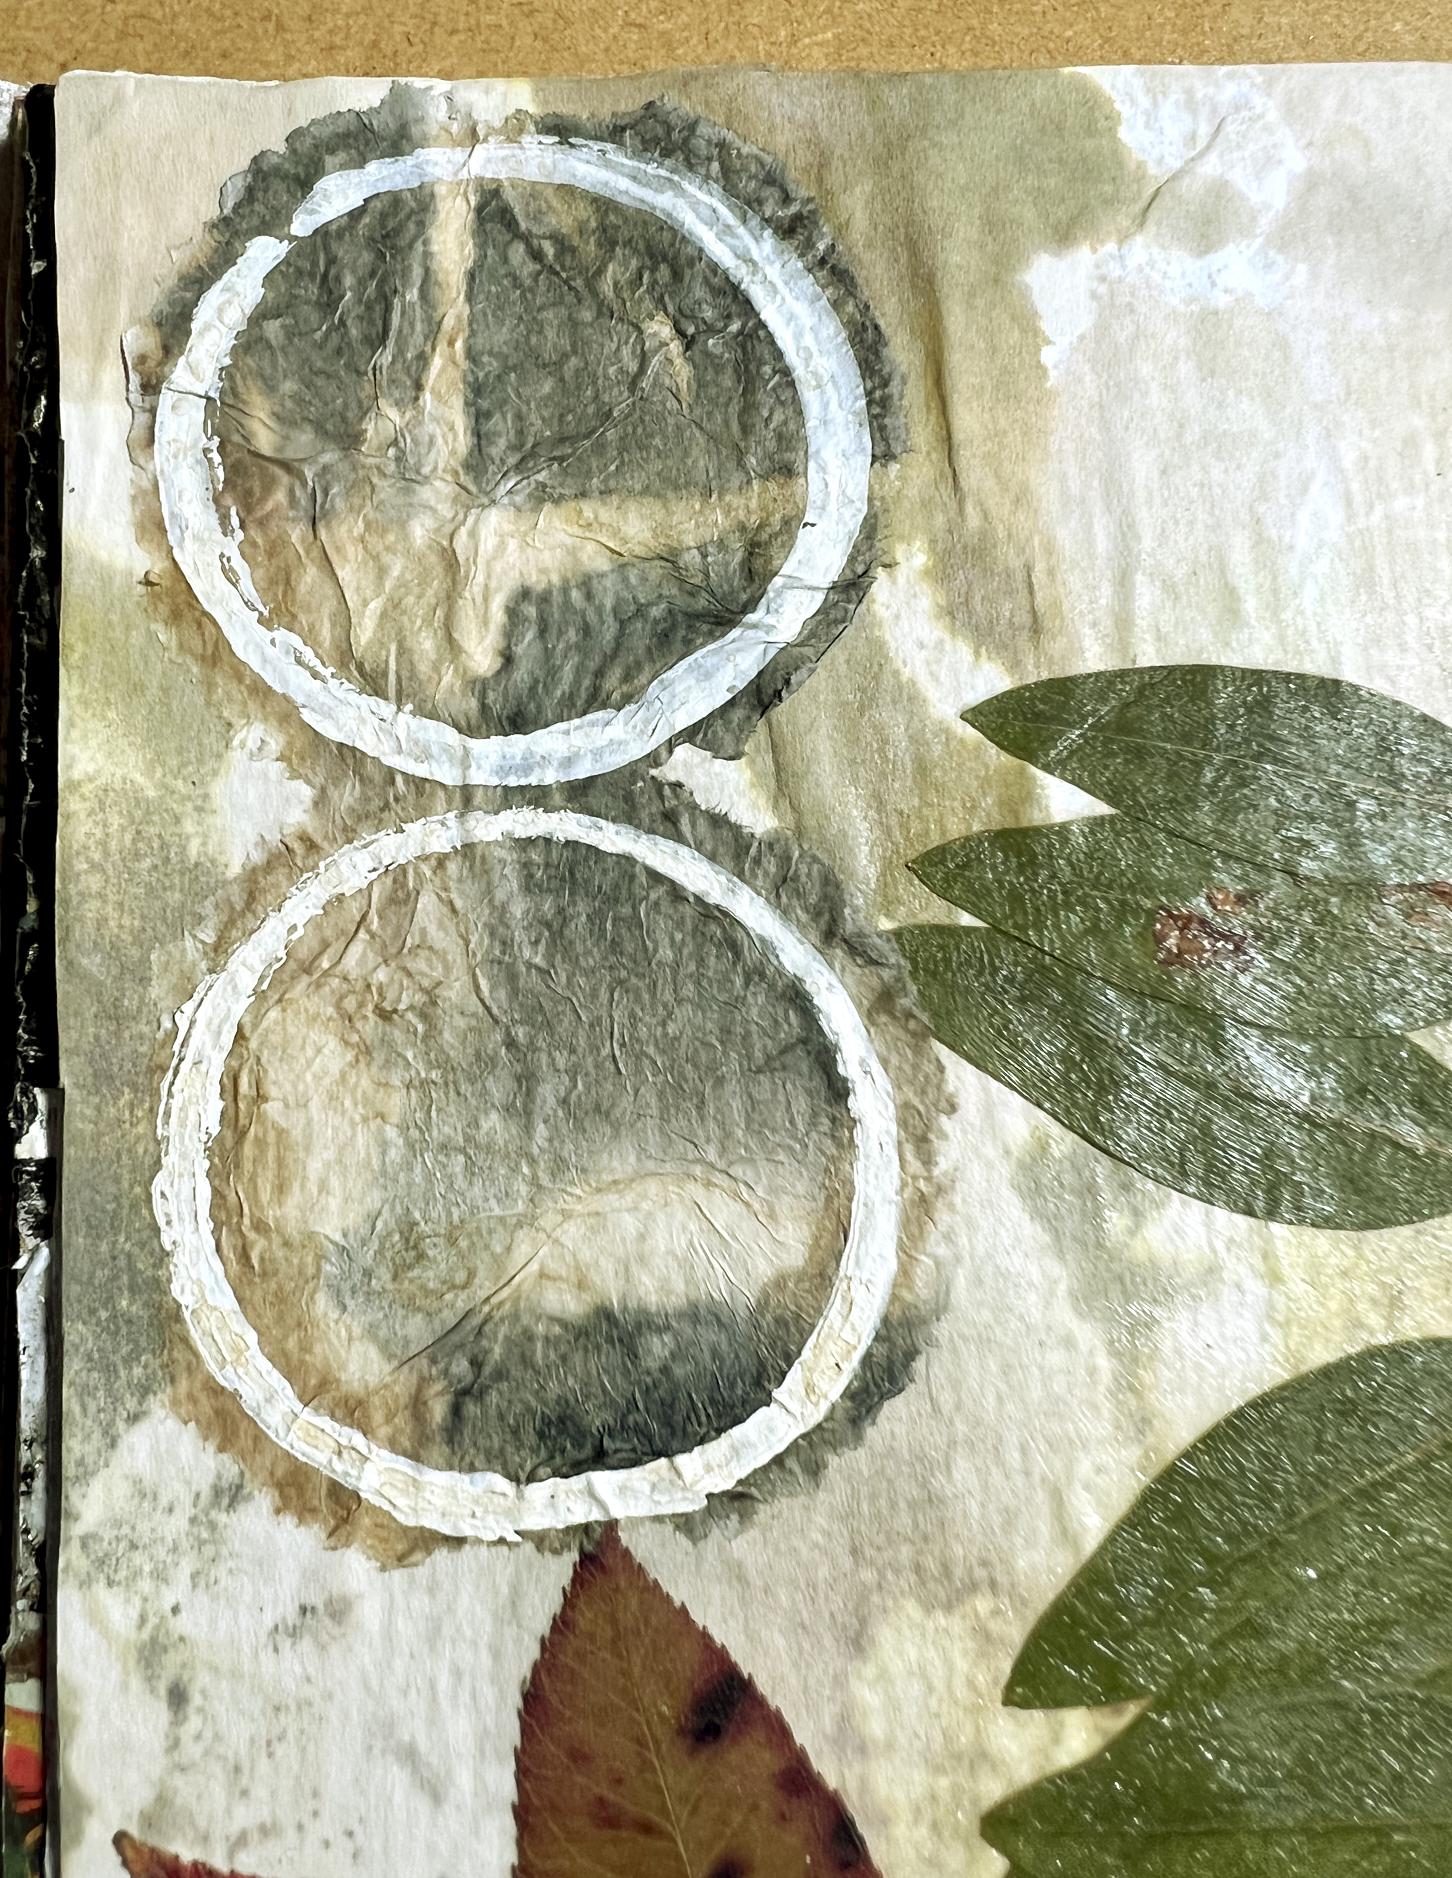
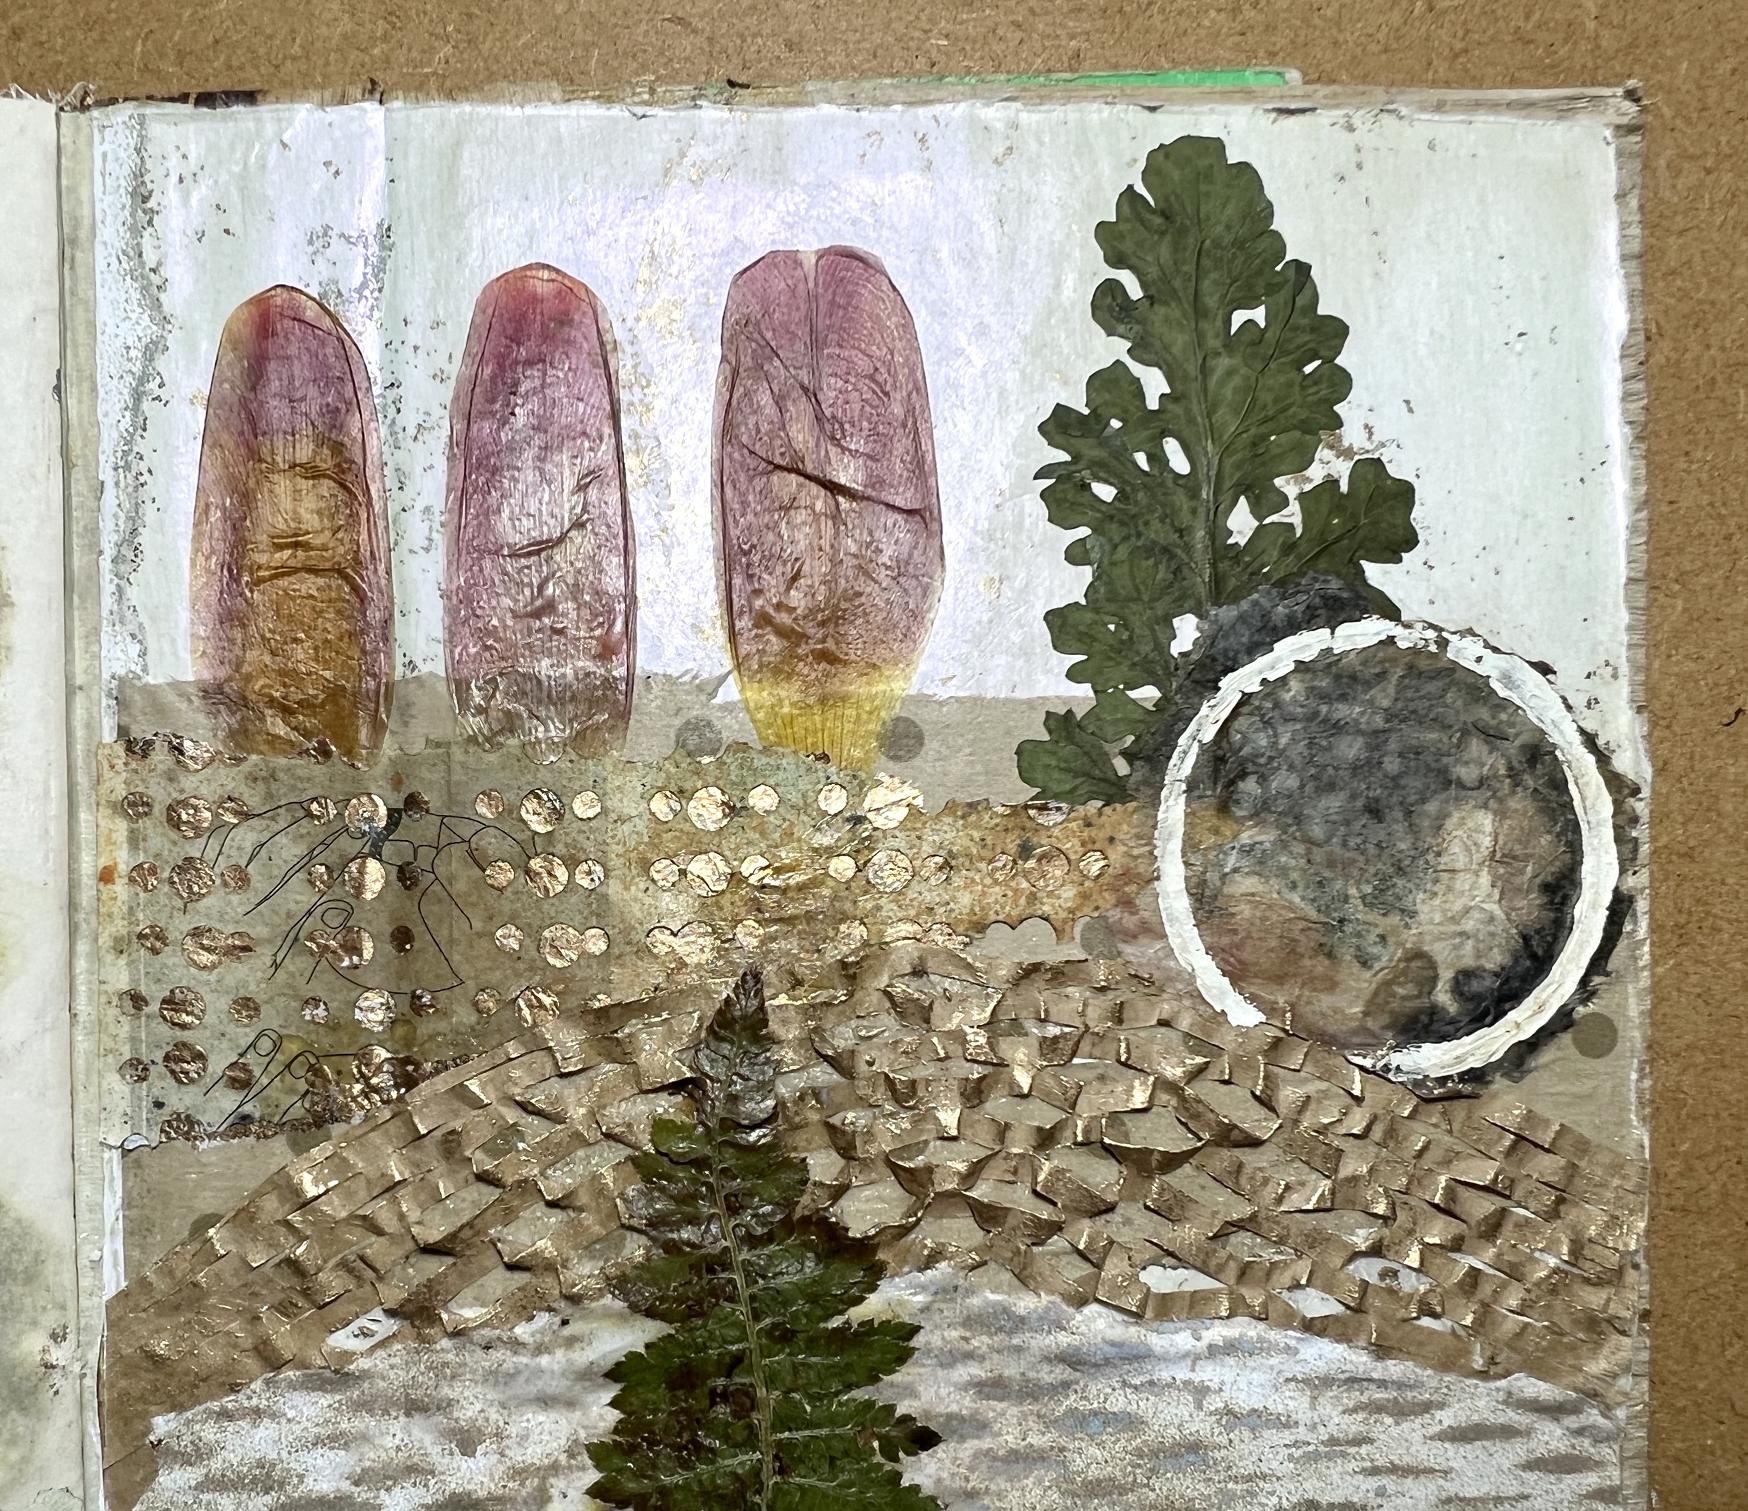
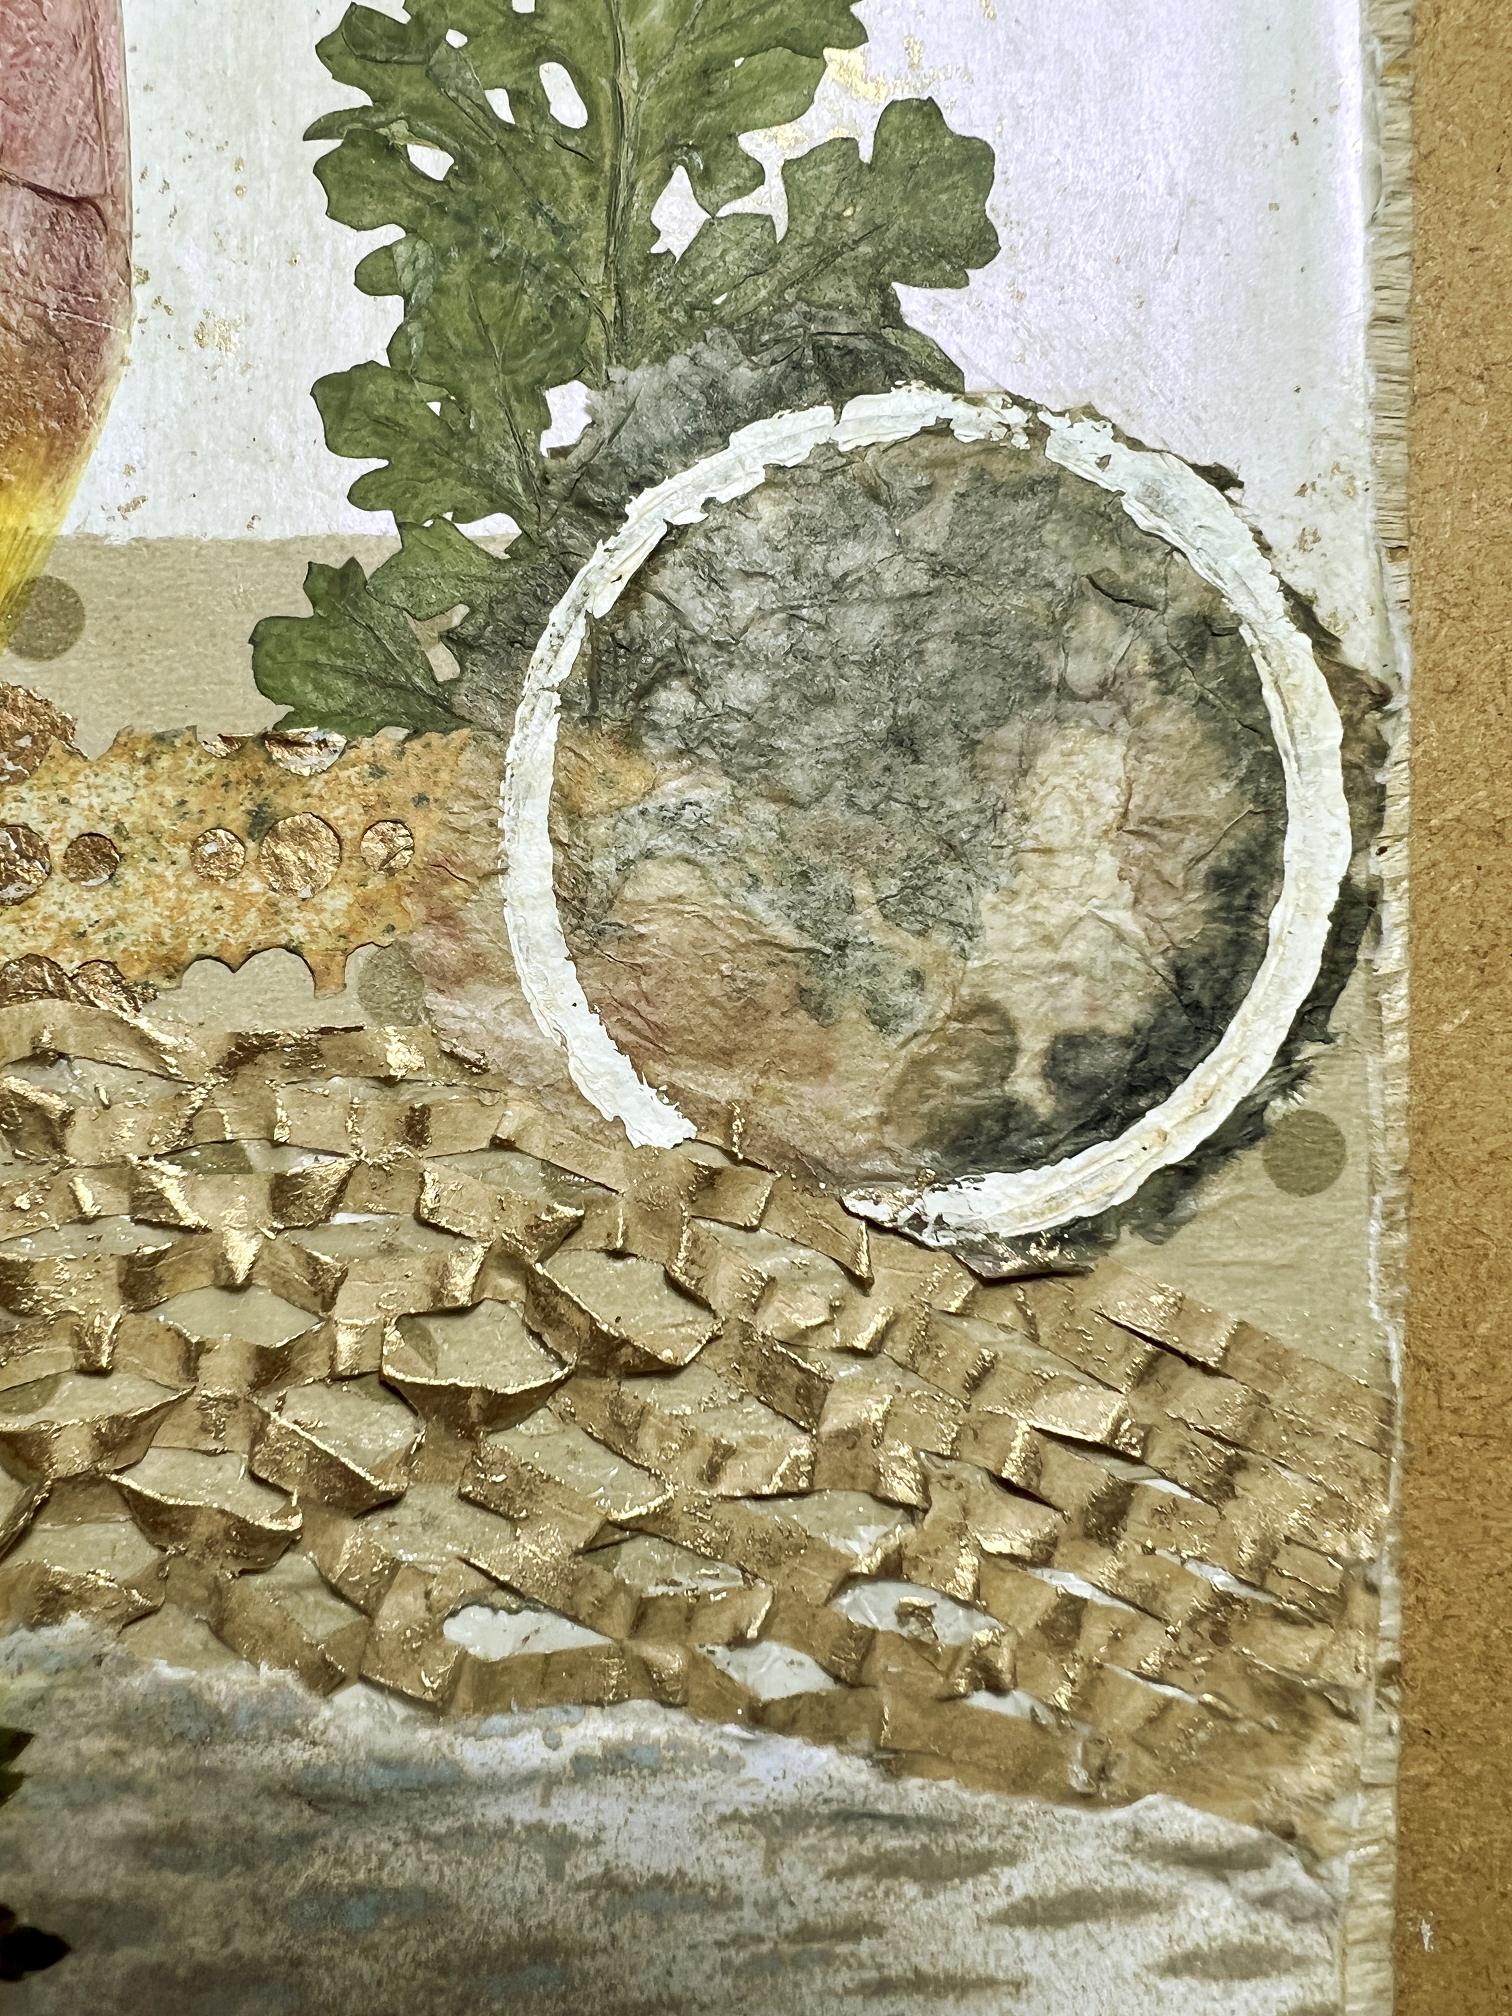
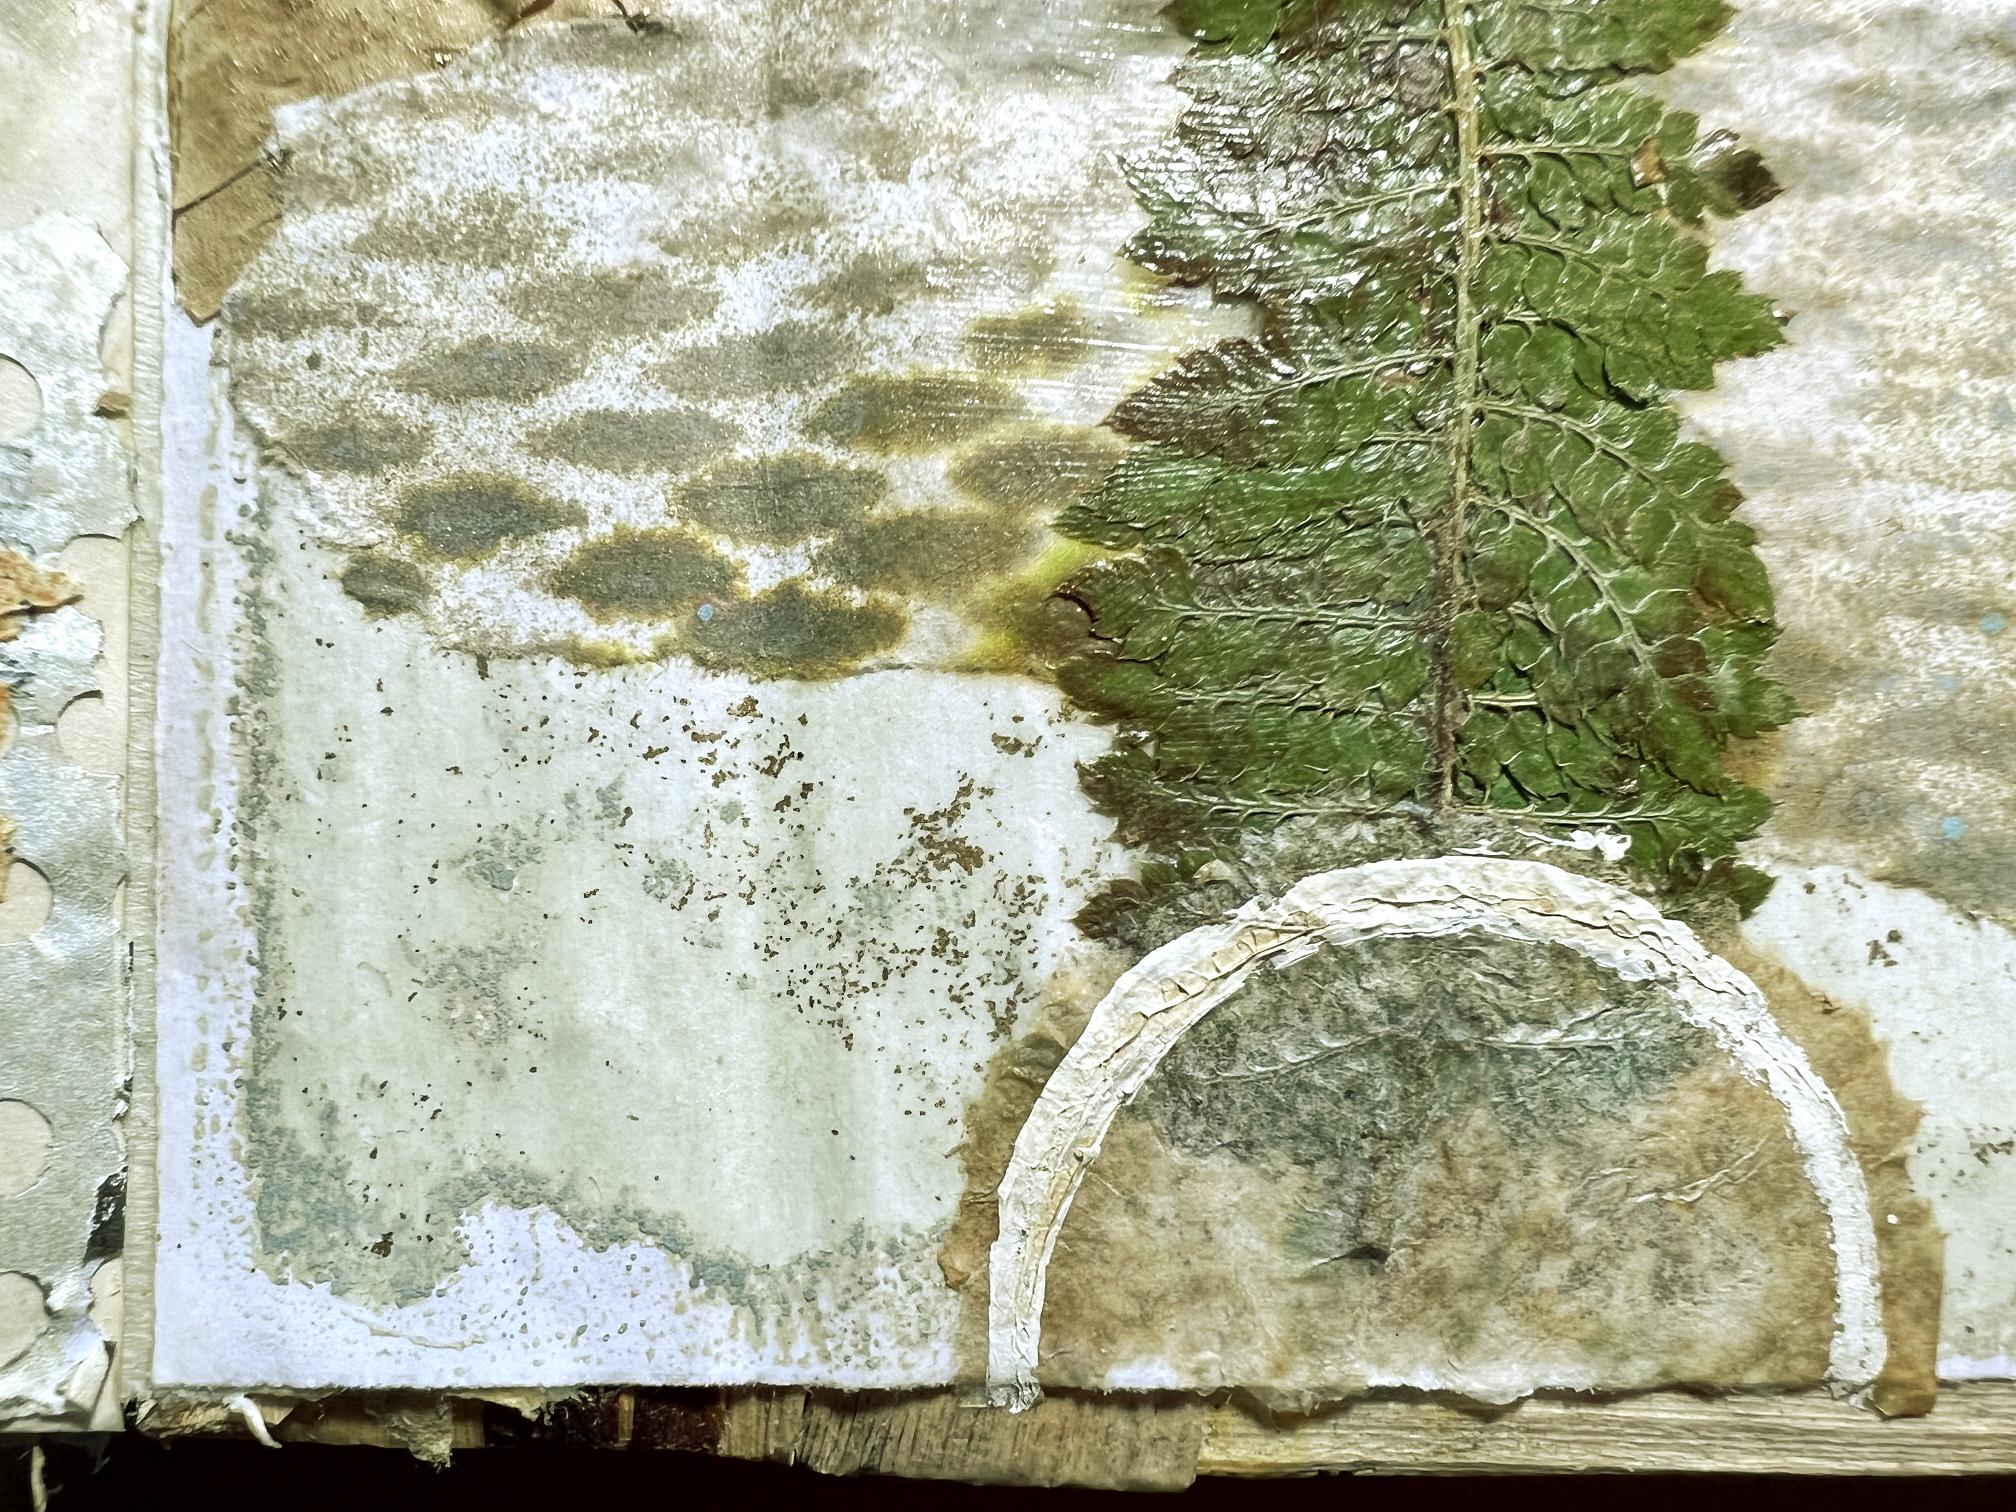
I used several of my DIY beehive paper circles on these pages. I made these by dipping the plastic lid of a jar into some white acrylic paint and stamping it onto tissue paper. This particular batch was a happy accident, because I put them in my splat box to spray them with coffee, and the liquid of the coffee reactivated some inks that were on the kitchen paper in the bottom of the splat box, and this transferred to the tissue paper. I absolutely love the result! I am rapidly getting through that particular sheet of beehive paper and will soon need to create some more! One of the lovely things about this paper is that when you stick it down, the tissue in the middle of the circles tends to disappear into the background, and what is underneath will show through. I tore the circles out using the wet tearing method, painting with a wet brush along where I wanted to tear, and then gently tearing the paper apart. This give you a controlled tear, with a nice soft feathered edge. You can use this method on any paper, but the thicker the paper, and the more medium on it, the more water you will need, and you have to wait longer for it to sink into the paper. If there is too much paint on the paper, you have to do it from the back.
On the left-hand page you can see that I have added further leaves, and two layers of the pierced paper. The larger piece looks quite dull in the photo but in reality it is really iridescent – as far as I remember this was done on the gel plate using Arteza Pearl Banana Yellow paint which is utterly gorgeous.
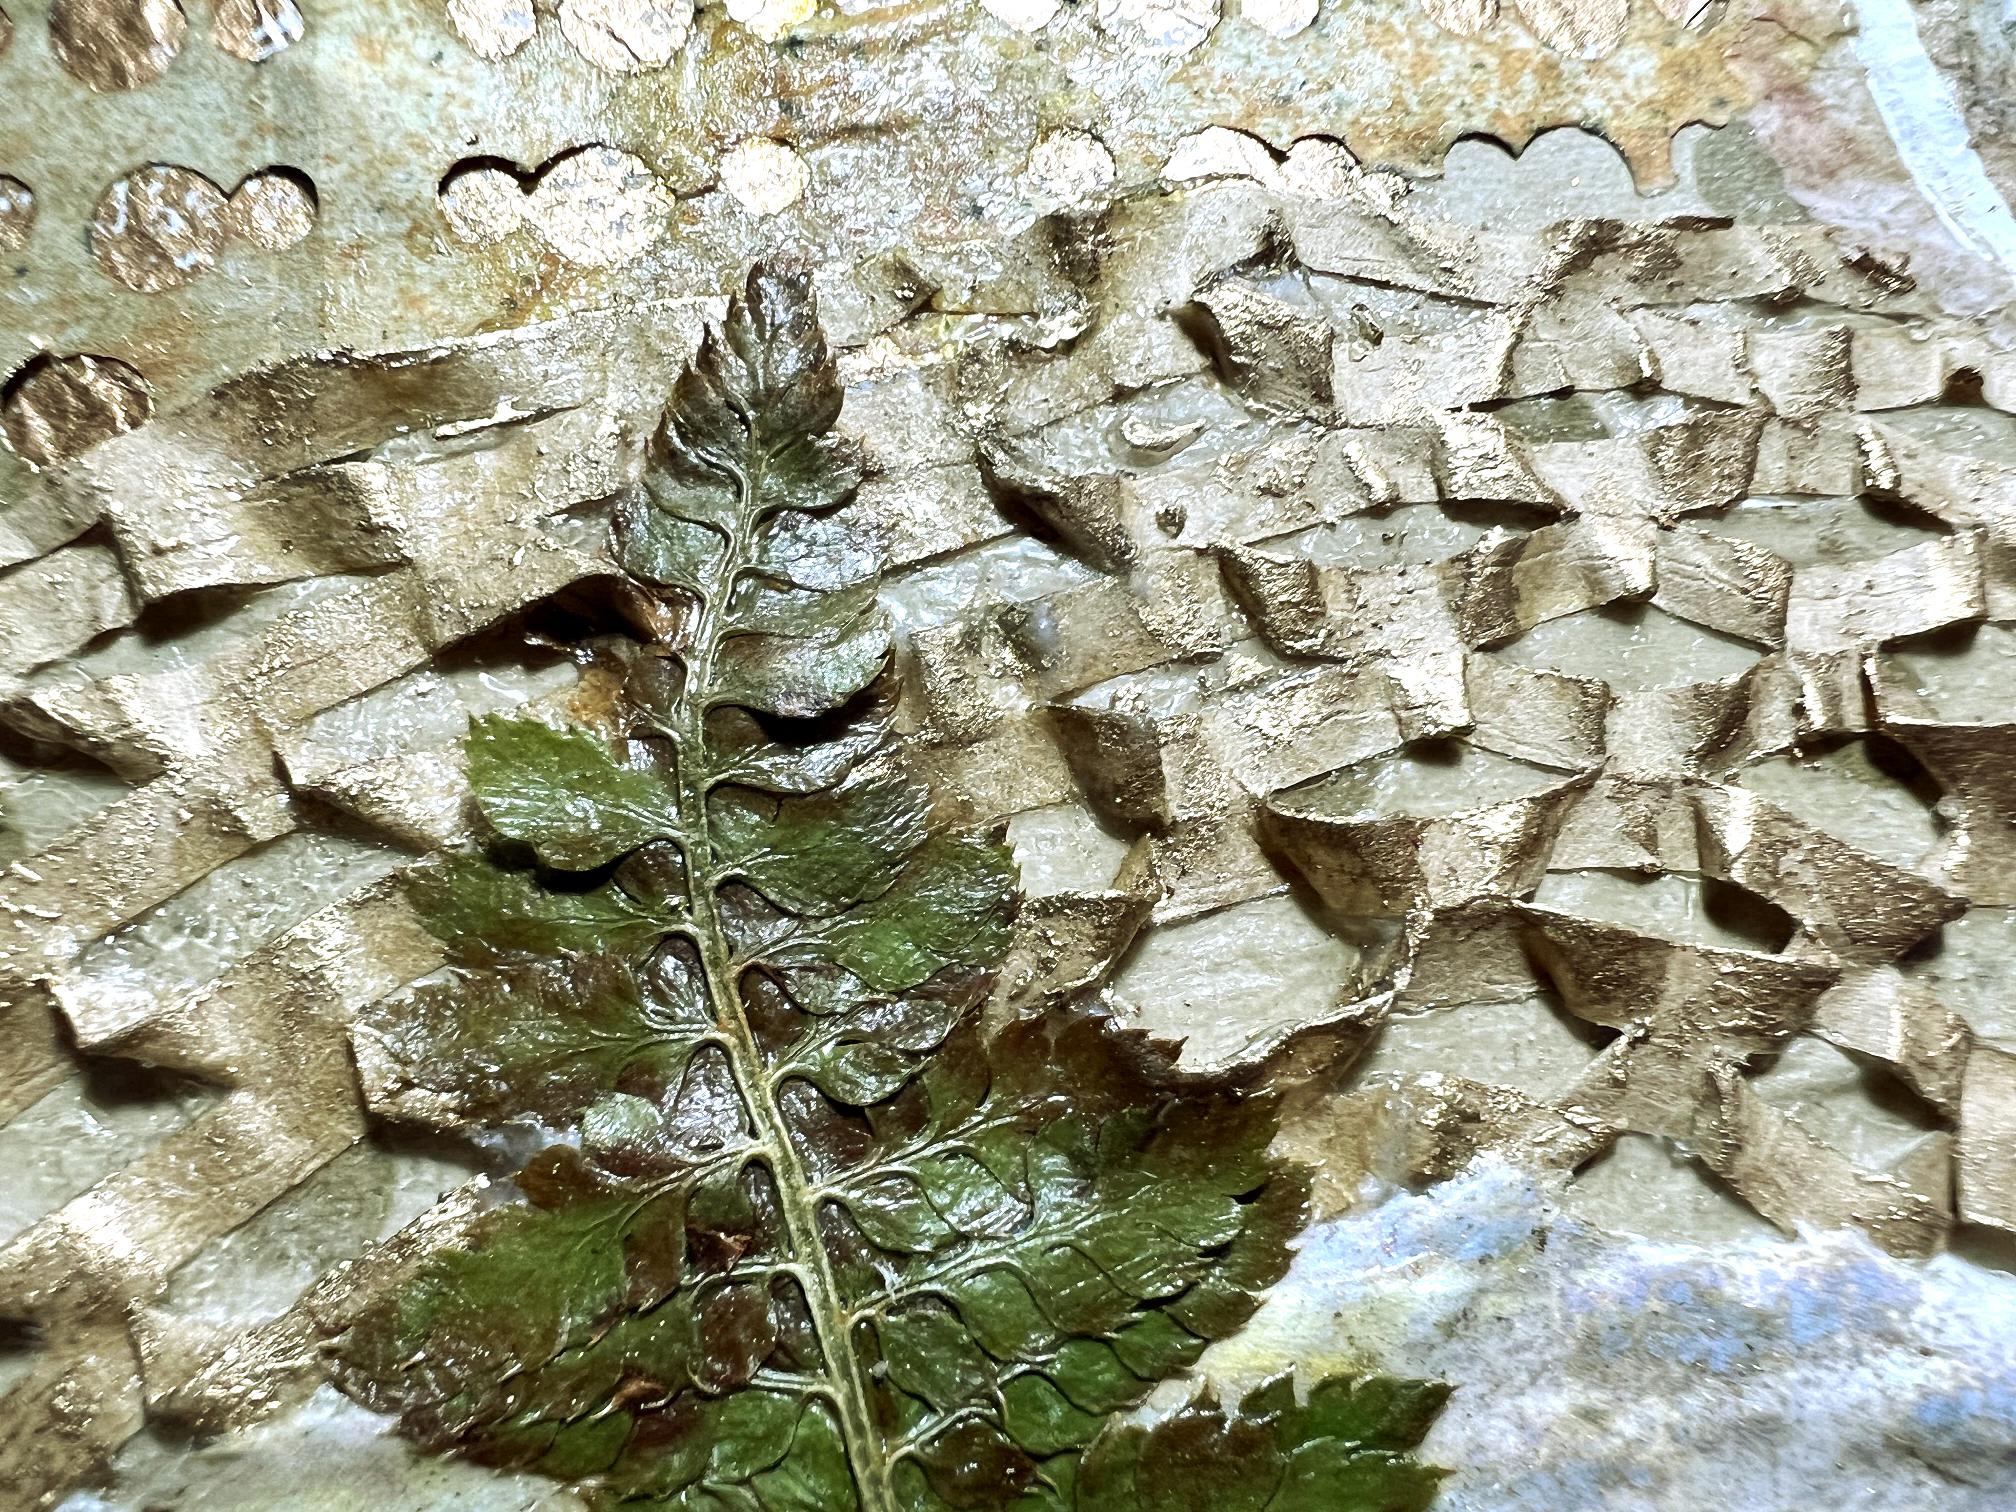
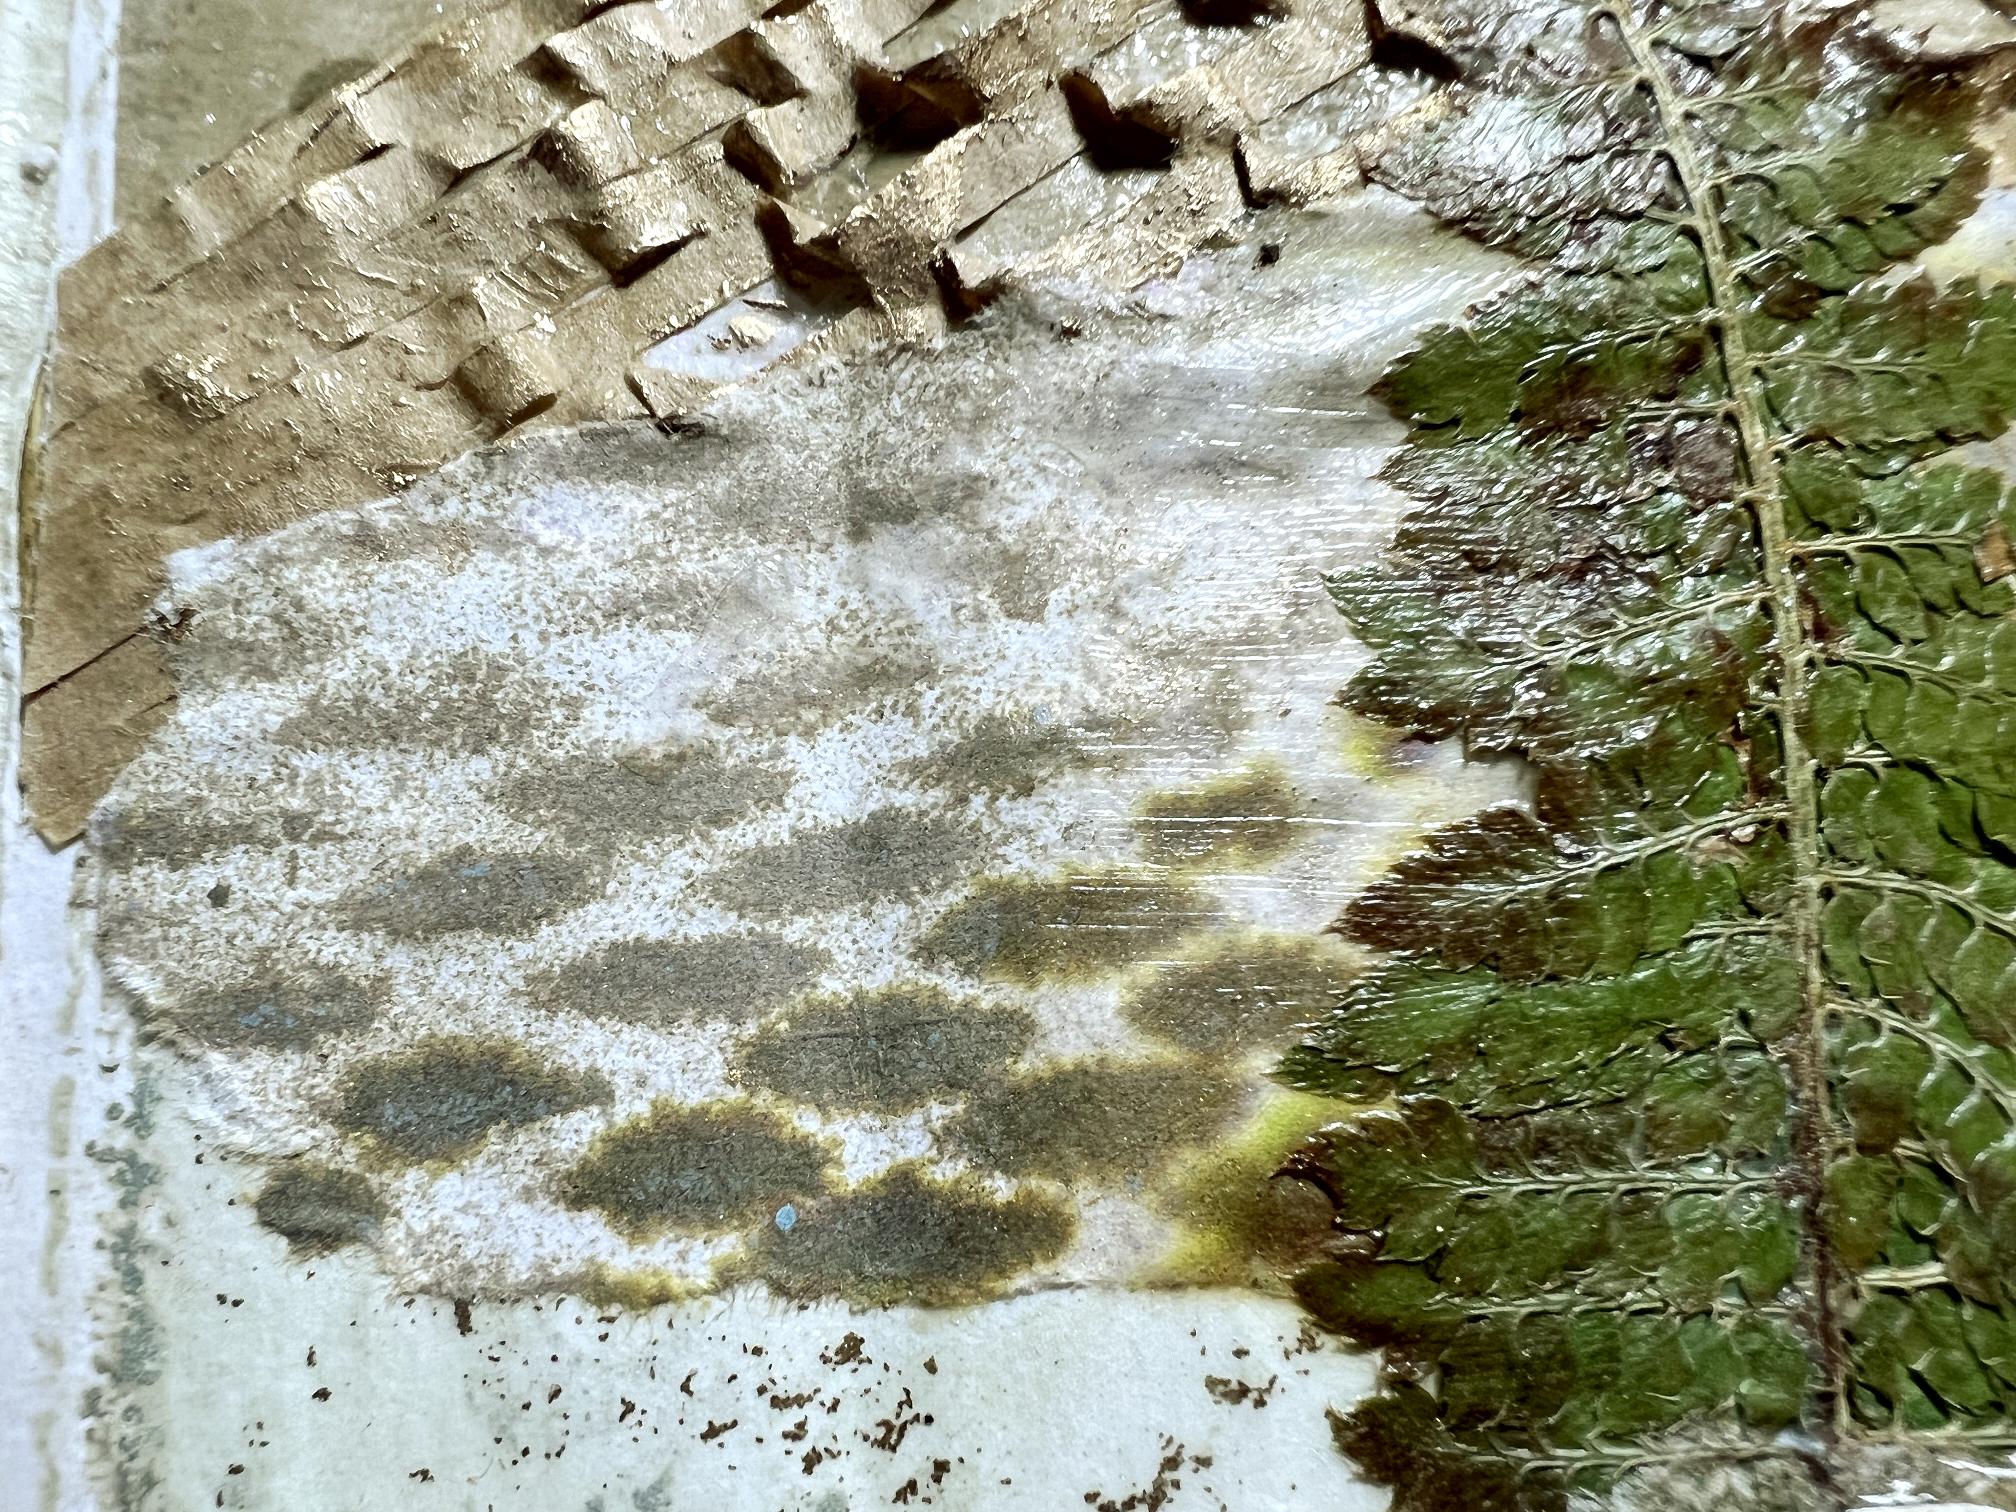
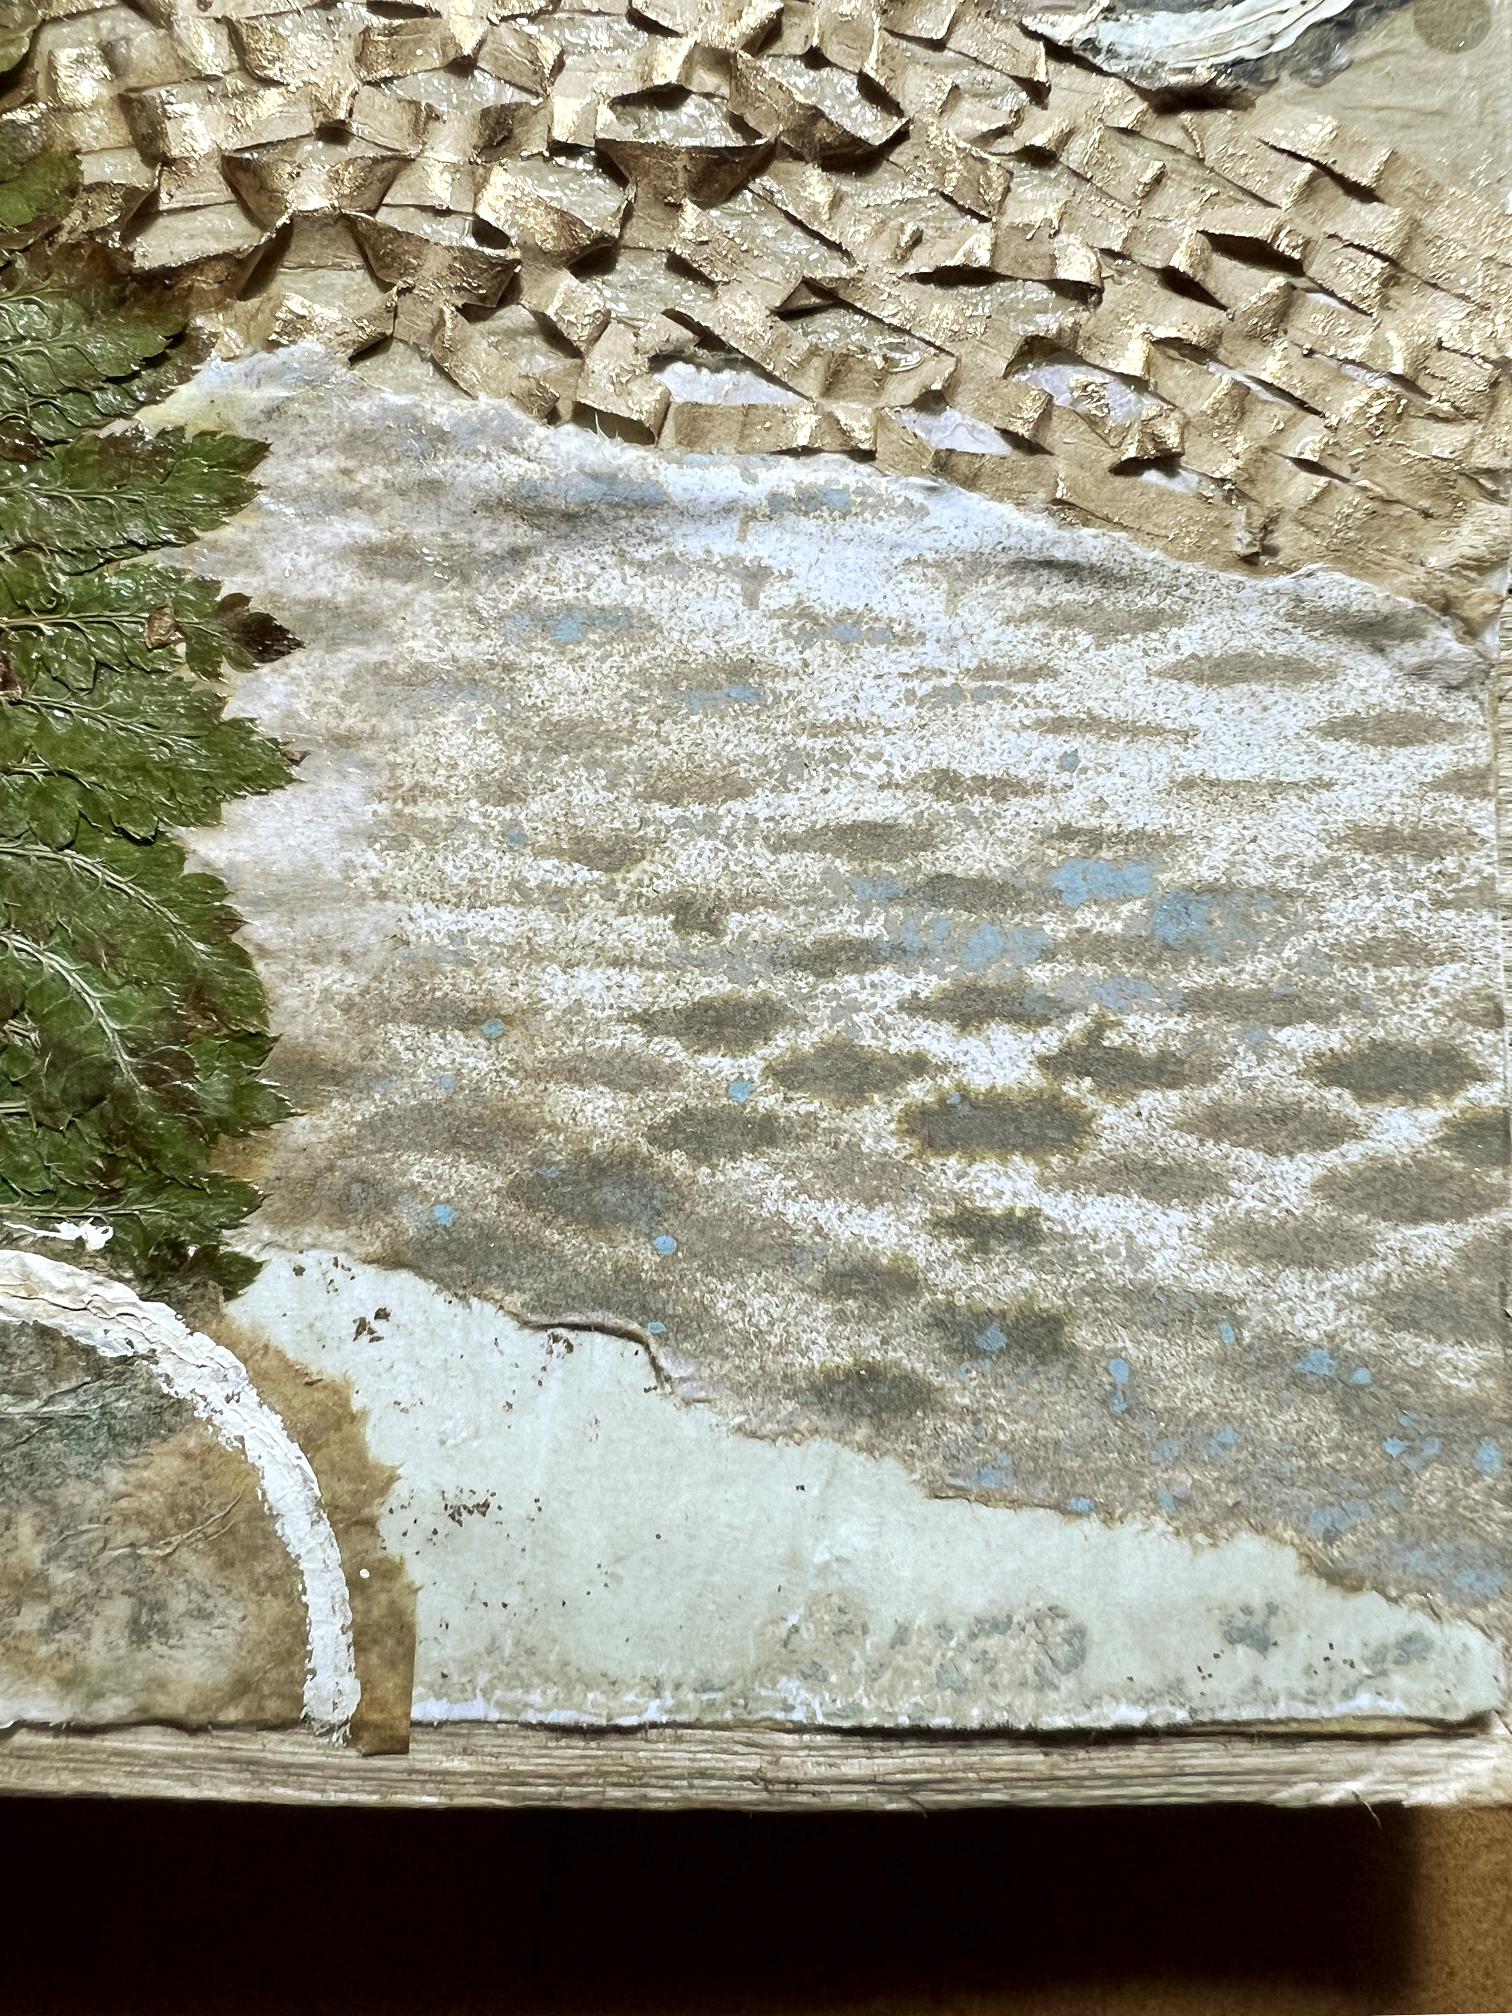
Going back to the right-hand page again, I stuck down the piece of paper mesh packaging, using heavy body gel medium. This free packaging paper is amazing! As I have done in the past, I added some gold gilding wax to the raised projections on the paper.
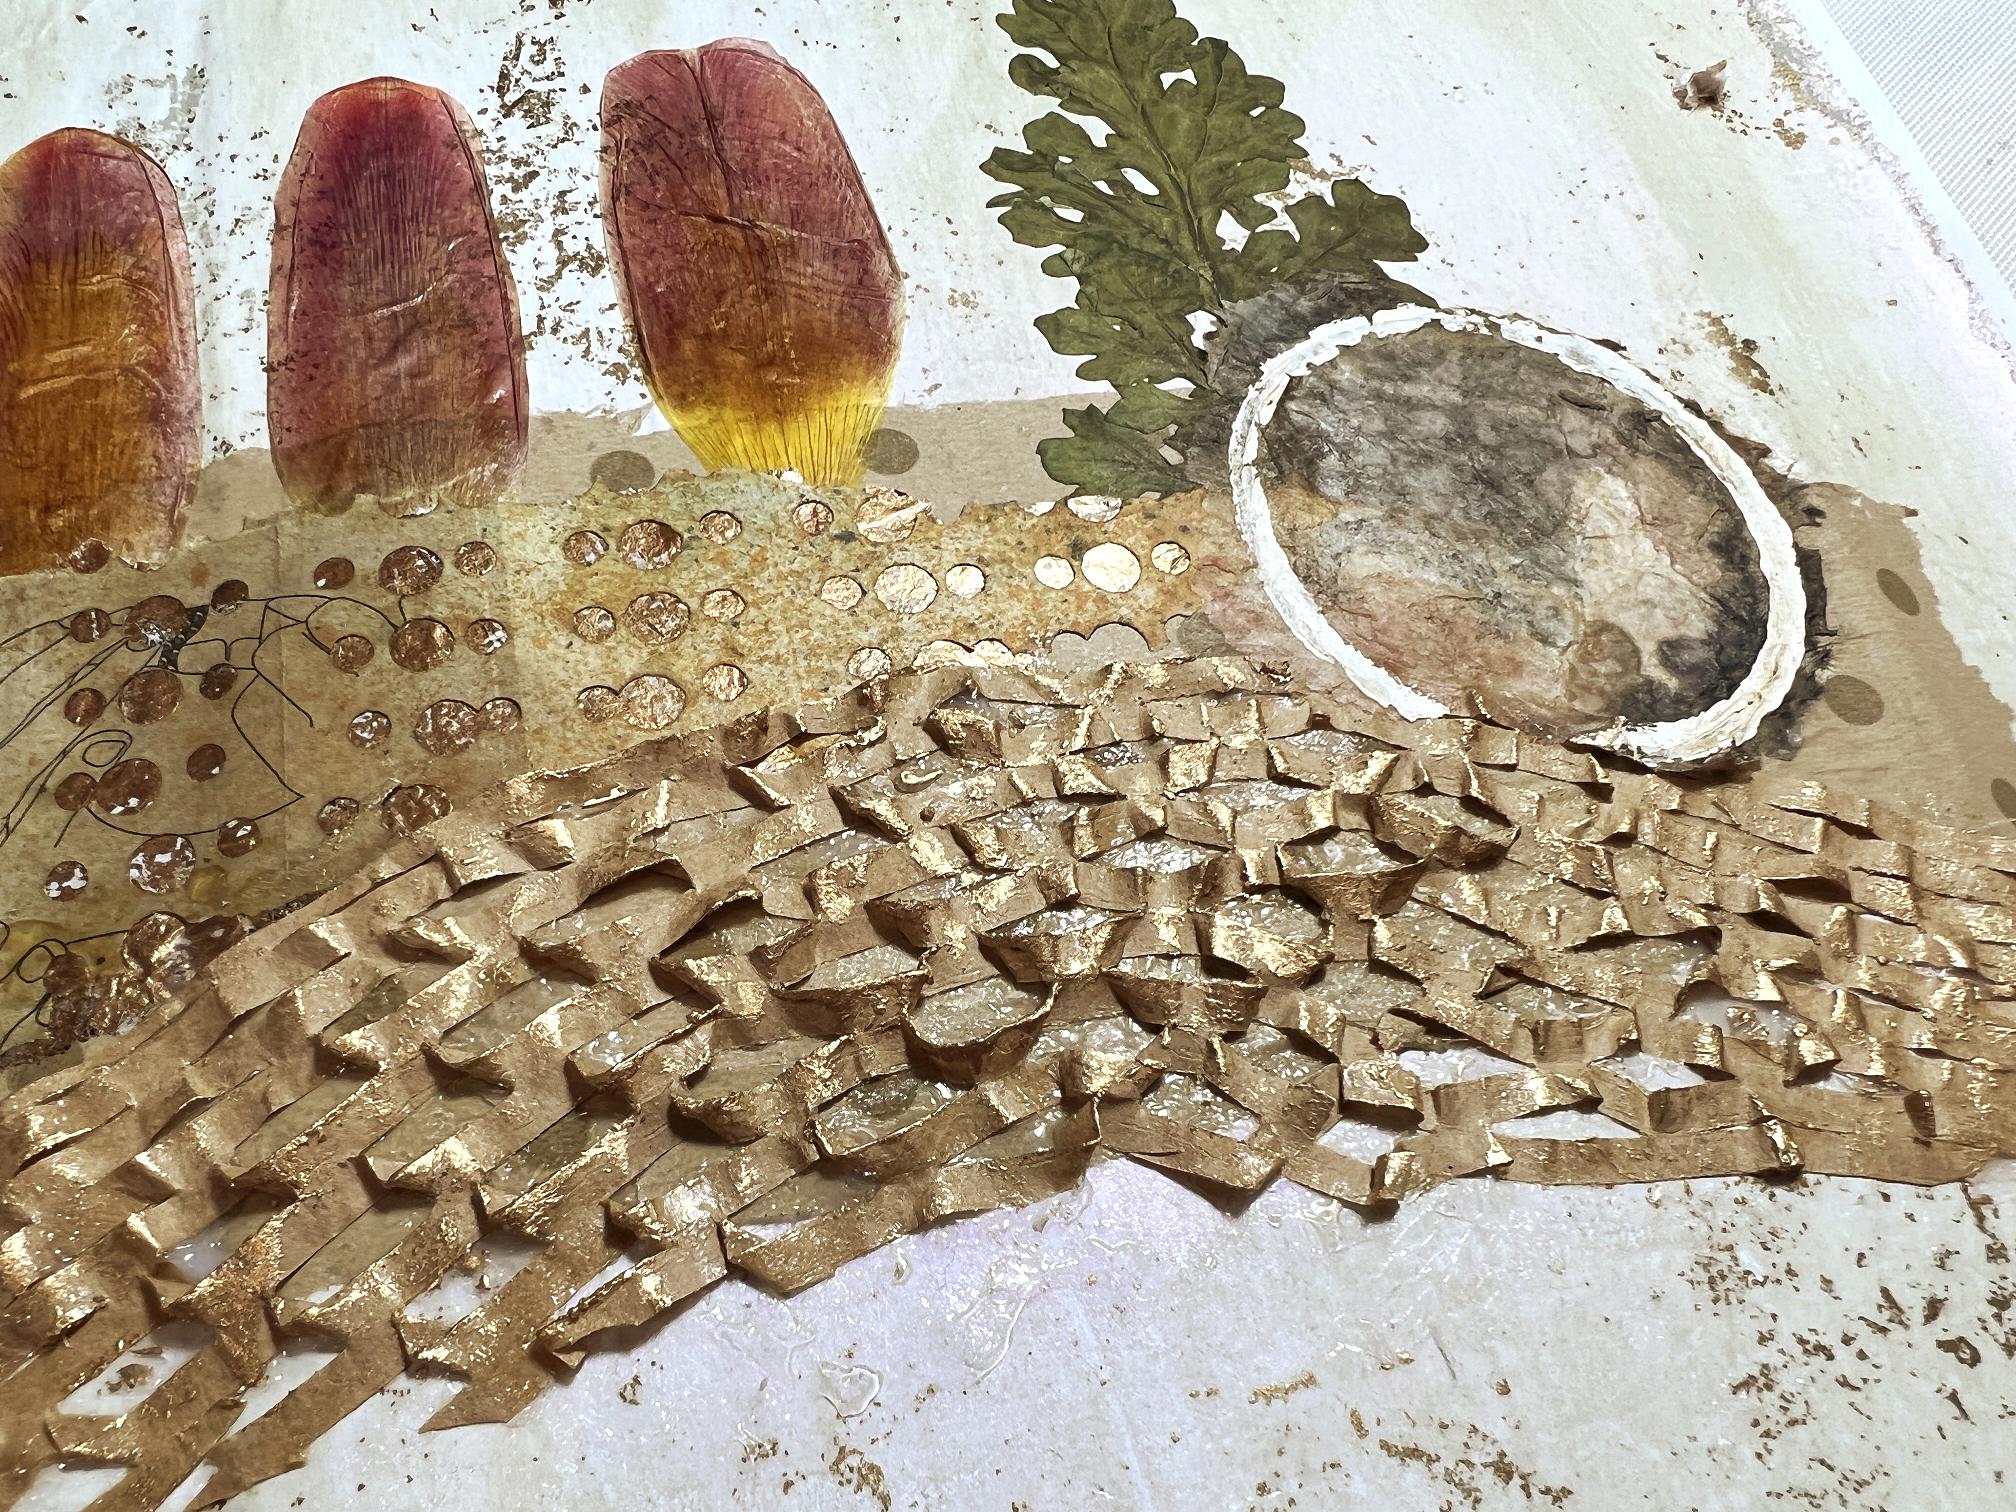
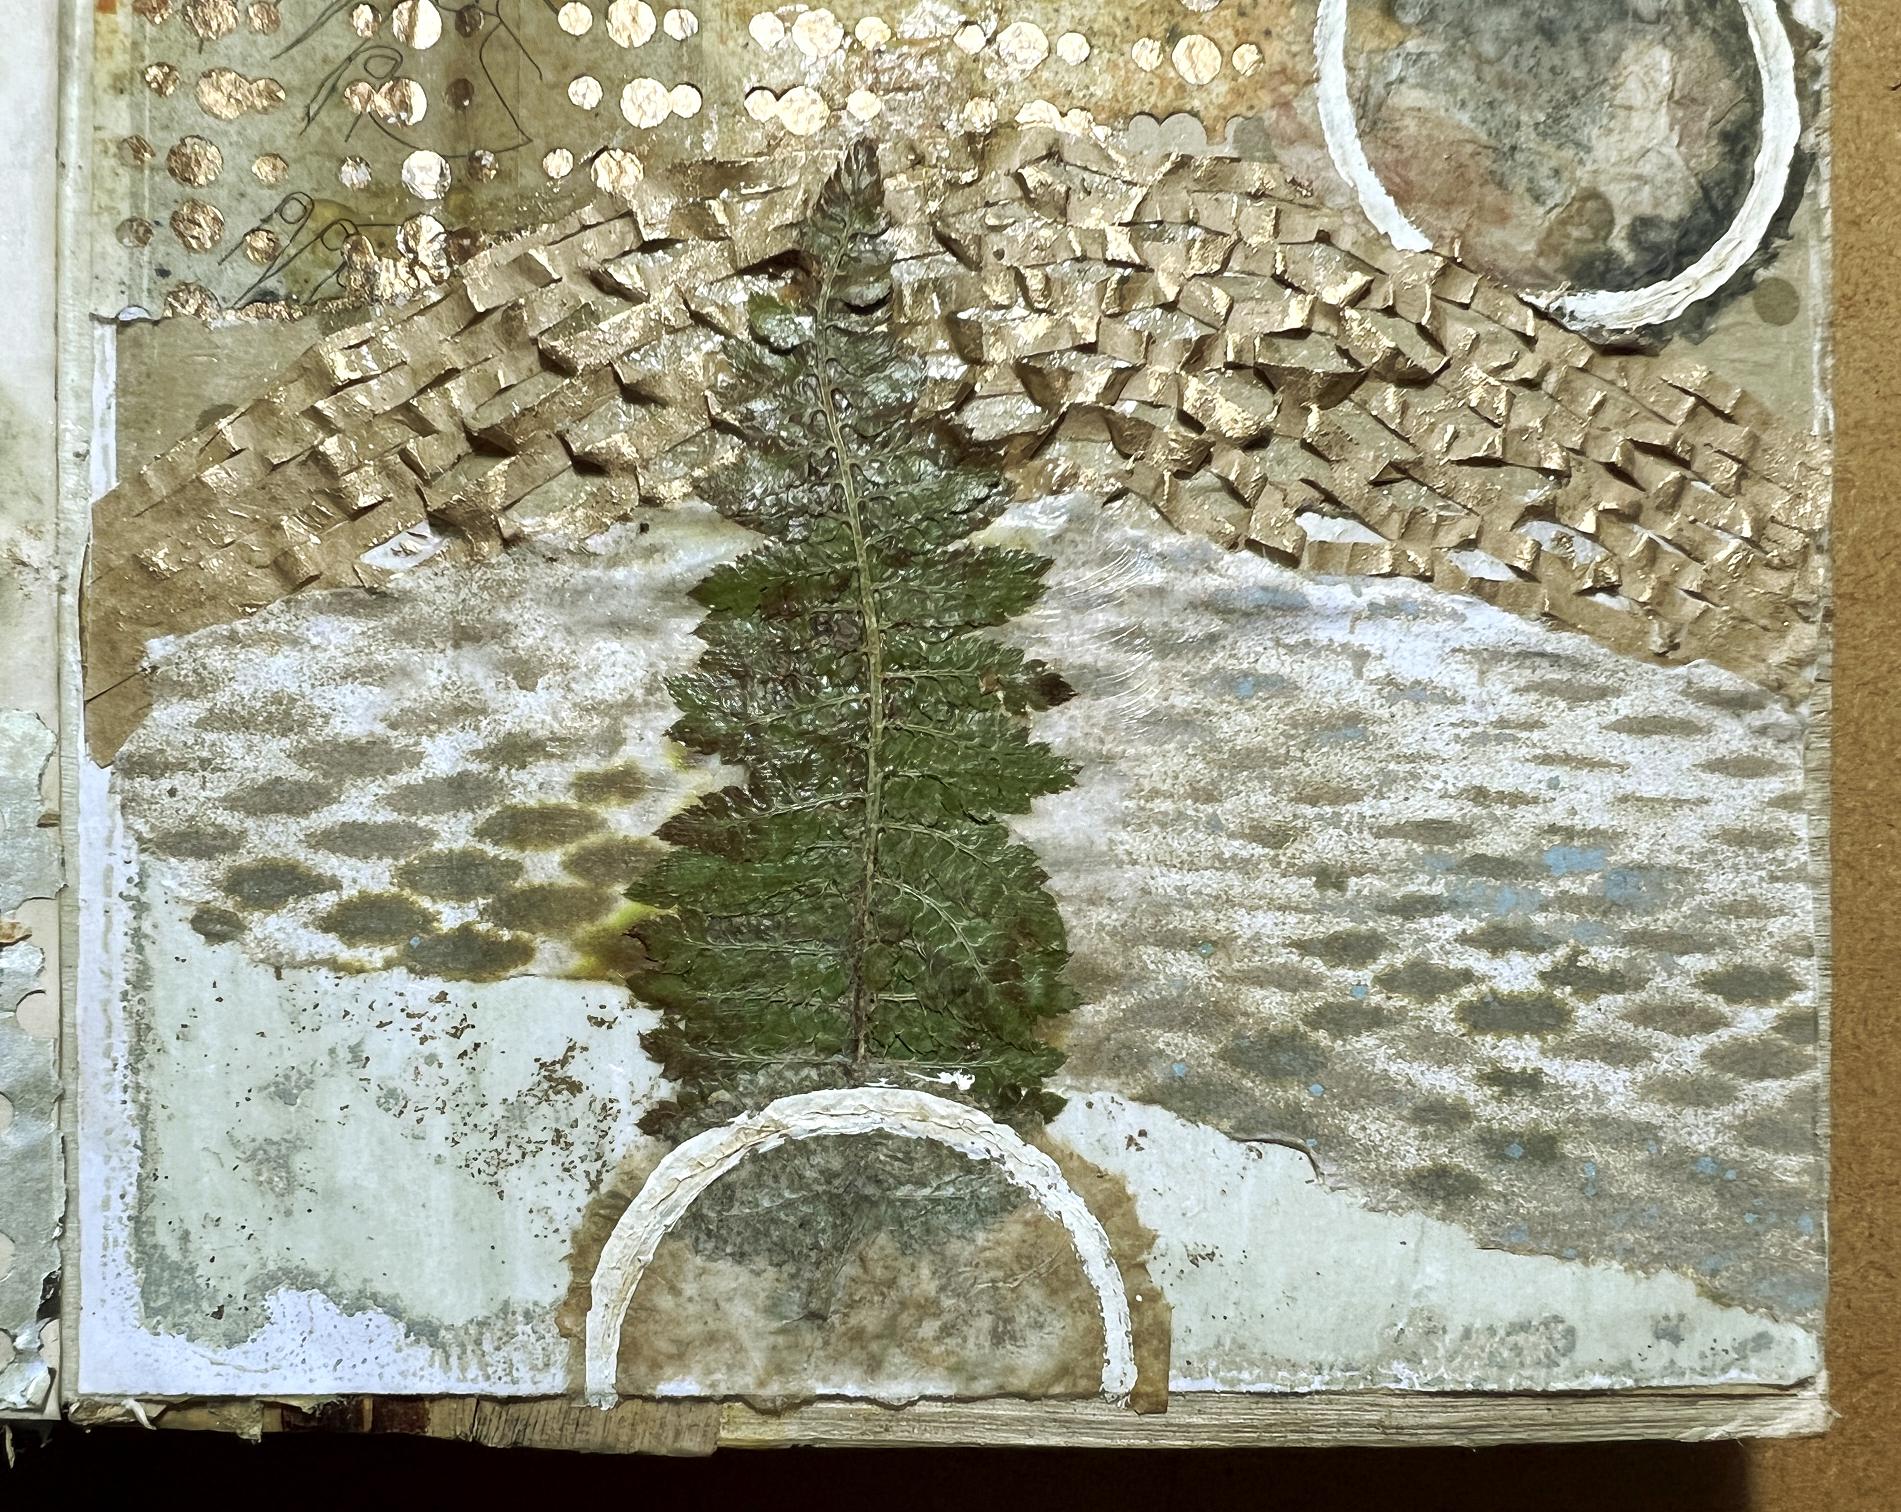
I then laid down a piece torn from a sheet which was made by spraying with Distress Spray Stains through some paper mesh that was stretched out and taped down over it, acting as a stencil. Over the top of this I laid a piece of fern and stuck this down with heavy body gel medium, which you can still see in these photos as it had not yet dried. Gel medium dries transparent.
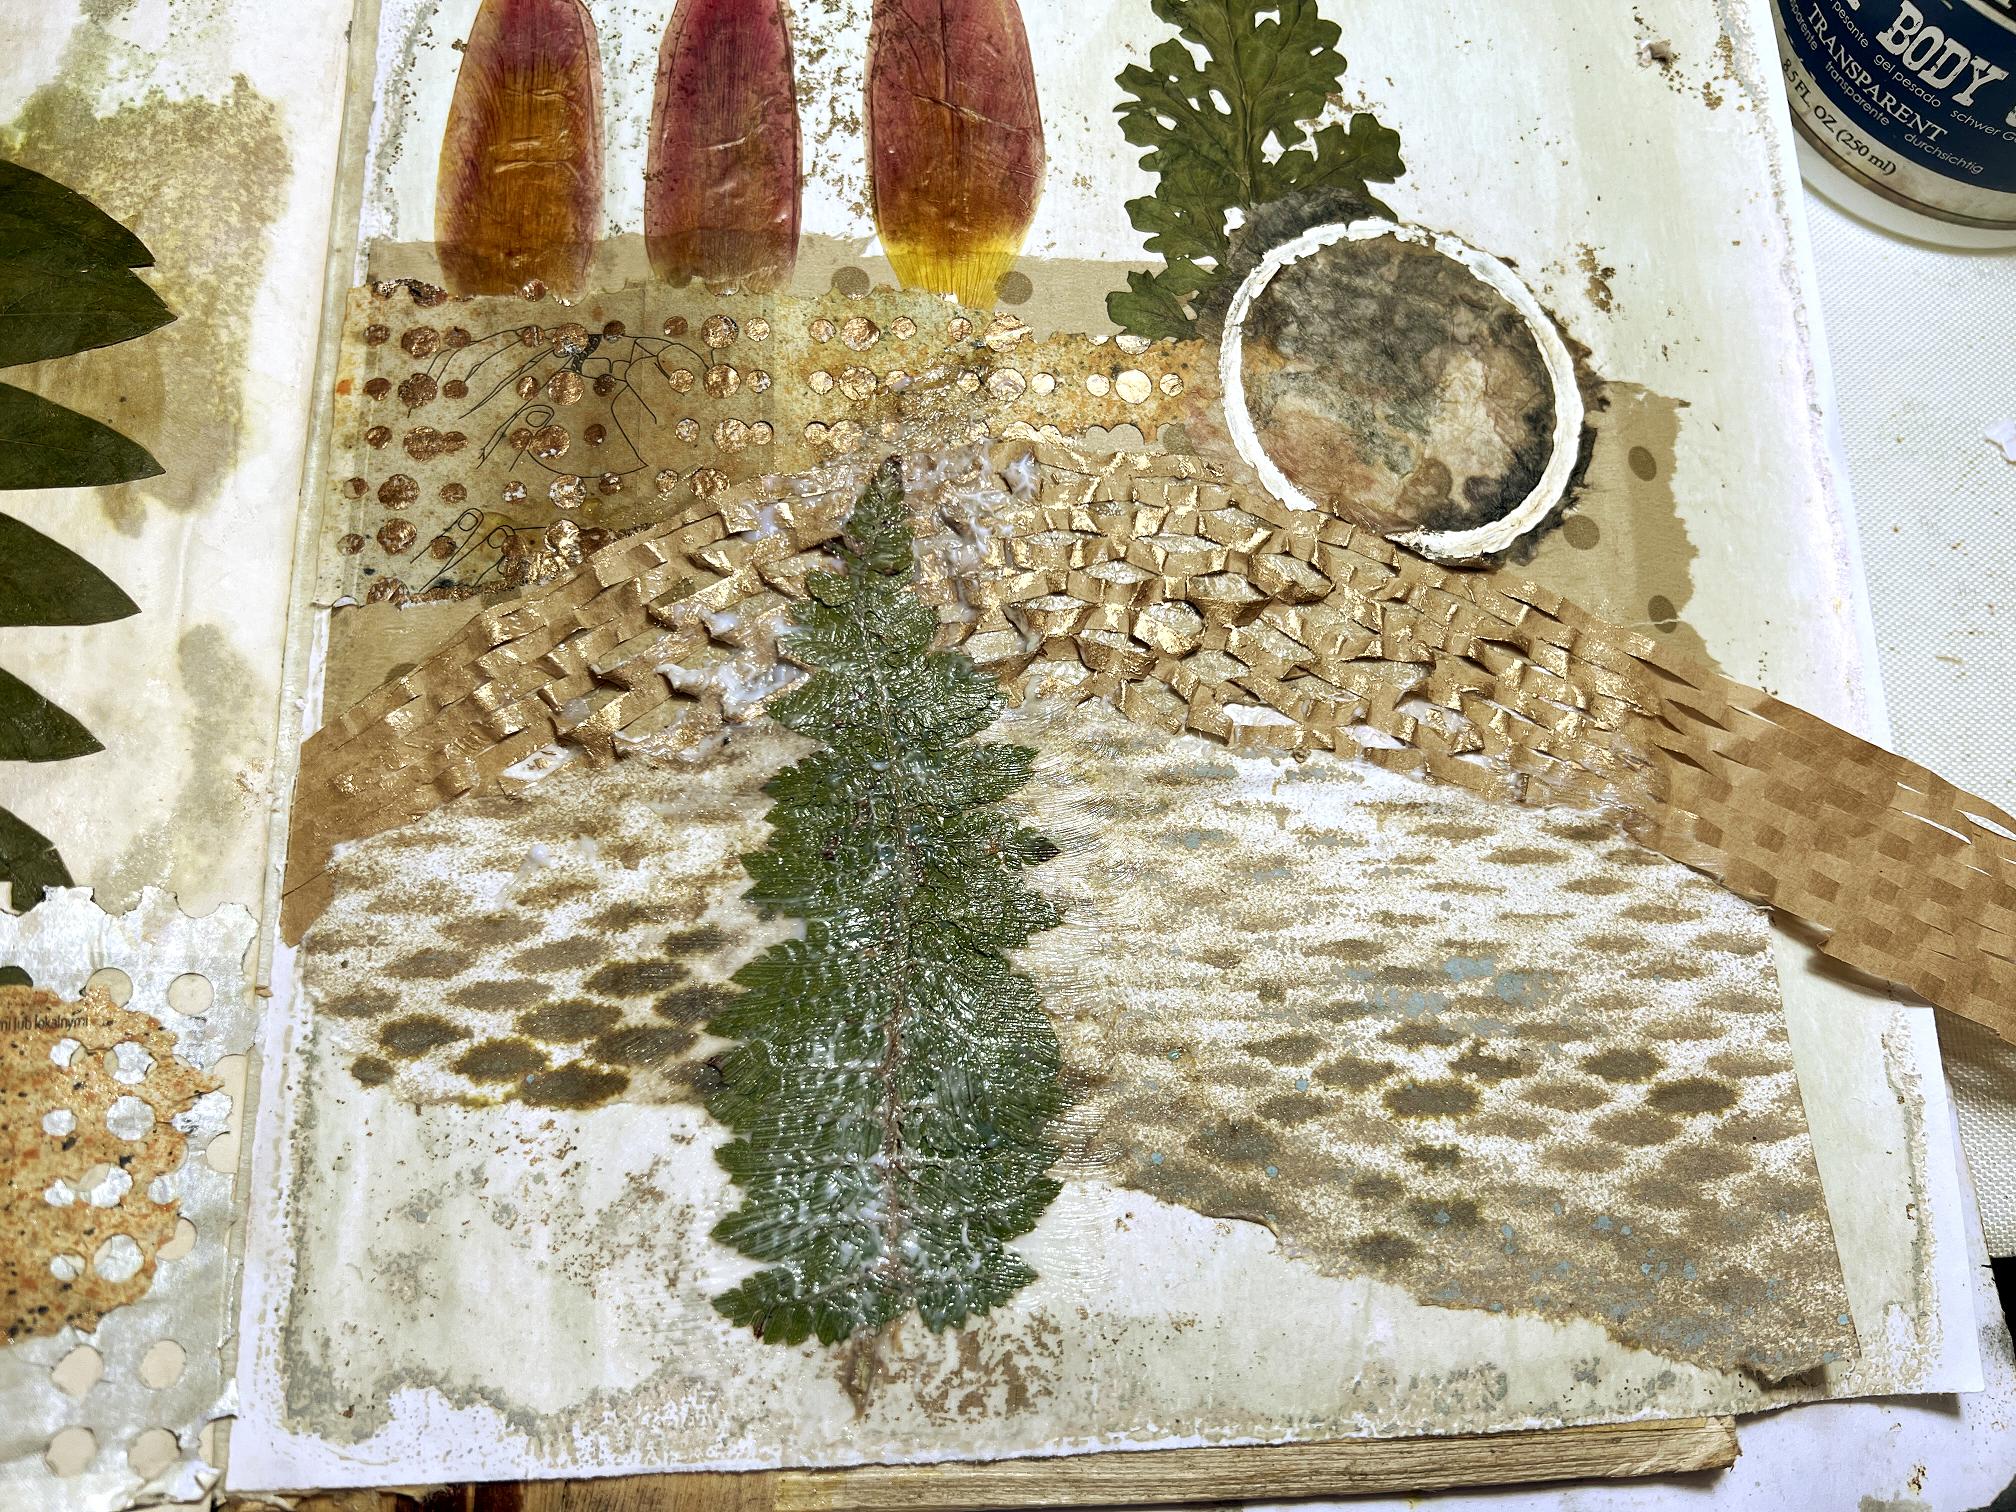
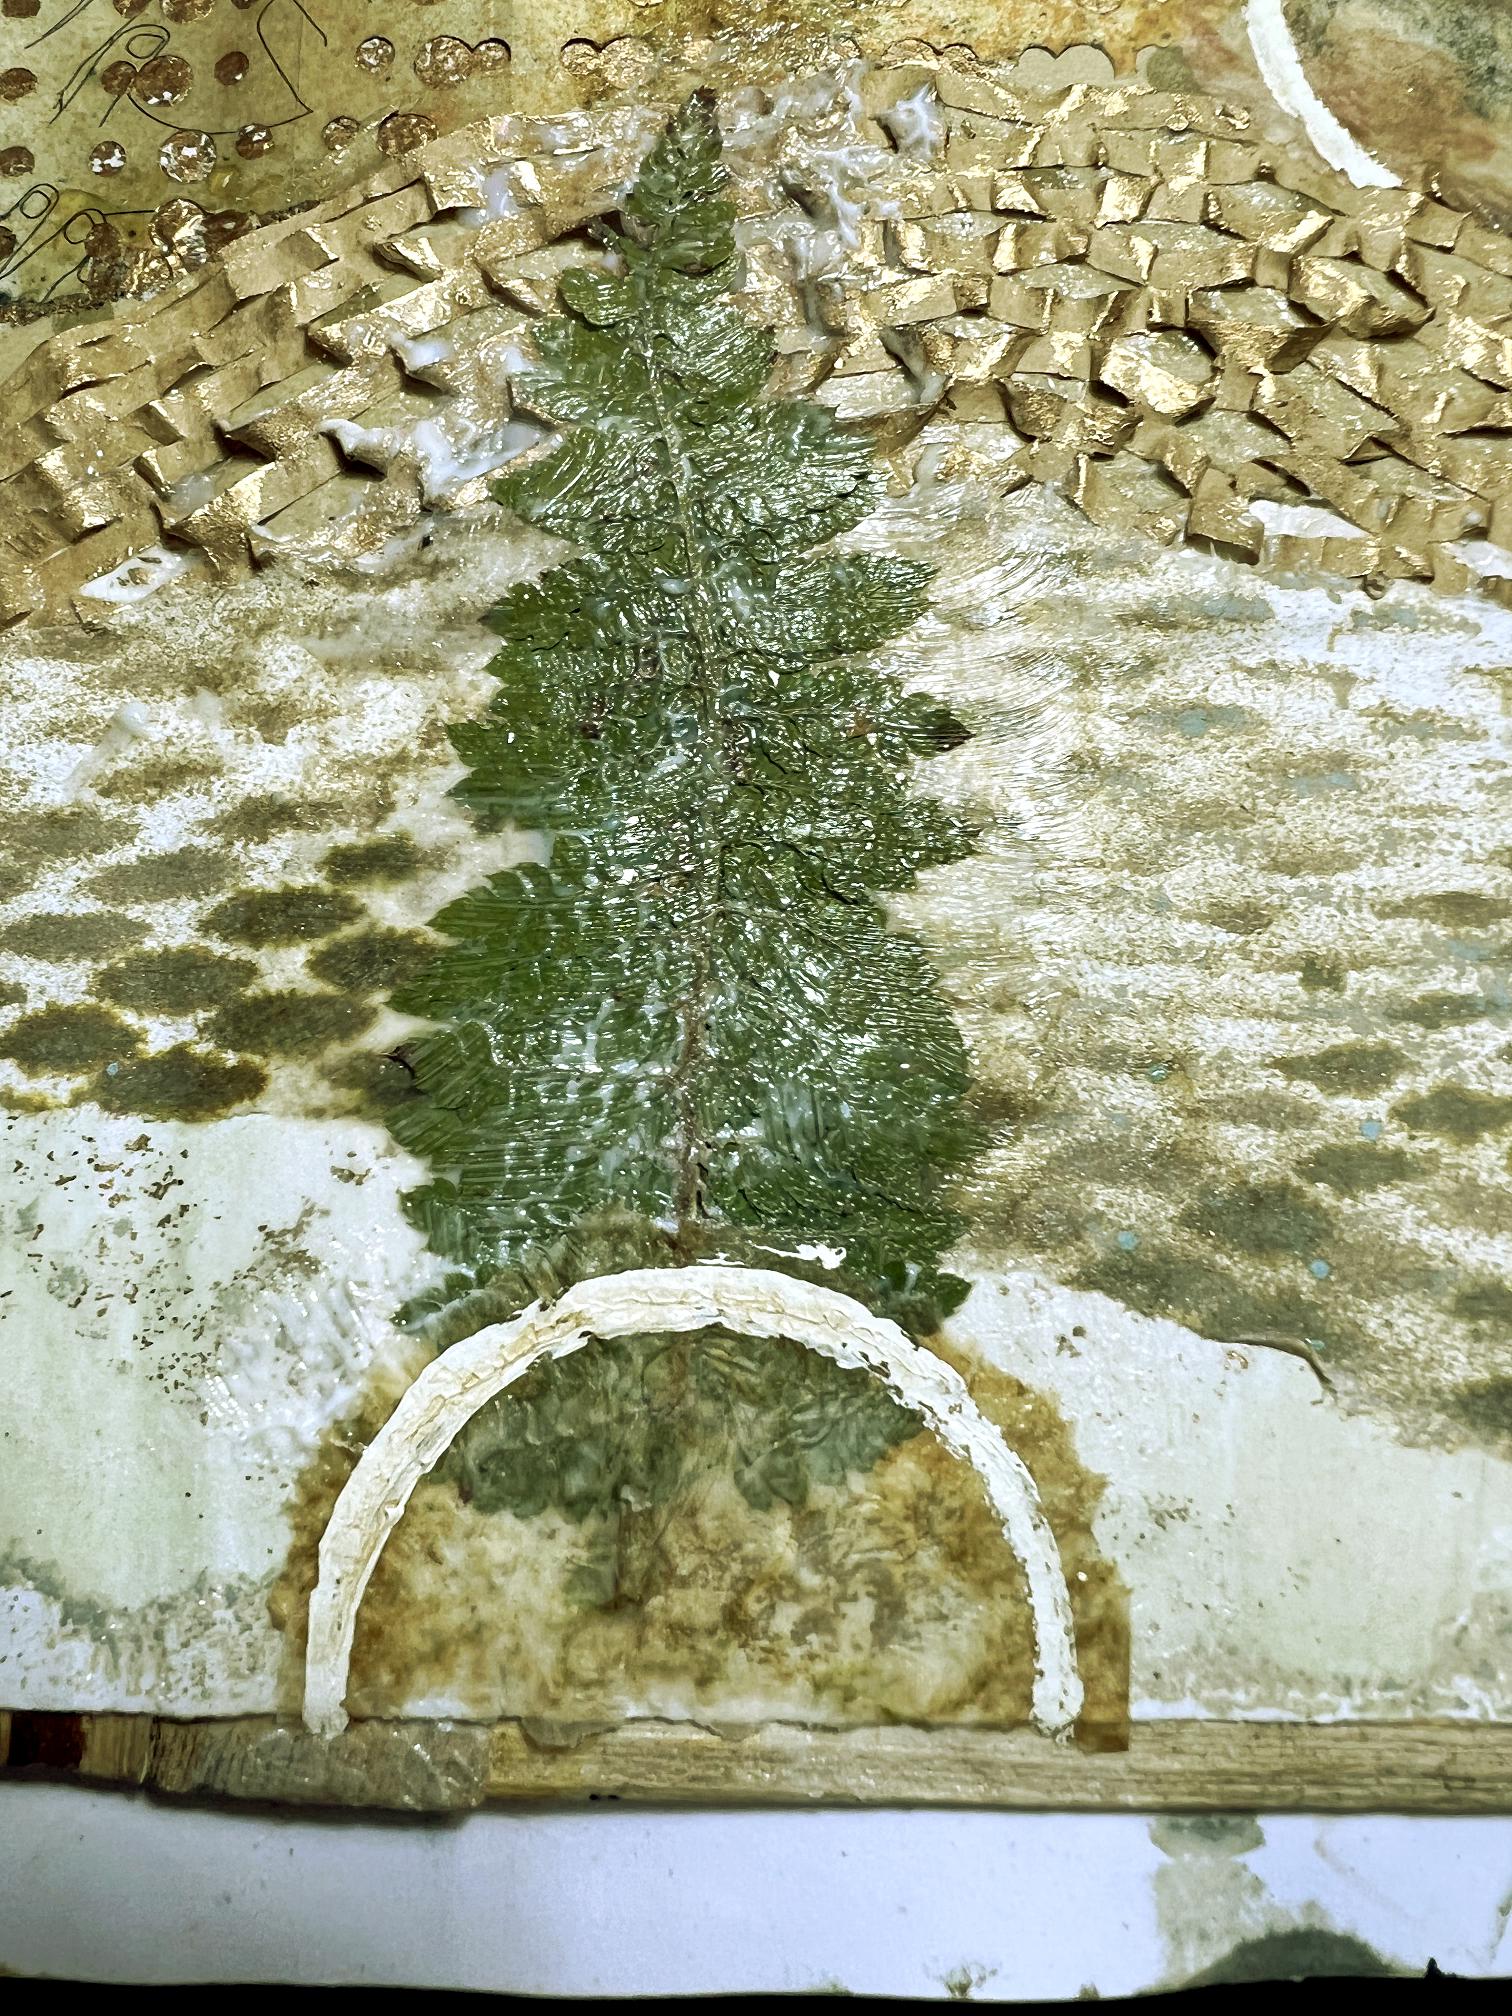
I put a half circle from the beehive paper sheet over the bottom of the fern. You can see how translucent the tissue in the centre has become, as you can see the bottom of the fern through it.
Here are the pages, complete and drying. I wasn’t able to trim away the excess backgrounds until they were completely dry.
The completed pages. I was careful to trim the background on the right-hand page just short of the edge, as this is the inside of the back cover of the book and I wanted a neat finish.
Now for the detail photos of the completed spread.
You can see the gorgeous accidental grungey pattern on these circles, and also how the pattern of the background shows through.

A final look at the finished spread.
What I hadn’t anticipated was how this would turn out looking a bit like a landscape! The various layers, especially overlapping the collage elements, push them back into the distance. Serendipity again! That’s the joy of intuitive collage. Happy accidents happen and you end up with something whose whole is greater than the sum of the parts. I never know in advance how these pages are going to turn out, beyond a vague initial idea of where various focal points might be, and the initial choice of papers.
I am excited to have finished this project at last. I am hoping to make a video flip-through of the book, with photographs.
What a beautiful tribute to our beloved Queen Shoshi, and yes time will tell how King Charles III succeeds.
Again a fascinating step-by-step account of how you built up the picture usuing mixed media, and I especially love the pressed flower (I uswed to press flowers myself years ago) and see how you worked them into your beuatiful design.