POCKETS AND PAPERCLIPS
Continuing my plan to mass-make various elements for future album projects.
Rescuing materials from the recycle bin
I have a large box of all kinds of intriguing rubbish – cardboard packaging, greetings cards (often with detachable or interactive elements), window envelopes and so on. Having just made a load of interesting background papers, I have begun putting them to use.
Here is the haul I pulled out, in order to start making some interesting pockets and other elements.
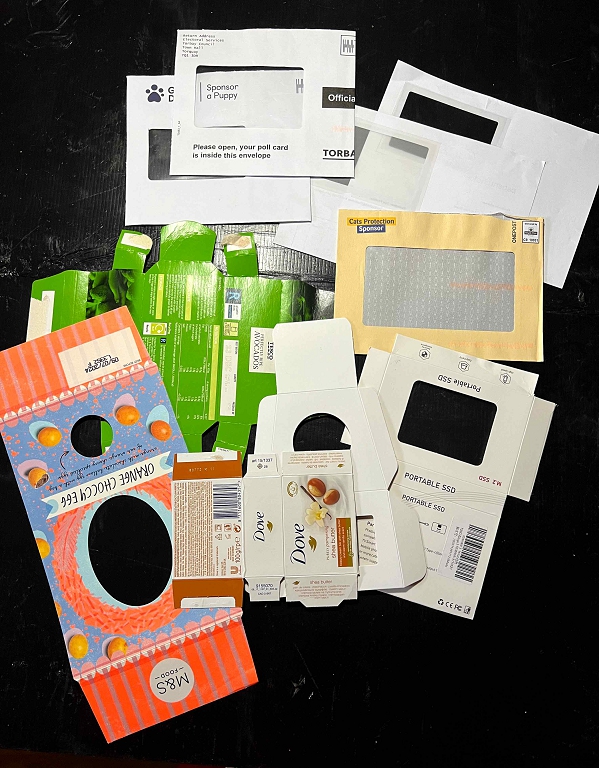
A lot of packaging has windows, sometimes open and sometimes covered with acetate or glassine paper or vellum. These make interesting pockets because whatever you put inside, you can see through the window, which makes a fun interactive element if you layer things with a bit of thought. Many small boxes, once opened, have ready-made flaps for attaching them to pages. Any unwanted bits can be cut off and may be used to make tags, page tabs or hidden paperclips, or perhaps charms and clusters.
I made four things today – which doesn’t sound a lot for a “mass make” over a whole afternoon! Choosing things to do, and actually doing them, takes more time than you might think. I need to learn not to overthink things too much and just go with the flow. It doesn’t matter if it all goes wrong because at the end of the day, it’s only paper, and would have found its way into the recycle bin without my intervention in the first place! That takes a lot of the stress away, which you sometimes feel when embarking on a “work of art” on expensive art paper. Fearing making a mess of it and wasting a valuable resource does rather cramp one’s style creatively!
I used some of my new tea-dyed, inked, rust-spattered and paint-stencilled papers for today’s pieces. I chose the yellow “Cats Protection” window envelope and one of the papers with windows at the top right of the above photo for my two pockets, and made a couple of hidden paperclips with offcuts and some card scraps from my stash. The papers with windows were delivery notes which had had the address printed on a detachable label which had been removed and put on the parcel, leaving the non-stick translucent window on the paper. These papers definitely have potential.
Using my light panel, I put a piece of scrap copy paper over the sheet or window envelope and traced the outline and the window, and cut them out to make a pattern. I used this to cut the decorative paper to cover the piece, and glued it down.
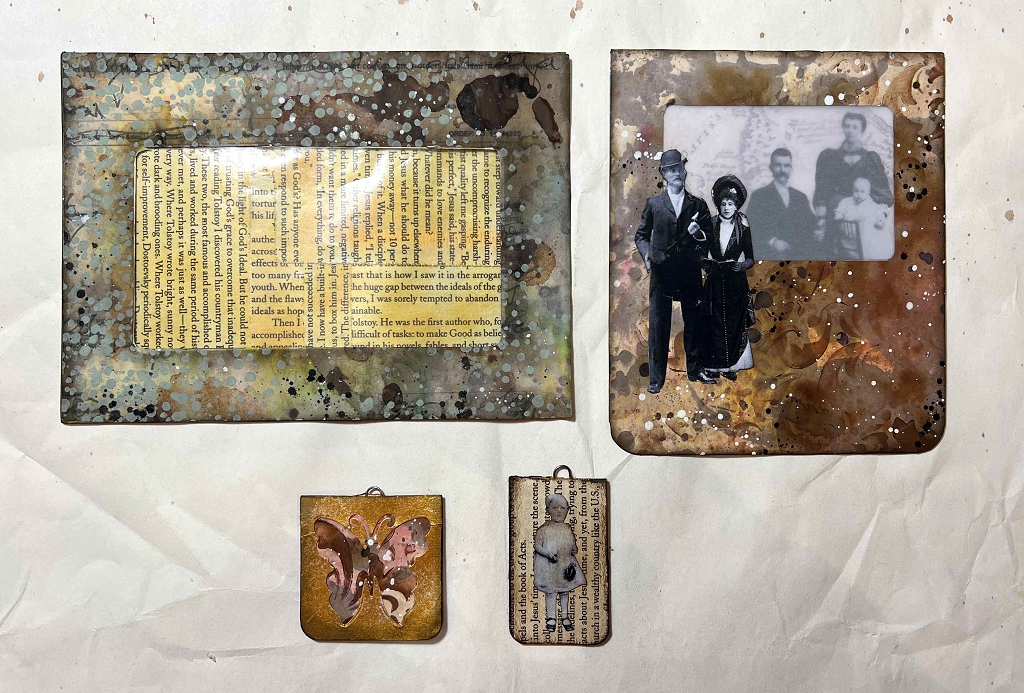
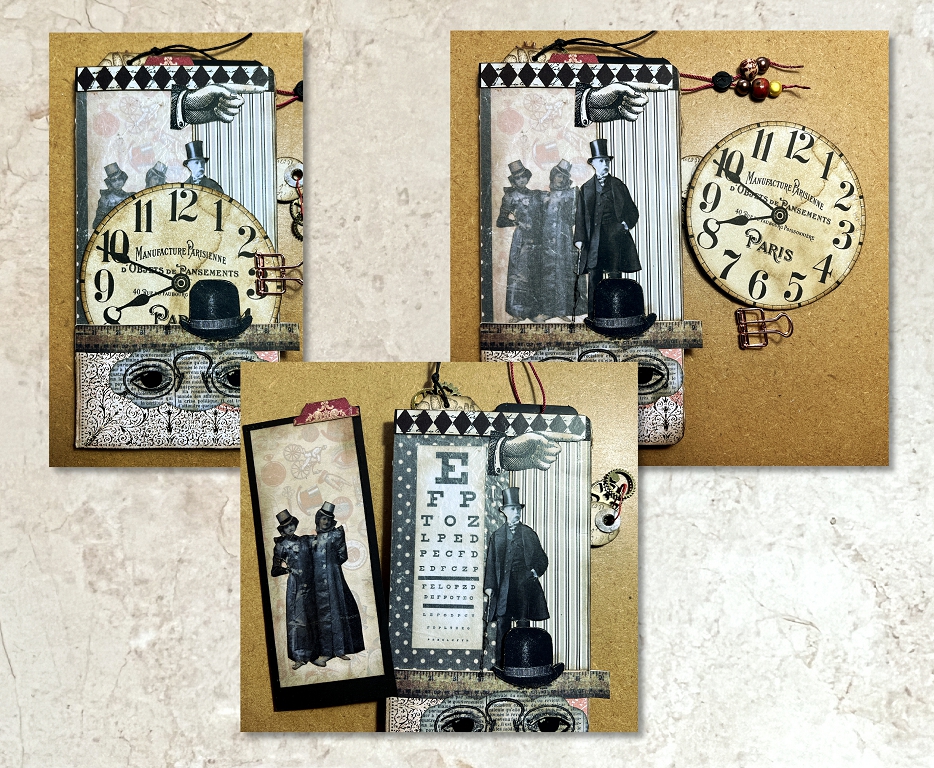
Here are the pieces I made today.
The window envelope
After covering the window envelope with some of my mixed media paper, I took some pieces of book pages with the margins cut off, and inked them, and glued them inside the envelope onto its back surface. The top is open where the envelope had been slit open, forming a pocket. Anything inserted will cover the book pages but be visible through the window. When the contents are removed, the pocket remains interesting.
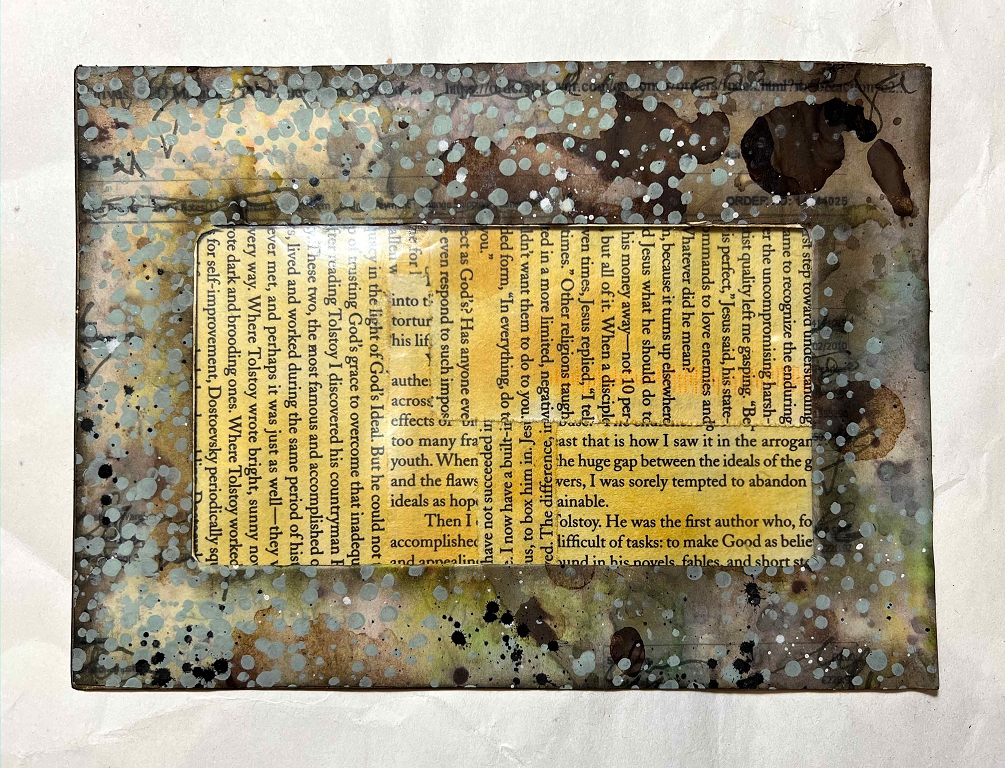
Once complete, I inked around the edges. The back is untreated. If I want this pocket to be a floating pocket, I can always decorate the back, but otherwise it can just be glued down onto a page.
The paper with the translucent window
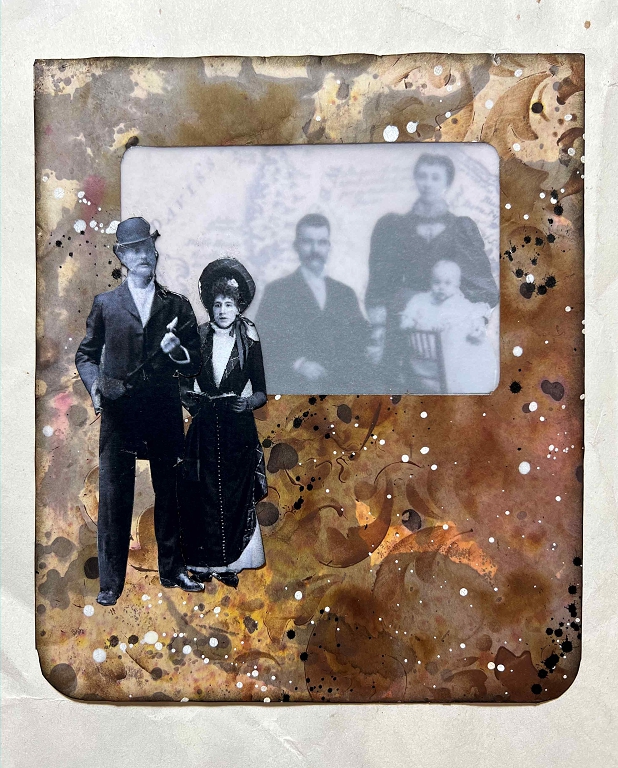
This is a flat sheet, and to form it into a pocket, I glued a piece of scrap card on the back around three sides, leaving the top open. Before attaching it, I glued on a piece of a vintage map printable, slightly larger than the window. Onto this, I stuck down the group of three fussy-cut figures from my stash, so that they would show through the window. The window is translucent, glassine-like paper. After covering the front with some of my mixed media paper using the pattern to cut out the window aperture, I selected some more fussy-cut figures to embellish it. These figures are digitals from the Graphics Fairy Premium Membership site which I subscribe to – every week they have a new themed bundle to download, and everything on the site is available to use. These vintage figures are very popular at the moment. You can print them out at whatever size you want, and then cut them out. I stuck the lady and gentleman on the front, overlapping the translucent panel, and the figures behind the translucent panel are pushed back into the distance. I shall make a tag to go into this pocket which will cover them (not sure what I’m going to put on it yet) and the figures will be revealed as the tag is removed.
This is what I did when I made my “Recycled Paper Glassing Bags” album a couple of years ago.
Once everything was dry on my piece, I rounded the corners and inked the edges. Again, this could be a floating pocket if I decorated the back, or it could be stuck down into place on a page.
Hidden paperclips
I had some offcuts left over from the mixed media paper, so I decided to make a couple of small hidden paperclips.
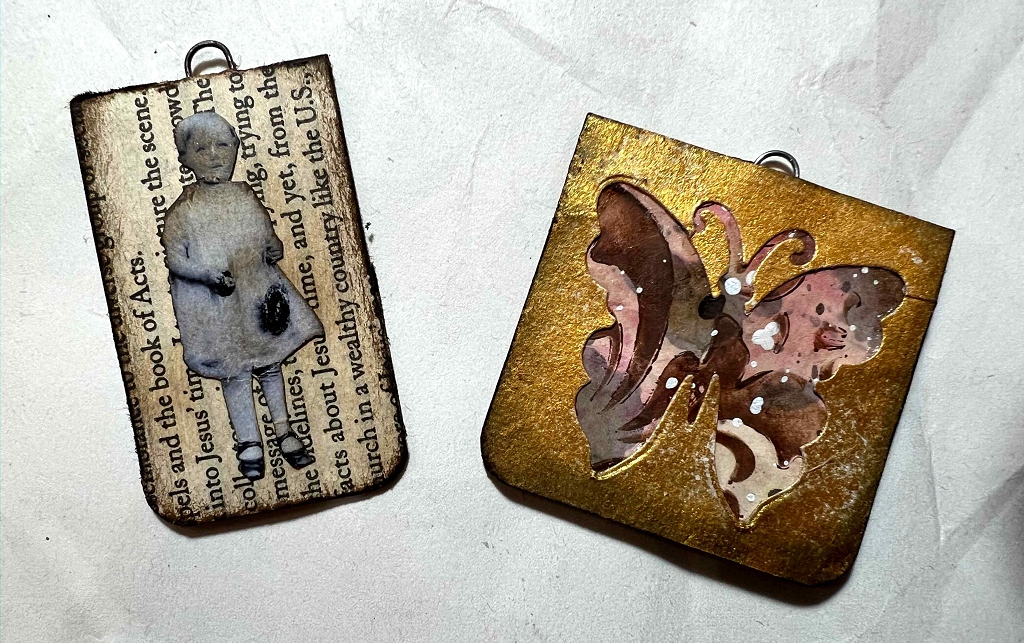
For each one, I folded a piece of scrap card in half and made a slit at the top, through which I poked the paperclip. I then folded another piece of card and glued each surface to the inside of the first piece, trapping the paperclip inside. To decorate the one on the right, I was rummaging through my card scraps box to find something interesting, and I found a piece of white card with the negative space left from die-cutting a butterfly at some point. I glued a piece of the mixed media paper onto the outer part of the paperclip and then glued this negative butterfly piece on top, after I’d sprayed it with gold ink. The mixed media paper therefore shows through the hollow butterfly.
For the one on the left, I covered the outer surface with some book page which I’d inked, and added a fussy-cut figure of a child on each side.
The other side of the clips
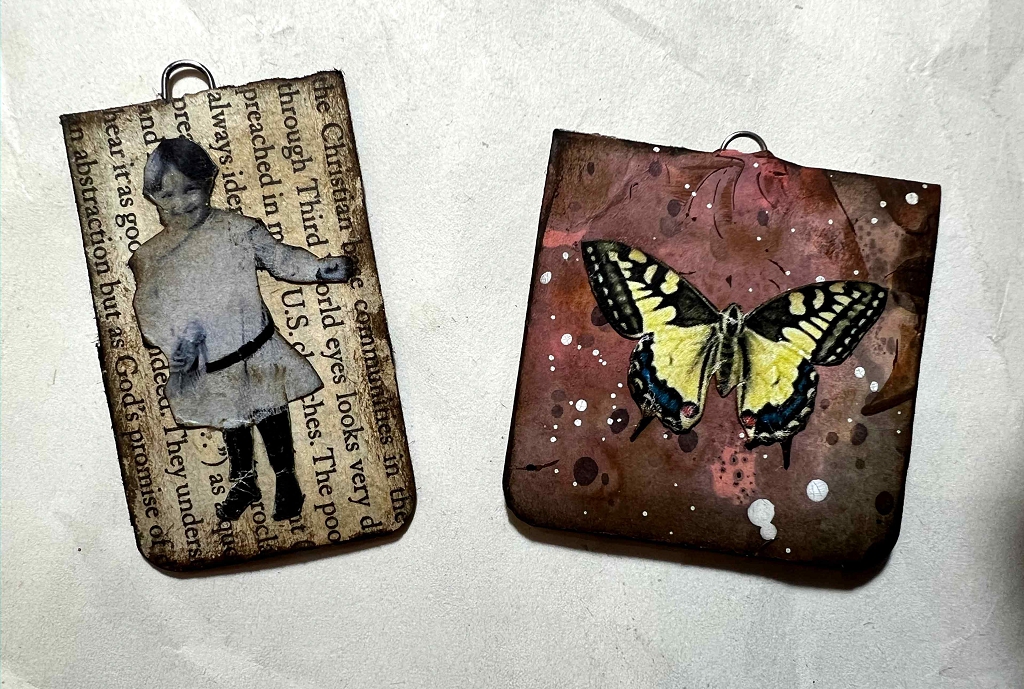
Turning them over, the one on the left is very similar front and back, but the one on the right just has a fussy-cut butterfly glued onto the mixed media paper.
To finish them, I rounded the corners at the bottom and inked around all the edges. The protruding top of the paperclip is ready to have some twine or ribbon threaded through for embellishment.
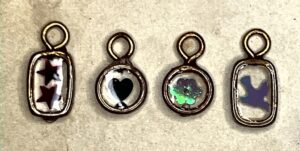
These hidden paperclips are quite small, so I used regular-sized office paperclips for them. I have some larger ones for bigger hidden paperclip embellishments.
Hidden paperclips are a fun interactive element in an album. You can move them around; they can act as page tabs, or simply to hold a loose element in place, such as a floating pocket or a tag. I’ve only just discovered how to make them and they are tremendous fun to make! You can make use of the tiniest scraps of waste card and offcuts of pretty paper or fabric. These ones are fairly simple and they are flat enough not to add too much bulk to a page but the sky’s the limit really.
I shall be making more covered packaging pockets and utlising the offcuts for more hidden paperclips or page tabs or clusters. I’d like to cover all the pieces I pulled out today, and discipline myself not to stuff them back in the box for another day! Definitely time to use up some of this stuff and make a bit more room in the studio!
What a fantastic use of envelopes and cutout thingies! Amazing – and you’ve captured such a sense of the past with the black and white photos. It’s truly lovely!