SOME EMBELLISHMENTS FOR THE ORIENTAL ALBUM, AND A FAN POP-UP
I’ve been working on a few embellishments to go in my 8 x 8-in Oriental-style album. Some of the pages really don’t need much adding to them so I’m keeping them simple, and splashing out on the other ones. I’ve been following various videos about pop-ups and am going to incorporate some in this book as they are really fun and interactive.
I’ve always been fascinated by pop-ups and loved pop-up books as a child, particularly ones with little tabs to pull to make things move. There is something amazing about a 3-D paper structure which folds completely flat!
Embellishing the waterfall inside the front cover
I had left the inside of the front cover like this:
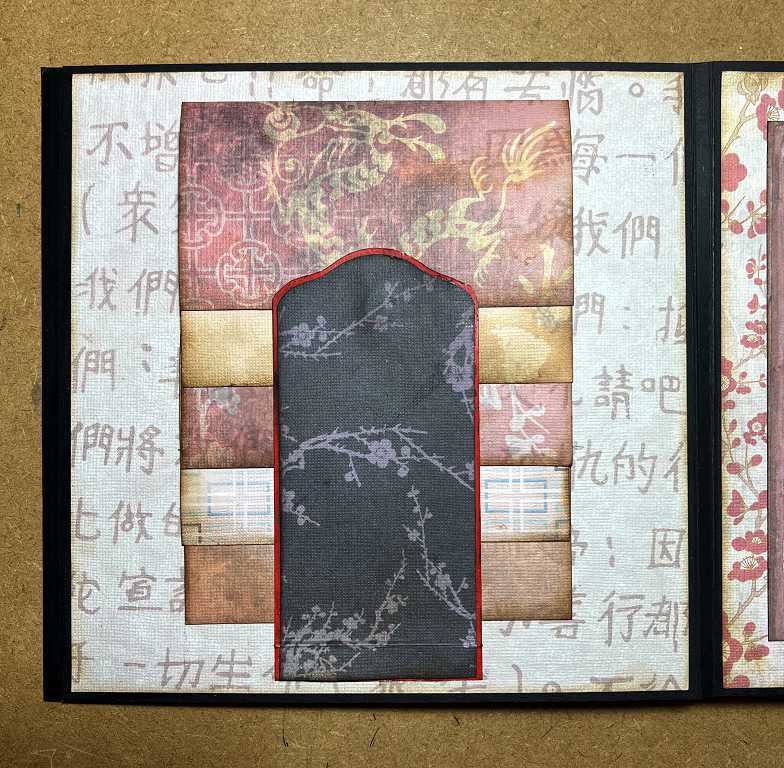
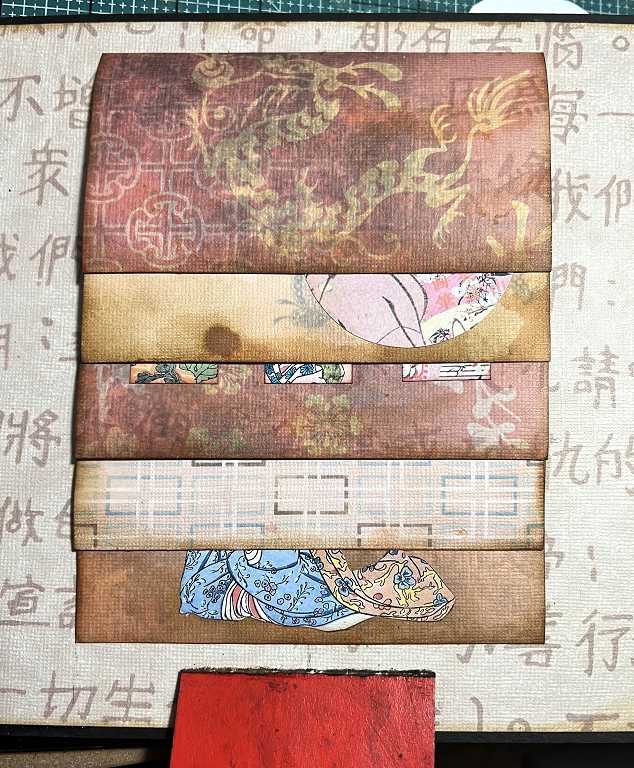
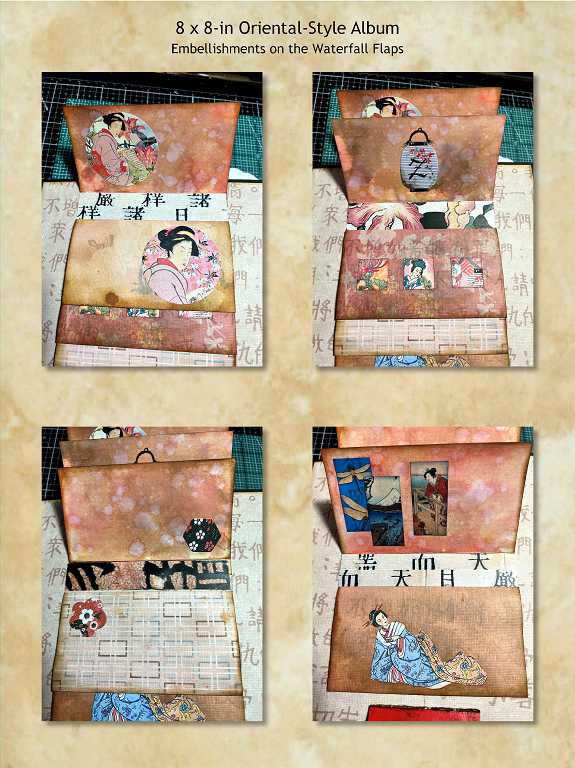
with the magnetic strap holding the simple waterfall in place. It definitely needed further embellishment. I have added some little pictures from the Graphics Fairy Premium Membership site to the flaps of the waterfall as well.
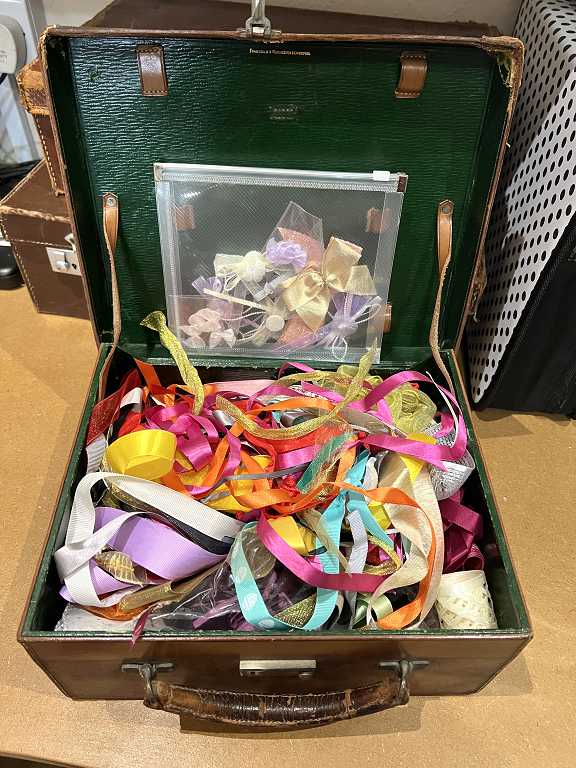
I love my vintage leather suitcases which are family heirlooms. I use them to store ribbons, trimmings and lace.
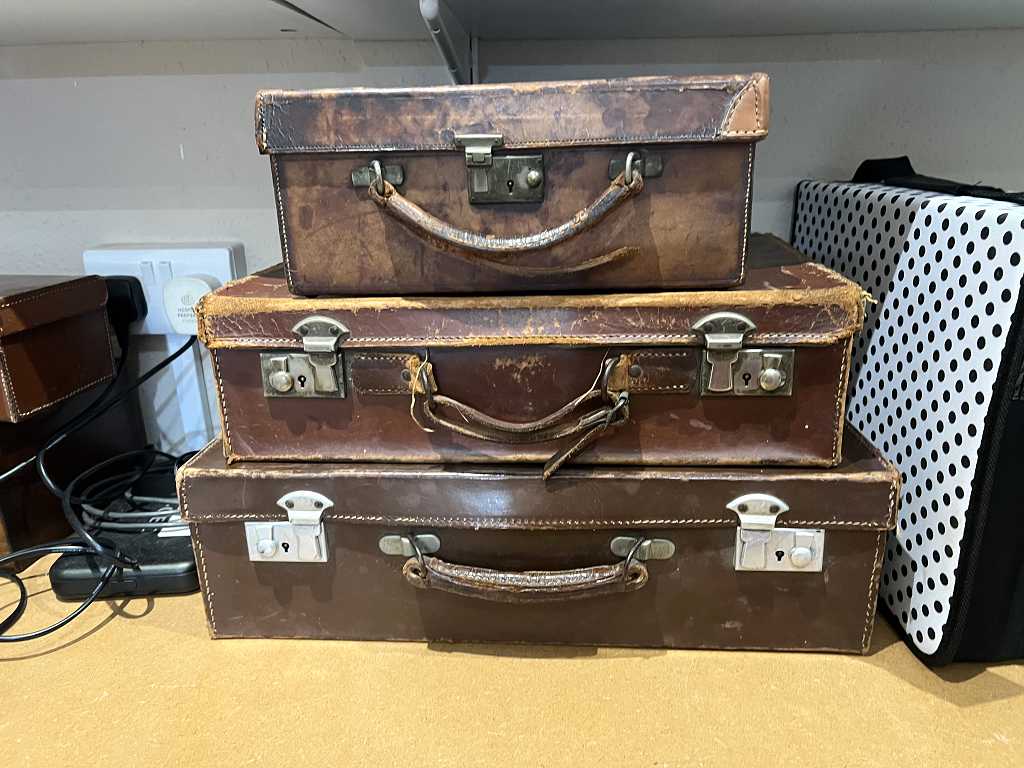
In the smallest one, I’ve got a wonderful jumble of ribbon scraps.
I found a piece of cream with gold edges, and the border of another piece of the same which I’d cut off at some stage.
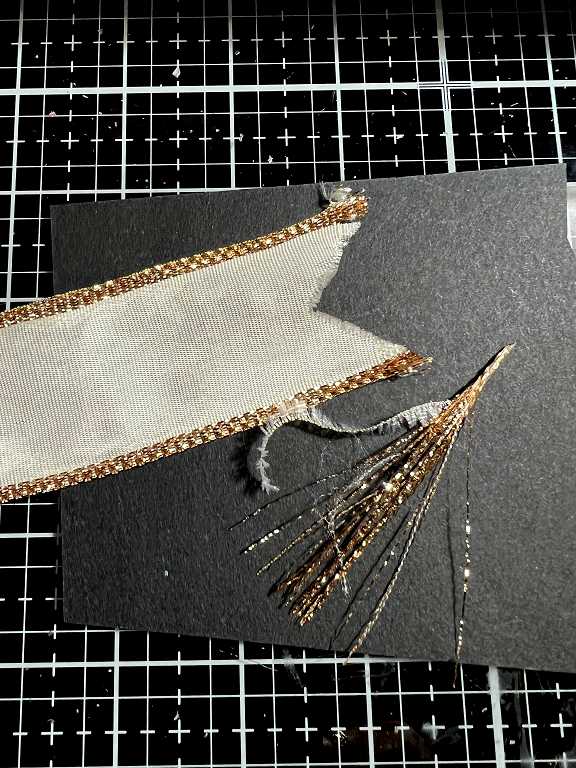
As I handled it, it began to fall apart, and I thought that if I rescued it, I could make it into a tassel! The frayed cream fabric just adds another element to it. I twisted and squashed the ends together between my fingers with some tacky glue until it began to set. I ironed the tassel between baking parchment to straighten the threads. I ended up making two of these. It was quite a fiddle as the gold strands seemed to have a life of their own!
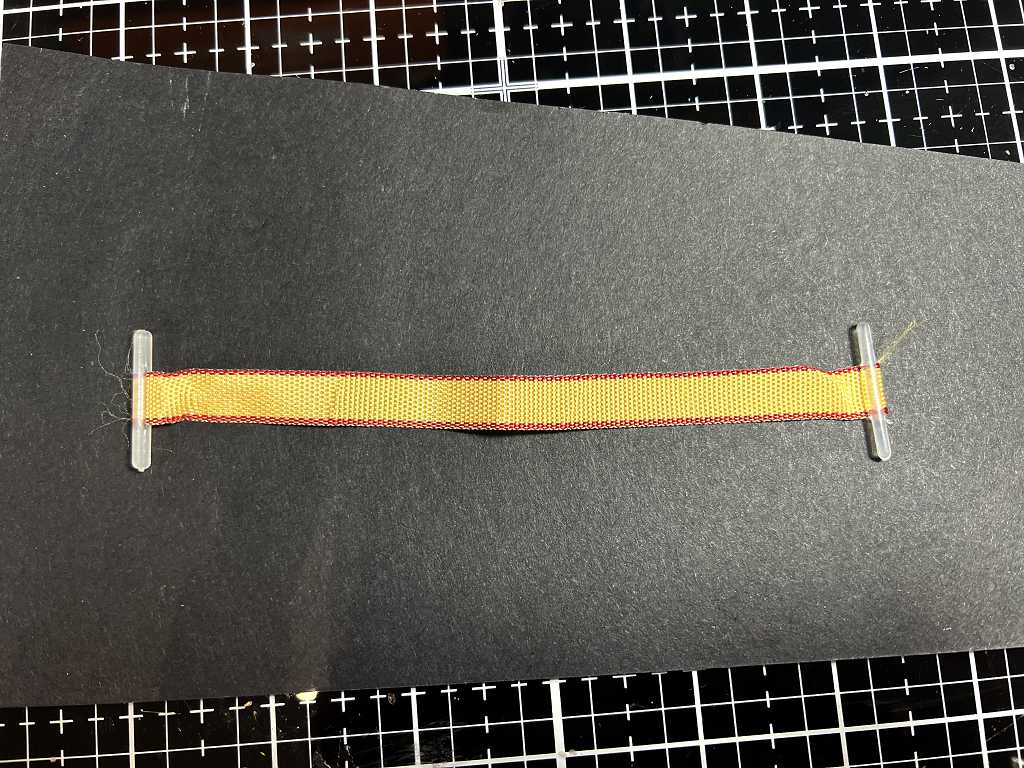
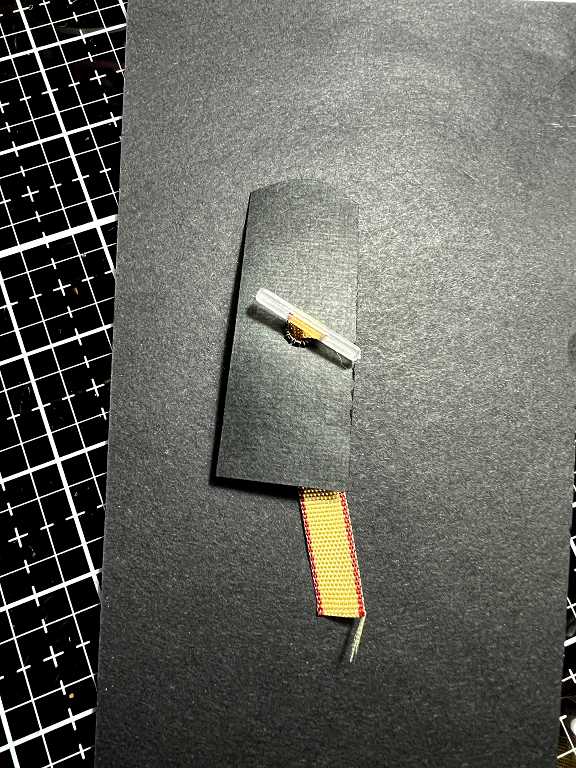
Another thing I found in the ribbon rummage was this little ribbon strap with plastic toggles on either end. This was the handle on the packaging from a Panettone loaf that I’d had one Christmas, and I thought that half of this might be just the thing for embellishing the magnetic strap on the waterfall page.
I selected a fragment from the Graphics Fairy collection and cut it to shape, mounting it on some textured black cardstock. Using my Crop-a-dile, I inserted an eyelet in the centre.
Half the little Panettone strap with its toggle inserted through the eyelet.
Another rummage through the ribbons and my bead box and I made some tassels to come through the eyelet. They were attached on the back with some double-sided tape above the eyelet, and with the addition of some tacky glue, the top half of this embellishment was attached to the magnetic strap.
The little Japanese girl wooden button came with the small pack of Japanese embellishments from the craft show. The small red bead was glued btween the loops of the bow on top of her head. The carved bone bead is one of several from my stash, from a vintage necklace. The gold thread on the smallest of these danglies came from the Japanese embellishment pack.
Some detail shots.

You can see that I have inked the frayed ribbon in the gold tassel, as I thought the cream was a bit too stark. I simply pulled it over the surface of the Fired Brick Distress Ink pad.
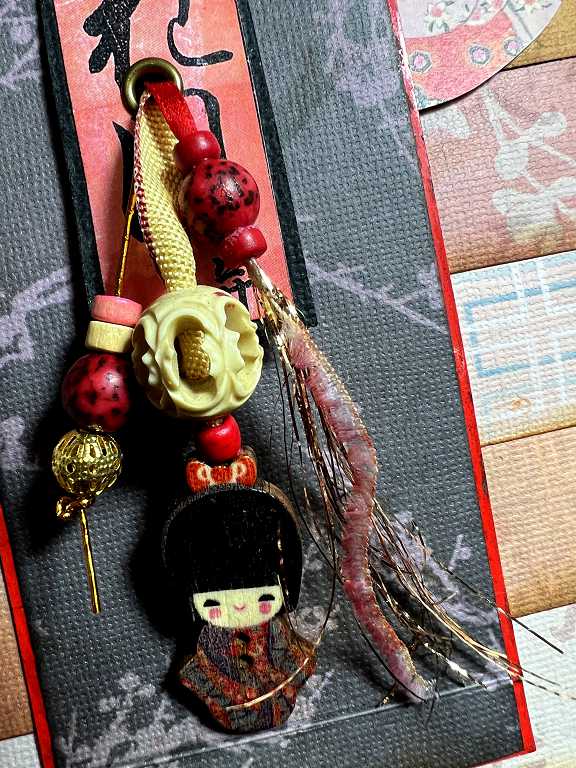
The carved bead makes this embellishment rather thick, but I was hoping that since several of the pages have little on them, I’d get away with it. This didn’t allow for my propensity for adding beads, however… (More later.)
Pop-up fan
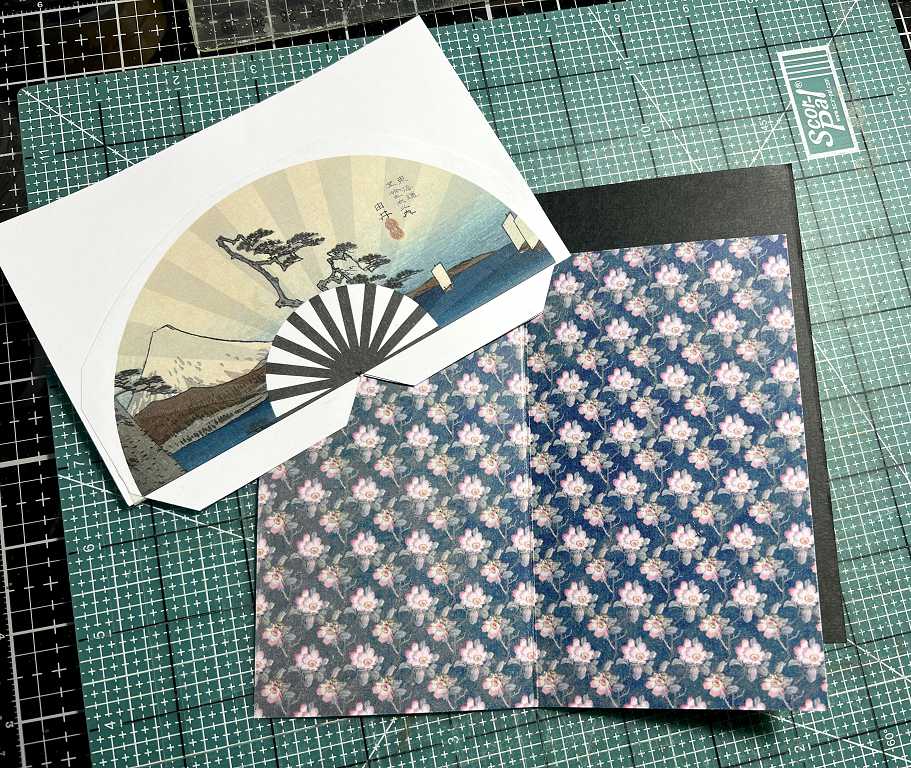
These are the pieces I printed and cut out, ready to make a pop-up fan embellishment.

I spent several hours working on this fan, designing it in my desktop publishing software, and it was very difficult!! When it was printed out, I experienced some difficulties with it.
In the above picture, the plain grey piece didn’t print out properly and came out streaky. This was supposed to be a “sandwich” piece between the two printed pieces but I threw it away and glued the two printed pieces back to back with a piece of black cardstock between.
This was a mistake. Actually there were several things wrong with this fan. First of all, it came out much too thick. I was worried about the pop-up element being too flimsy, but scoring it down the centre after glueing the pieces together proved difficult, and the back part was beginning to crack, despite my taking great care with repeated scoring and gentle folding, coaxing it into a fold.
Then, when I tried to cut out the wedge-shaped pieces between the fan struts, I was making a mess because the whole thing was too thick. Also, however hard you try with lining things up, it’s almost impossible to get it exact, and the printed struts on the back piece weren’t perfectly aligned with the front.
At this stage I decided to abandon this piece and print it again. I set it aside to adapt and use elsewhere in the book.
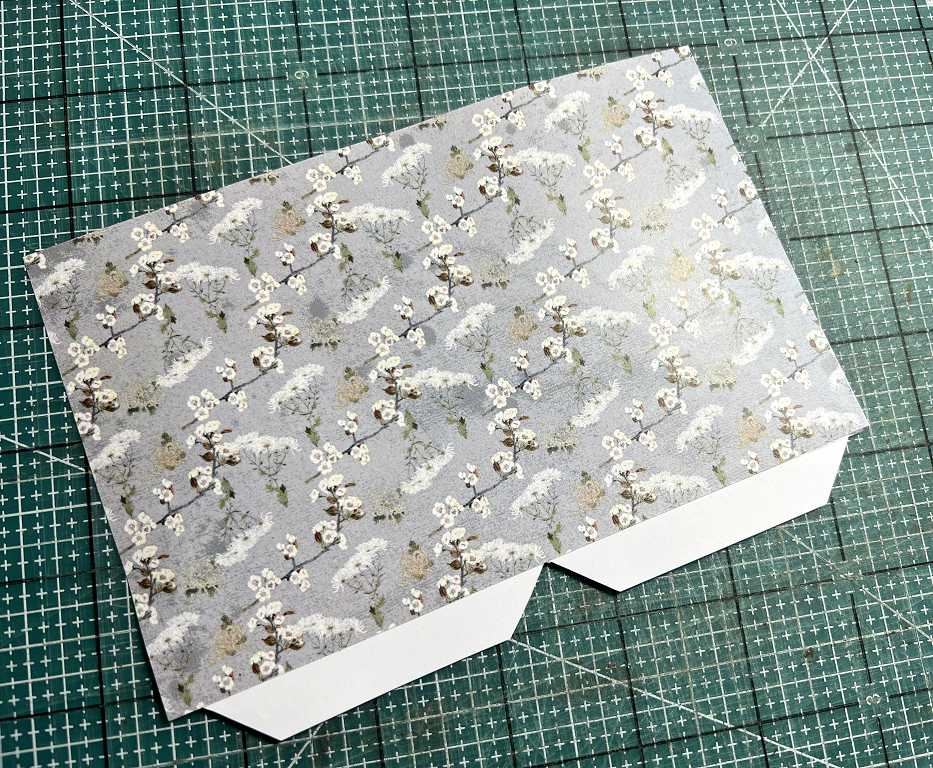
For the second version, I simply printed a small rectangle of the background paper (from the Graphics Fairy) for the reverse side, and glued the front fan piece onto this and cut it out as a single piece, omitting the mounting tabs on the bottom of the back piece, as you really only need one thickness for this.
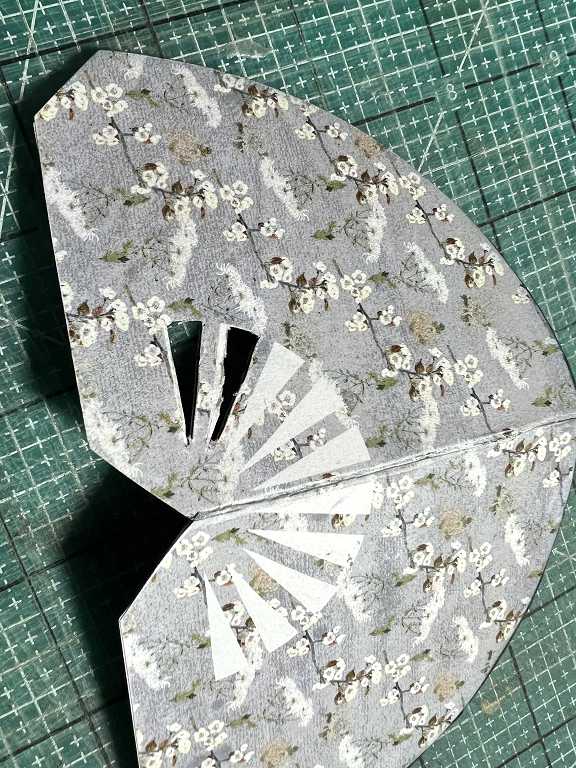
Here is the glued fan piece ready for cutting, together with the pieces for the pop-up mechanism.
Part of the problem with the cutting out of the wedges on the first piece was that the tacky glue wasn’t quite dry. This time I left it until the piece was completely dry before attempting to cut it. My new finger blade is proving really useful for this kind of thing.
I cut the wedges out successfully but they were a bit messy. After running round the edges of the cuts, and also over the whole of the front of that part with a grey marker pen, the result was very much better. I did get better at it as I worked around the fan – practice makes perfect!
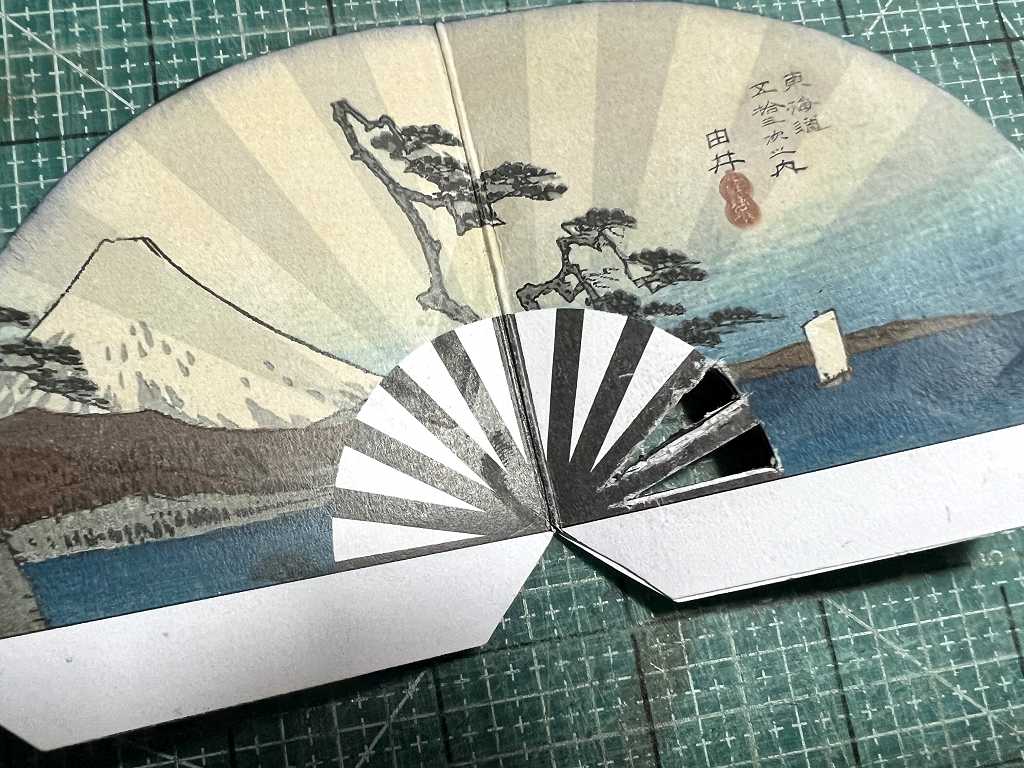
I folded the patterned background piece in half vertically and cut a diagonal slit from the centre outwards, to accommodate the tabs on the fan. I inserted them into the slit and glued them to the back of the sheet. I was then ready to assemble the mechanism, sandwiching magnets and a ribbon tab between the layers before glueing the whole thing together and attaching it to the page of the book.
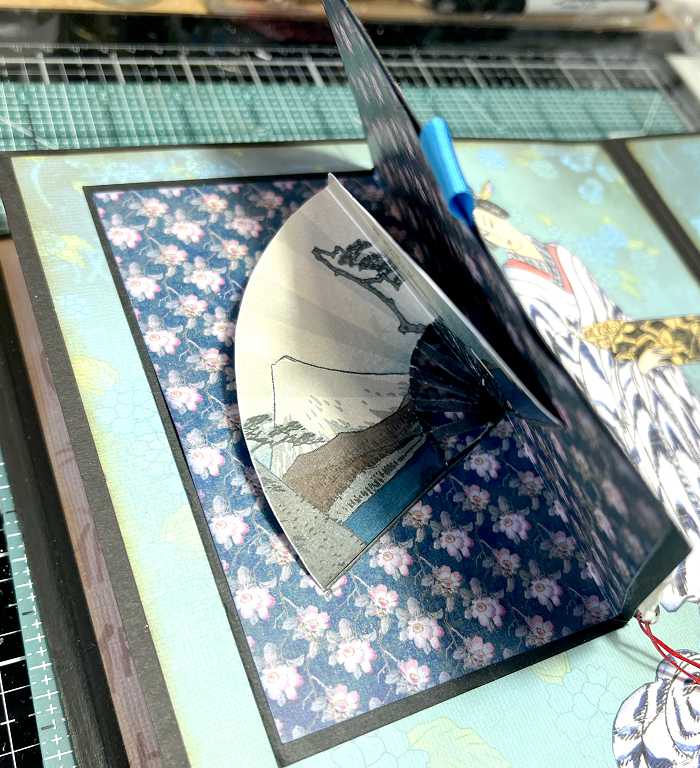
Here is the completed pop-up. It is probably the simplest pop-up you can make, but effective. I followed a YouTube video for inspiration.

The ribbon tab to open it. The magnet is invisible, sandwiched between the layers.
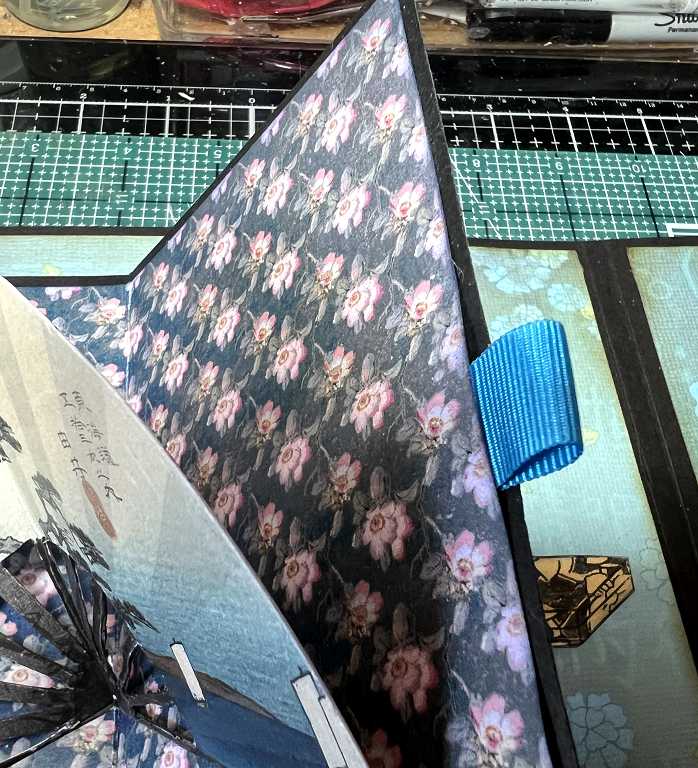
Closing the pop-up, showing how the fan folds flat.
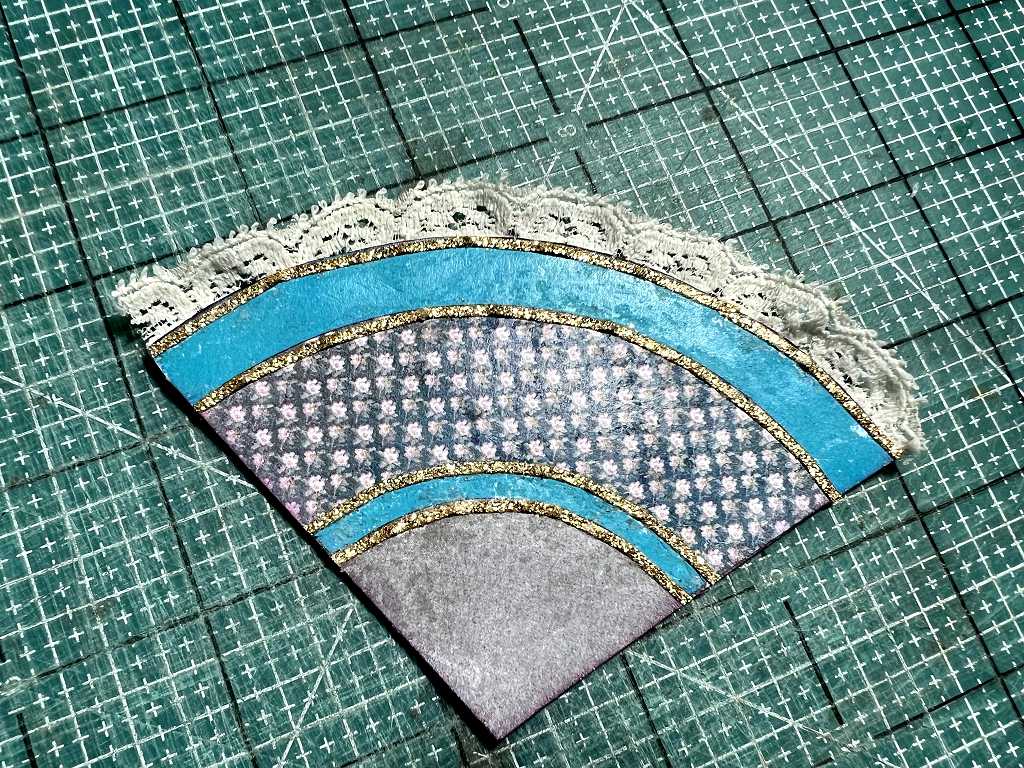
I made the small fan to tuck into a pocket on the front of the pop-up element. This was designed and printed as a single piece, and again I backed this onto a background piece and cut out the whole thing in one. I dug around in some ancient stash and found some gold peel-offs which I used to use in my early days – these narrow sparkly strips have deteriorated somewhat with the years and it was hard to peel off a single strip without it breaking, and the self-adhesive backing wasn’t as good as it had been, so I attached these strips with a narrow bead of tacky glue, curving them around to follow the shape of the fan. The scrap of cream lace from my stash was sandwiched between the two layers of the fan and stuck with tacky glue.
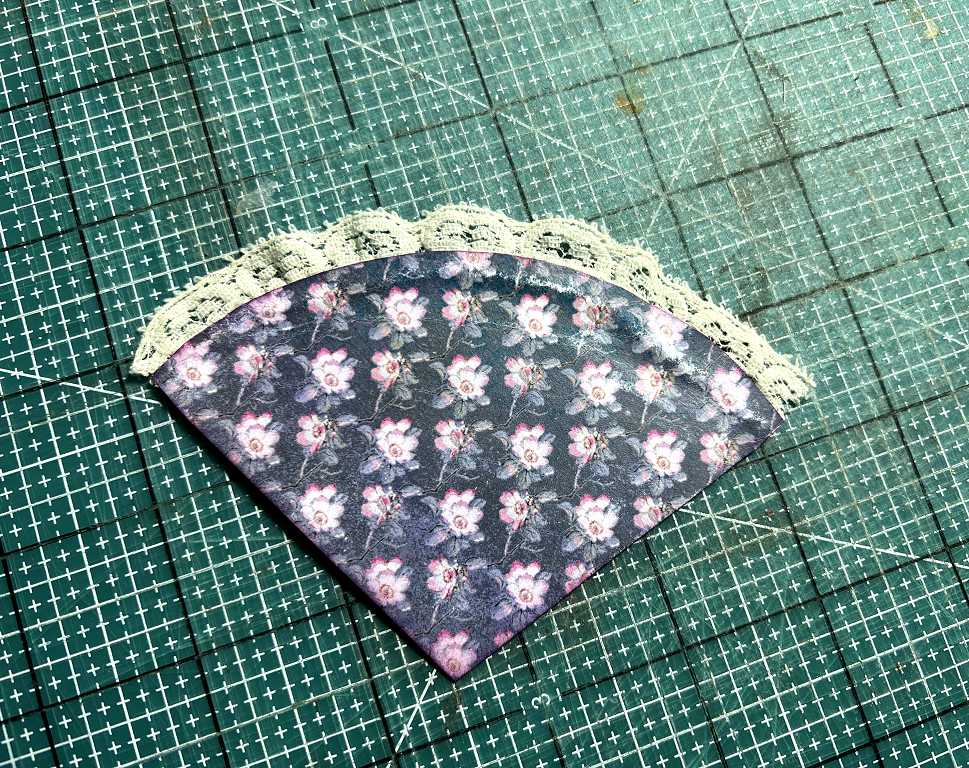
The reverse side of the small fan.
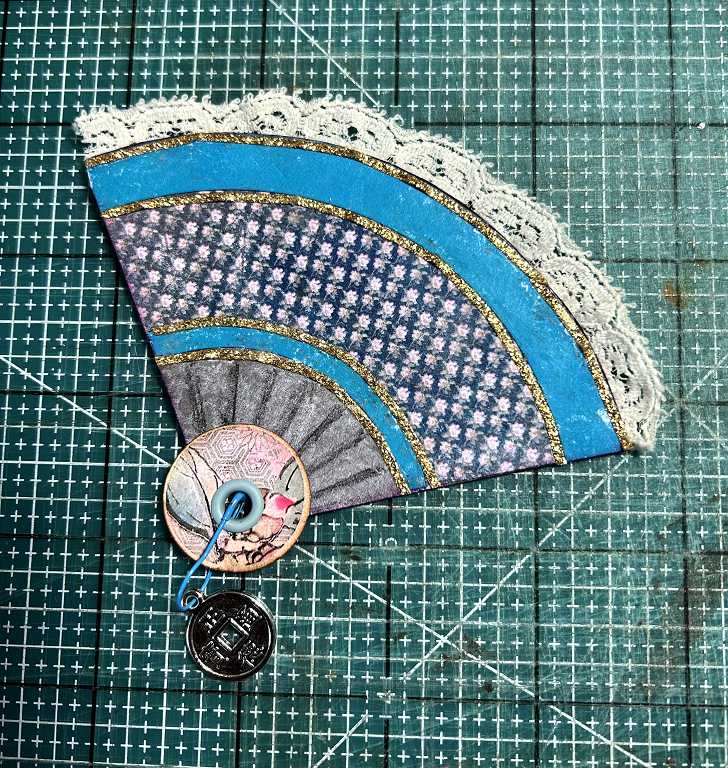
I used a couple of the small Graphics Fairy circles to complete the bottom of the fan, sandwiching the fan between them and glueing them securely with tacky glue. I punched a hole, added an eyelet, and made a dangly embellishment. A few radiating lines drawn on the bottom part of the fan with a grey coloured pencil completed the illusion of the fan struts.
Various embellishments
The little silver coin embellishment was attached with one of my new bulb pins – I bought a pack of these in different colours. They are like little safety pins and are very handy for adding beads and other embellishments to projects.
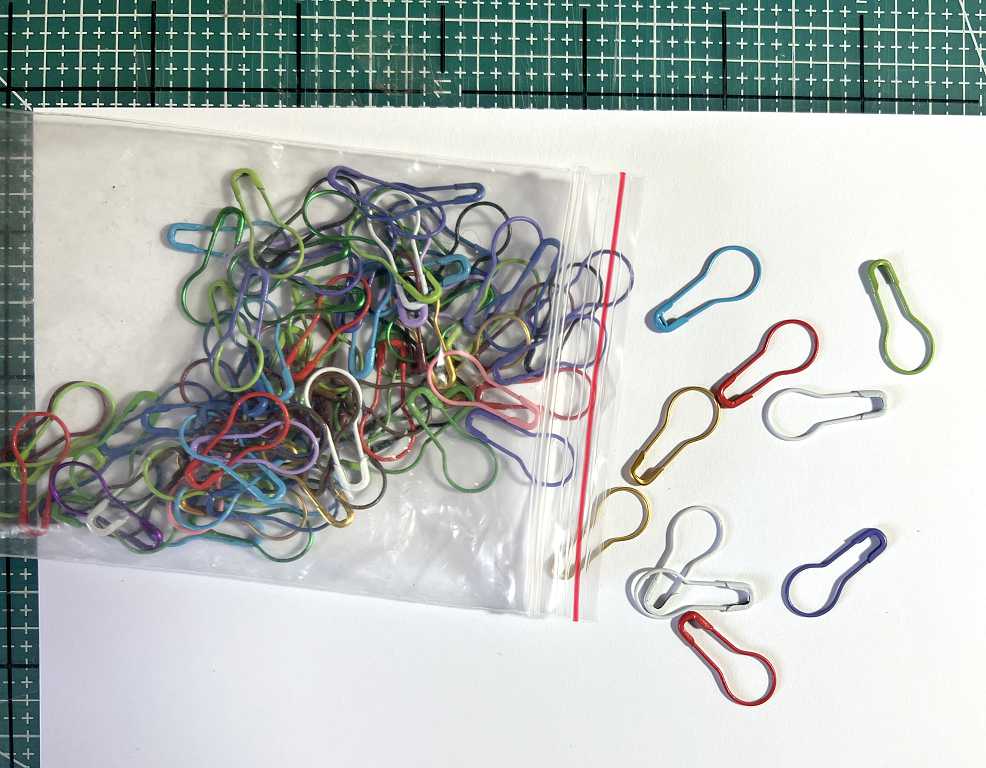
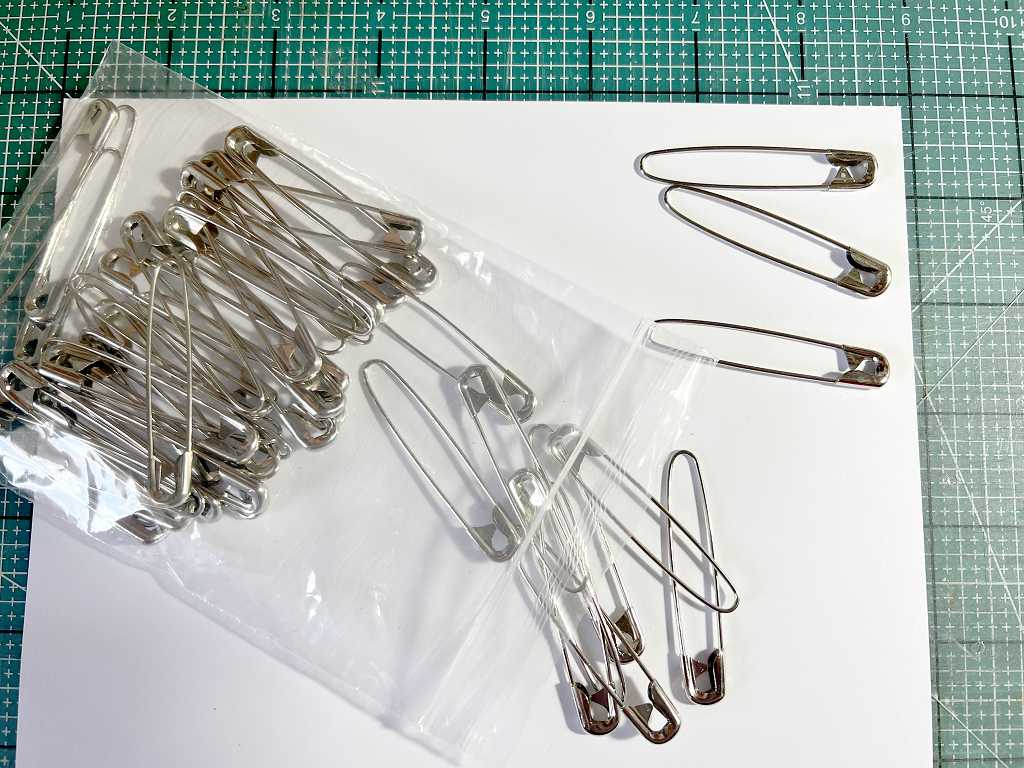
At the same time, I ordered some coil-less safety pins (these were quite hard to track down). The advantage of these is that you can slip on quite a few beads and danglies and slide them around to the other side of the pin, leaving the pointed end free to go through whatever you are attaching it to – with a traditional safety pin, there is not enough room on the pin for this, as the embellishments won’t go past the coil.
On the subject of embellishments, I’ve also acquired two packs of decorative bulldog clips. The wire ones came in various sizes and unfortunately there are very few of the tiny ones – the large ones are huuuge! – and probably won’t be much use for album attachments. The little brightly-coloured ones at the top of the photo are more promising. They will all come in handy for holding things while glue sets, too. With these bulldog clips, you can detach the handles and slip on beads and danglies if you want.
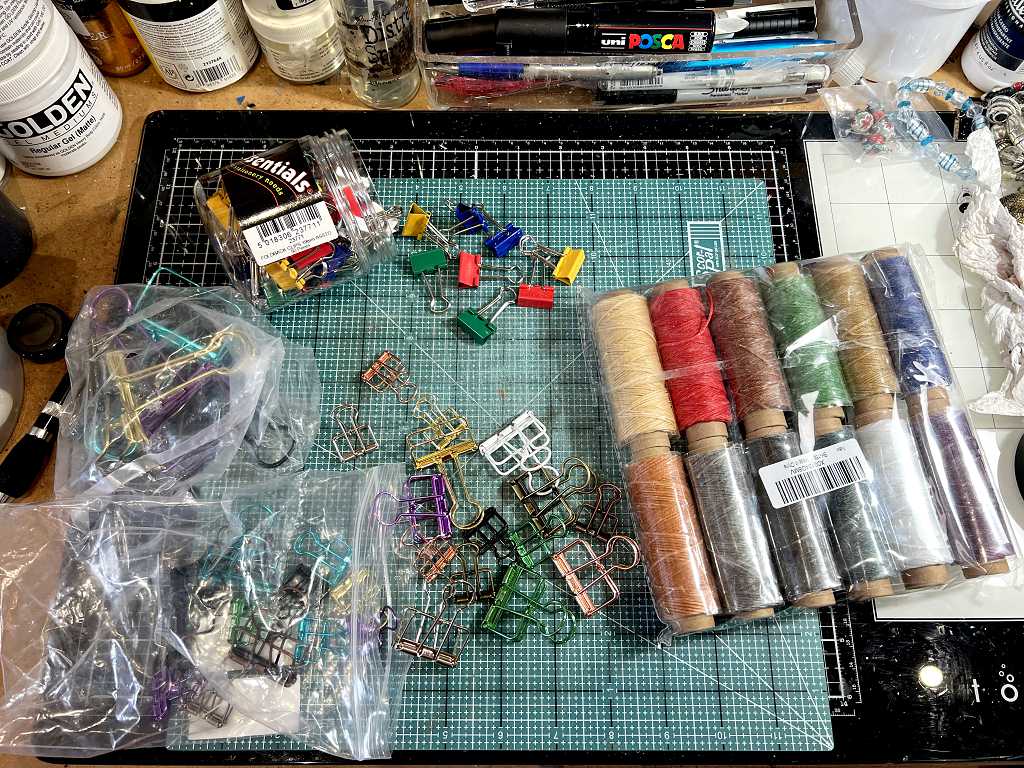
Also in this picture is the pack of coloured waxed threads that I bought some time ago for binding signatures. I used some of the red to attach the embellishments to the cover of this pop-up (see below).
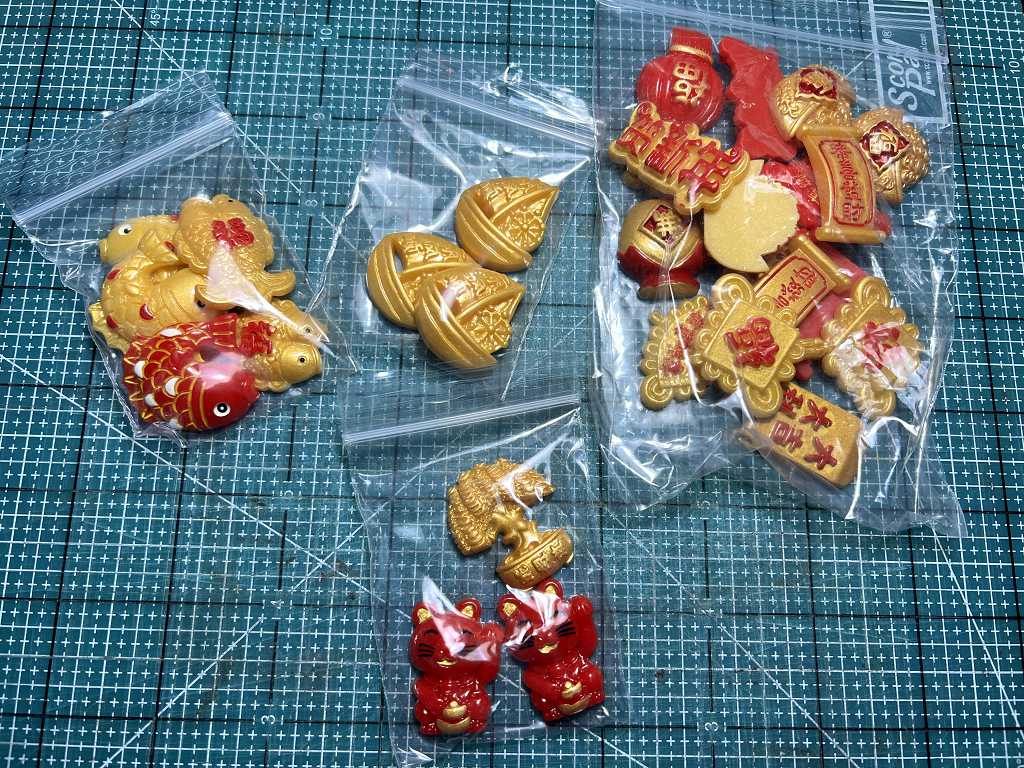
Some el cheapo plastic Chinese embellishments from Ebay. I may have to drill holes in these, or stick them on. They are a bit thick and will add further bulk to my album!
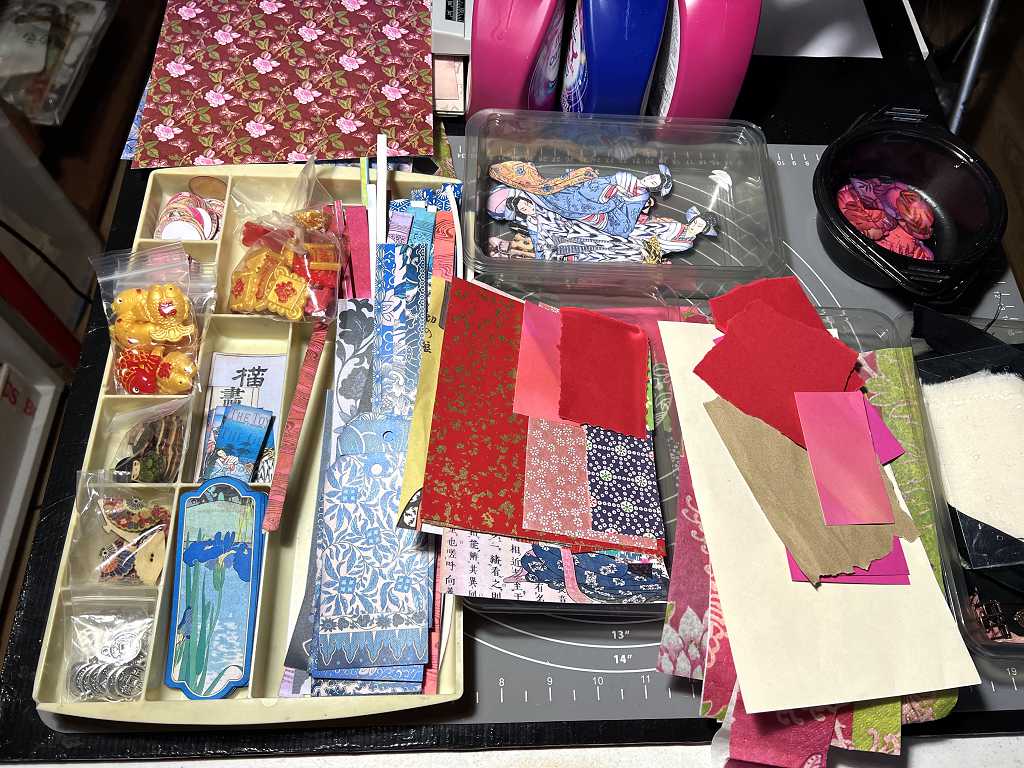
This is the state of my pull-out unit at the moment, which I am using to organise my various embellishments and print-outs for the album.
Embellishing the fan pop-up
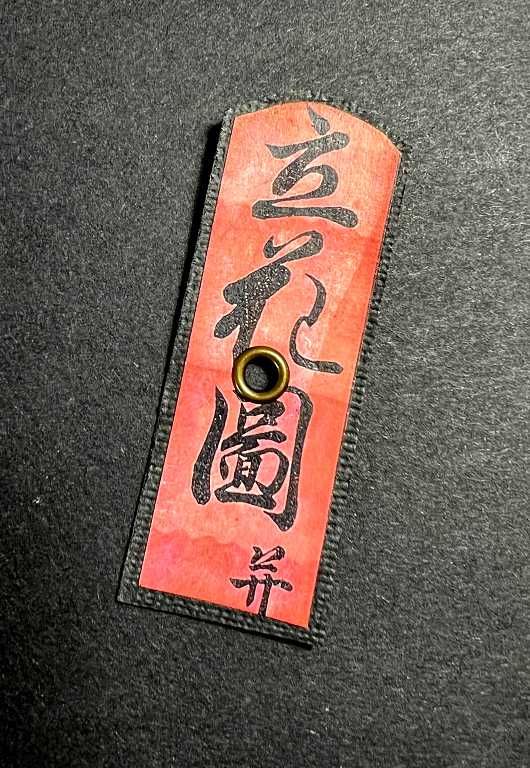
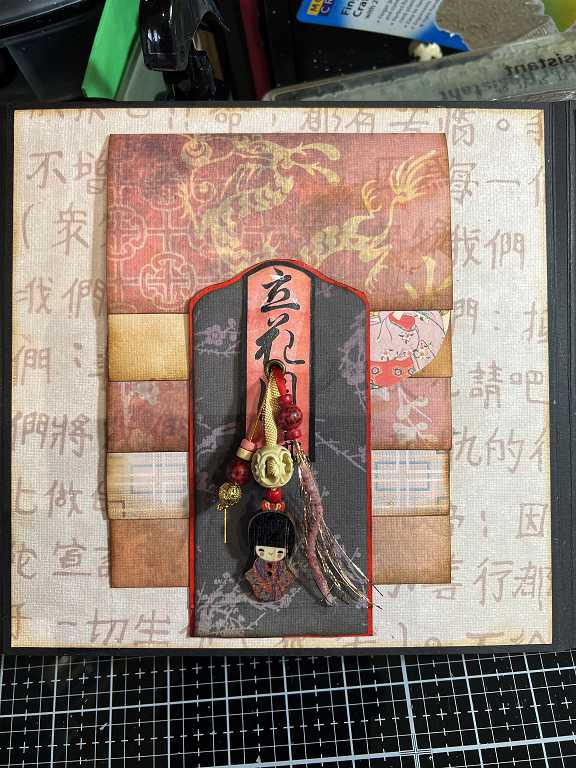
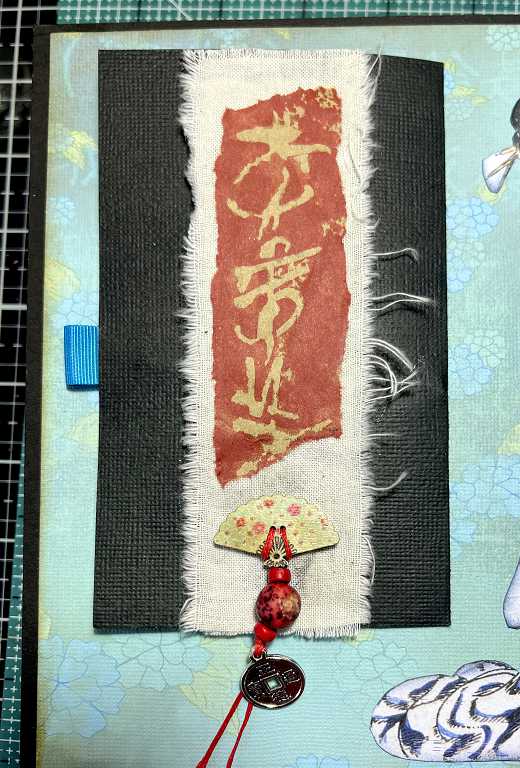
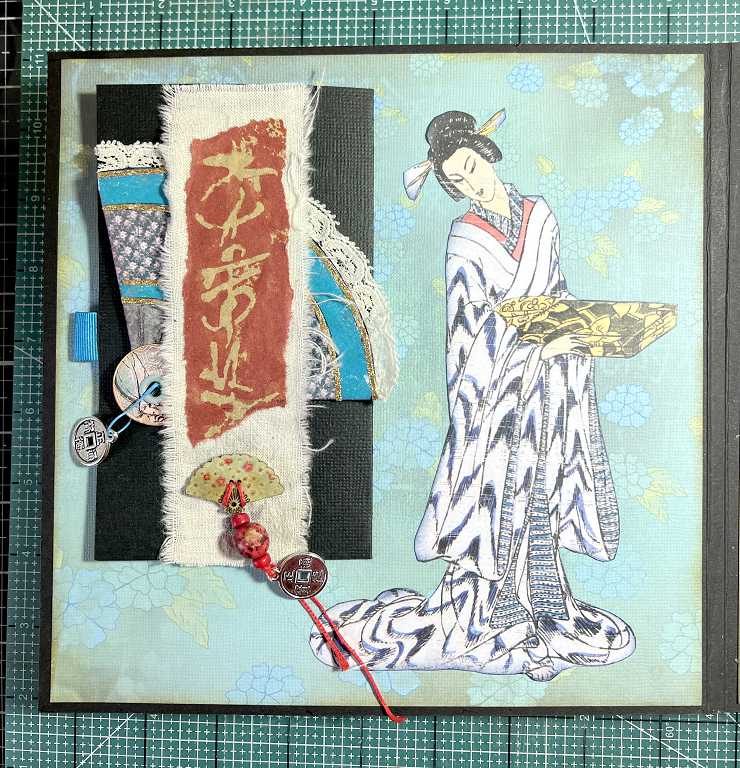
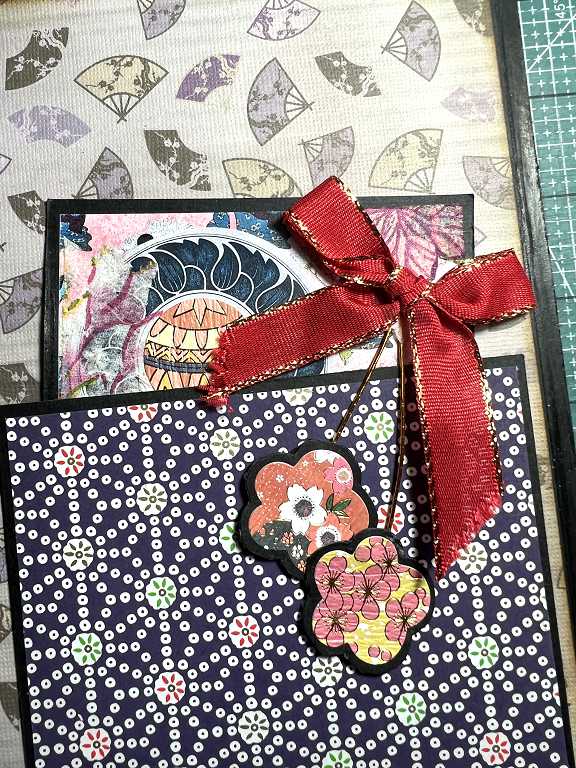
To embellish the black cover of the fan pop-up, I glued down a small piece of my intuitive Oriental-style scripting which I’d done with one of my own masks with red ink onto some Amazon packaging paper. I have quite a few pieces of this in my stash. I glued it onto a torn strip of callico which I attached to the cover, using Fabri-Tac glue for both. I chose a small wooden fan bead from the Japanese embellishment pack and attached some beads and another small coin embellishment, using the red book-binding cord.
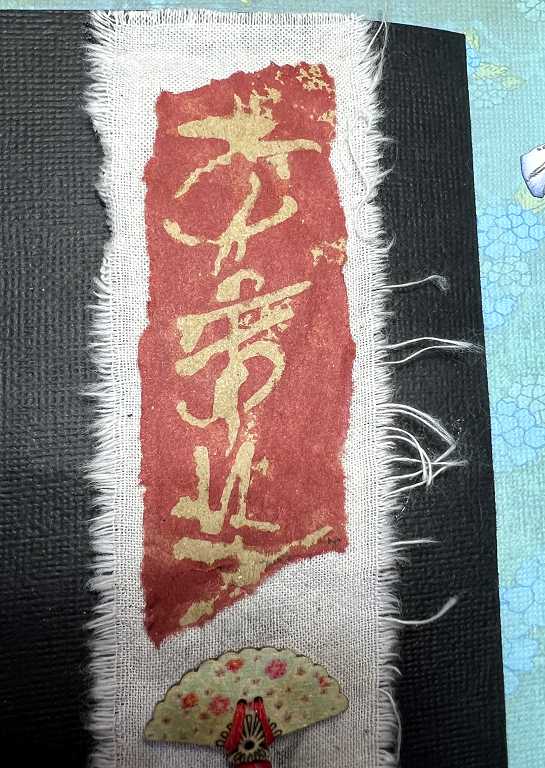
The calligraphy strip.
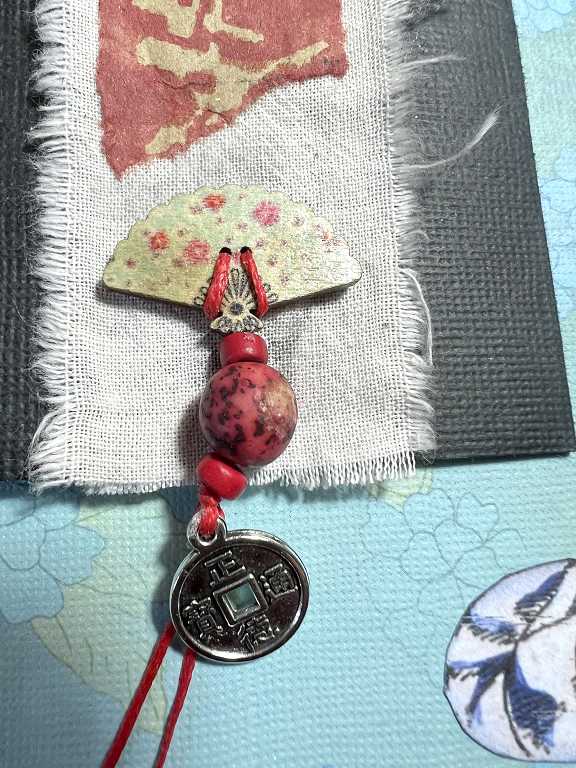
Detail of the fan and bead embellishment.
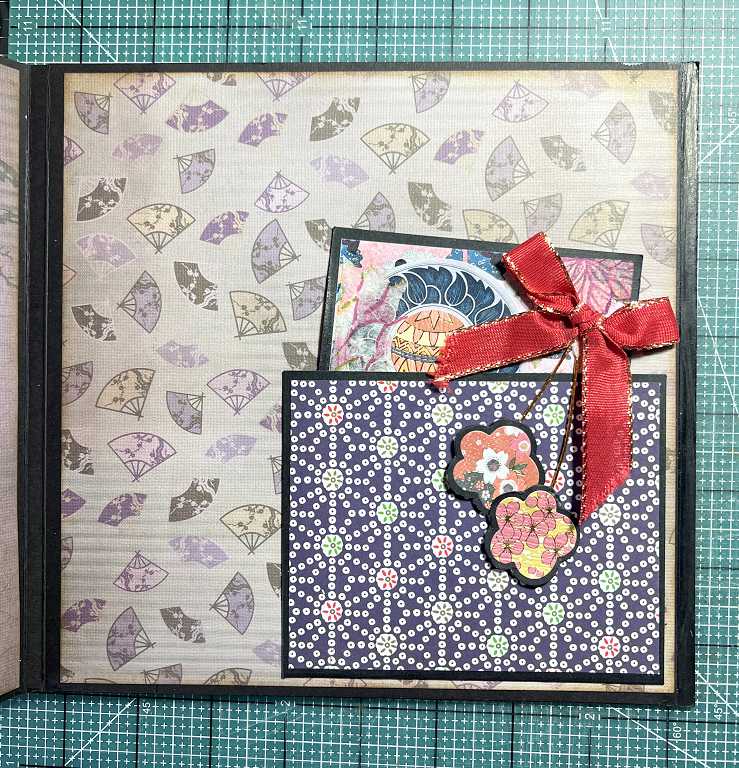
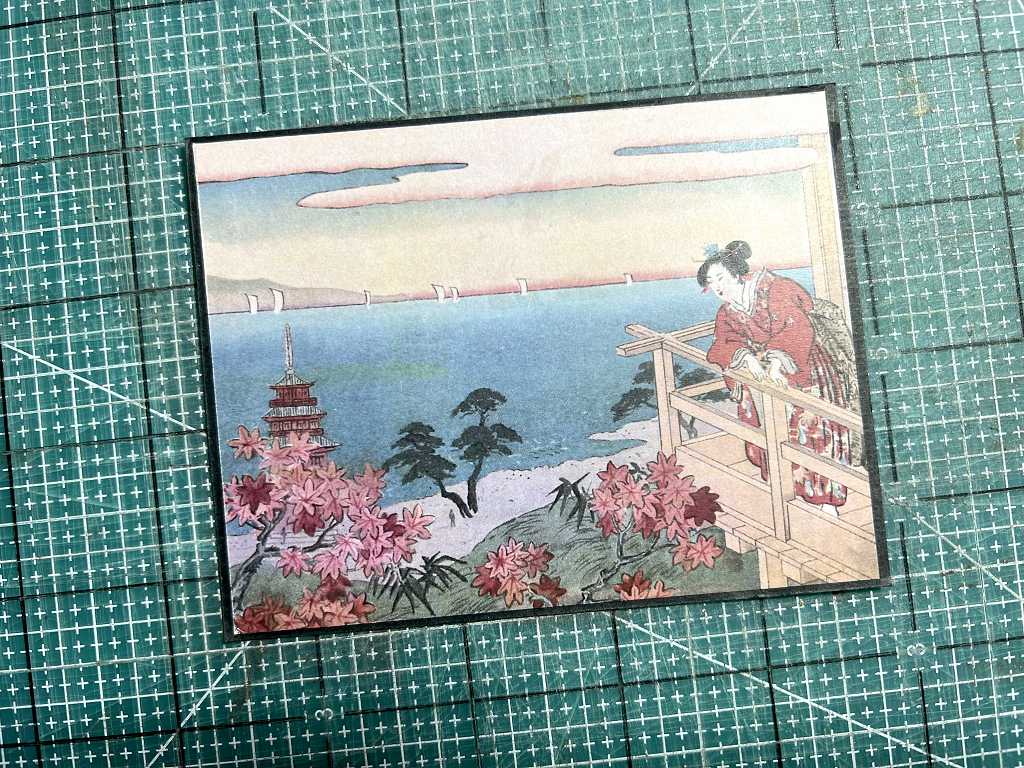
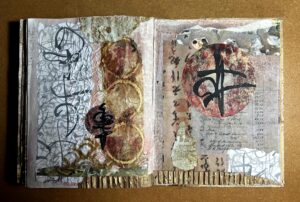
The completed page, with the addition of a Japanese lady on the right-hand side, fussy cut from one of the Graphics Fairy collection of images.
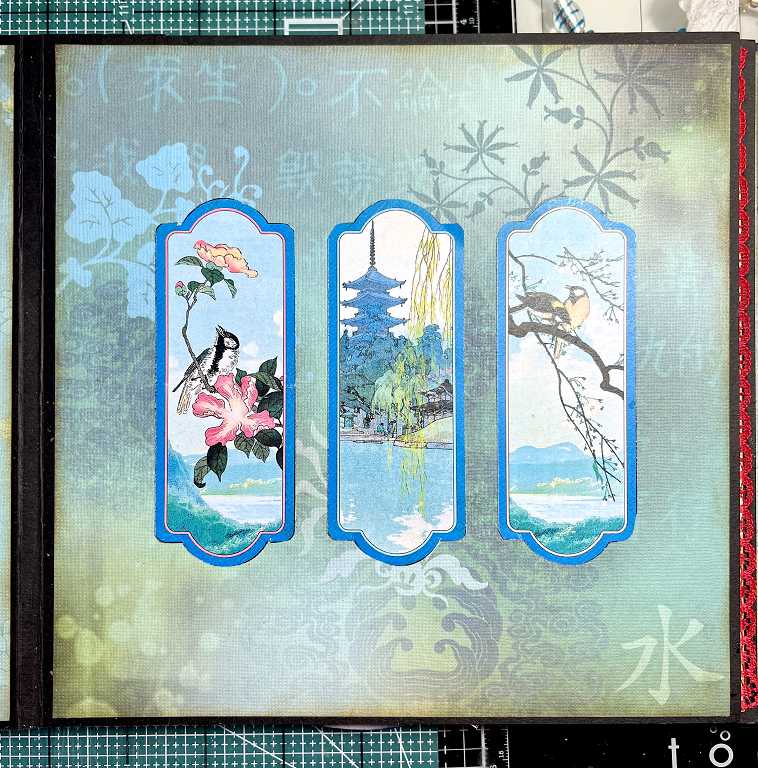
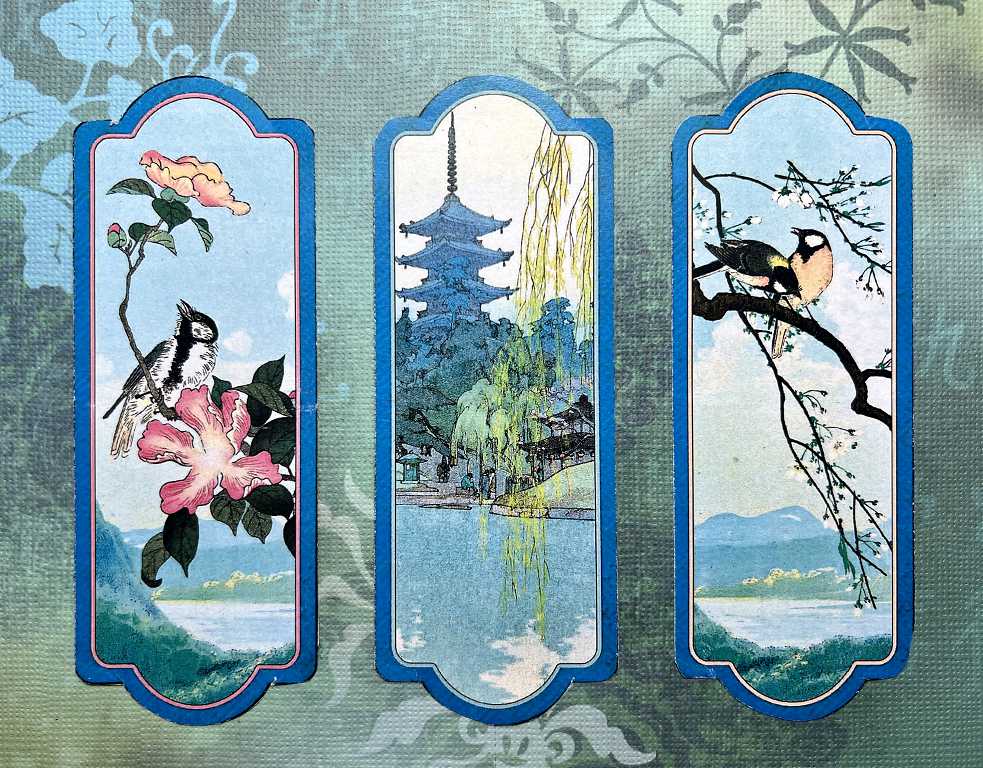
I decided to keep the right-hand page simple, and just glued down a little triptych of three panels from the Graphics Fairy collection. I absolutely love the packground paper for this page and didn’t want to cover up too much of it.
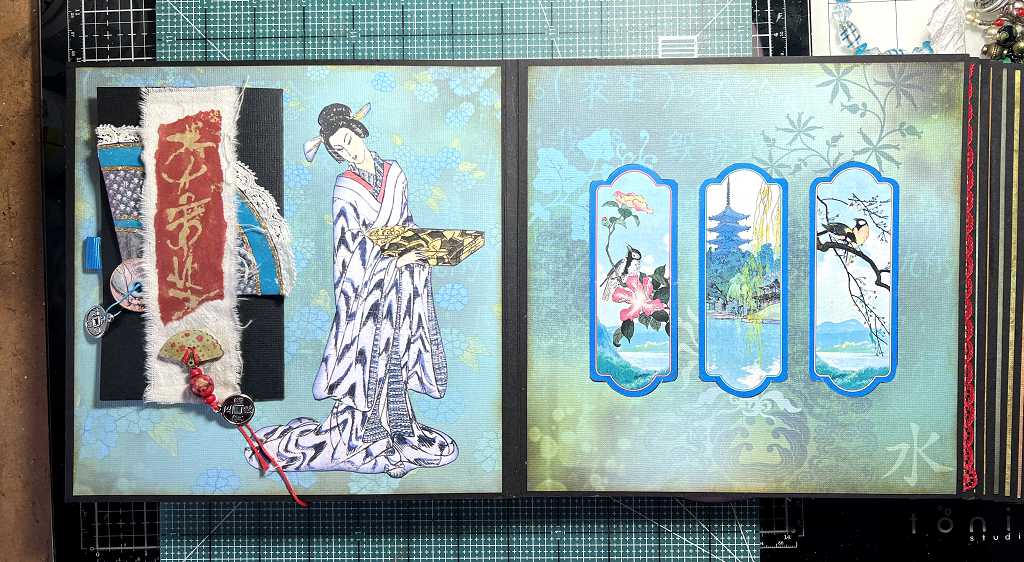
The completed spread.
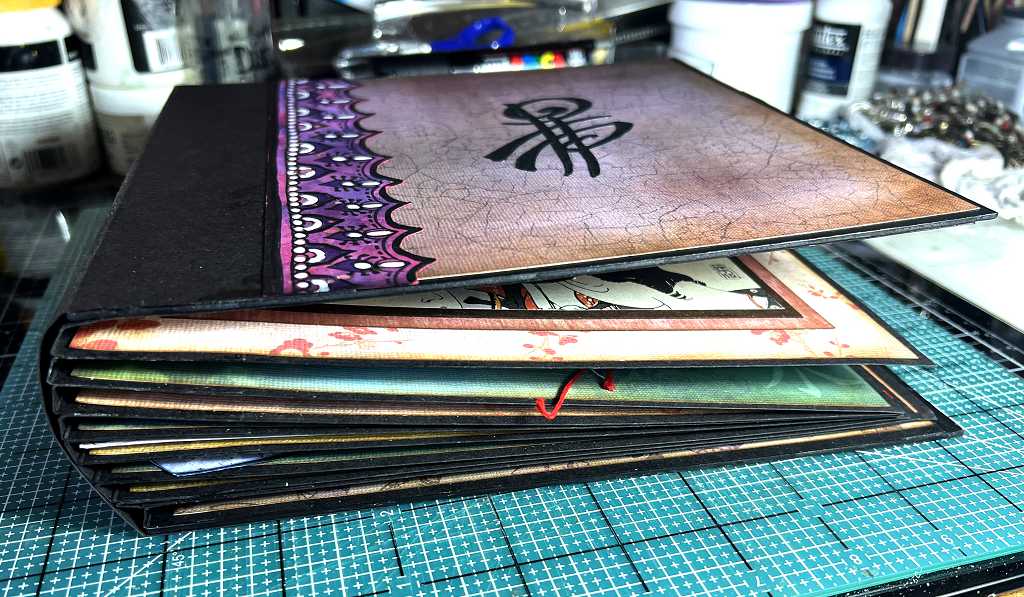
Bead overkill!
I am going to have to stop using any more beads in this project from now on! I thought the book was going to survive all this thickness, but look how thick it already is, and I have plenty more pages to work on!
I am not working through this book in chronological order, but jumping about as I choose different pages for whatever I feel coordinates well.
More embellishments and papers
I made this embellishment the other day.
The background of this one was a piece of Graphics Fairy background paper glued onto some black cardstock. The blue circular element is another piece from one of their collections, and I glued a sticker from the Japanese embellishment pack in the centre, and made two danglies with two more of the stickers, backed onto black cardstock, dangling on some more of the gold thread from that pack. It was topped off with a red bow from my ribbon stash, and down the left-hand side I glued a fragment of napkin left over from the laminated napkin embellishment I made the other day. I like how this blends in with the background and partially covers the blue roundel. There’s another little fragment of it in the top right-hand corner under the bow.
I decided to put this embellishment in the pocket I have stuck on the inside of the back cover of the book, with its danglies hanging on the outside.
The paper on the pocket is from the Japanese embellishment pack.
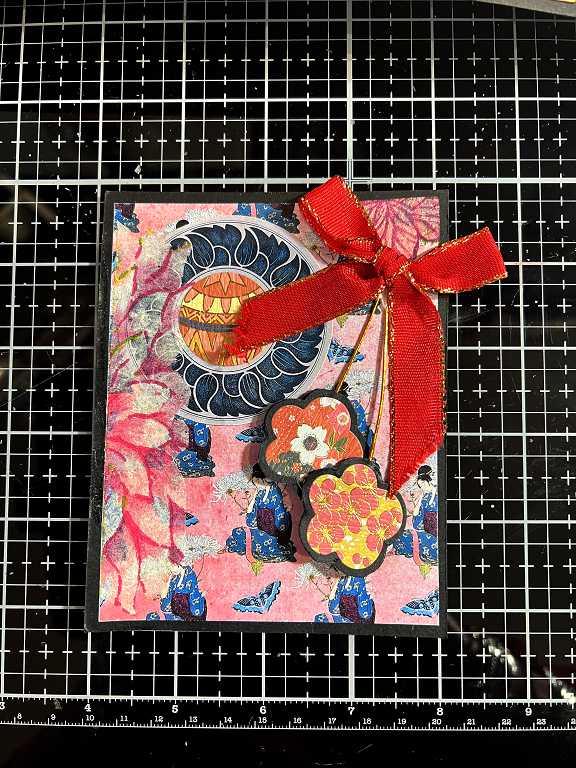
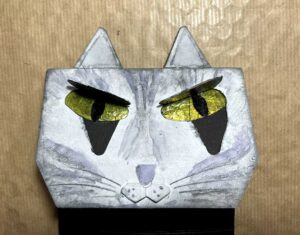
I also made this small picture card, and have yet to decide where it will go.
I realised I had not posted a picture of the cover of the paper stack I have been using to make this album. It is from DCWV – probably no longer available as I’d had it for several years before finally deciding to get down to using it!

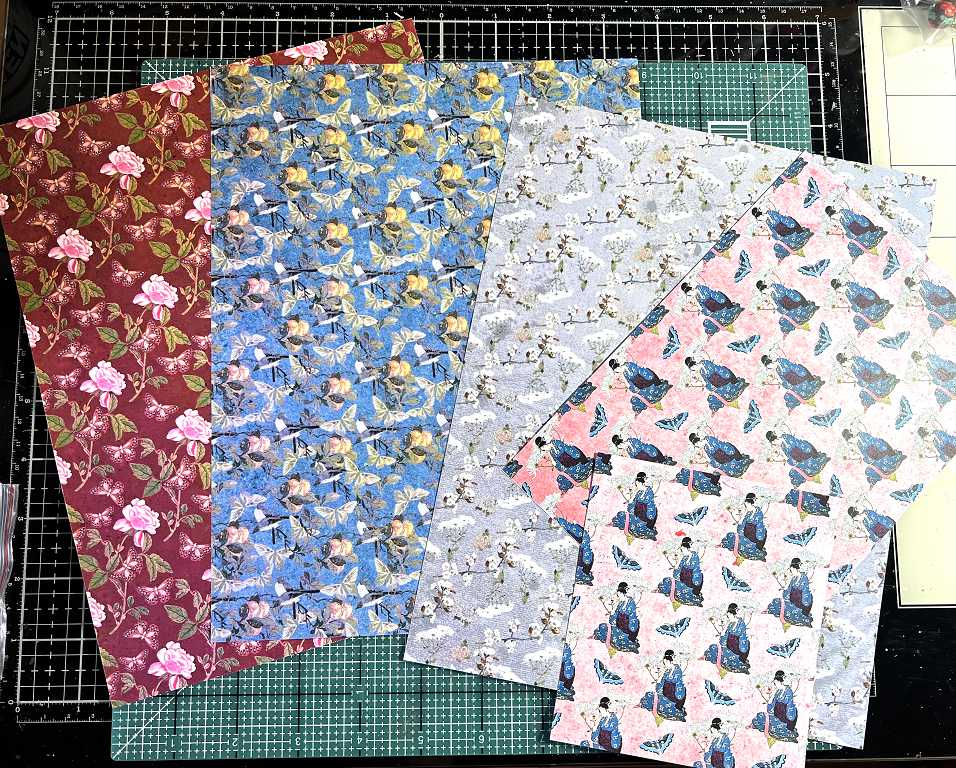
Finally, some of the Graphics Fairy backgrounds I’ve printed out from their Premium Membership site.
I have several more pop-ups in the pipeline, and I hope I shall be able to restrain myself and not add any more beads or my album will end up as a real crocodile mouth!! (RIP Shoshi, devoured by a crocodile.)
This is so exquisite Shoshi! I love the pop-up fan, and also the embellishments – especially the carved bead, but also the little China lady!! This truly captures the Eastern Oriental culture and is a work of art. Love it!