A PINK PAGE IN MY ORIENTAL-THEMED ALBUM
Having made a large collection of elements ready to create embellishments for my 8 x 8-in Oriental-themed album, I was keen to start working on the pages. I decided to leave the second spread for now and work on the next one which has a pink theme.
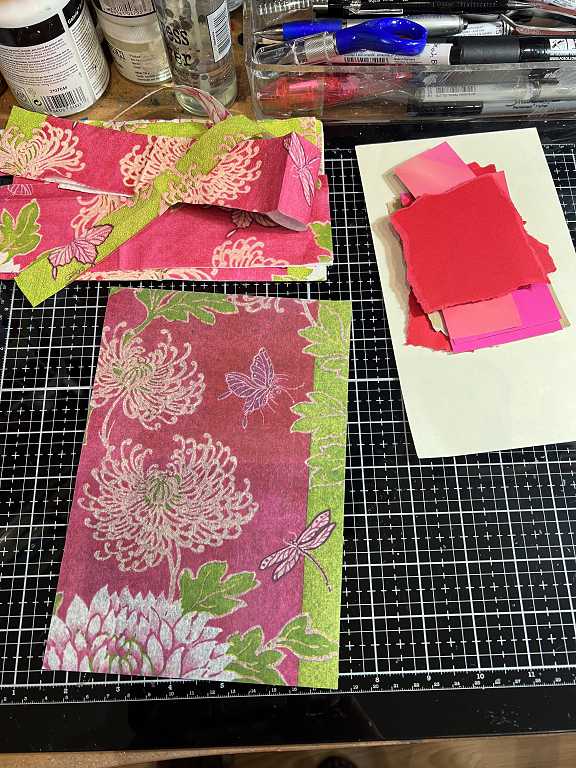
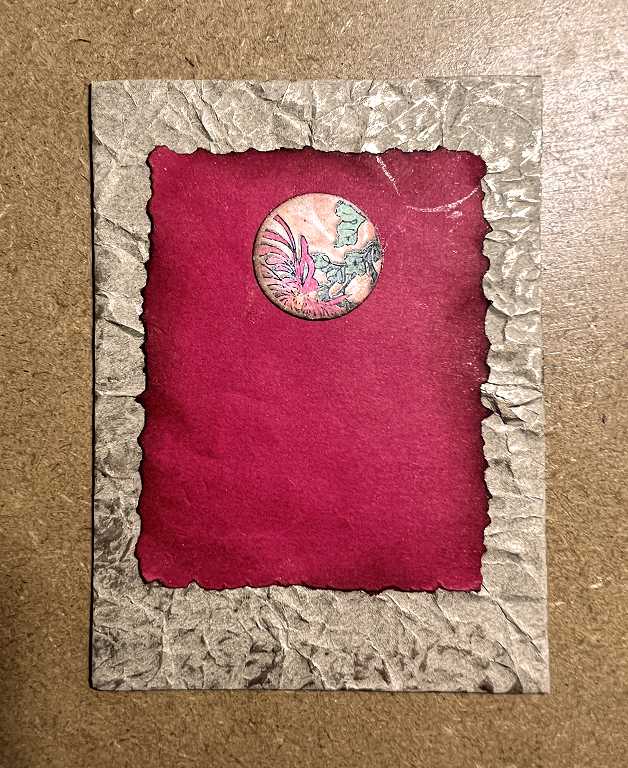
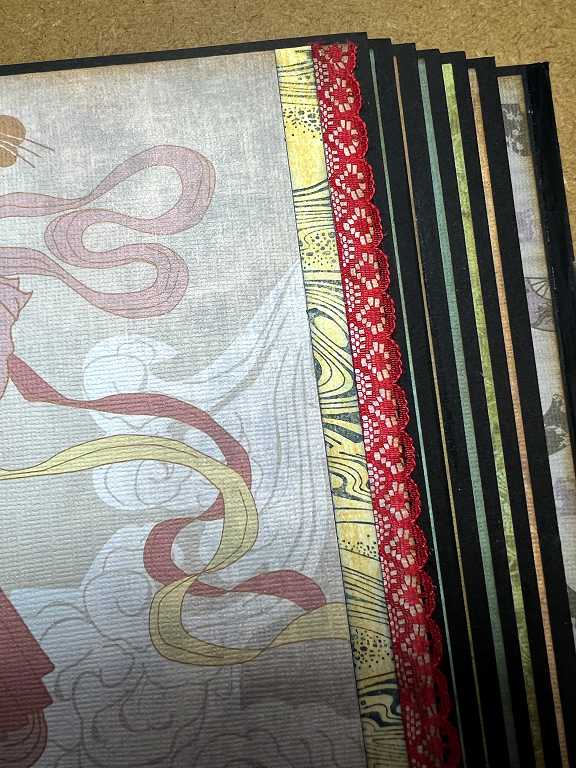
I began by selecting some papers, including a very pretty napkin from my stash, which I cut into several smaller pieces and removed the plain backing layers. I laminated two pieces back-to-back with a couple of sheets of plain copy paper between them, in a matte A5 laminating pouch and then trimmed off all four sealed edges to reveal two pieces of laminated napkin. This has made them much stronger, and with a nice somewhat silky semi-gloss finish on one side, and a papery back which will take glue. In the above picture, one of these laminated pieces is in the foreground, and the pieces above are not laminated. The laminated piece is fairly translucent and I tried it against various coloured backgrounds, settling eventually on cream-coloured paper which was less stark than white, and didn’t dull the colours as much as red. Once this was stuck down, I matted it onto some red card.
The smaller pieces on the right in the above photo are scraps from my stash, some of which I ripped along the edge of my DIY deckle edged ruler.
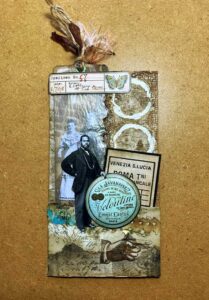
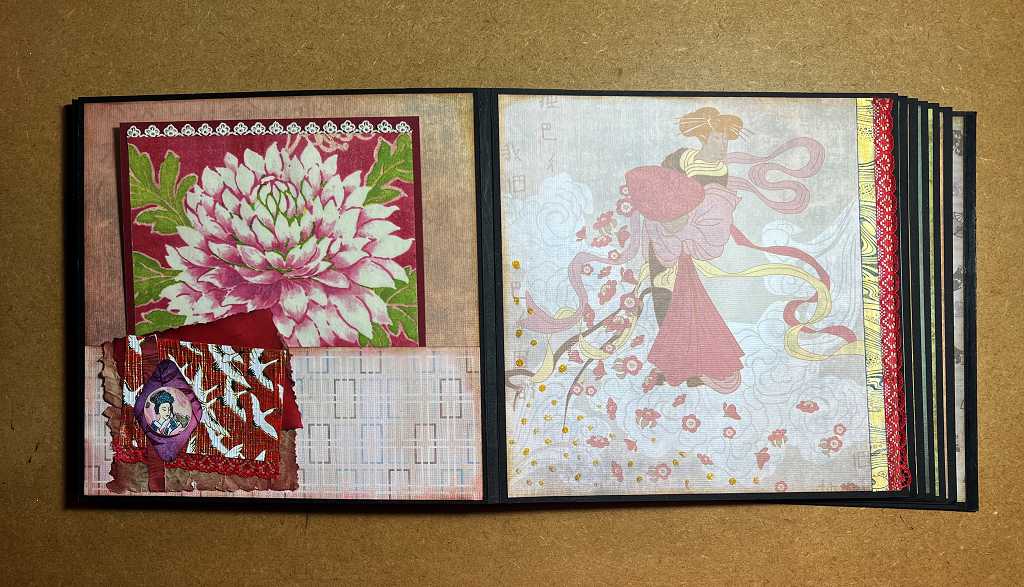
This is the finished spread. I shall go into the details one by one below.
I wanted to add some lace to this page, and in order to get at my beautiful vintage leather suitcases on the far side of the studio, which hold my stash of lace, trims and extraneous ribbons, I had to knuckle down and tidy the place up a bit! (This is an old photo.)
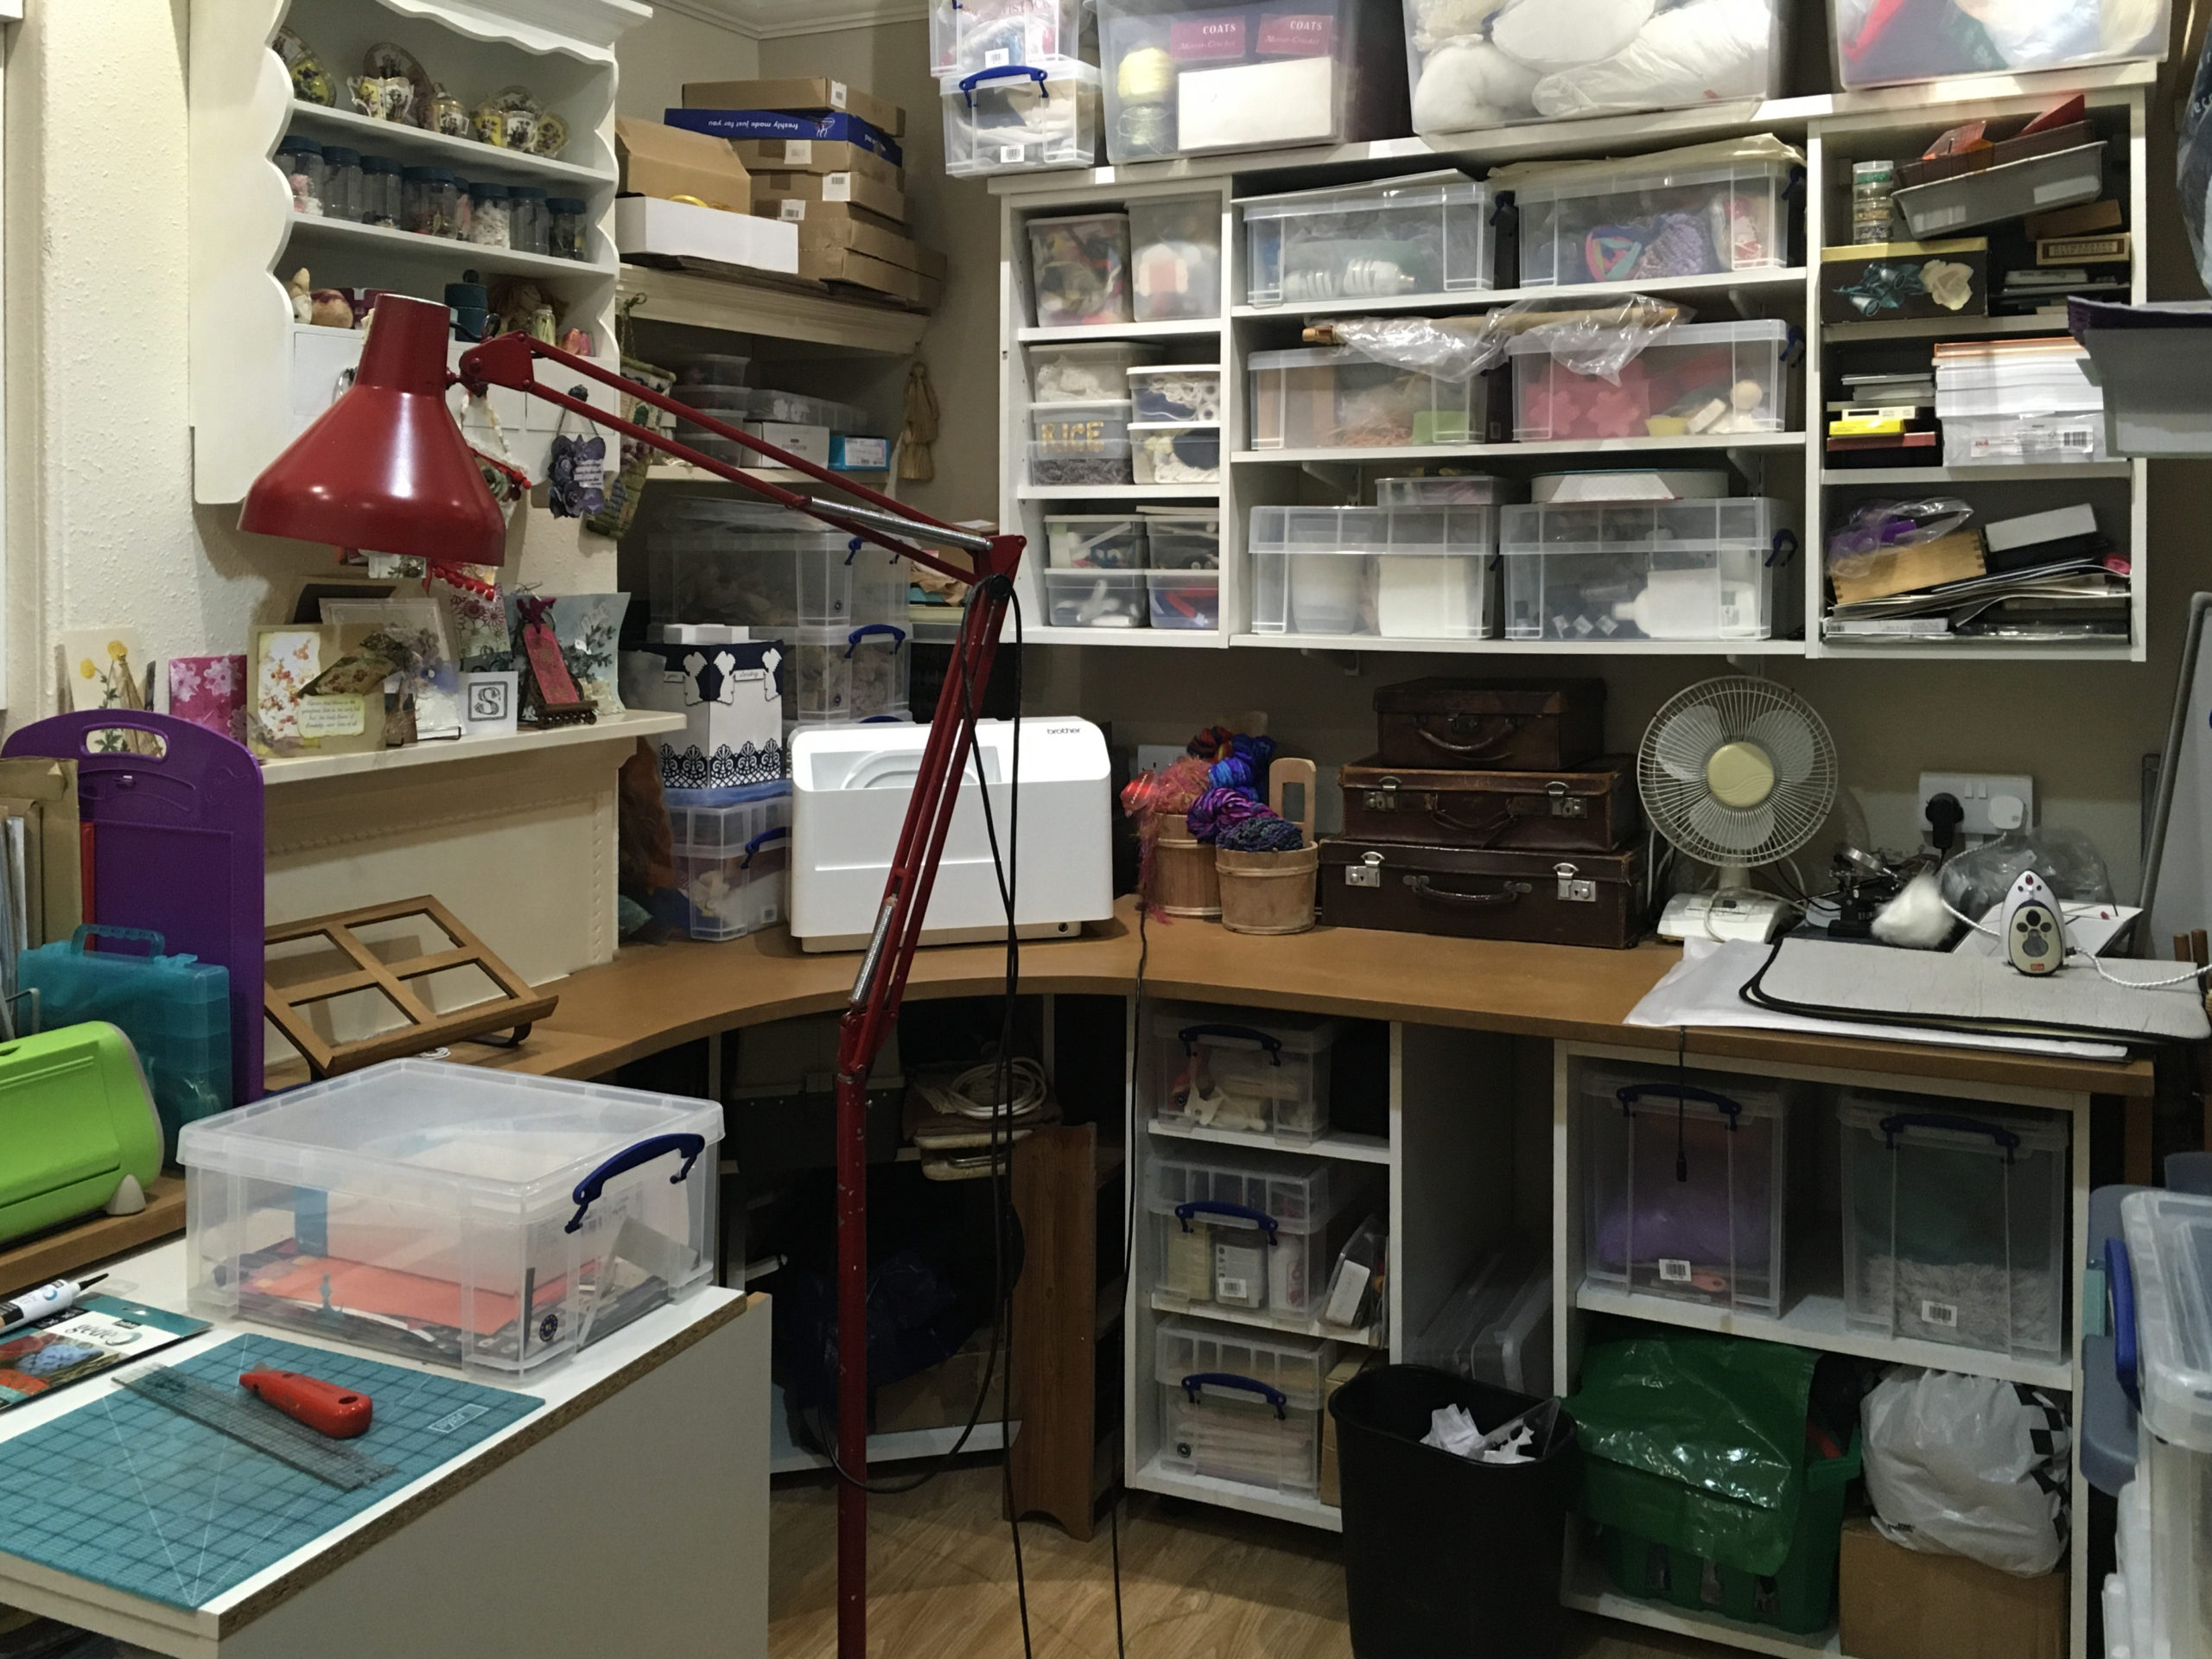
This took me quite some time and occupied a good portion of this afternoon’s studio session, which I would have much preferred to spend creating!! The whole studio has been a tip for far too long, which is frustrating because it looks awful and tends to put me off going in there at all, and all the surfaces are covered with junk which makes it difficult to find any space to work, or to put things down! I had several bags of miscellaneous bits and pieces in that area of the studio which needed sorting and putting away in their respective boxes, and this is now done.
Eventually I managed to sit down and work on my album.
I trimmed the top of the large tag made from the laminated napkin with a scrap of cream lace.
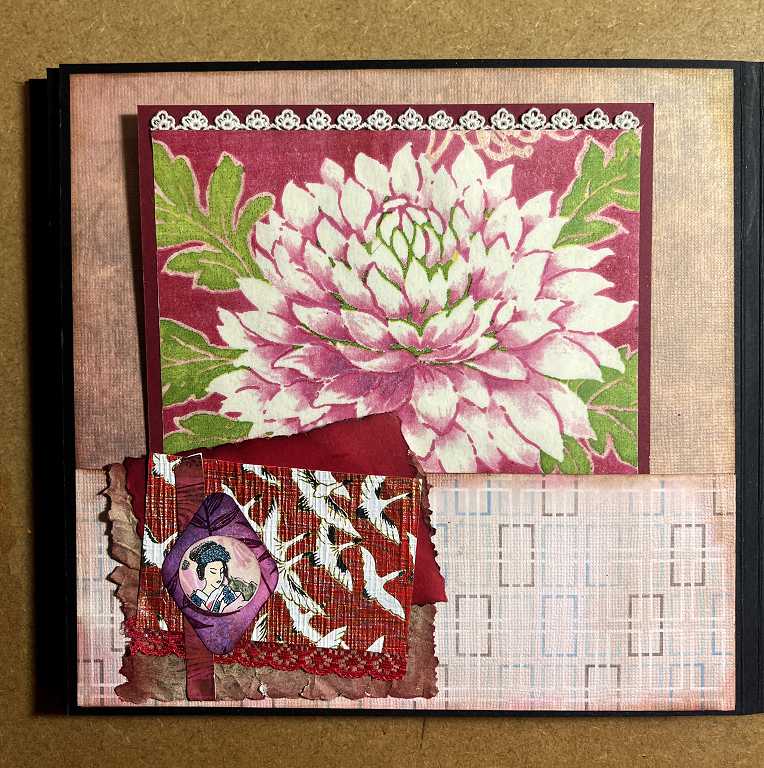
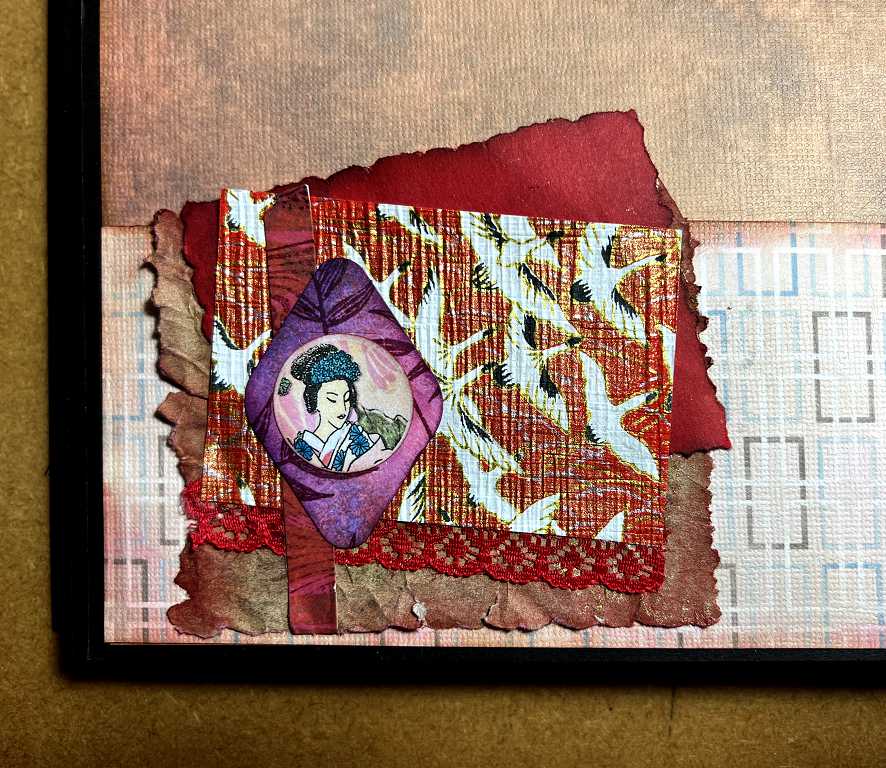
The pocket is made from an offcut from the Oriental paper stack I used for the pages of the album. The pocket cluster is made of several layers: a scrap of Amazon packaging paper which I scrumpled up and then spread out, and added gilding wax to the creases (not visible in the photo unfortunately). The edges were inked with Distress Ink. The next layer is a scrap of red card, also inked around the edges. Both pieces were torn along the DIY deckle ruler. On top is a piece cut from one of the genuine Japanese papers from the embellishment pack, with one of my DIY stamped washi tapes stuck down vertically, and it is topped off with one of the push-out shapes which I stamped during my last session, and a small circular cut-out from the Graphics Fairy Premium Membership site. The Japanese paper is flecked with gold against the red background, and I have trimmed the edge with some red lace. (See my previous post for details of these embellishments.)
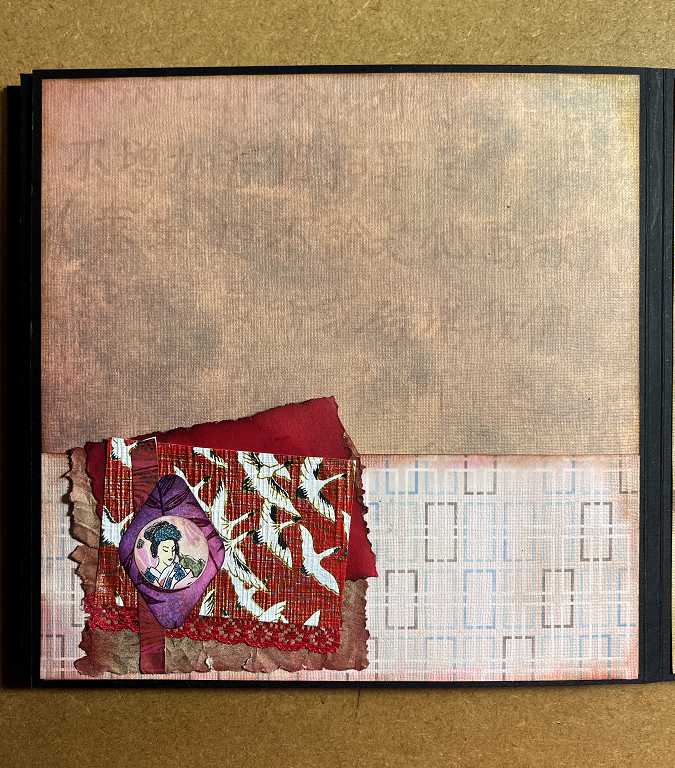
Here is the page with the large tag removed.
A detail shot of the pocket embellishment cluster.
The large tag made from the laminated napkin.
Detail of the lace-trimmed edge.
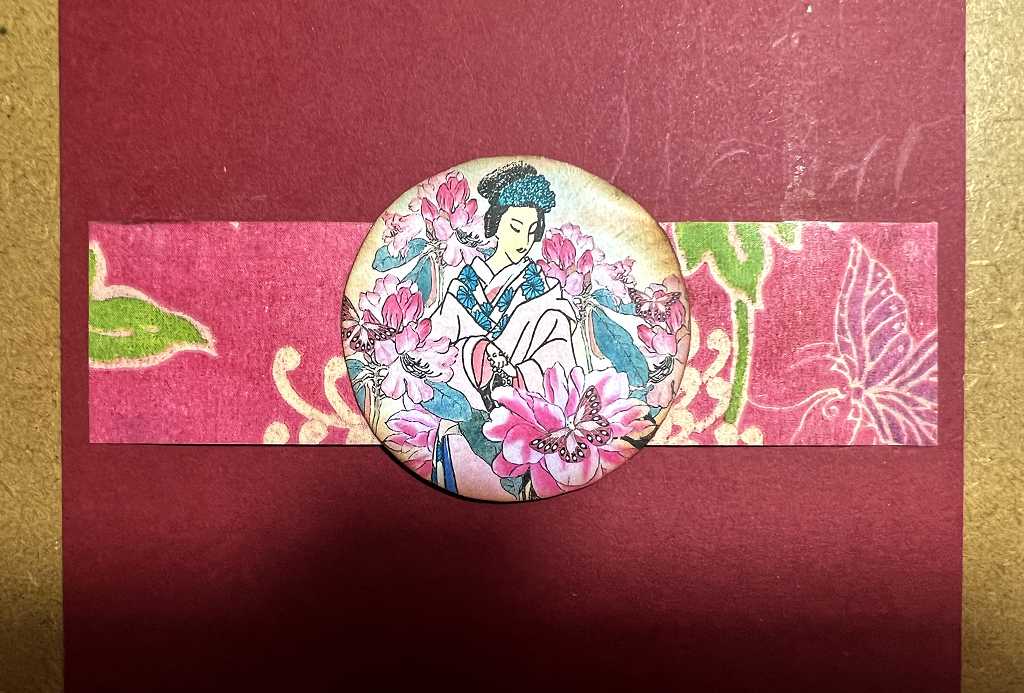
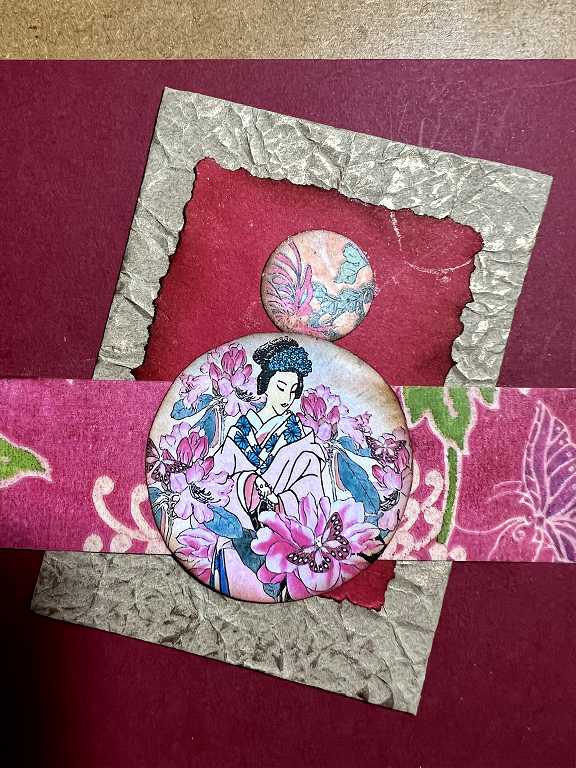
On the reverse of the tag, I made a belly band with some more of the napkin backed onto card, with a larger curcular design from the Graphics Fairy. Tucked behind this is a smaller tag made from a scrap card which was part of some packaging for eyelets for my Crop-a-dile. I covered this with more of the scrumpled up Amazon paper with gilding wax and laid another smaller red scrap with DIY deckle edge and inking, and a small Graphics Fairy circular element.
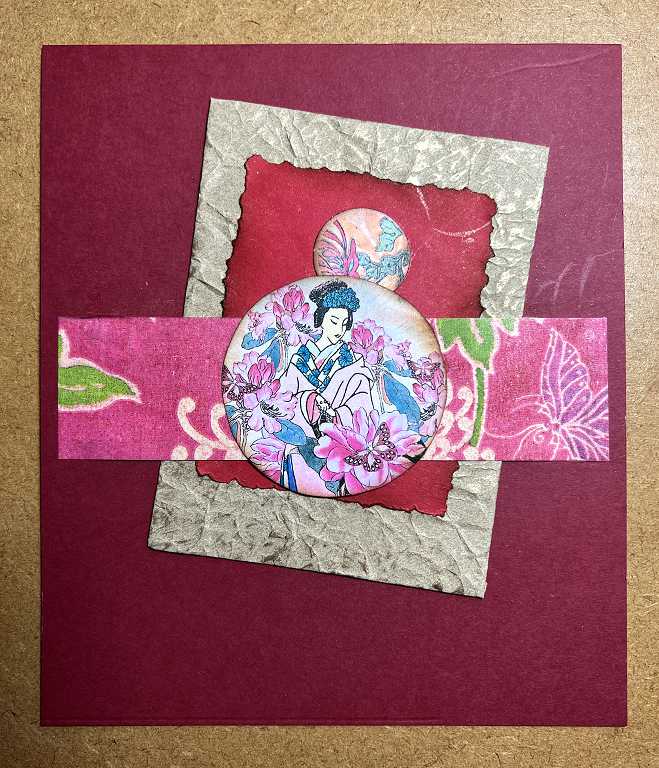
The colour of the Amazon packaging has come out most peculiar – it looks grey, when it is actually brown. It is a shame that the gold doesn’t show up because it’s quite rich-looking.
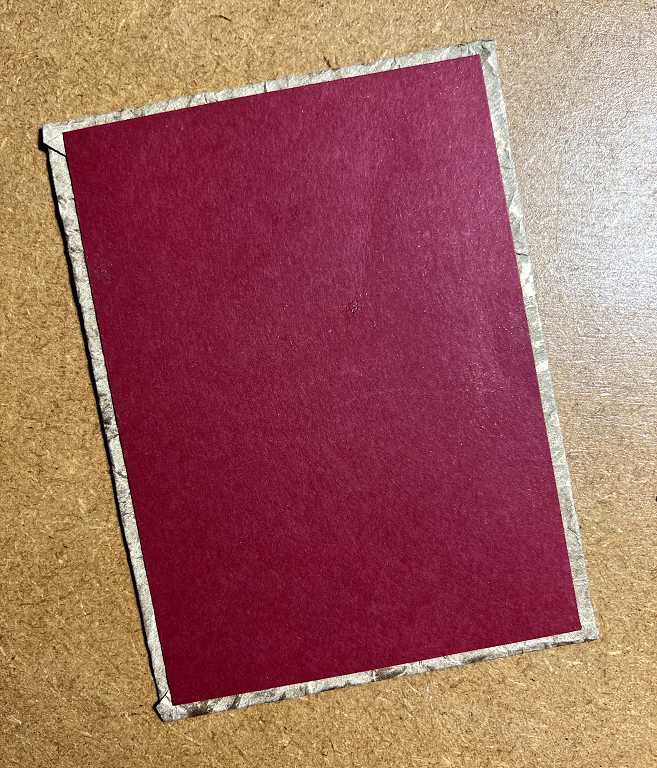
The reverse of this small tag is covered with a piece of plain dark red card.
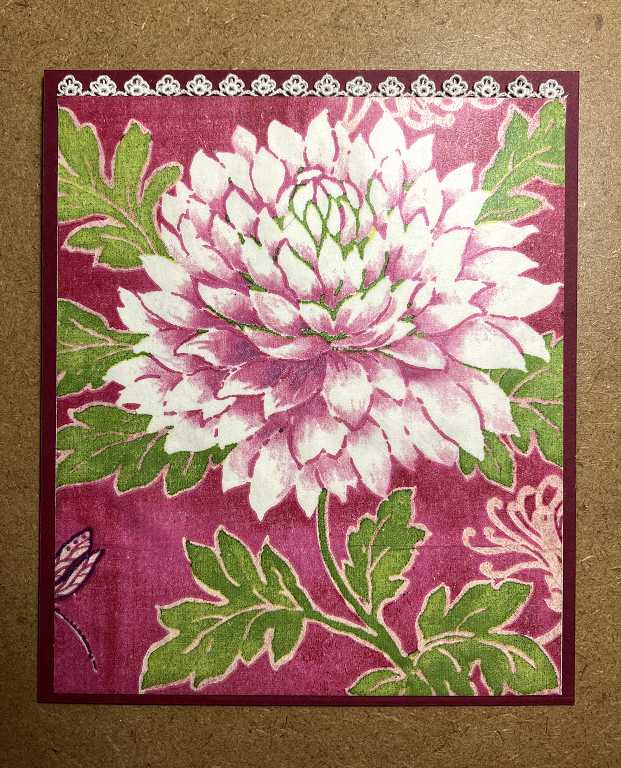
The right-hand page was covered with a whole sheet from the 8 x 8-in Oriental-themed paper stack, and really didn’t require much embellishment. I simply added some more of the red lace down the right-hand edge and covered the edge of it with one of my DIY washi strips which I had stamped. The colours of the lace and washi echo the colours in the image.

As a final touch, I added some spots of yellow Stickles glitter glue to the bottom left-hand corner for a bit of bling – as always, the shimmer doesn’t show up on the photo.
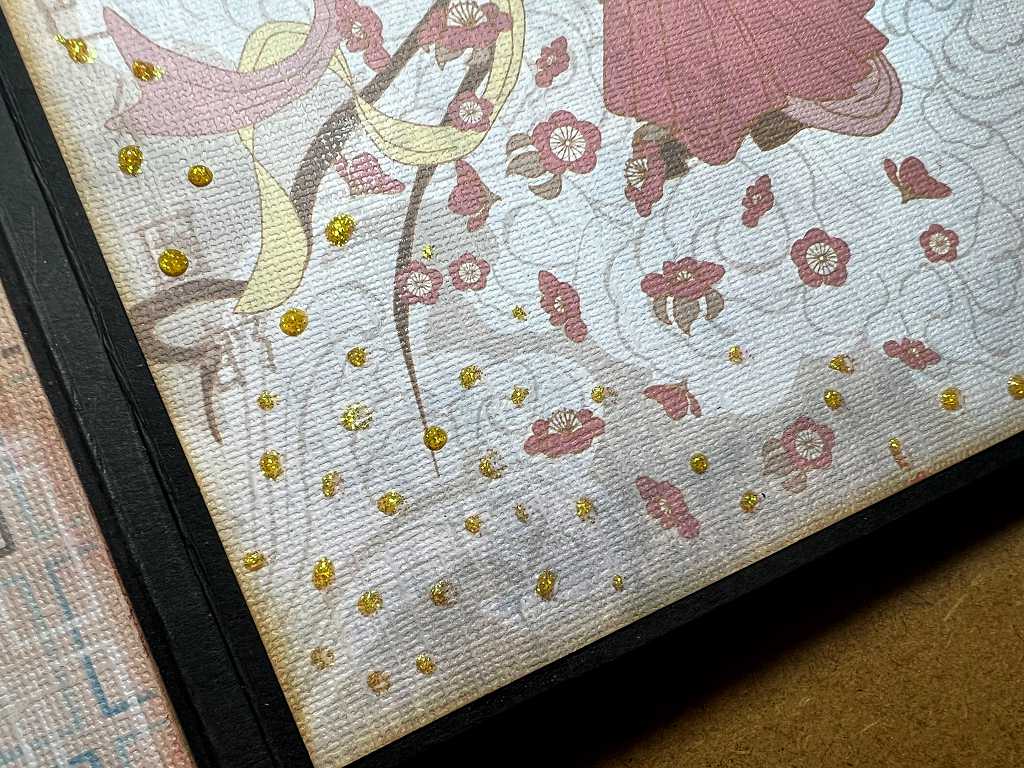
You can see that the paper from this stack has a rather attractive texture to its surface.
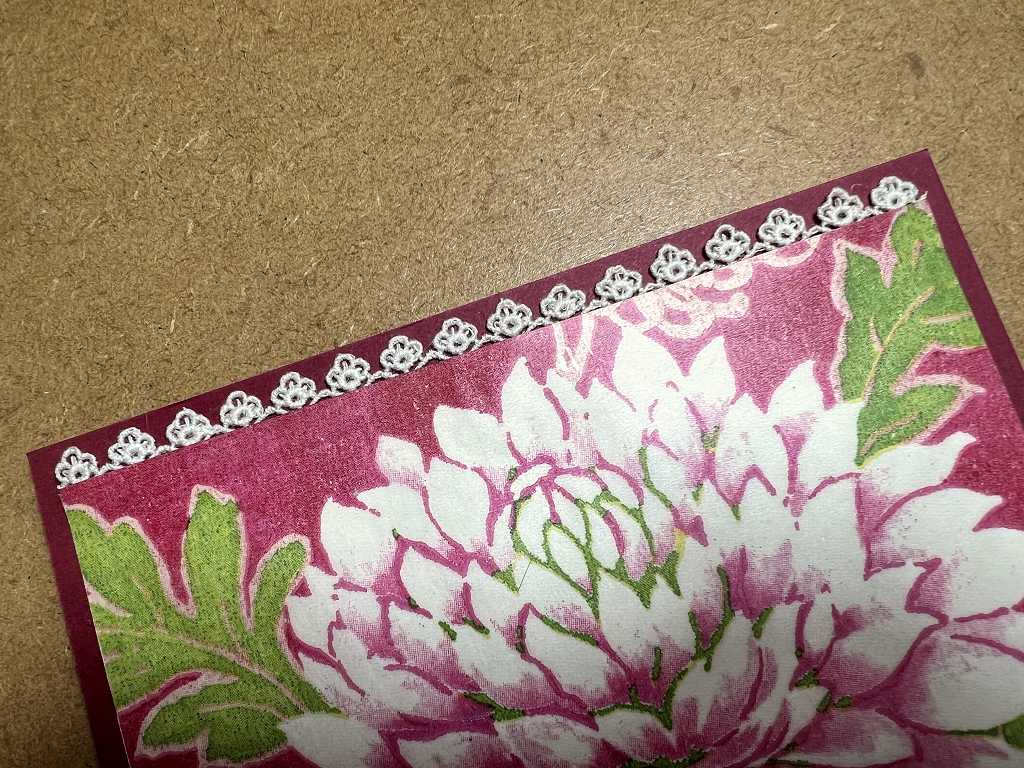
A detail of the page border.
A final look again at the full spread.
Assembling pages like this doesn’t take too long. What takes the time is selecting what I want to use to embellish them!
A gripe about glue
I don’t know why, but I have a real problem with wet glue. Watching people on YouTube, they seem to manage this perfectly well – they tip up the bottle, and out comes a beautiful thin stream of glue. I squeeze the bottle and shake it, and squeeze it some more, and having learned by experience to do this over my glass media mat and not over my project, eventually a spurt of glue comes out accompanied by a loud farting sound. I keep an unwound paperclip in the nozzle to stop it clogging but this doesn’t work too well, and it seems to stain the glue a bit (not a problem really, as it’s covered up, and it runs clean eventually) and I have tried storing the bottle upside down. The bottle itself can be quite hard to squeeze.
Somewhere I think I have got some small bottles with needle-like nozzles and perhaps I should decant into one of those but that would probably clog up even worse.
Many people use a glue called Art Glitter Glue from the USA but here in the UK that is very expensive. I have been using Ayleen’s Tacky Glue which I understand is thicker and less fluid. Perhaps PVA would be better but I have heard that it tends to buckle the paper because of its high water content. I have used matte gel medium for collage work, and this is fine, but sometimes you need a fine bead of glue along the edge of something and you don’t have this level of control with gel medium.
For things that just need sticking down, like matting and layering, I tend to use double-sided tape around the edges and run a little glue stick over this to allow a bit of wiggle-room, and more glue stick in the centre. This works well, and for sticking down very small elements, but for pockets and other construction elements where there may be some strain on the join, I find this method less secure, and wet glue is best.
I really don’t know what the answer is. There are just so many glues out there, many of which I can’t get here in the UK anyway, and I struggle with squeezing the wretched bottle and no glue coming out! I am really envious of people who do this with such ease. Everyone seems to have their favourite glue which always seems to perform perfectly for them, leaving me huffing and puffing, shaking and squeezing, and cursing with frustration! What to do?
Update
Just after posting this, I was watching some more YouTube videos and came across this one. I have followed Sam Calcott, a British crafter, for some time now and she does some really good stuff. In this video she reviews 16 different glues, and being UK based, these are all glues we can get here! Her review is thorough, although she concentrates mostly on matting and layering (a card-making technique) rather than construction or collage which is what I am more interested in, but this video is a real boon. I had read some reviews of her favourite glue, which is Collall All-Purpose glue, a solvent-based adhesive, and thought it looked worth a try, and having seen her review, I shall definitely be giving this one a go.
She also mentioned Aileen’s Tacky Glue, which I have been using and struggling to get out of the bottle, and showed the “upside down” version which sits on its head, which she said was a good idea. I already had some of this on order and it arrived yesterday. She did say that the bottle is rather hard to squeeze so I may be up against the same problem but at least it should be easier than the standard version.
What a timely video – very helpful.