Shoshi’s brainstorm
When I was doing the work for the last blog post on the subject of my stencils, I think I was having some sort of brainstorm! Later, I couldn’t believe how stupid I’d been – somehow I was unable to wrap my head around the whole stencil/mask business, and added bridges to my stencils across the backgrounds instead of across the stencil design! I didn’t even have to do a test cut to see that the middles would just fall out…
Back to the drawing board.
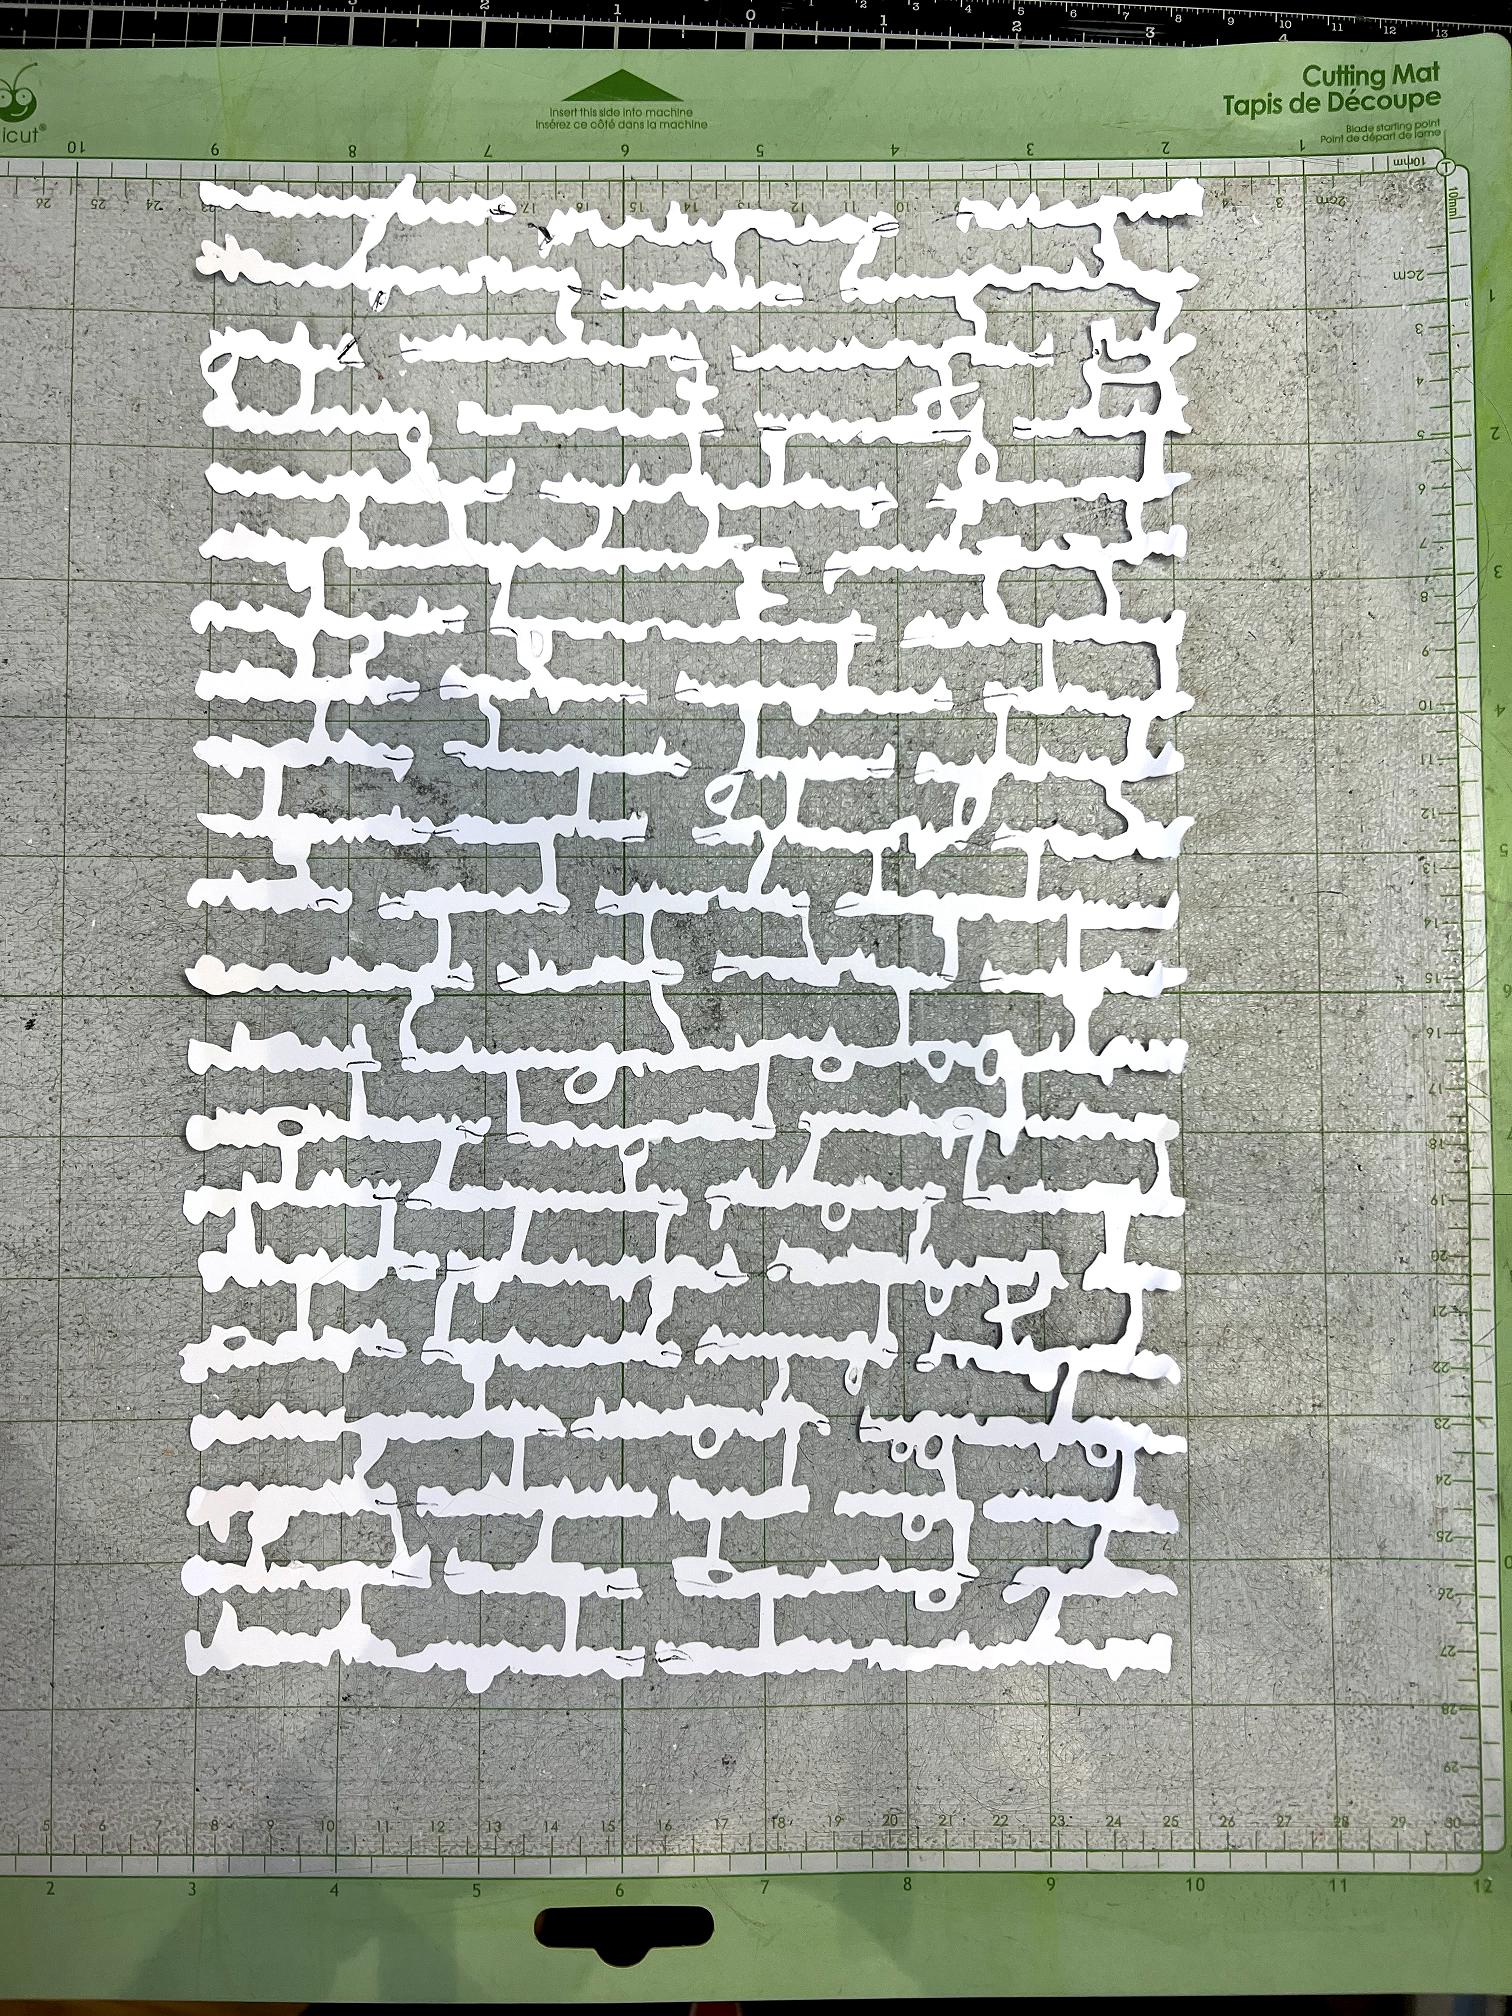
The test cuts of the all-over background stencils (with the exception of the circles one) were no problem – just a series of holes all over the surface, which would cut with no difficulty, and with no necessity for bridges. The test cuts came out beautifully and I am very pleased with them.
The test cuts for the others showed that the bridges I’d created were unnecessarily thick. Many of the test cuts revealed problems which weren’t apparent until I was able to handle the real thing rather than looking at images on a screen. For example, some pieces were not firmly enough attached. Some holes were too small to bother with, and all of the stencils required additional bridges. I redid them all, and made all the bridges narrower, and the same width. When test-cutting on printer card some of them broke, but once they were cut with the Tyvek they would hold up fine.
I spent a considerable time redoing these stencils but it was worth it in the end. The test cuts are now complete, and I am happy with them, and I have also created a few additional stencils. These have now all been uploaded to my OneDrive. Further information about this at the end of this blog post.
The updated photos and some new additions
Here are the revamped images of them all, which may not look all that different from the originals superficially, but it is really important to get the details right if these are going to cut properly, and be stable and functional in use. If they are to be available for public download I need to be sure that nobody is going to have any problems with them.
Background stencils and masks
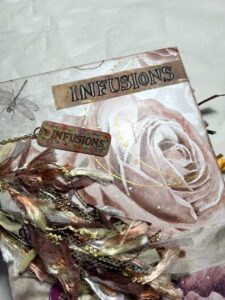
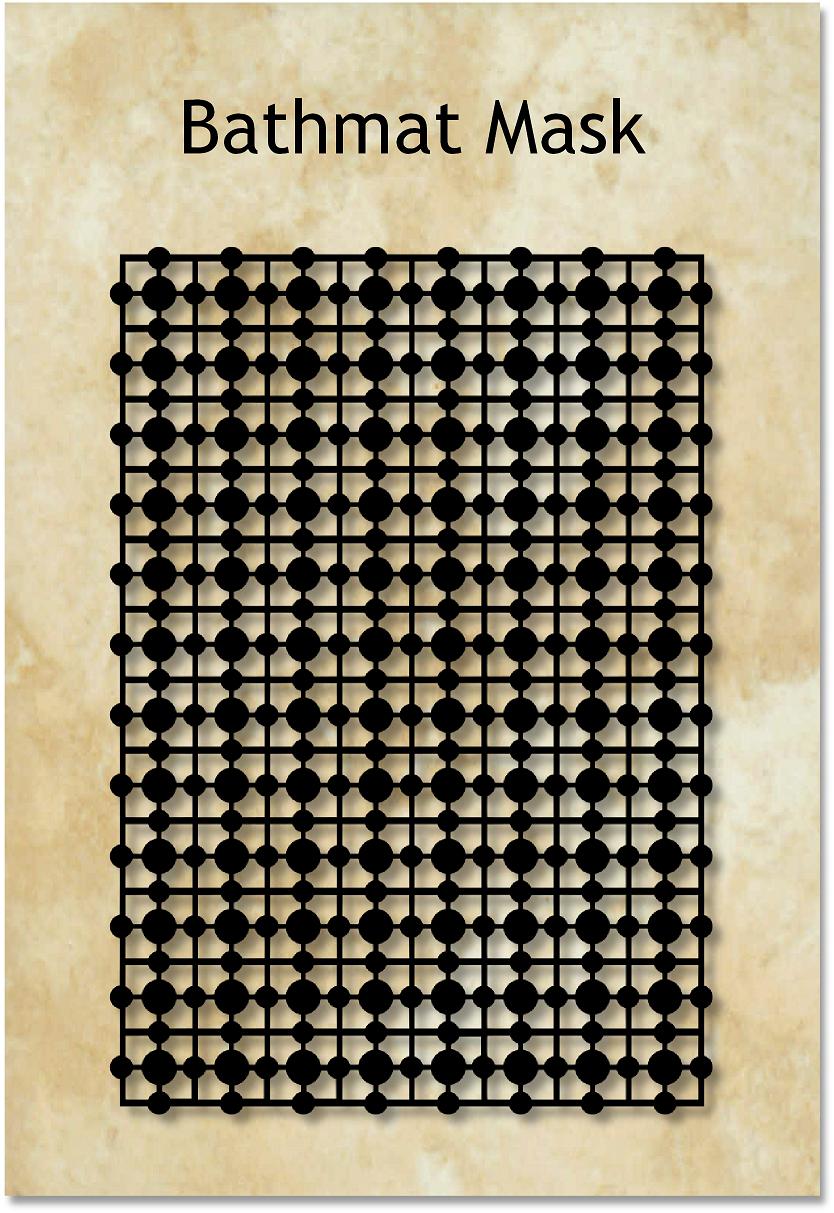
Beginning with the bathmat mask, this is the design I created in Serif PagePlus, my desktop publishing software, from the cheap plastic bathmat I bought on Ebay. I first saw this on Froyle’s YouTube channel – she picked hers up from a cheap shop, thinking it would make a good texture on the gel plate, and she was right! My bathmat is excessively ugly, being a sickly transparent pink which I wouldn’t let anywhere near my beautiful bathroom, but for art, well, it’s perfect.
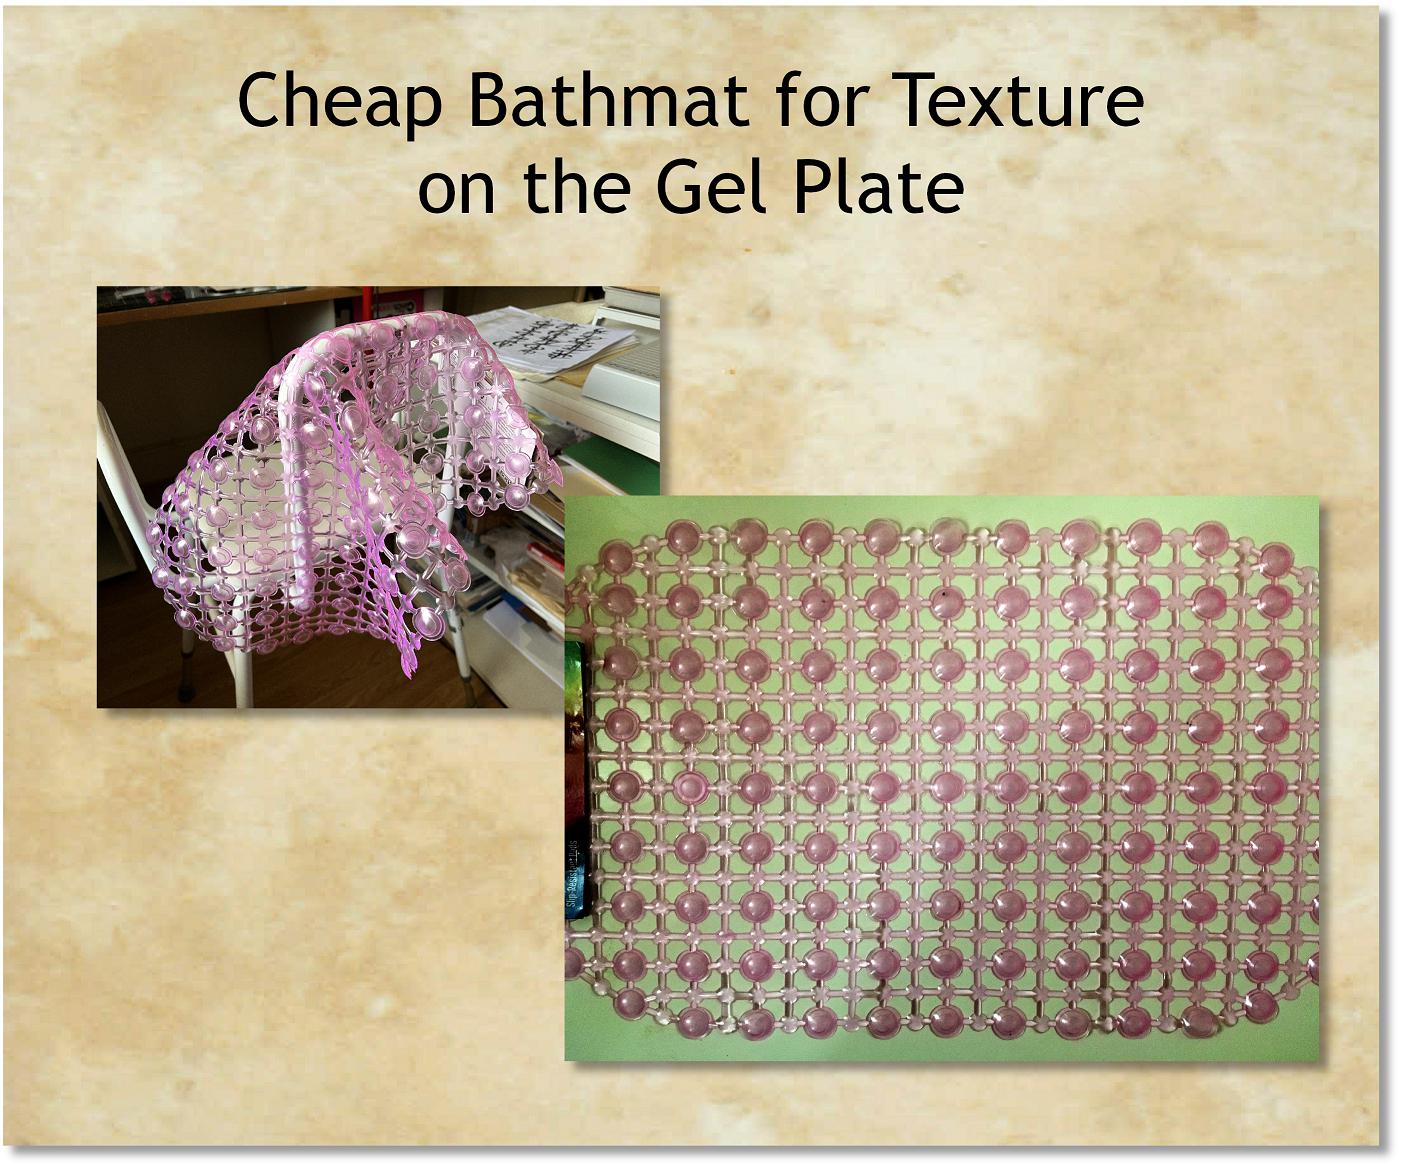
I thought I’d expand my options by creating a mask in Tyvek from the design. The bathmat itself proved very difficult to photograph or scan because of its transparency and shininess, making it impossible to trace a decent outline in Inkscape, so I designed it from scratch, using the desktop publisher which made it easy-peasy to create a repeating pattern using circles and rectangles. This was then easy to convert to svg in Inkscape. An additional advantage is that I can change the size of the pattern. There won’t be as much texture as from the actual mat because that has suction pads on the underside, but it is another option.
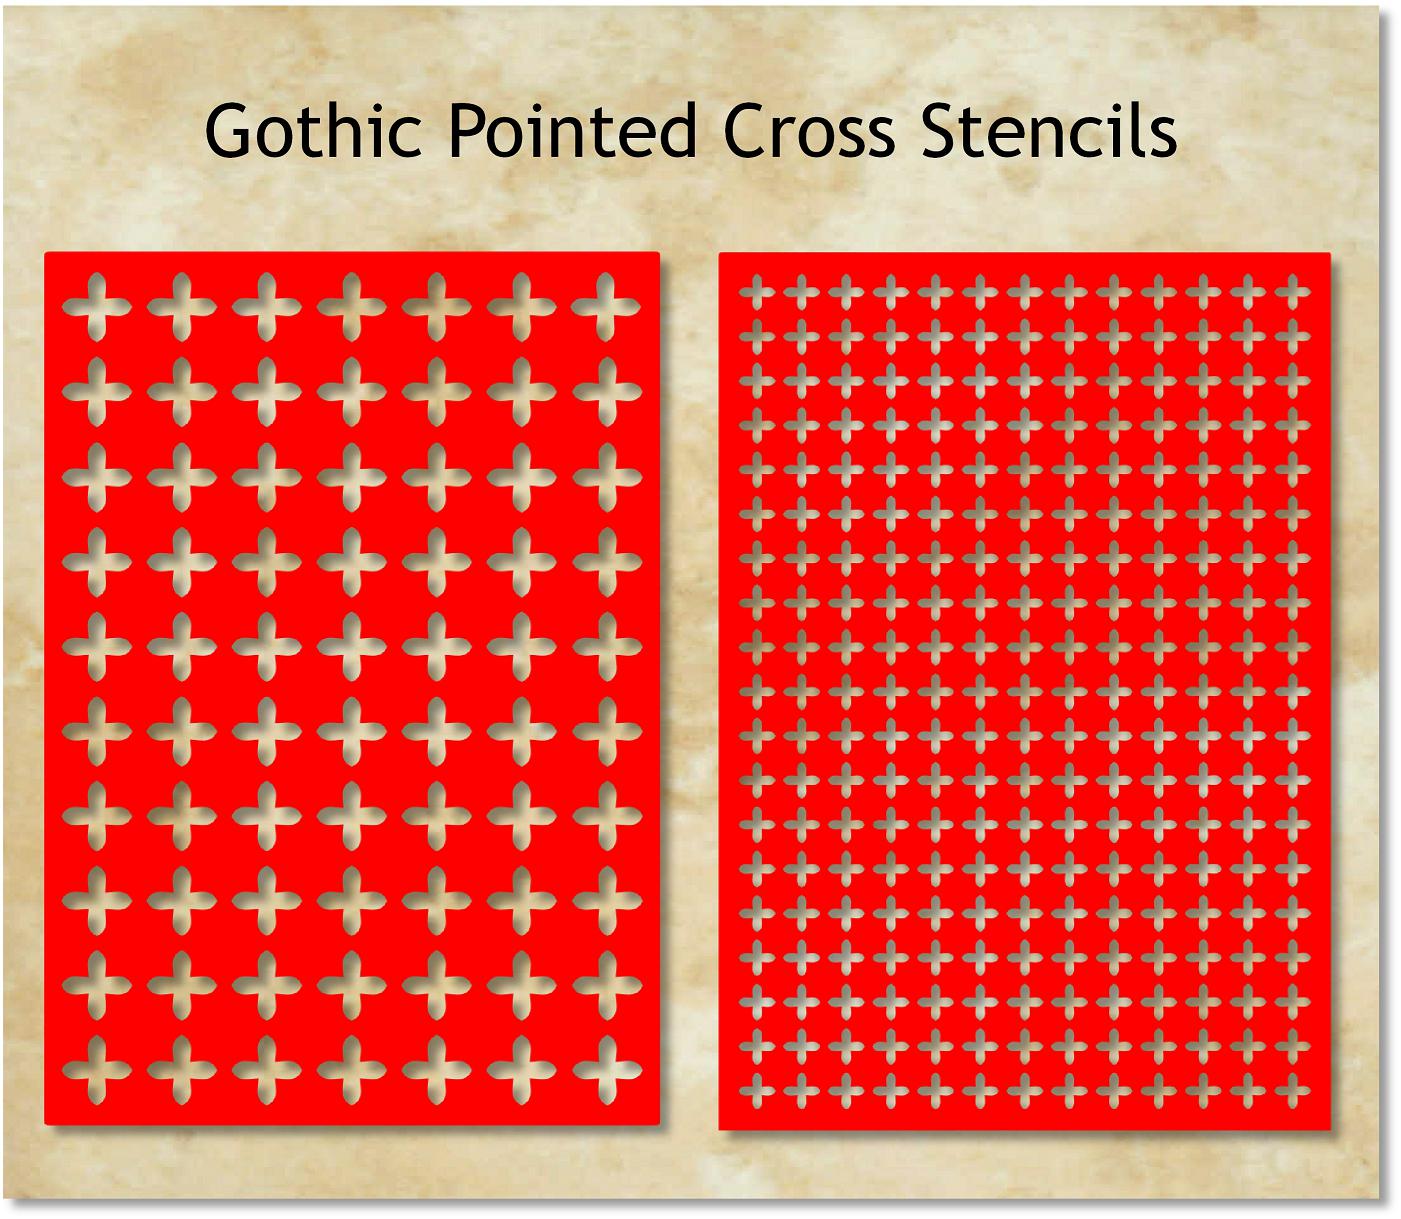
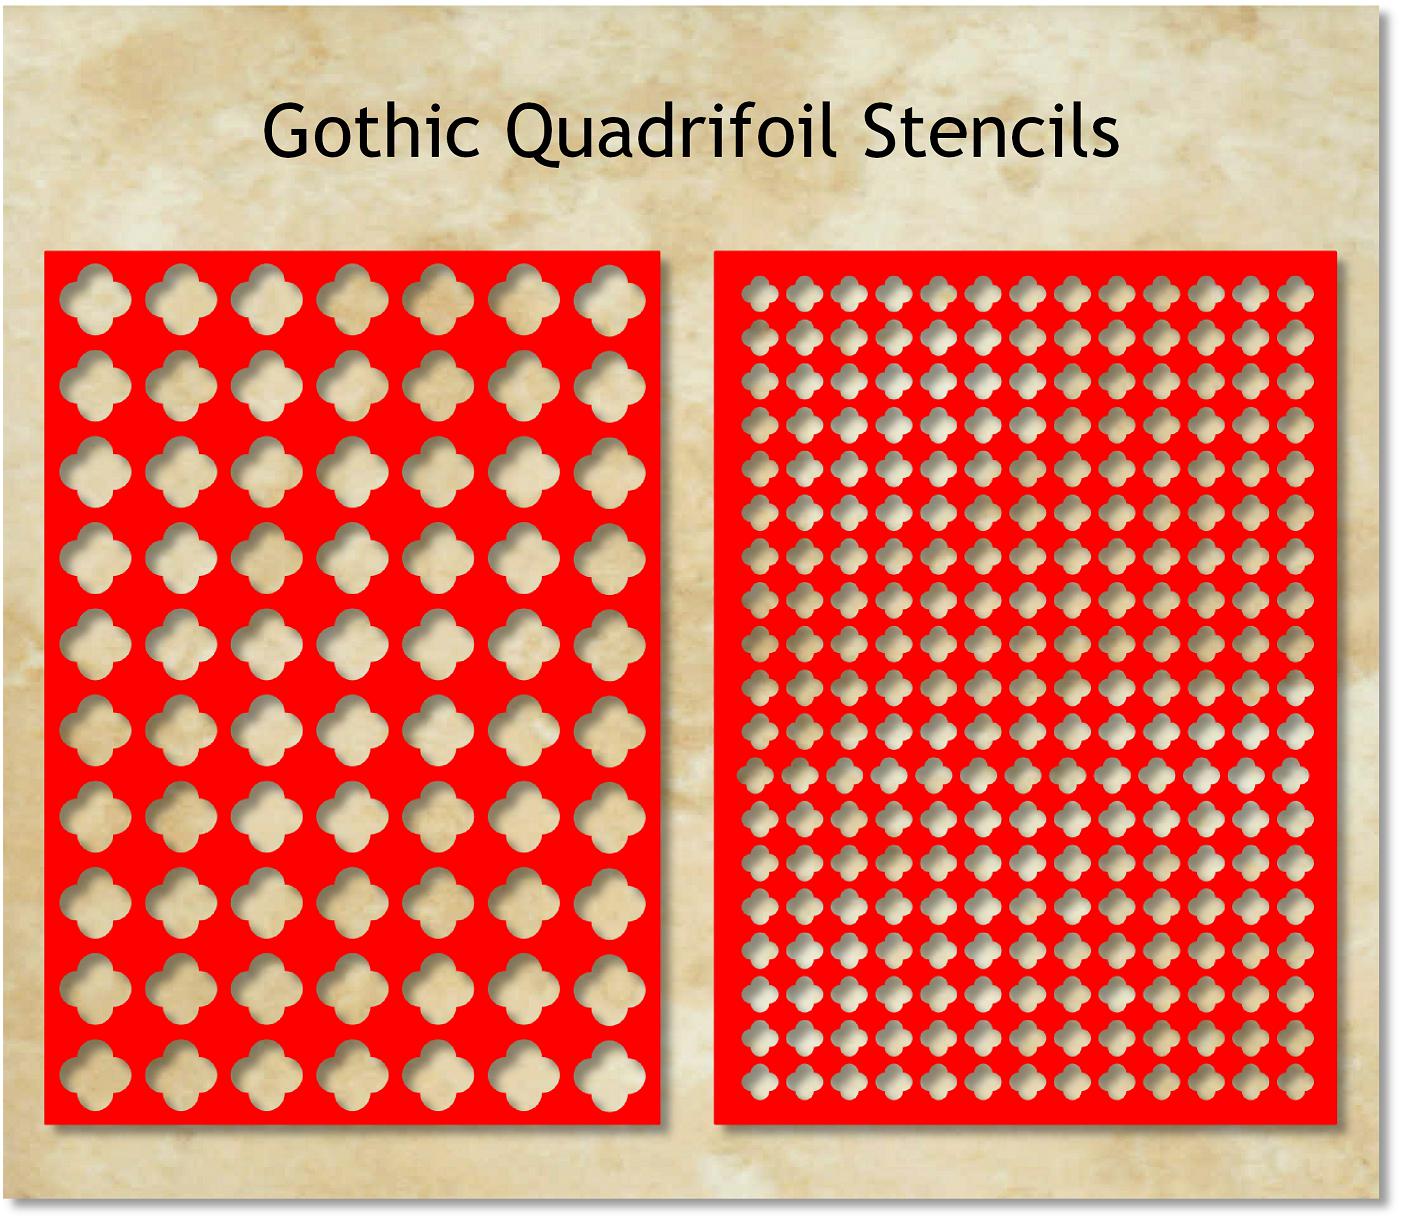
A couple of years ago I created some repeating patterns in Inkscape based on Gothic designs. I’ve now turned these into stencils.
The following stencils didn’t need any further work doing on them.

I adapted the Irregular Ovals one for a pair of new Pebbles ones – much simpler to edit existing svg files than to create new ones. I simply moved the shapes around, and made them fatter and altered their sizes as required.

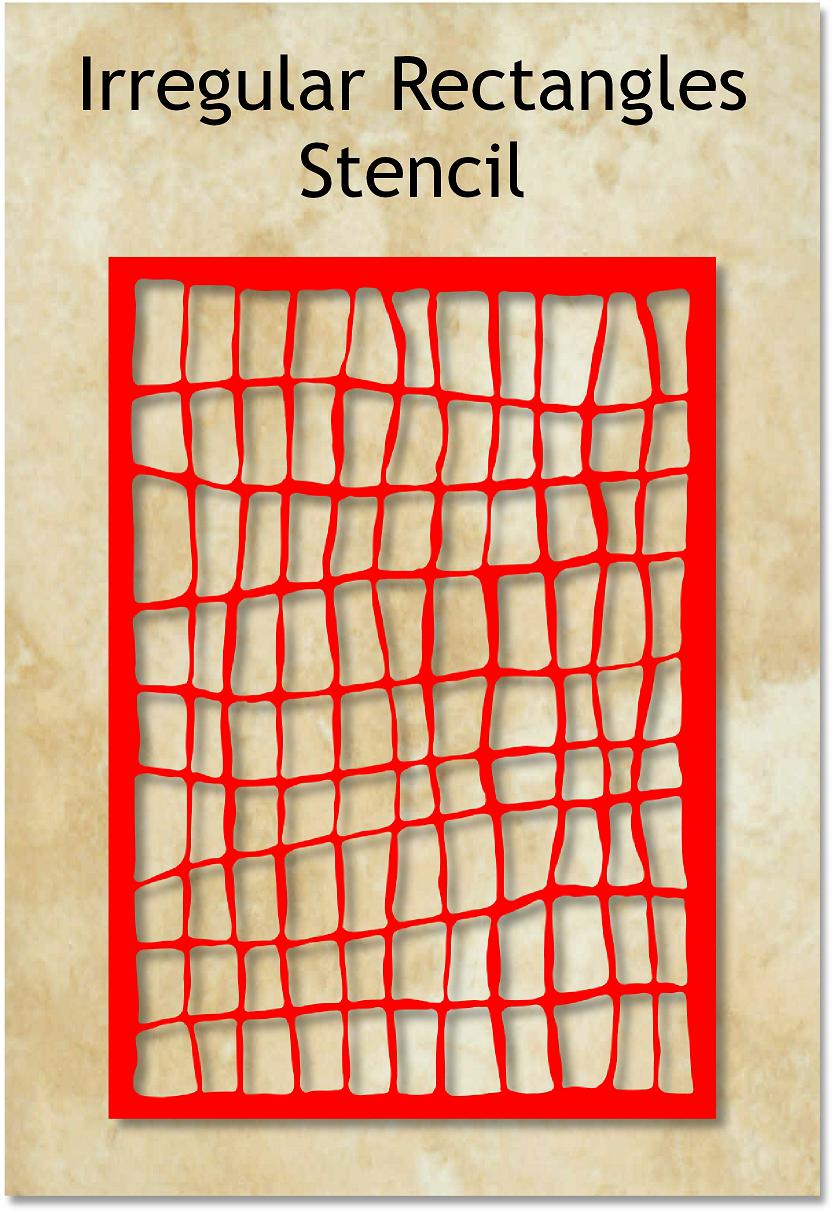
The irregular rectangles stencil was another one that didn’t require any further work.
I also cut an old design, my scallops stencil, which has been in my svg folder on the computer for ages. This has come out very well, and will be another useful background stencil. I have paired it with another new one, called seeds.

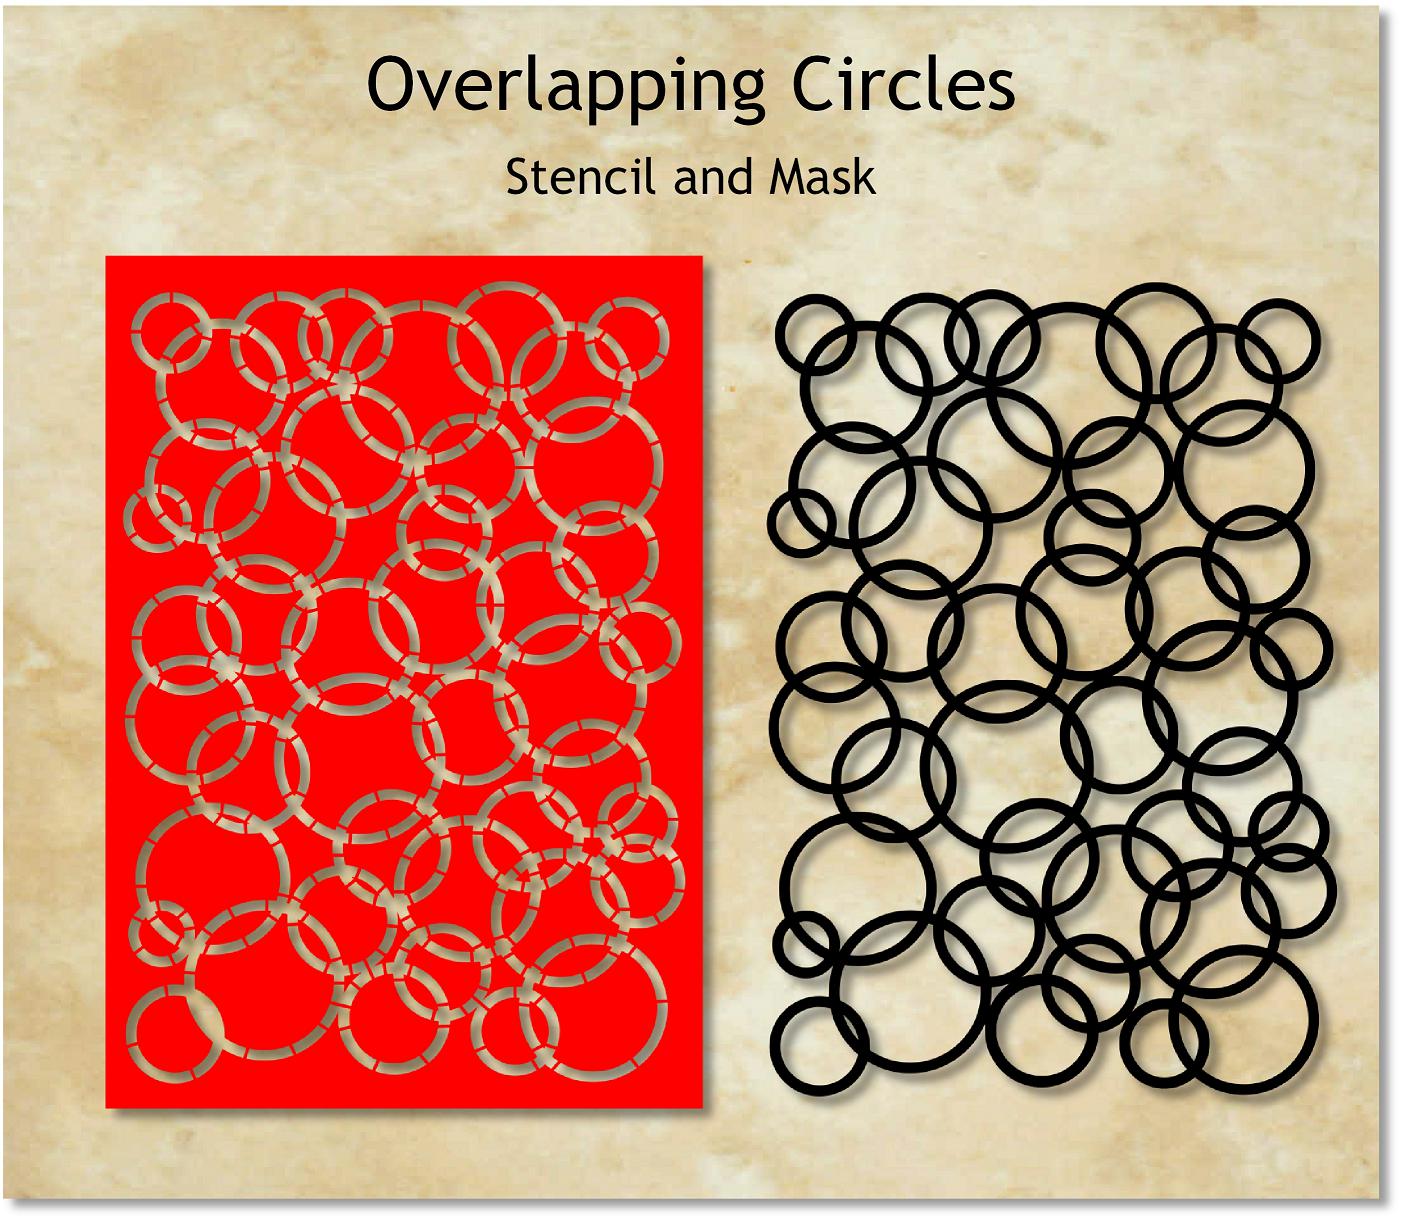
The overlapping circles design needed a lot of work, mostly with the stencil bridges. I made them all much thinner, and edited the design in a few places where it was falling apart, or there was too small a gap to be worth cutting. The mask version was fine. I am pleased with the result now.
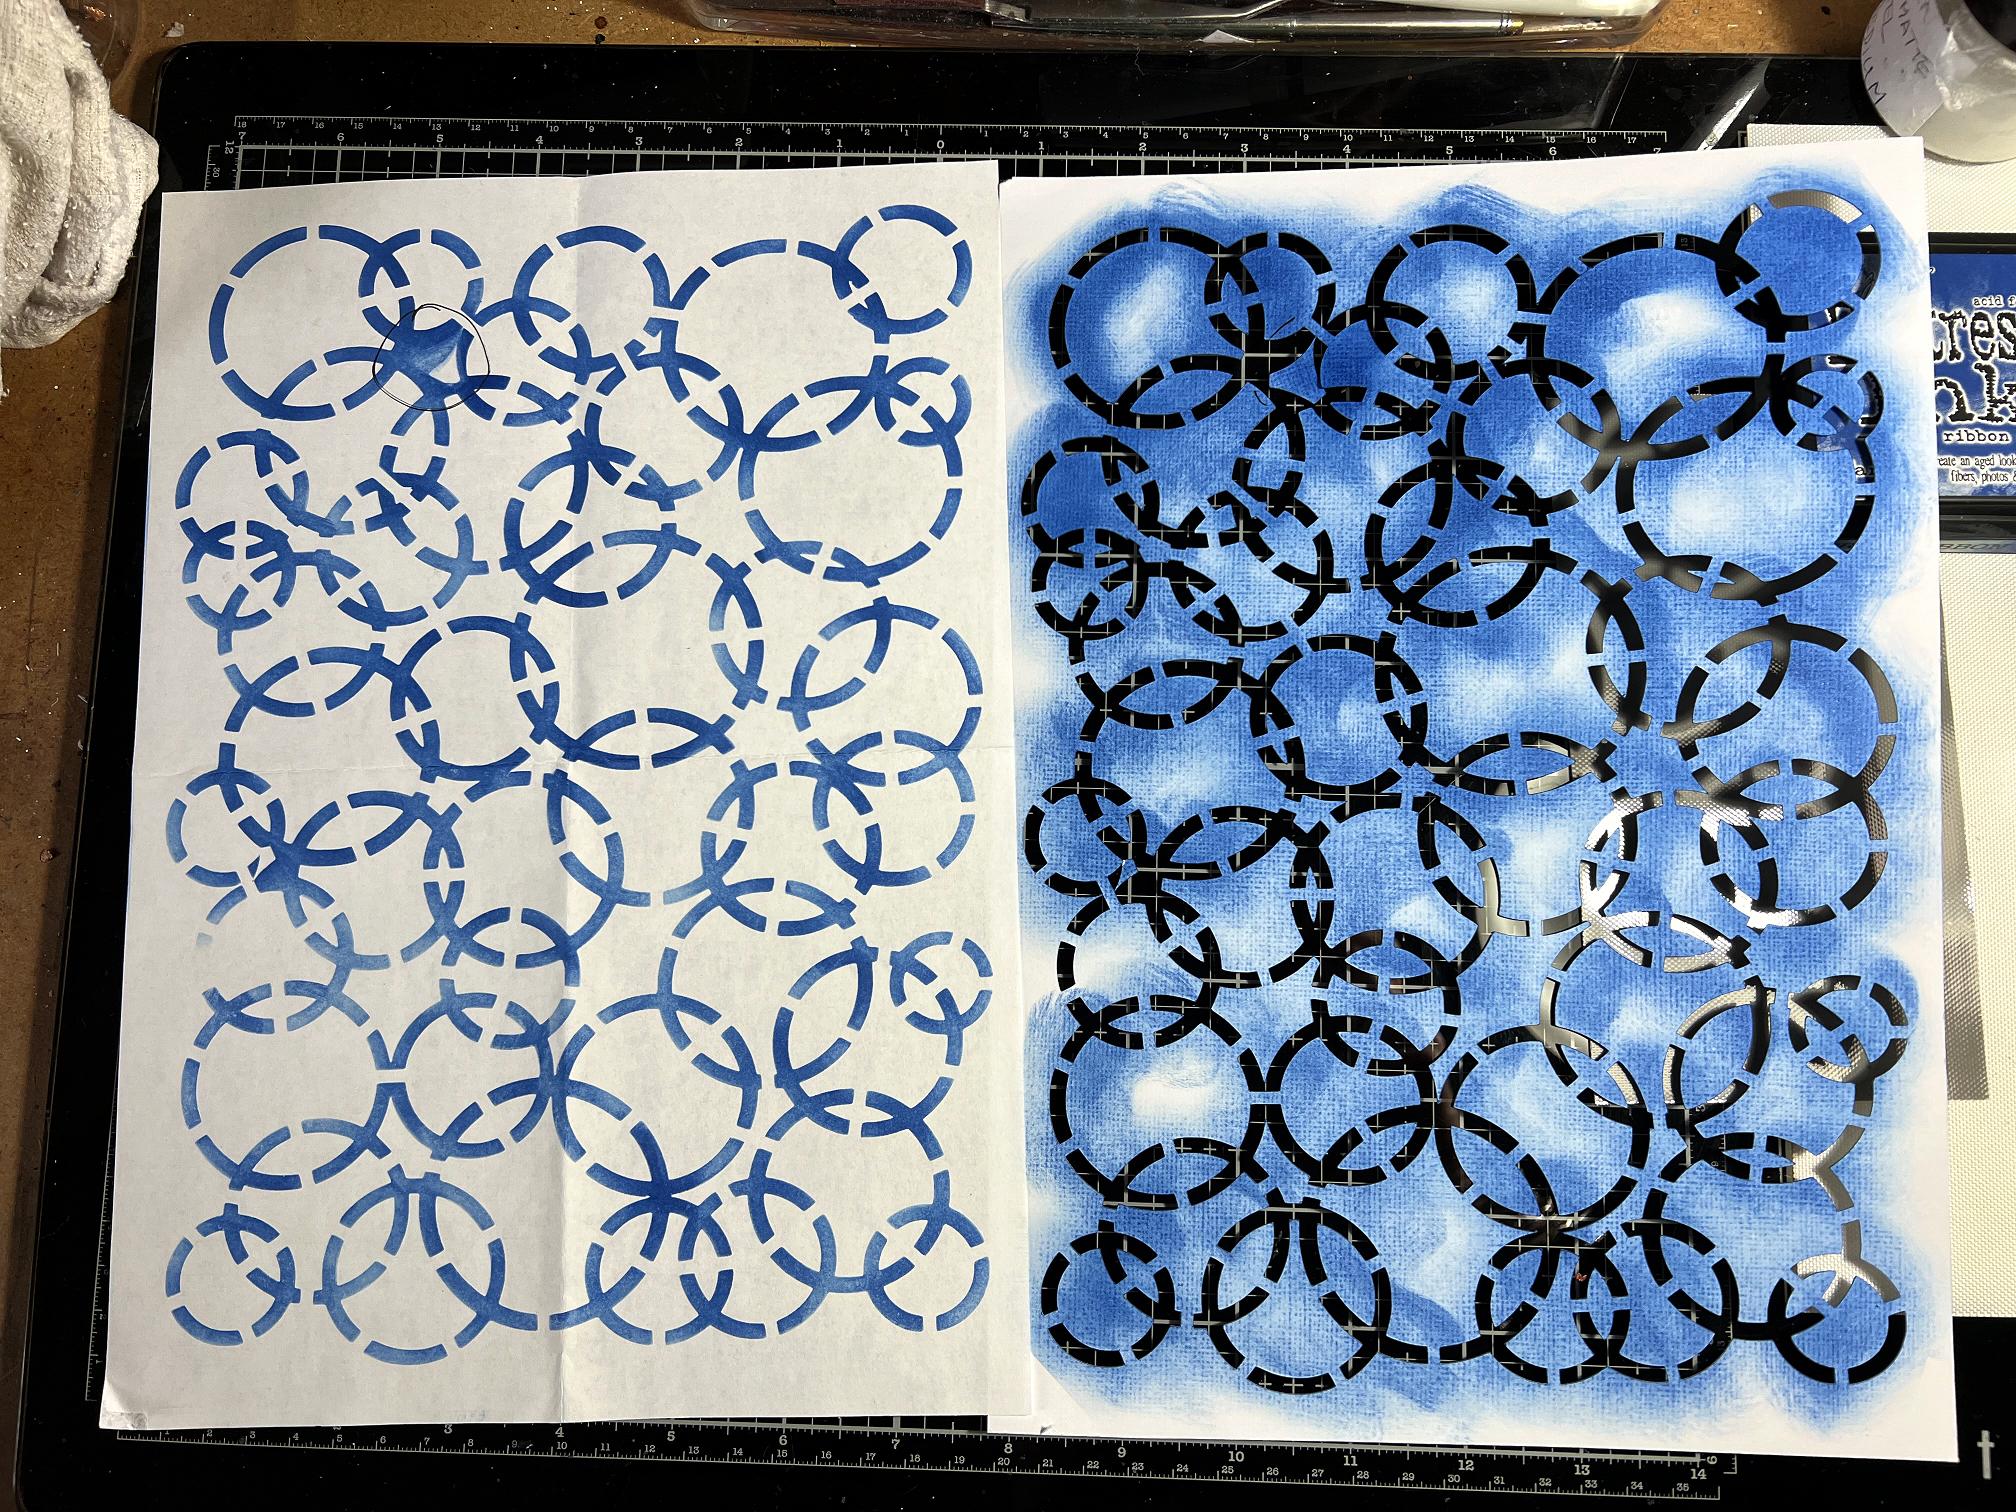
If you compare the stencil design in the above photo with the test cut and resulting test run with Distress Oxide ink from the original one, you can see the difference that the narrower bridges makes (photographed upside down!). You can see where I have ringed a problem area.
Motif stencils and masks
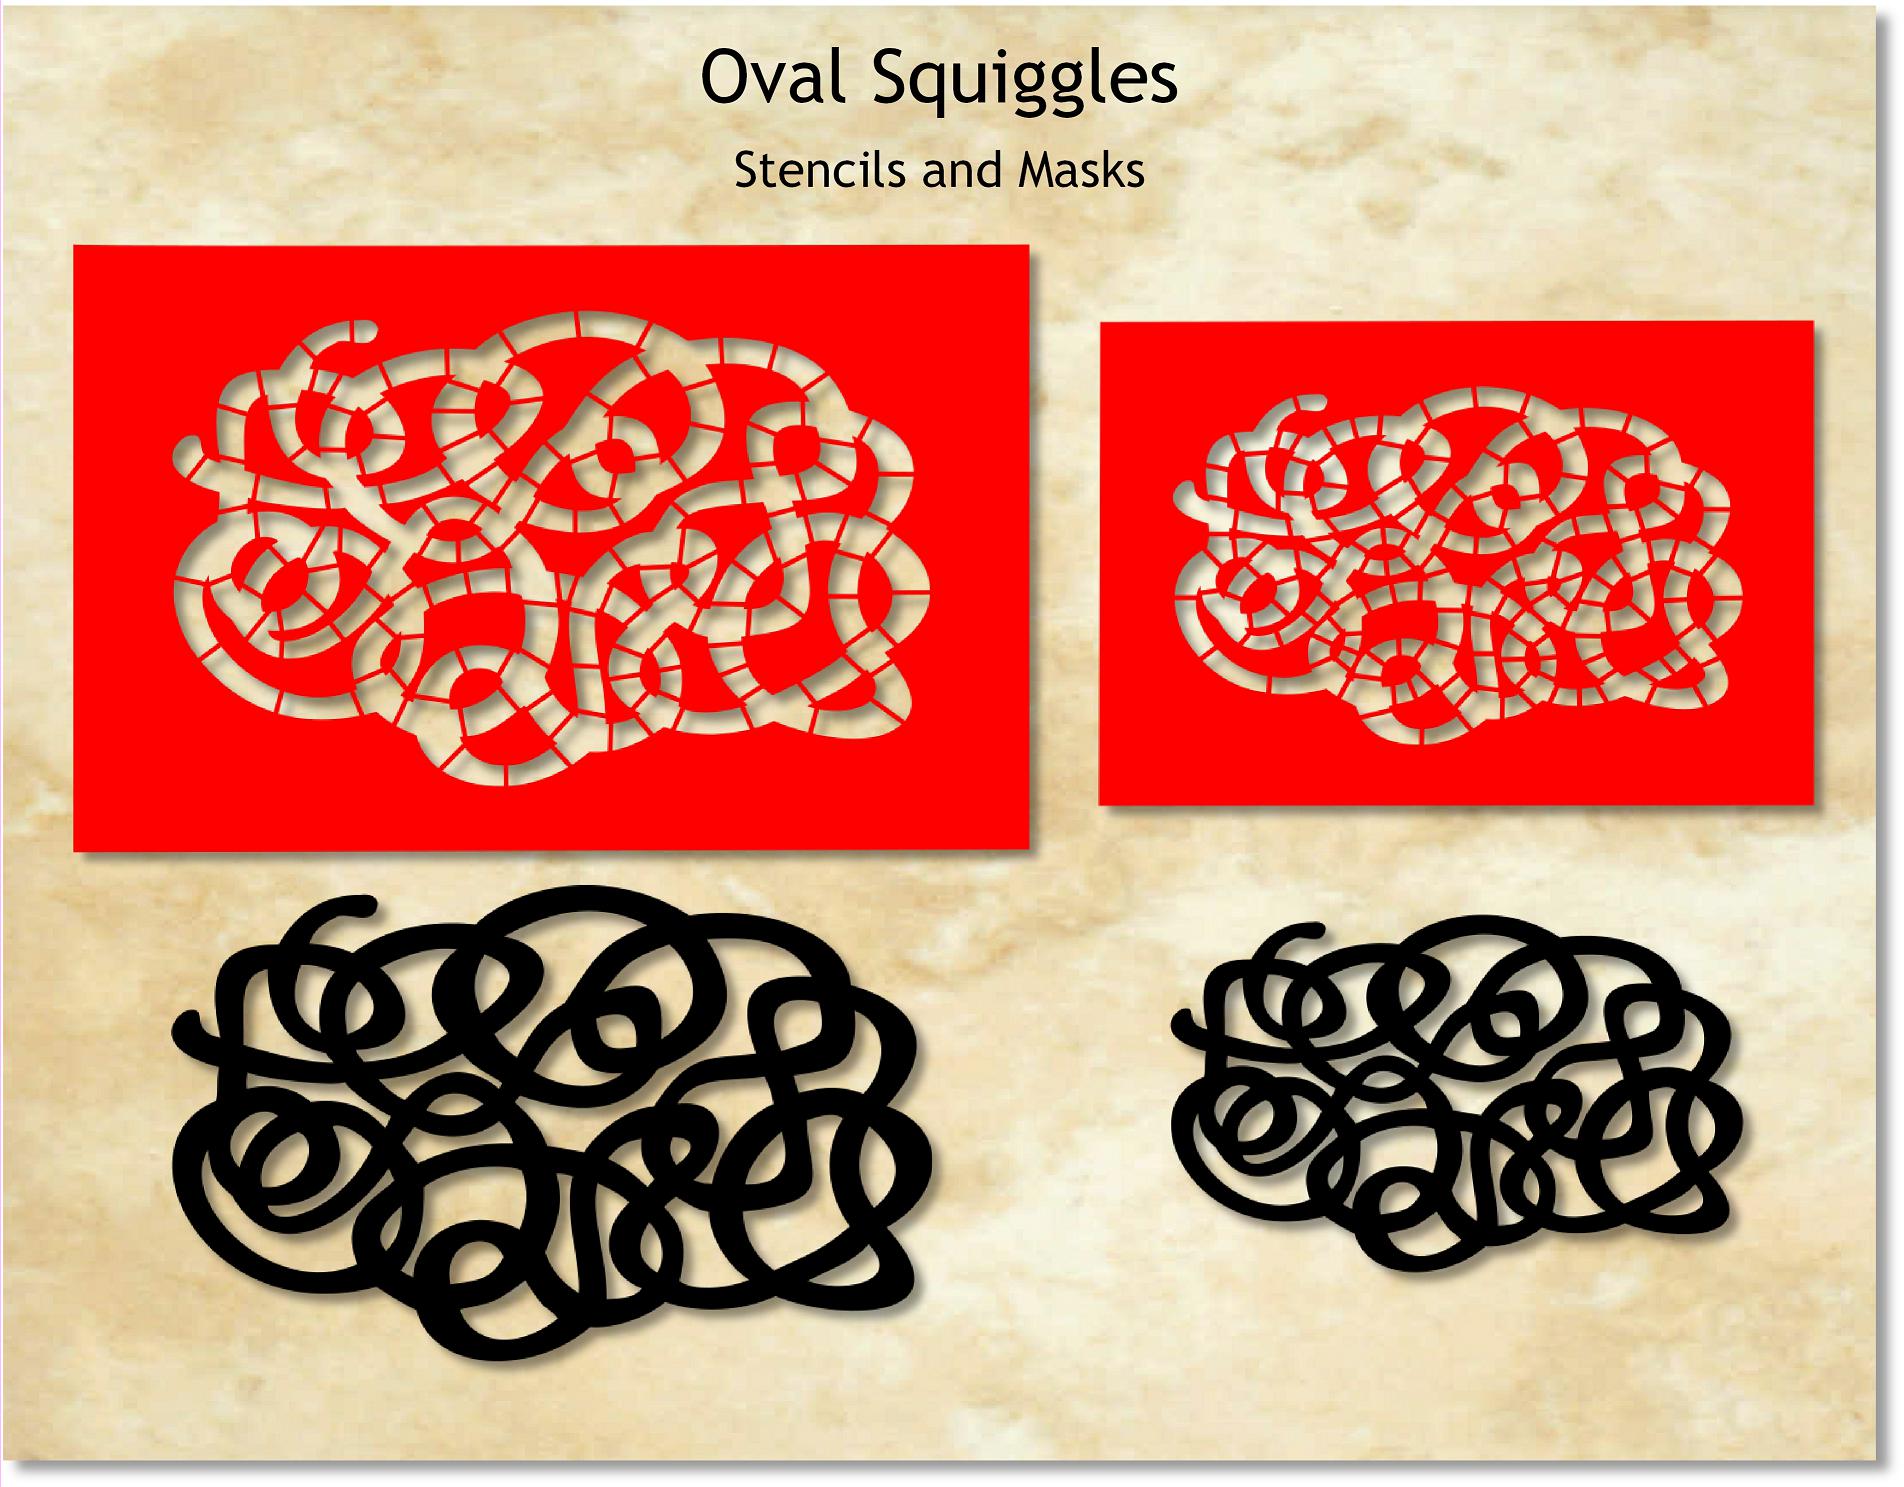
Froyle also showed on one of her videos a gorgeous squiggly line mask she had bought. As I mentioned in my previous post, since there can hardly be copyright on squiggly lines, I designed my own, being careful not to look at the original so I wouldn’t be tempted to make it look the same. I have made this in the form of both a stencil and a mask, and in two different sizes. This one did require a lot of extra work to improve on the original that I made, whose deficiencies only showed up once I’d cut the test piece. I made all the bridges thinner. If you don’t like the appearance of these in the finished piece, they can be painted over – it would take a while but probably worth it! However, with a lot of multi-layered stuff on the gel plate and with mixed media, these little gaps may not show up that distinctly. They actually make the stencils look a bit like rope!
Please refer back to the previous stencils and masks post for details of Froyle’s hilarious “Fix-a-Loo” masks! Here are my digital versions.

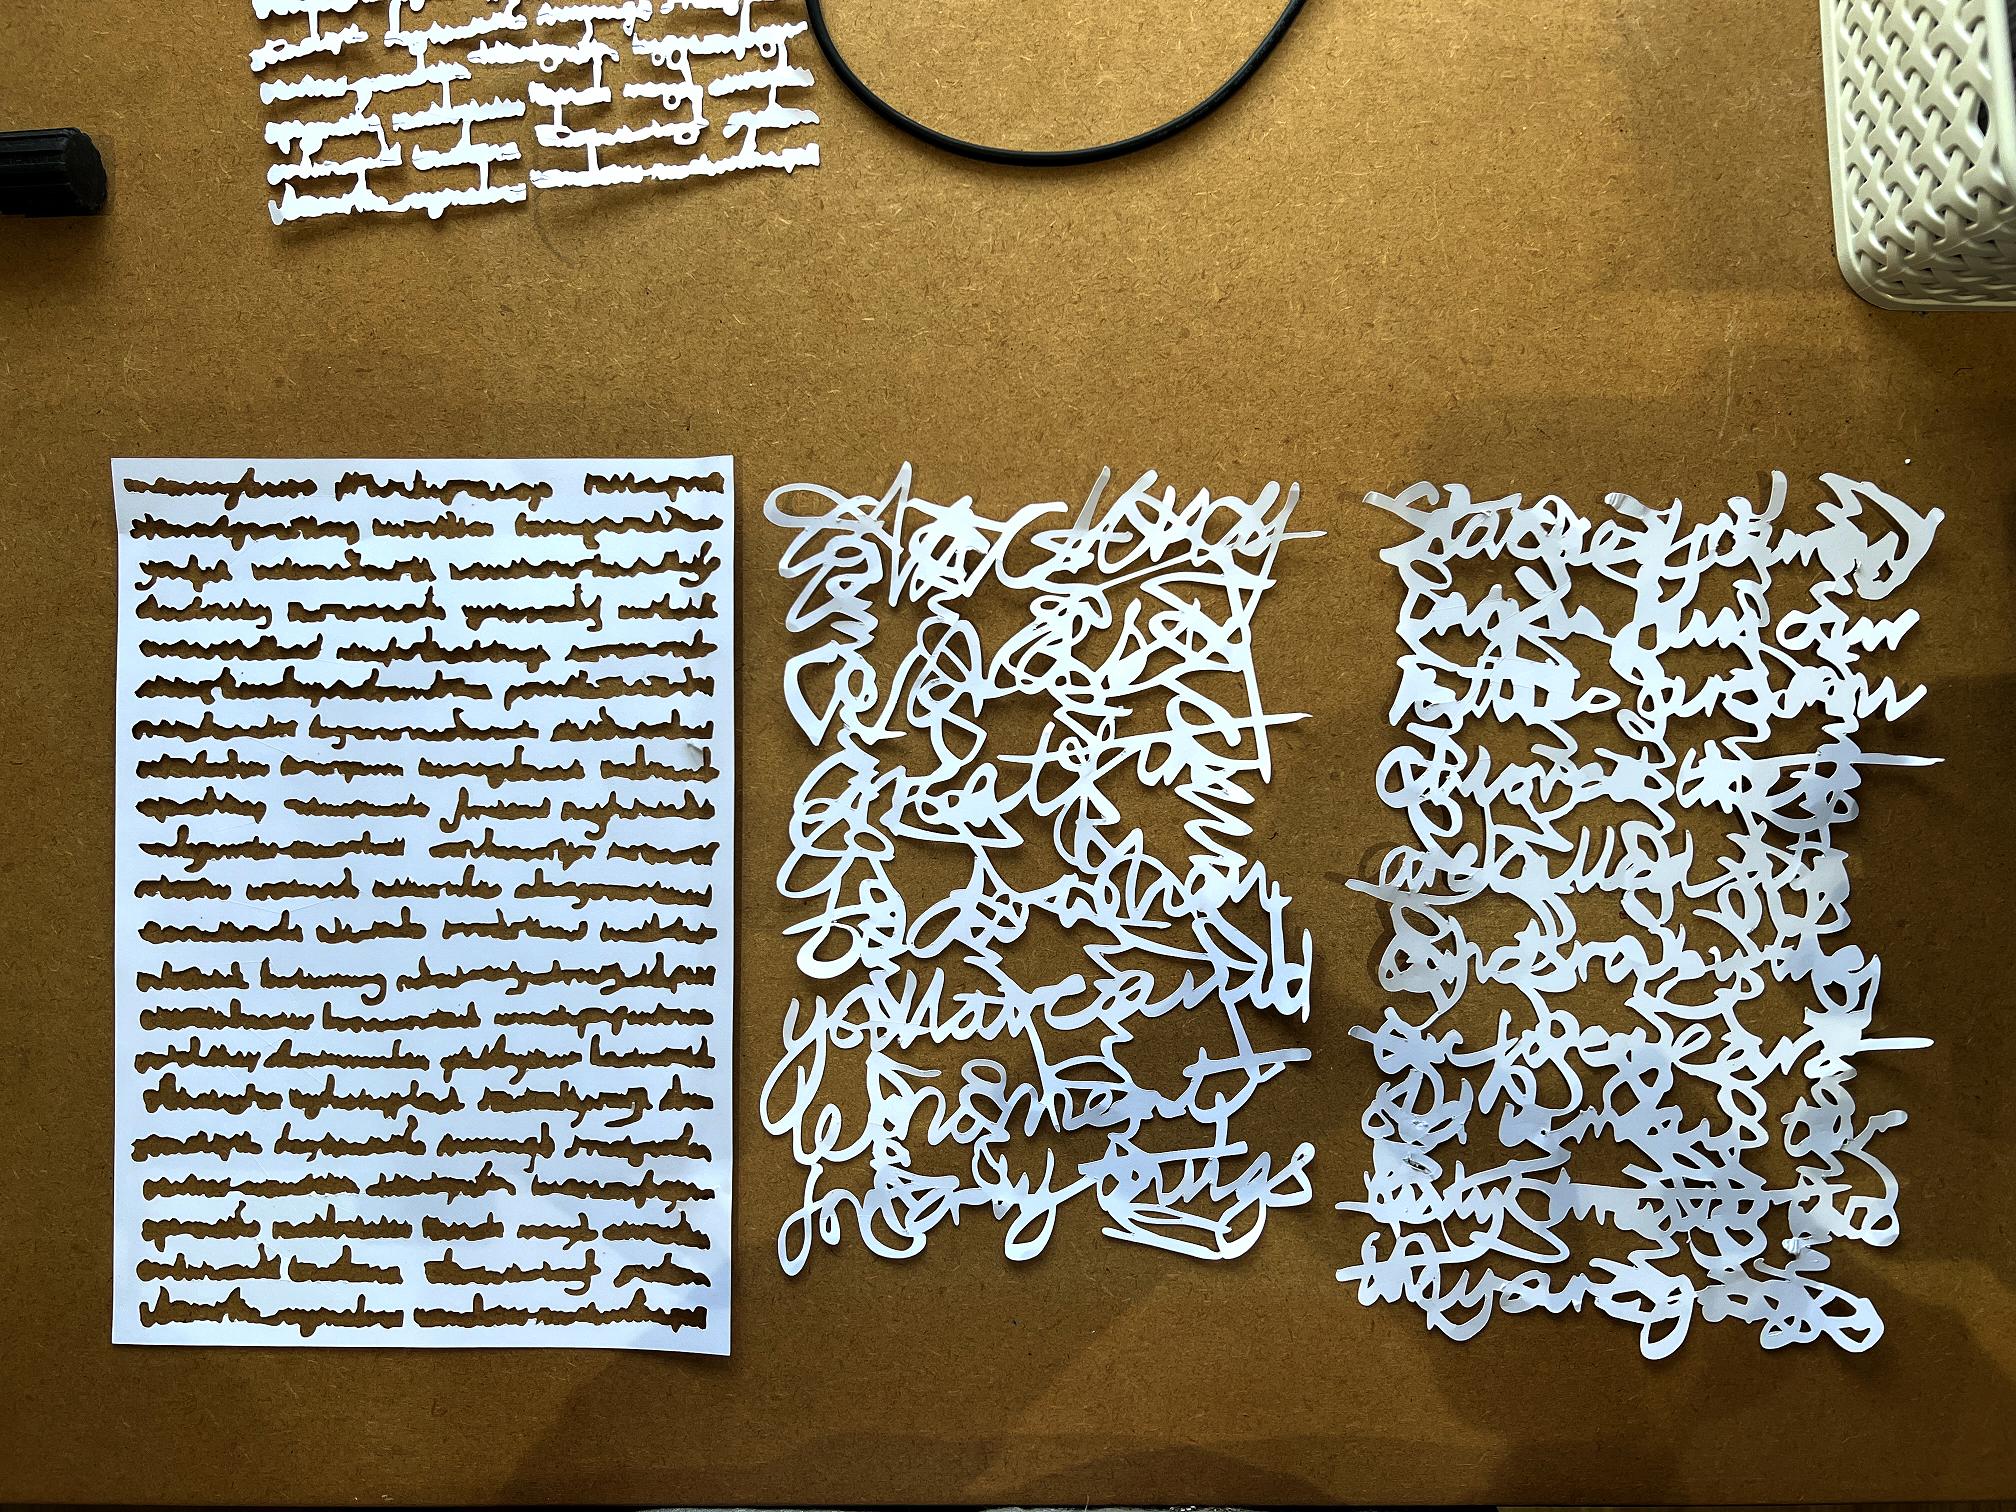
“Intuitive scripting” text masks
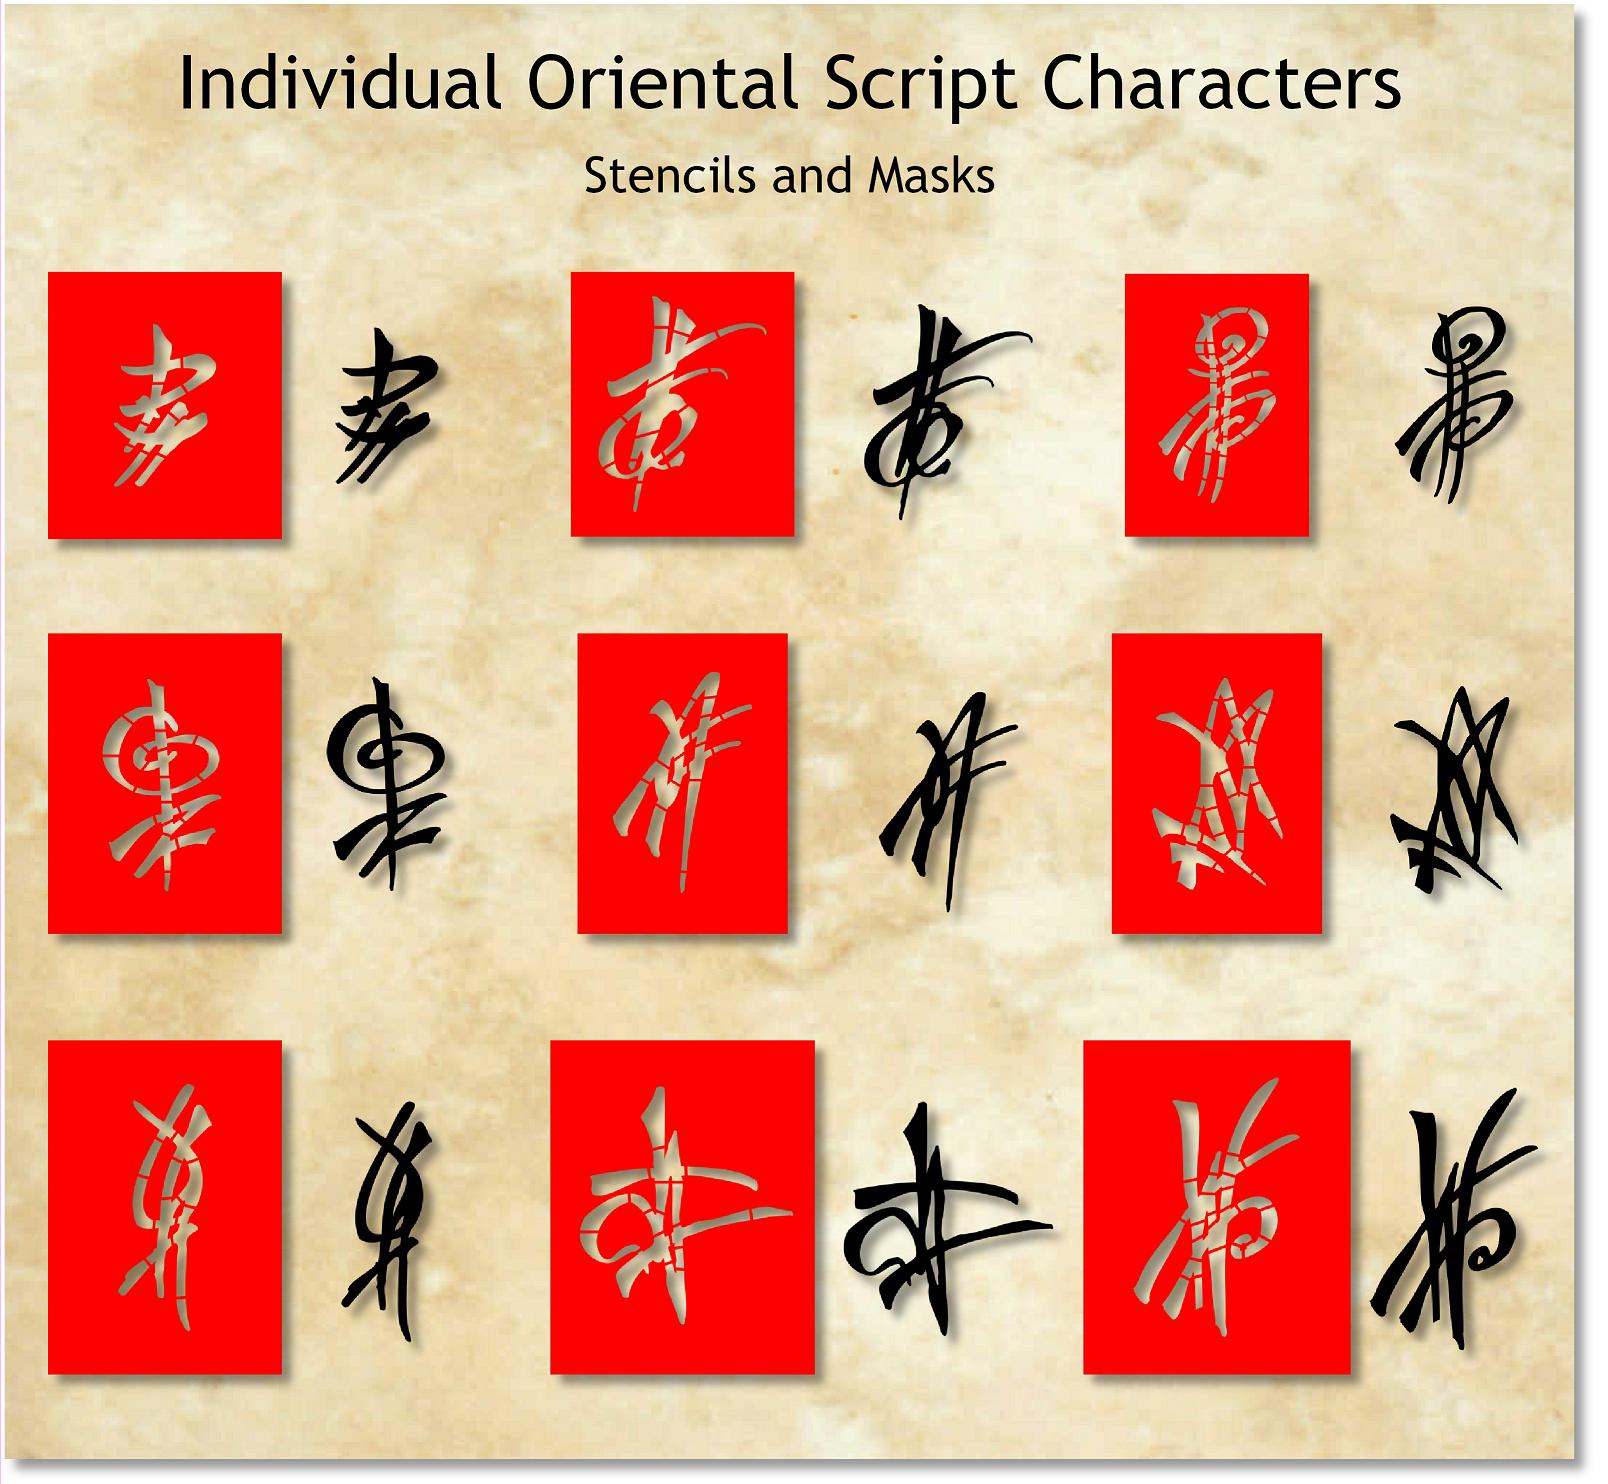
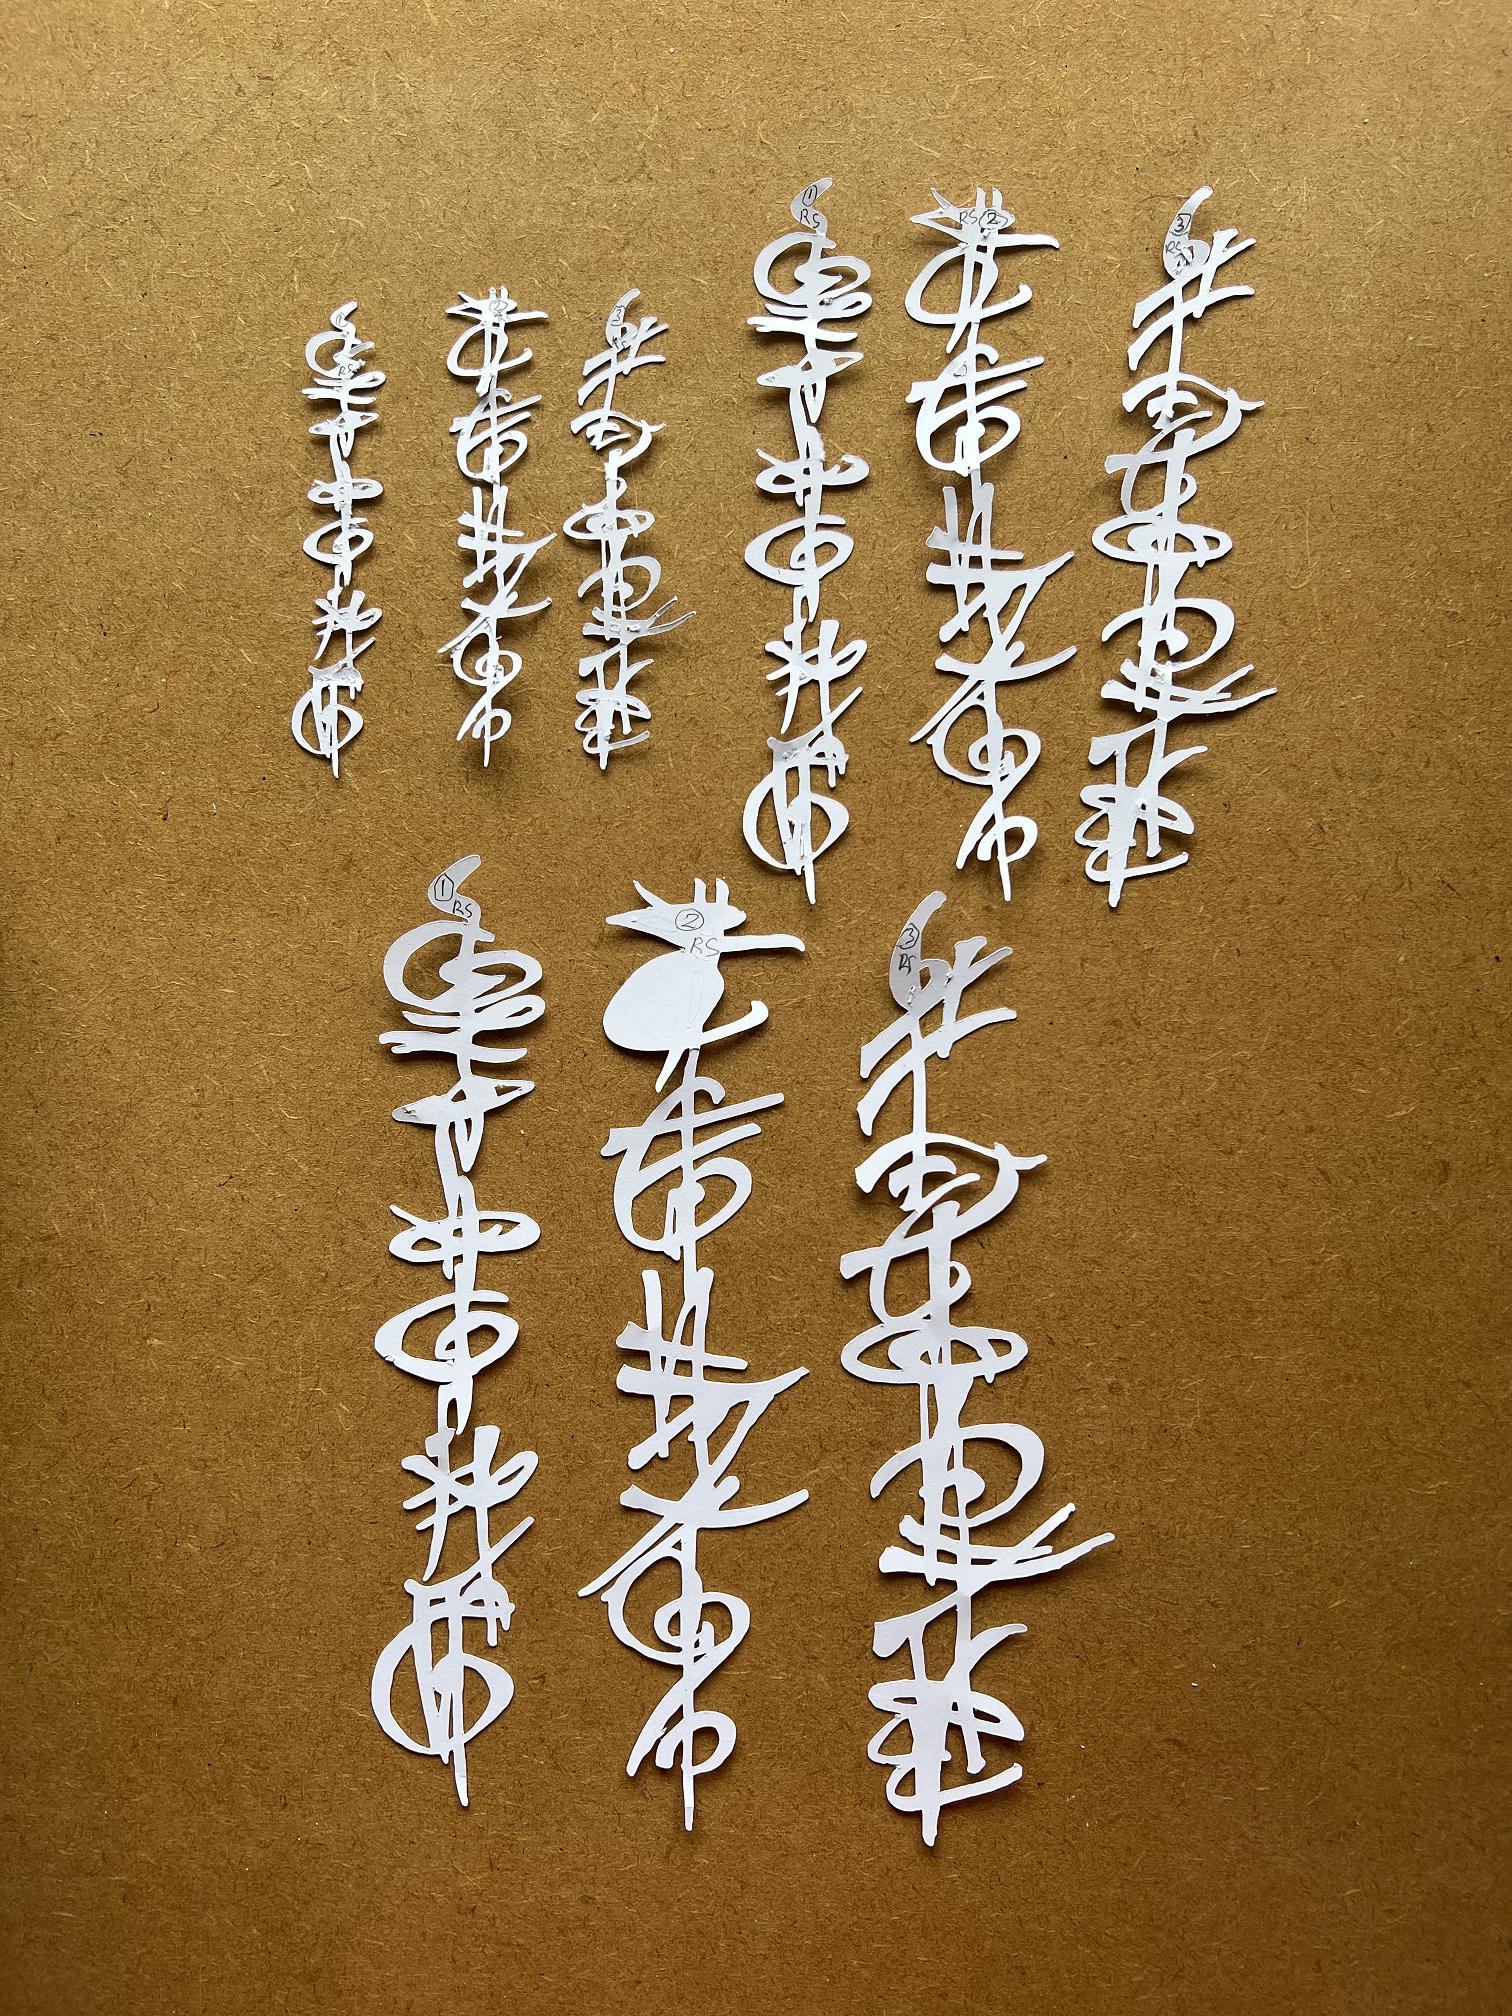
Inspired by Robyn McClendon‘s “intuitive scripting,” I made these Oriental script lines. They all cut beautifully.

Here is the revamped collection of individual Oriental script characters, with the stencil bridges redone. They are now all correctly placed, and I have made them thinner and all the same width, and created additional ones to make the stencils more stable.
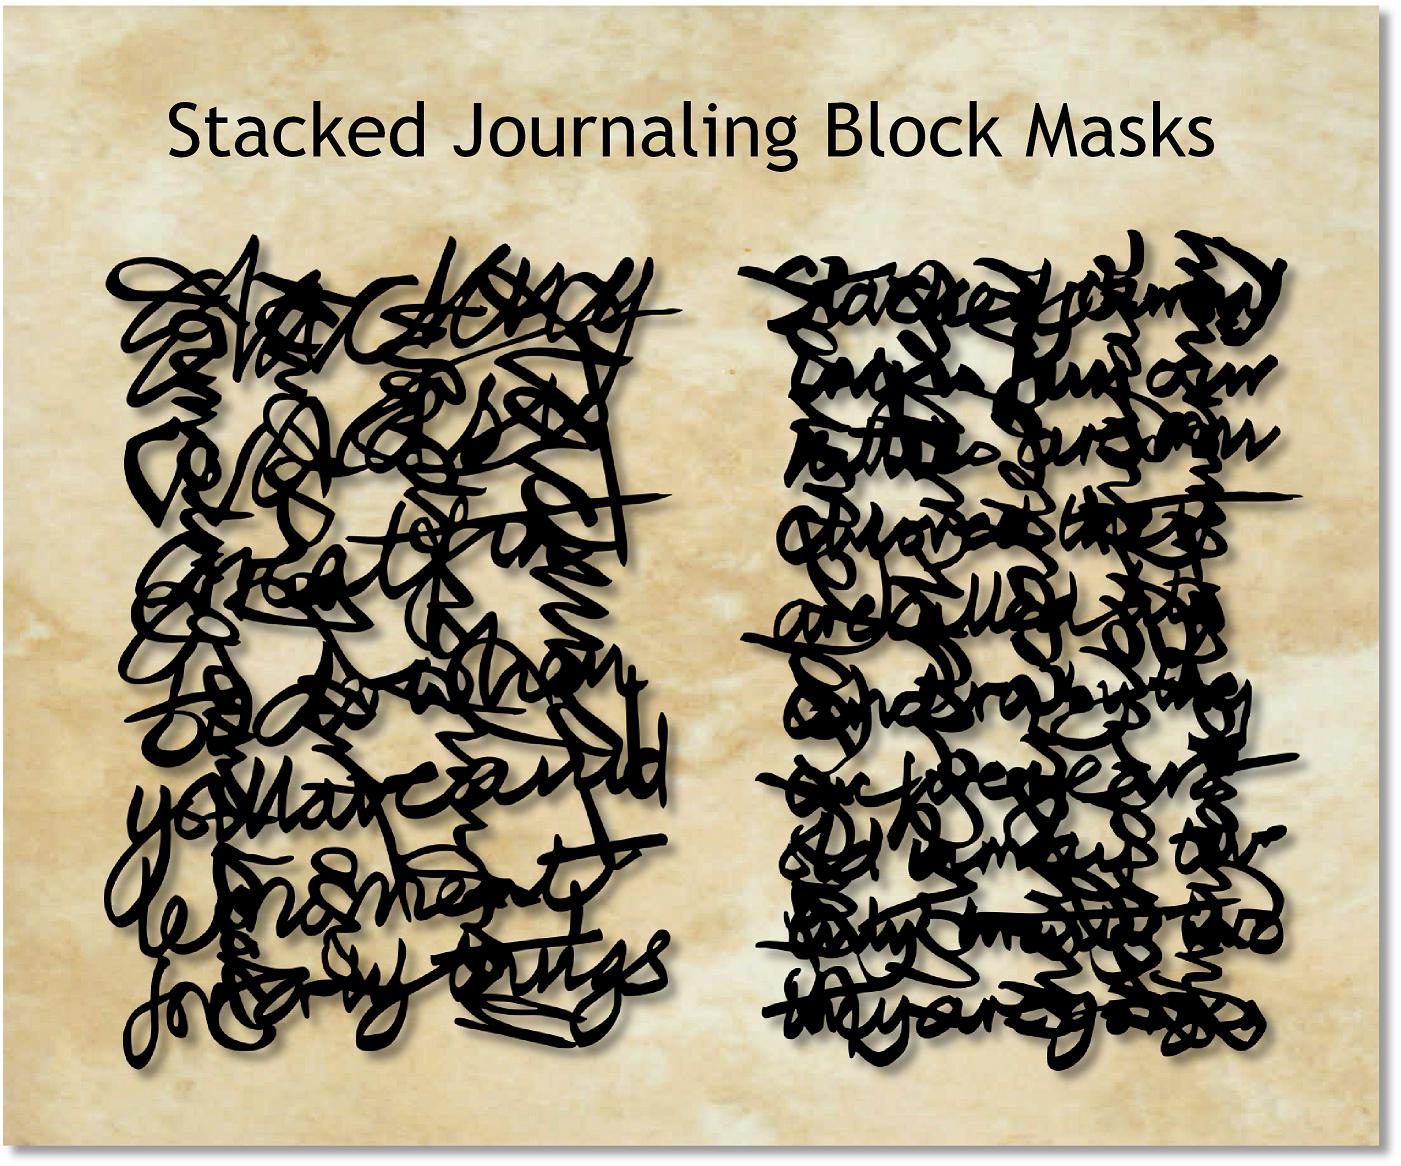
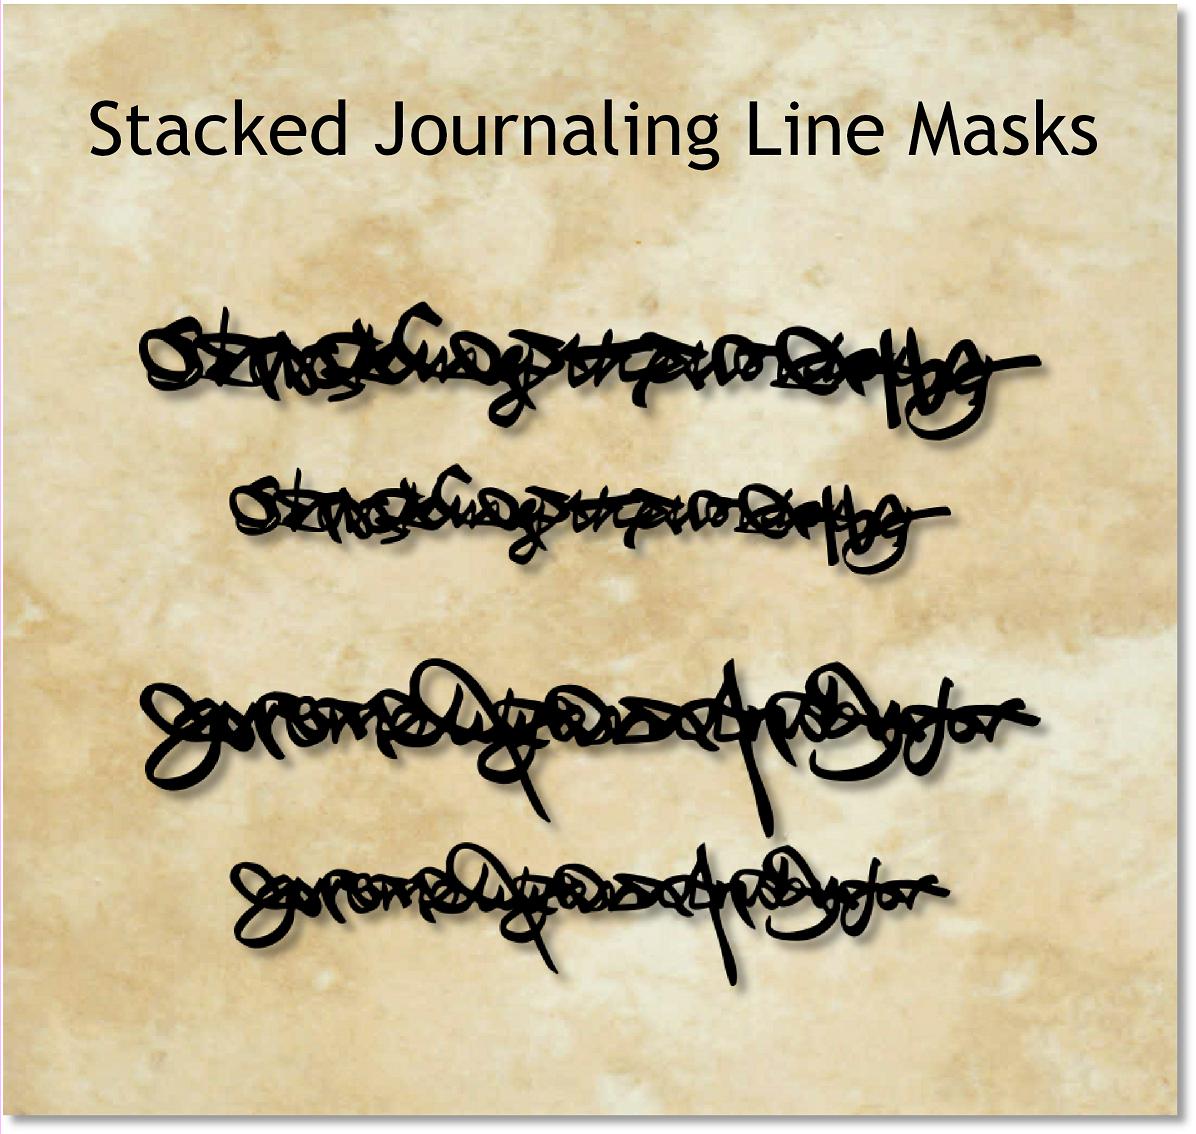
“Stacked journaling” text masks
As mentioned in the previous post, this idea came from Judy Hurwitt. I have cut two separate block designs, and two lines in two sizes, having abandoned the smallest size as I did with the Oriental script ones.
All my mask pieces can also be cut from normal card and applied as collage pieces. Being svg files, they can be made any size you like. I have cut 12 x 12 in sheets of all of them from black card and filed them away for this purpose. The black card did not cut nearly as cleanly as the cheap printer card! It also left a lot of black fuzzy residue on the mat, which I had to scrub with warm soapy water to clean it off. I don’t remember having any problems with this card in the past but I have usually cut either white, or other colours (it is American Cardstock card which usually cuts like a dream). I think the blade may have become blunt after cutting all that Tyvek.
Some test cuts
Most of these worked perfectly, but there were a few exceptions.
The small script mask looked fine on screen, but once cut, was impossible to handle. There were not nearly enough connections between the different elements and the whole thing was far too floppy and unstable to use. I shall probably glue this test piece down as a collage element but have abandoned it as a useable mask.
The smallest versions of the Oriental script lines and stacked journaling lines were really smaller than I would need, and the cutter struggled with them a bit, although I was surprised how well they did cut under the circumstances. The test cuts were done with cheap printer card, and the small pieces would probably have cut OK with the Tyvek but it wasn’t really worth the hassle. Again, I shall use these test pieces, but shan’t cut them again. You can see the Oriental Script test cuts here, in all three sizes. One of the large ones didn’t cut completely for some reason, but when I cut it from Tyvek there was no problem.
To return to the small script design, the stencil cut perfectly, and I am extremely pleased with this background script design. You can get a masking effect from stencils anyway, on the gel plate, so it’s not really essential to have the mask version. You can see the test cut here, with the two stacked journaling block masks. At the top of the picture you can see part of the rejected small script mask.
Of course, the test cuts only served to expose any obvious problems, which I have remedied. The true test will be when they are put to use on the gel plate with real paint and ink! I do not foresee any problems, though, but if anything does come up which requires the pieces to be further edited, I will edit the uploaded ones as well.
Cutting with Tyvek
This went extremely well. I took the precaution of changing the cutter blade before I embarked on this final stage of the project. Tyvek cuts like butter, and although it is thin, it is super-strong. At the moment it feels pretty flimsy but I think after it’s had a bit of build-up of paint, it will feel less flexible. There is no danger of them tearing, anyway, and they are waterproof.
Storing the stencils and masks
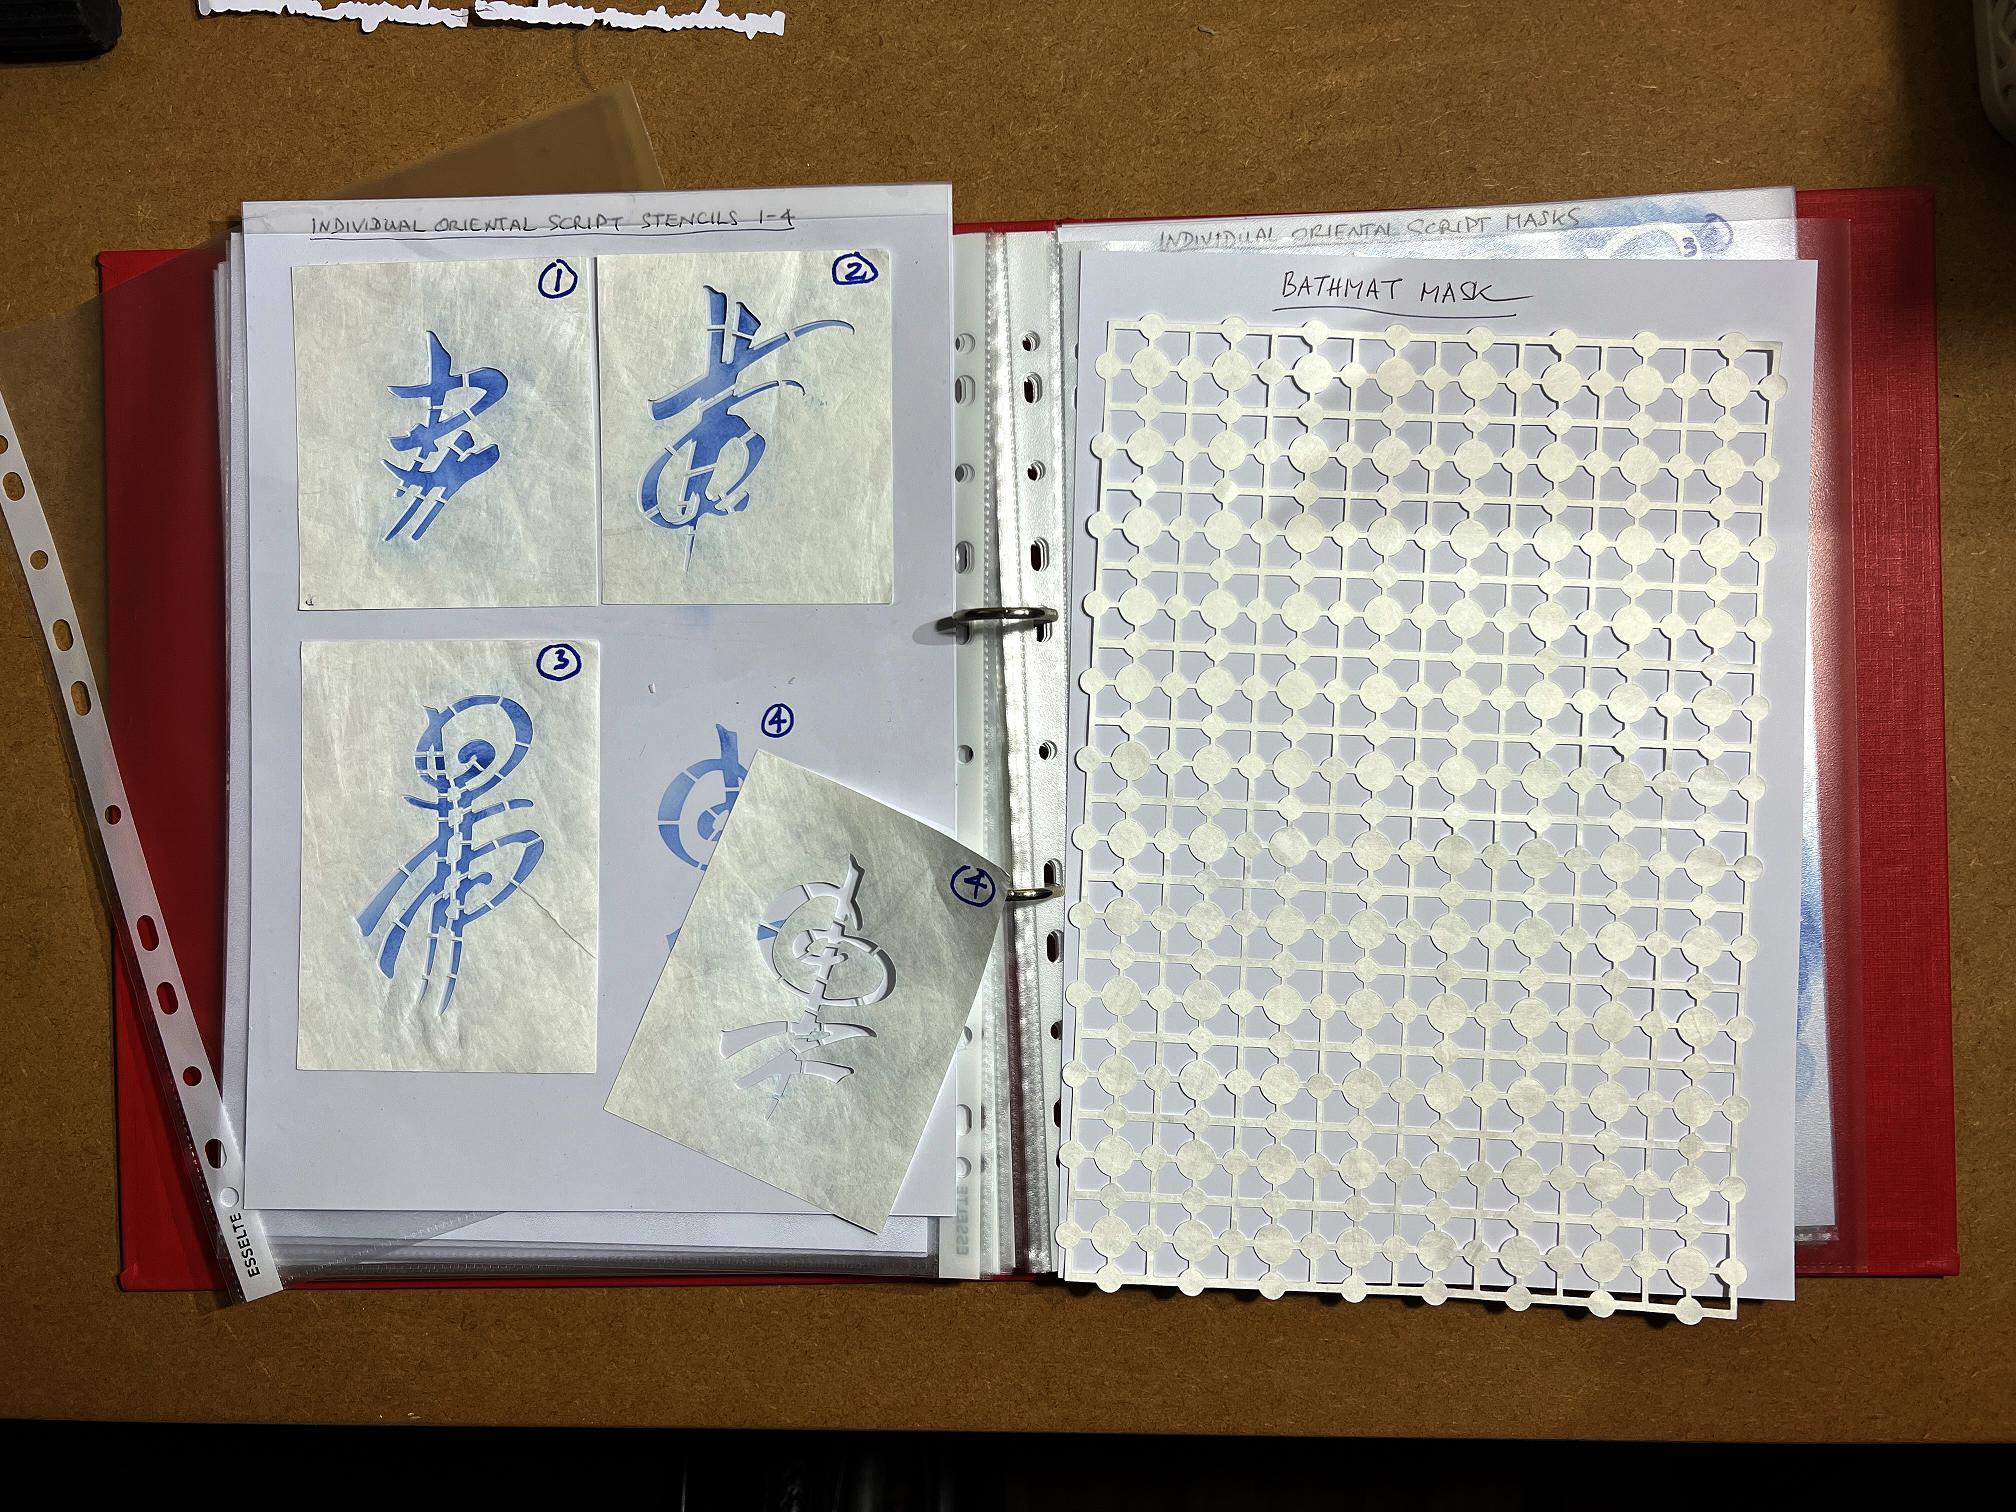
Beginning with the individual Oriental script stencils, I inked through them using a soft blending brush and Distress Ink, onto a sheet of A4 card, 4 to a sheet, and numbered each one. The stencils themselves are numbered, too, using a Sharpie pen. I taped a piece of acetate to the card along the top, and applied some mat glue (remains tacky when dry) onto the surface of the acetate where each small stencil would be, and then stuck the stencils in place so that the design on the card showed through. I found that if I just used card, the glue was absorbed too much to be effective, hence the acetate. Each completed sheet was then put into a document sleeve ready to store with my other stencils in a ring binder. The full-sized ones do not need to be glued to a carrier acetate sheet but each one just has its own individual piece of card in a document sleeve. As you can see in the above photo, the pattern shows up quite adequately for easy identification.
In this way, I shall know where each belongs, and will easily be able to see if any are missing.
Small stencils and masks are liable to tangle with each other if put together in a pouch or folder, and it’s difficult to find what you want, but this way they are kept separate, and easily visible. It may take a bit of time to organise the storage, but in my experience, a bit of time invested in a good storage solution saves loads of time and frustration later.
With the Oriental script lines, I tried a different method for storing them. I have got some stencil glue which I have had for ages (which may have caused it to become more sticky than it should be – I’ve never used it before so I don’t know what it should be like). I applied this to the back of each of the script pieces and left them to dry. They ended up super-super-super sticky and very difficult indeed to handle! I stuck them down onto the acetate sheet over the card which I had used to ink their shapes, and hoped they would be OK. The next day I tried pulling them off and they were far too sticky. If they had been made of card, I would have ripped them to shreds, but the Tyvek held up just fine. I cut another series from Tyvek, which didn’t cut at all well because of the black residue on the mat from cutting the black card which caused the mat to be a lot less sticky than it should be, and the blade was probably blunt too. I then decided to see if I could remove the offending glue from the original pieces, and sprayed them liberally and repeatedly with Crafter’s Companion Stickaway spray (brilliant stuff) and after 2 or 3 applications and wiping with kitchen paper, and then washing them in warm soapy water, they came up absolutely fine. They were a bit creased, but I was able to flatten them out by rubbing my fingernail over them. I have now applied mat glue to their carrier sheet as I did with the other masks, and they are fine. The second batch of Tyvek ones can be thrown away as they did not cut perfectly.
Now this final stage of the project is complete – the Tyvek cutting, and the storage – I can settle down and start playing with them on the gel plate. I can’t wait! Unfortunately other activities, and a couple of bad days with my ME have intervened, and apart from cleaning off all that horrible glue, I haven’t been in the studio.
Free downloads on my OneDrive
As I mentioned above, all the stencils and masks have been uploaded to my OneDrive, to join some old ones that I put up several years ago.
There is an explanatory note attached to the folder containing my various free downloads, to the effect that all these files are free for personal use only. I ask that you credit me (Shoshiplatypus) with them if you use them, quoting my blog address and/or the OneDrive address. Also, that you do not alter them in any way, apart from perhaps resizing them as necessary to fit your projects. Please do not sell them.
I am grateful for everyone online who has helped me over the years, with excellent instructional tutorials, inspiration and ideas. It is very good to be able to put something back, and perhaps to help others as well. Enjoy using the free downloads, and keep watching out for fresh ones to make an appearance.