FUSSY CUTTING IMAGES FROM OLD BOOKS
Before anyone gets aerated about destroying books, I would only usually do this with books that were damaged or destined for landfill. However, there are a lot of second-hand books on Ebay, full of beautiful images, and I don’t really have any qualms about cutting these up for art. Most people don’t seem to read much any more, and going on nature walks and identifying flora and fauna is not an over-popular pastime these days, either.
Images for collage and other projects are best in the form of illustrations (drawings or paintings) rather than photographs. The detail is better and there is no distracting background. Many people are now using these images from books in their art because it isn’t affected by copyright. Another way of looking at it is that it is giving an unwanted old book a new lease of life.
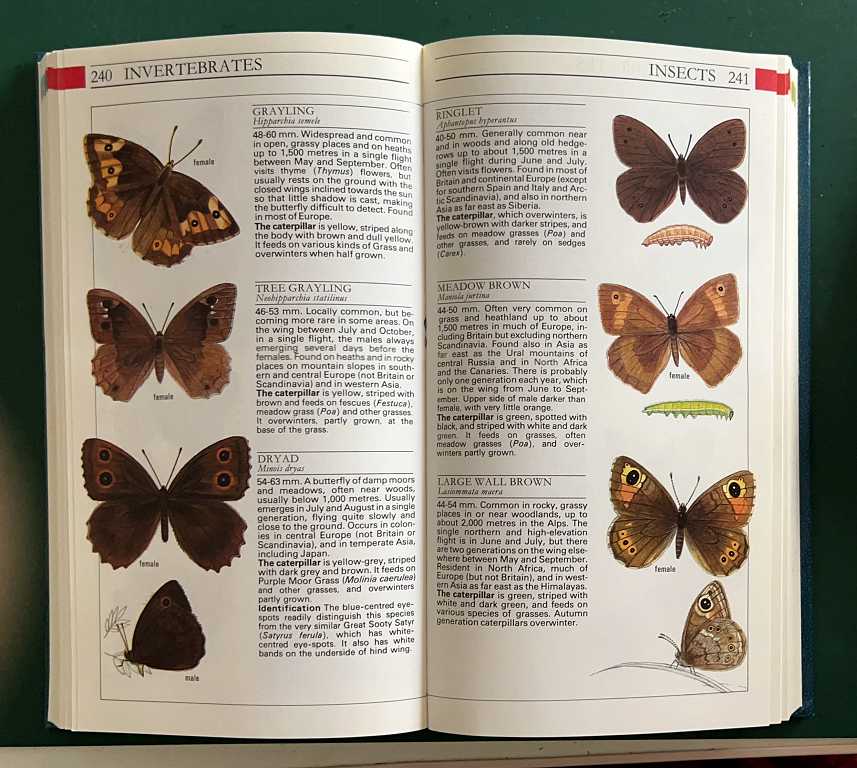
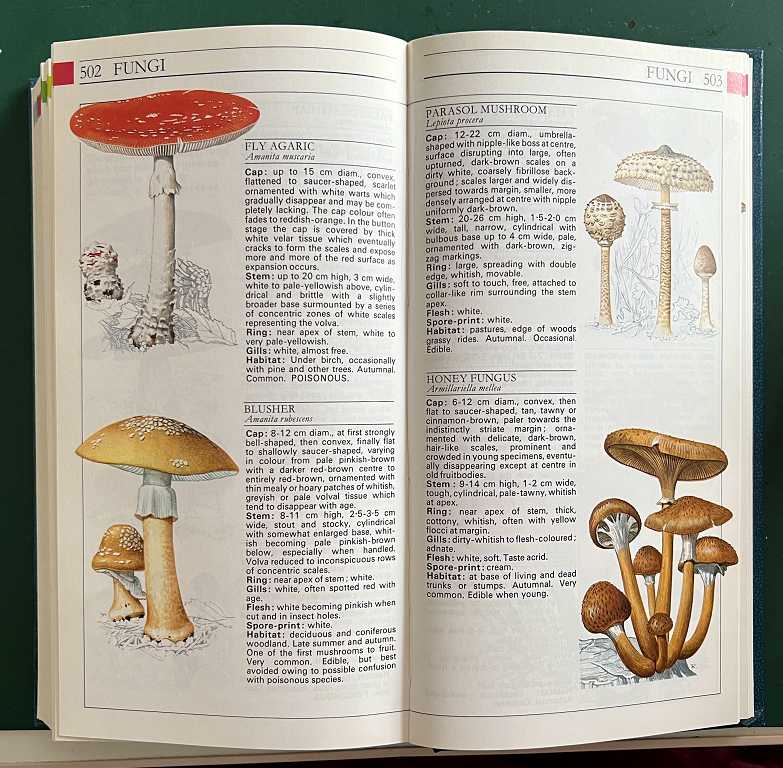
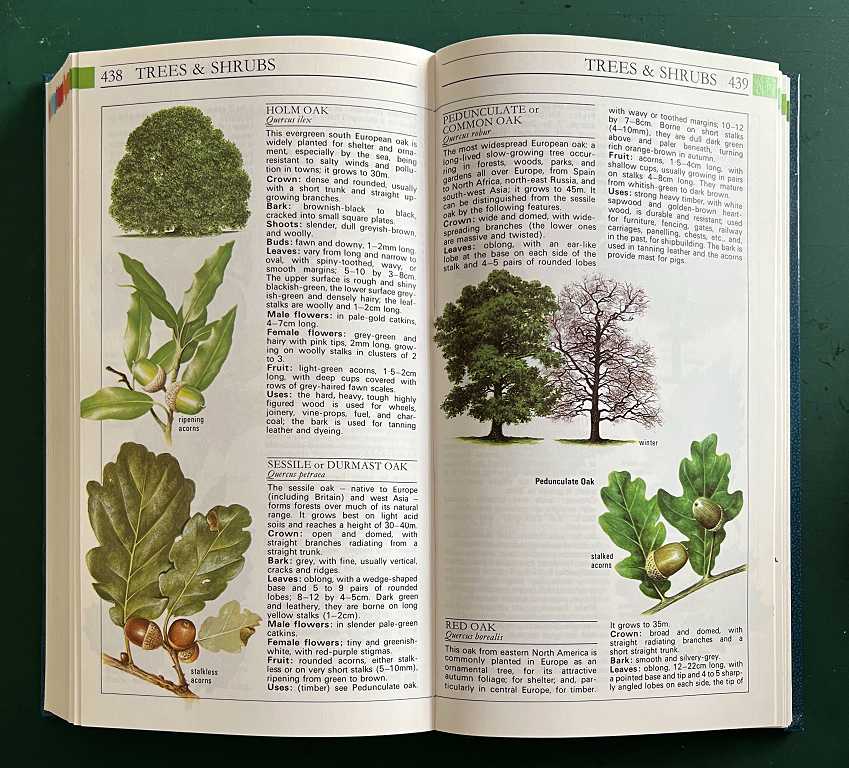
British wildlife and nature books
I recently acquired three such books from Ebay – all hardback and excellent quality. Two are Reader’s Digest books. They are chock-full of beautiful images which can be fussy-cut and used.
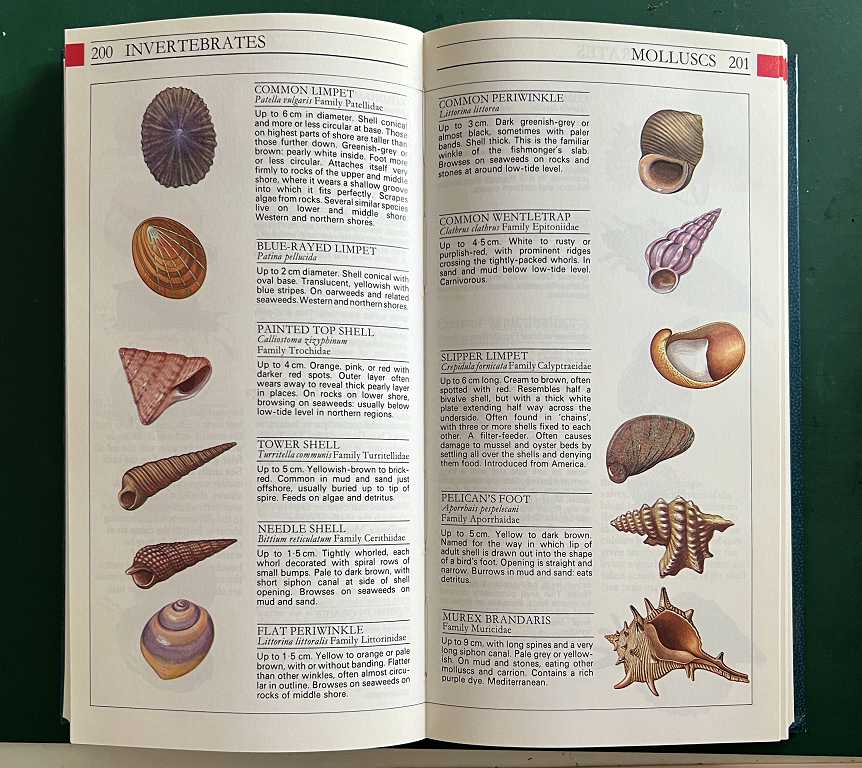
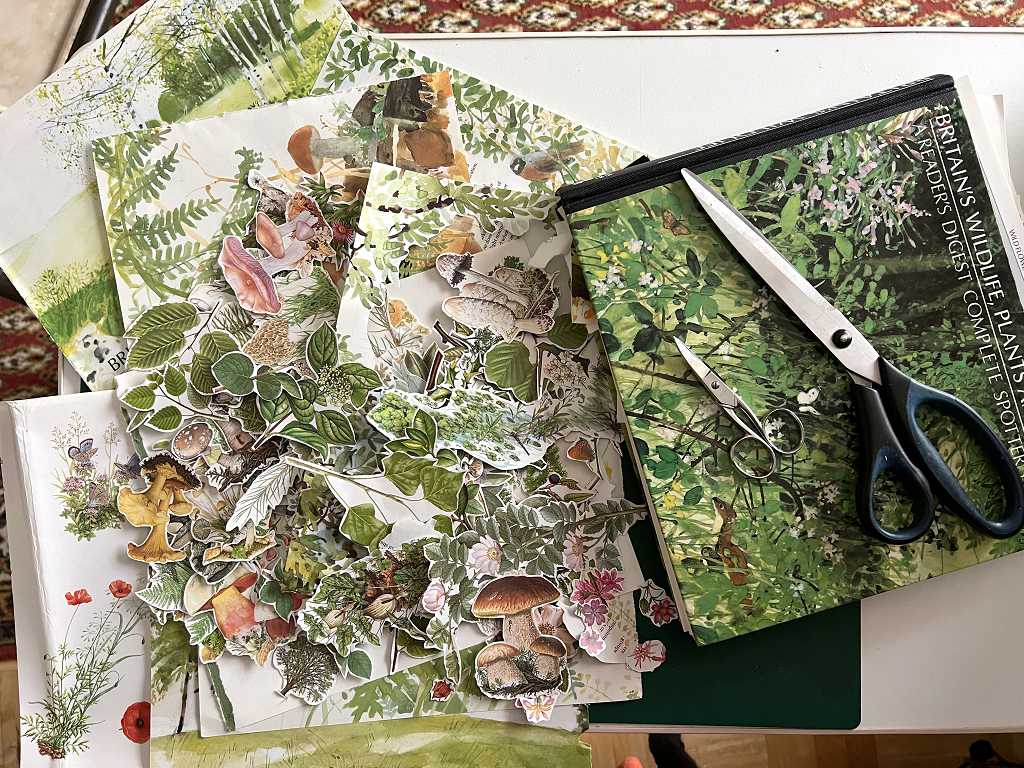
Here are some pages from one of the books which I have not yet begun to cut.

Cutting the first book
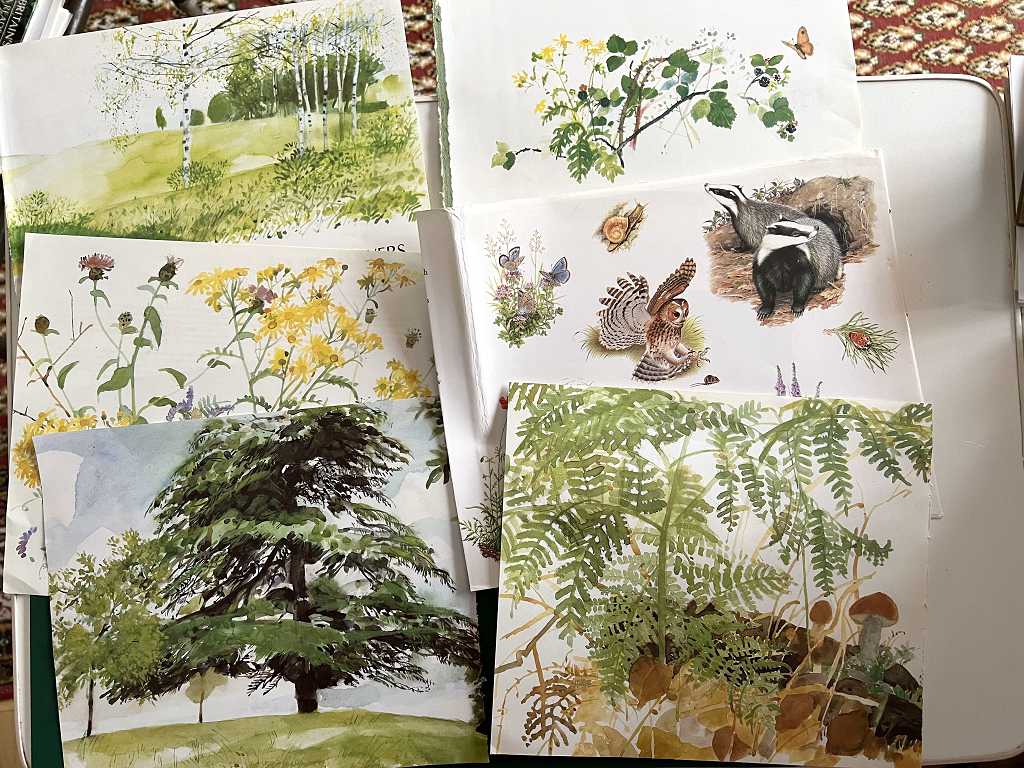
I have completed the cutting of the larger Reader’s Digest book, which is now reduced to an empty cover (which will be used to create a new album), several full-sized title page illustrations, numerous individual fussy-cut images, and a pile of pages and part pages which I do not want. These will be turned into collage fodder by various means. The smaller scraps generated by the fussy cutting will be shredded and added to other scrap paper which will eventually be turned into useable handmade papers. There is hardly any waste.
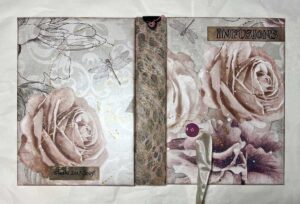
Large images
Here are some of the beautiful chapter title page watercolour illustrations which will be used as whole pages in albums. The one at centre-right is the back of the dust cover of the book, and is fairly thick and shiny.
The process
Here is the fussy cutting operation in progress. I have found by experience that it is better to use large scissors rather than tiny ones, even for quite fine detail, although there are occasions where only the small scissors will do. The secret is to turn the work, not the scissors.
This is the plastic box lid containing all the images I had cut out by this stage.
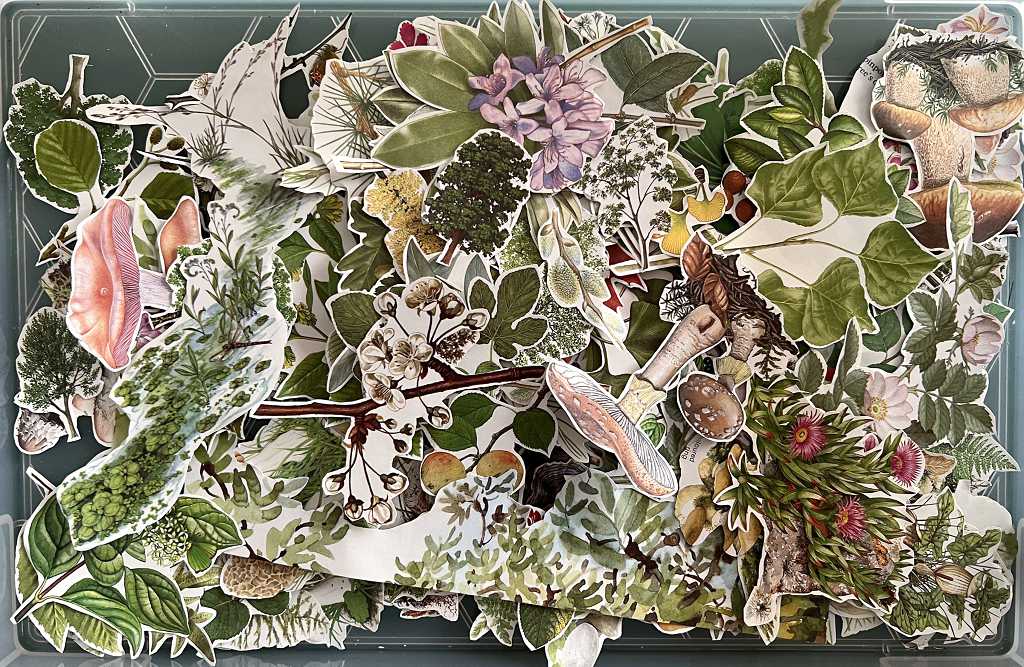
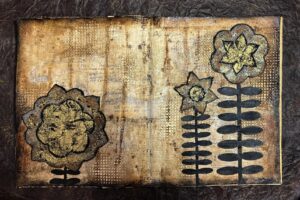
Individual images and small scenes
Many of the images in this particular book are not just single images of objects, but small scenes. These are going to make beautiful collage elements. As you can see, I have cut everything out with a narrow white border, and left internal spaces intact because otherwise the pieces would be much too fragile. When I use them, if I want the white border removed, it will be a simple matter to cut it away on an individual basis. For now, though, I think the border makes the image stand out from the background. If the white is too stark, it is a simple matter to add some Distress Ink to tone it down. Some of the images are tiny, but worth cutting out to be used to embellish tabs and other album elements.
I haven’t taken any further photos of this project. The third book has arrived in the meantime, which is exclusively about birds. As I now have a lot of fussy-cut birds I shall probably leave this book for later.
Art from creepy crawlies
As these books are about all British flora and fauna, there are quite a few images that I wouldn’t want to cut out and use – notably slugs! My hubby and I had quite a laugh about that, and also about the cockroaches and spiders and house flies. Some people may want to make art out of those, but not me!! Most of these creepy-crawlies literally give me the creeps.
Embroidered bugs
I remember many years ago, we had several visits from a teacher to our local embroidery group who made the most astonishing 3-D insects from cream silk embroidered with gold. We had a 2-day workshop on this, and I went on to create quite a few beetles and butterflies and so on, for later projects. She had a fantastic display which she would set up for her classes, including screens with illustrations of her inspiration and work, and she always joked that she was probably the only artist who gained inspiration from a flea!! She was really intrigued by the overlapping scales on the insect’s back.
This is a bit of a digression (I’m good at those, in case you hadn’t noticed), but here are a few of my own little cream and gold beetles:
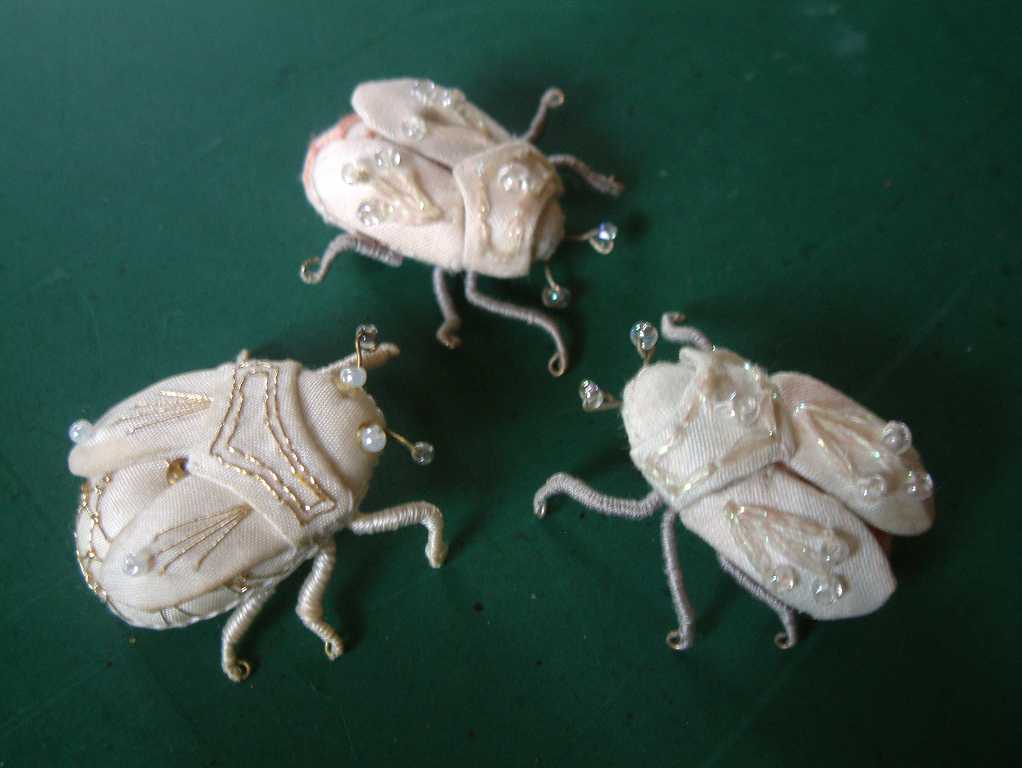
Bees’ and dragonflies’ wings were done over a wire frame with detached buttonhole stitch in fine gold thread and the striped abdomens of bees were wrapped alternately with cream silk and gold thread. The undersides, where everything was gathered together and closed off, were covered with fine gold leather. These little insects didn’t creep me out! Not a slug in sight, though. This teacher also made the most exquisite little silk boxes which normally contained a beetle or a bee – she said that every box should contain a surprise.
Storing fussy-cuts
This can be a problem because they come in all sorts of sizes and shapes, and tend to get all tangled up together. I had devised a very good system which has worked well for me so far – using paper CD envelopes with windows on the front, stored in a small box.
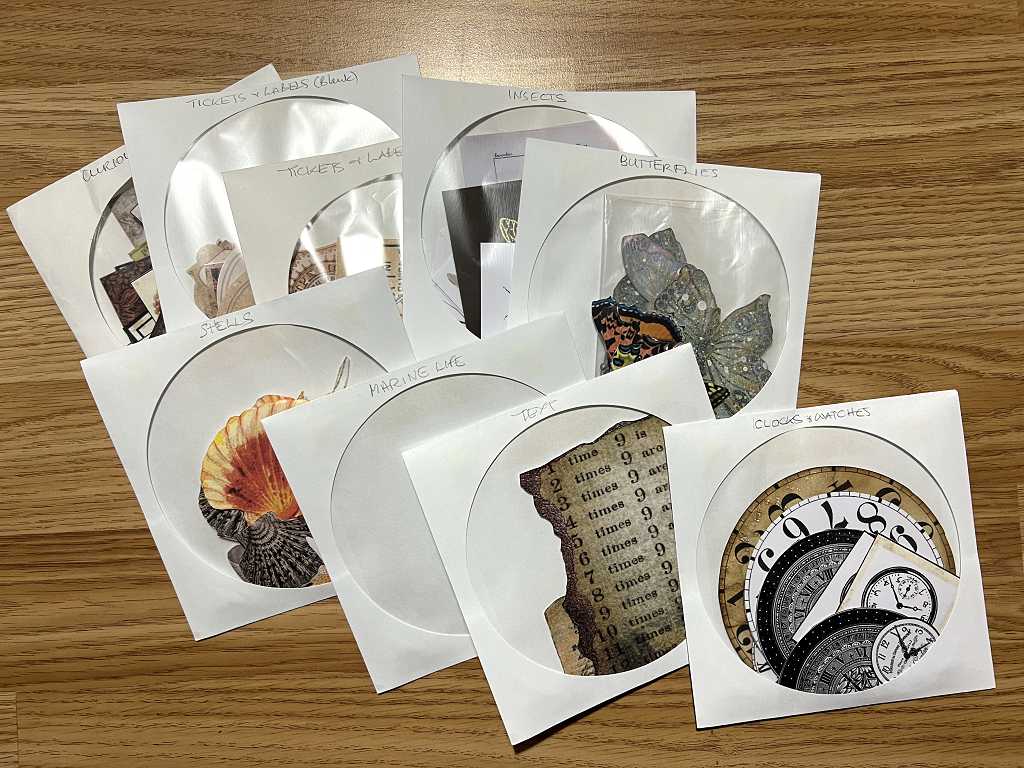
This has worked well for small quantities but with the amount I am now generating, this is no longer going to work.
I follow Luise Heinzl on YouTube, who is an amazing mixed media junk journal artist, and in one of her recent videos that I watched a couple of days ago, she was taking postage stamps out of an album for use on her page. I was really intrigued by this and looked it up on her channel. She has done a series of videos on how she made this book, and how it works for her. If you have ever seen those stamp collectors’ books with narrow strips of transparent paper running aross the pages, behind which you store the loose stamps, this is the inspiration. I thought it would work well for fussy cuts and small ephemera as well, and I am now in the process of making my own version of this. I shall be posting about this in due course.
Storage of small collage elements and album-making ephemera is always a bit of a problem because you need to be able to see what you’ve got, and it needs to be easily accessible and take up the minimum of space. You also need a system whereby you can separate the items into different categories, whether it be size, colour, theme (e.g. animals, birds, plants, human figures, steampunk elements, etc.). The system needs to fit in with whatever your studio setup is. If something is tucked away in a drawer, you probably won’t use it. When you do as many different things as I do, huge amounts of stuff accumulates over the years and organisation is absolutely key if you are ever going to find anything, and know that you have it to hand when you want it. I think that storage and organisation is a form of mixed media art in its own right!