INFUSIONS MINI-ALBUM – THE SPINE EMBELLISHMENT AND COMPLETION OF THE PROJECT
Now that I had finally sorted out all the problems with binding the mini-books, I was able to concentrate on the final stage of the project: the spine embellishment.
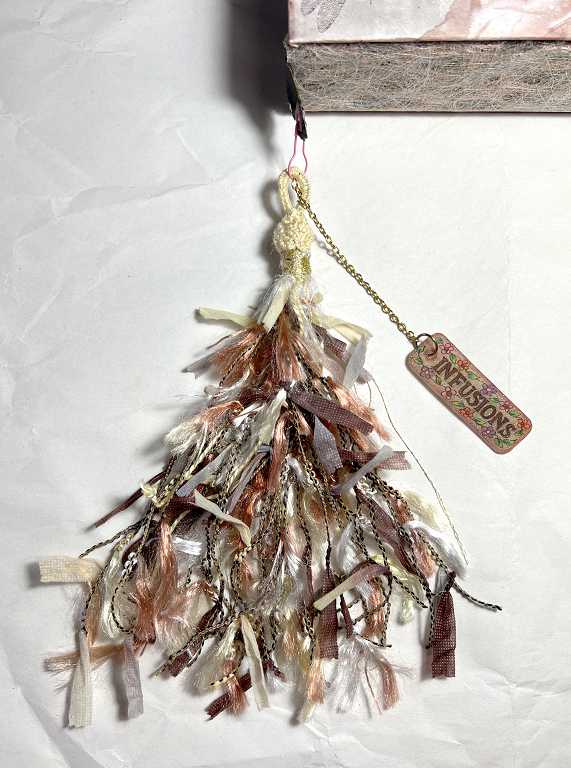
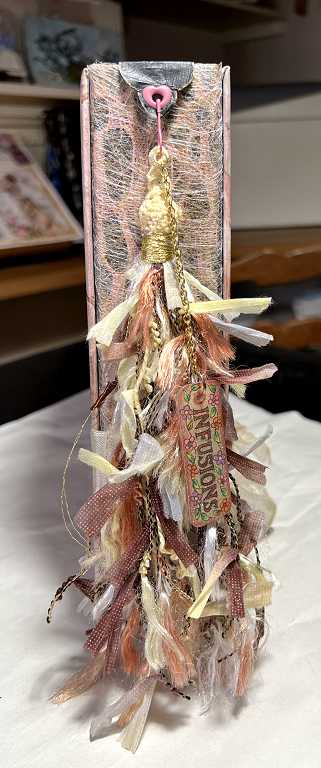
Tassel
I found this fancy ball of yarn in my stash, and was delighted to discover that it matches the project perfectly.
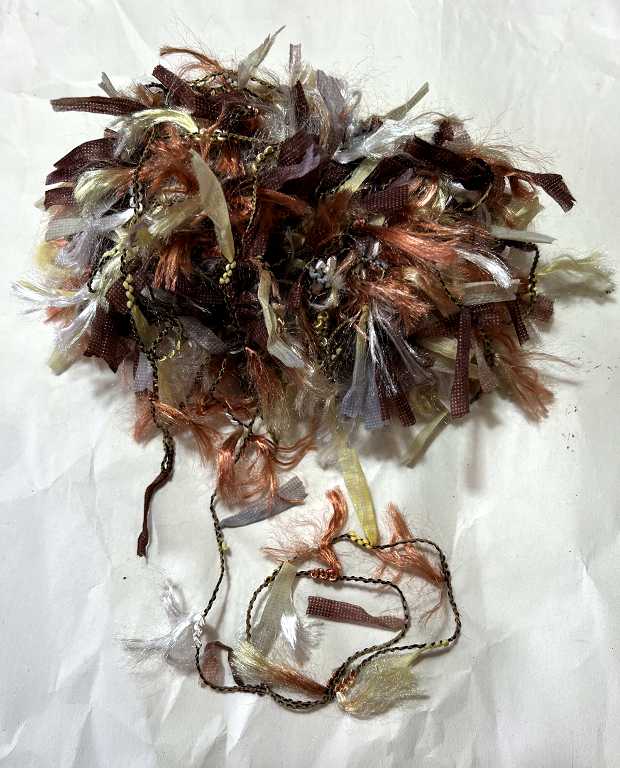
I’ve already used some of it inside the back cover of the book, and thought it would be appropriate to use it in the spine embellishment as well. It’s a simple enough matter to make a tassel.
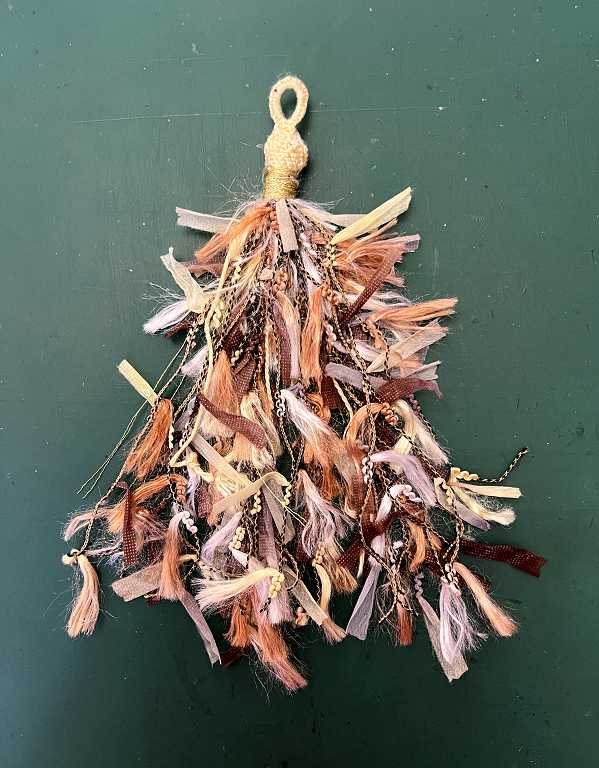
I bound the top with some gold embroidery thread, and then made a loop with the top thread, winding it around my finger several times. Using a DMC #3 perle thread, I worked buttonhole stitch around this loop, and then covered the top of the tassel with detached buttonhole stitch, using the same thread. As I worked and had to start a new thread, the ends were left to hang in the tassel, adding more interest.
Plastic book title charm
Originally I wasn’t going to put a title on the front cover, but changed my mind after I’d completed the cover, and I am pleased with how it looks. I decided to go with my original plan, though, to make a Shrinky Dink label for the spine embellishment.
Shoshi loves Shrinky Dinks!
My hubby always teases me about Shrinky Dinks. I’m too old to have enjoyed these as a child, but the child in Shoshi never grows up so I just came to them late. You cut your shapes and then heat them, and they shrink right down and become hard and thicker – ideal for making charms, jewellery and so on. Many years ago I bought a grown-up version trial pack – “Artist’s grade shrink plastic.” Somehow they’ve managed to make it sound boring. Shrinky Dink sounds sooo much more fun. Why do grown-ups have to rob things of their childlike joy and make them oh-so-boring? I shall go on calling them Shrinky Dinks, and this is Shrinky Dink plastic!
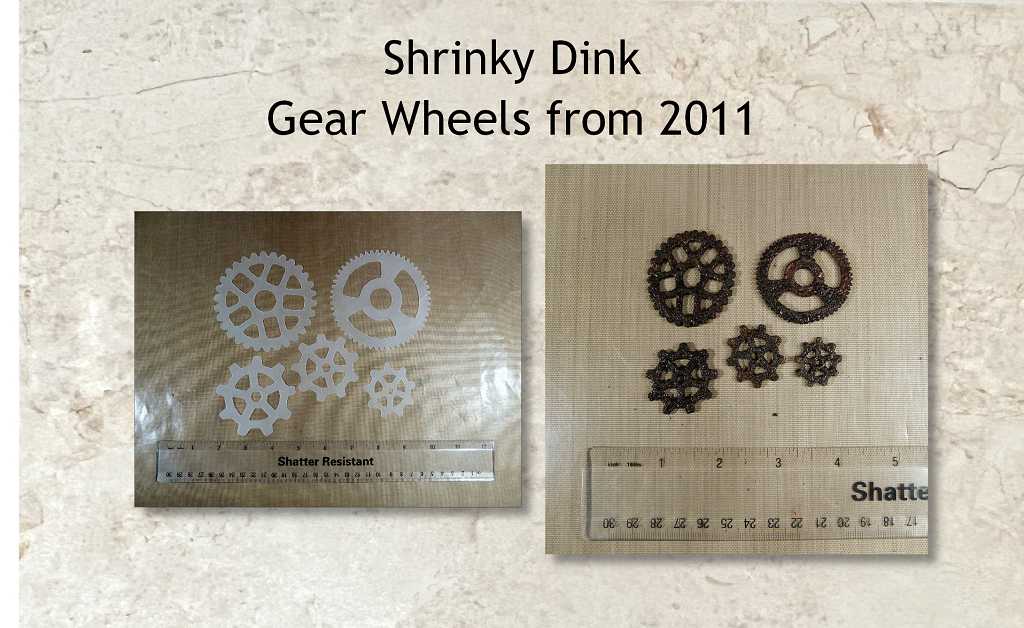
Shrinky Dink plastic is actually polystyrene – not the expanded foam version we are more familiar with, but something like acetate. I managed to cut some shapes years ago on my cutting machine – large gear wheels which shrank down splendidly. I sprinkled on embossing powder before shrinking these and they came out looking really grungey as if they’d been at the bottom of the ocean for a while! I laid a ruler under each group before photographing them, the original un-shrunk and the shrunk version, to show how much they do shrink when heated.
This polystyrene is also known as #6 plastic, and you can find it for free in food packaging. Look for the triangular recycling label embossed in the base, with the number 6 in it.

The trouble is, our supermarket only seems to use #1 plastic for its packaging, which is no good. Apparently #6 plastic has a reputation for being fairly hard to recycle, which may be why it seems difficult to find, but what a great way to save it from landfill – shrink it into ART!
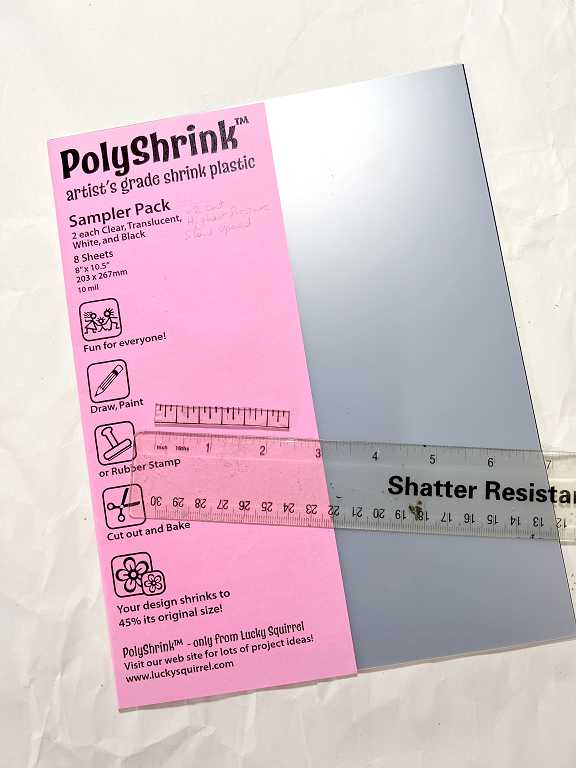
Here’s my sample pack.
In the photo you can see my normal ruler, and a tiny clear plastic one. I got this idea many years ago (can’t remember who posted it) and always thought it was genius, but never got round to making it till now.
The idea is that you draw a ruler on the Shrinky Dink material, with real measurements. I drew mine by tracing the lines from my cutting mat – one-inch main divisions, subdivided into half- and quarter-inch increments to a length of six inches.
I then heated it and watched it shrink. Shrinky Dink material always curls up when you heat it and then it is supposed to unfold again as you proceed to heat it, but this little ruler was a bit more stubborn! Its elongated shape may have had something to do with it.
Anyway, I have ended up with a miniature six-inch ruler! I can use this to determine what size any given Shrinky Dink needs to be before heating. For instance, if I want to make a charm of a certain finished size, and it measures 1 1/2 inches on my mini-ruler, all I have to do is cut a piece 1 1/2 inches with my real ruler, knowing that it will shrink to the desired size.
You can colour Shrinky Dink plastic with markers or coloured pencils, or add text – whatever you like – before shrinking. You can stamp on it – anything really. Then heat it and watch it shrink and become hard and thick, and everything you’ve drawn on it will be shrunk too. If you are making a charm and want a hole in the top for a jump ring, you have to allow for shrinkage and make the hole a lot larger than you think. I found out that the ideal hole size was 1/4 in, so I used my 1/4 in hole punch. Shrinky Dink plastic punches well, fortunately. It shrinks down to a small hole suitable for inserting a jump ring.
After all that preamble and Shoshi’s joy at thinking of it…
Title label for the Infusions Mini-Album
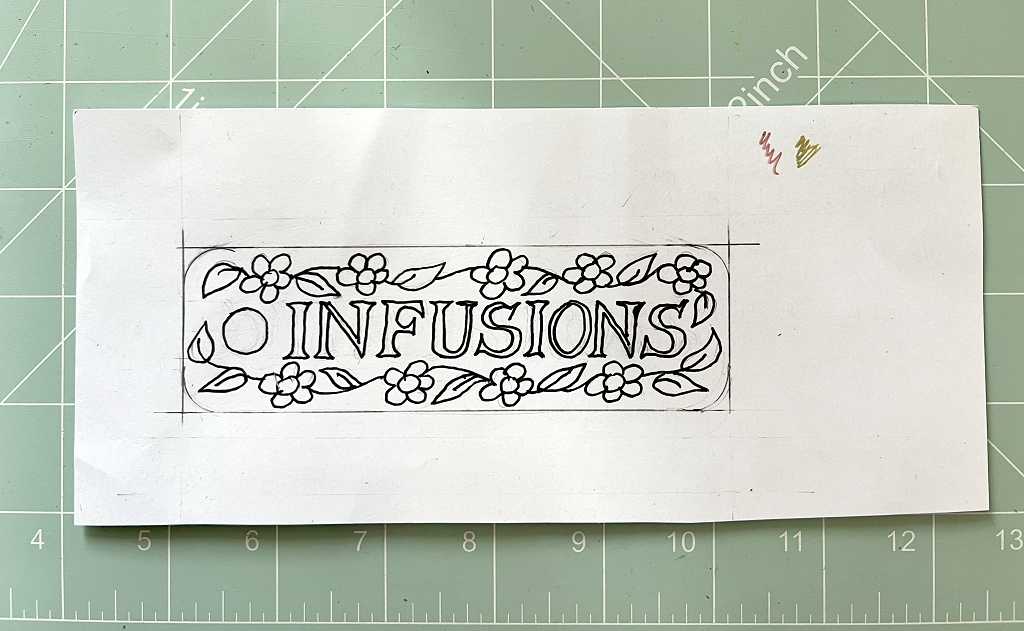
I began by making a design on a piece of scrap paper.
Using my light panel, I was able to see this through some white Shrinky Dink plastic from the sample pack. I began by painting it with a couple of layers of acrylic paint but it was pretty streaky. Then I did some online research (should have done this to start with!). They say that painting it with acrylic paint is a mistake. It doesn’t adhere well when shrunk and will end up lumpy and will probably flake off. It appears that Shrinky Dink plastic has moved on since I got that sample pack. It now comes in a variety of colours, and one side is shiny, while the other is slightly roughened. This is the side you draw and colour on. My original sample pack sheets are shiny on both sides.
I decided to buy myself a pack of multi-coloured sheets.
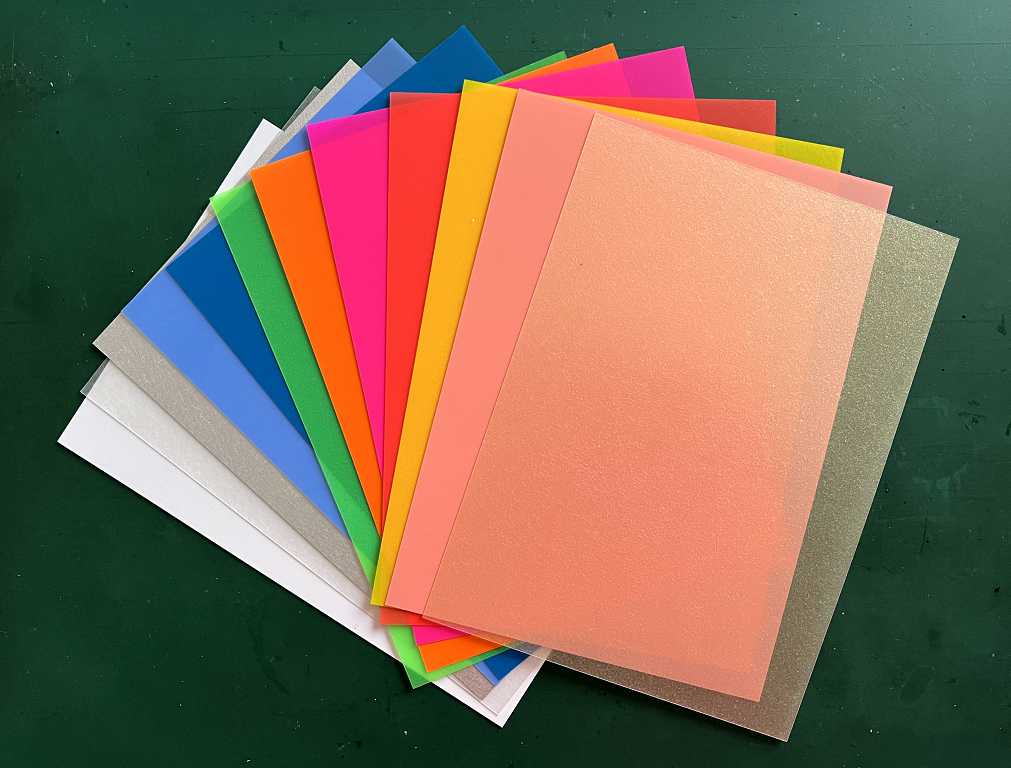
They are approximately A6 size, and one side has the roughened surface. The best product for colouring them with is apparently coloured pencil, but you can use markers too. You can also buy the sheets ready for inkjet printing, but of course laser printing is a big no-no because the heat of the laser printing process would shrink the piece! You can imagine what that might do to your printer…
I chose the top sheet in the above photo, which is a translucent iridescent cream colour, the effect I wanted for my label originally.
I shrunk my original piece that was painted with acrylic paint, and as expected, the result was horrible. Streaky, lumpy and unpleasant. Straight in the bin!
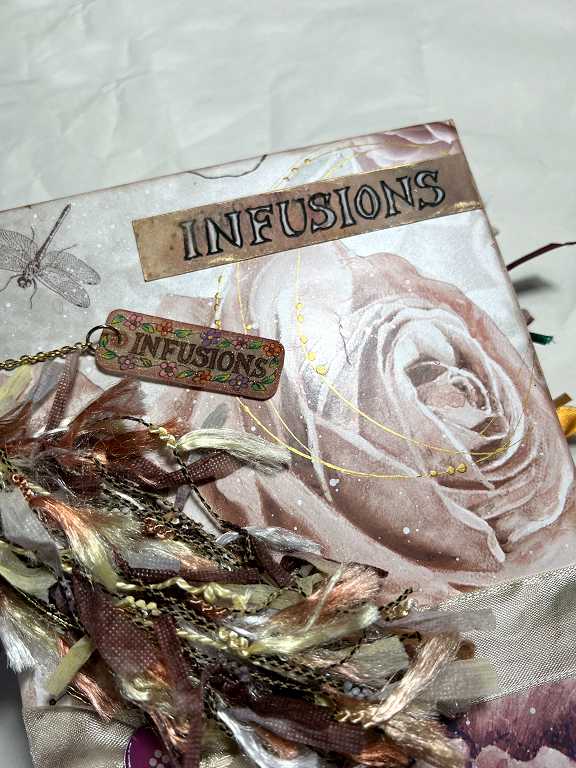
The Shrinky Dink Label
Here is the new piece of Shrinky Dink plastic with my design on it.
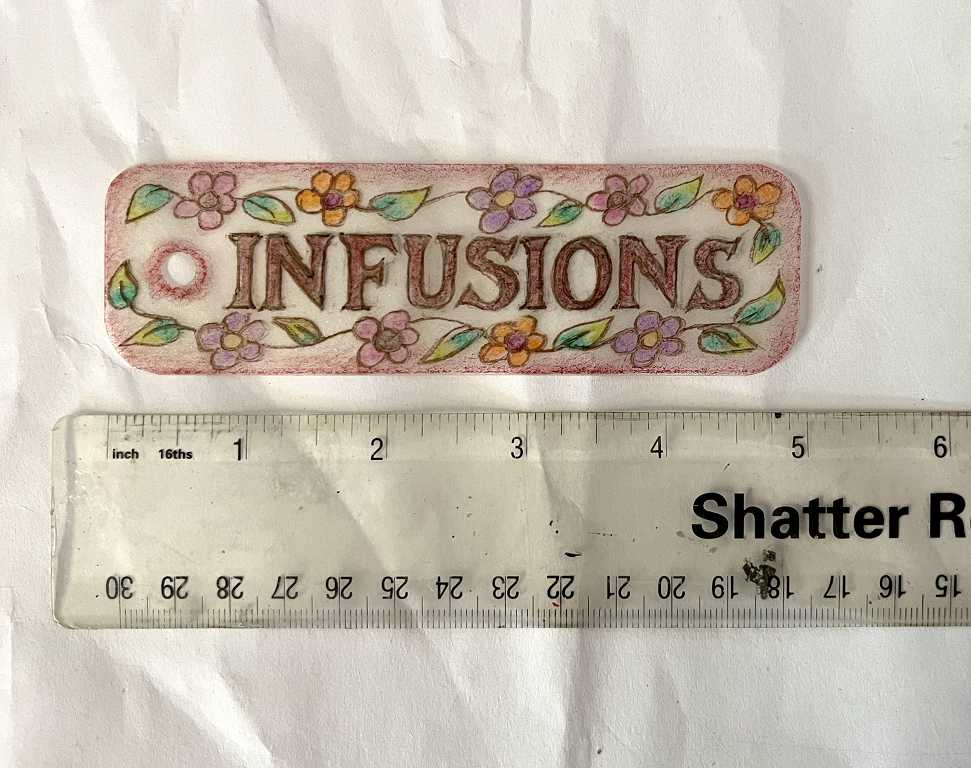
As you can see, it is 5 inches long. To colour it, I used a sepia permanent marker for the outlines, and the rest was done with coloured pencils.
Here it is after shrinking.
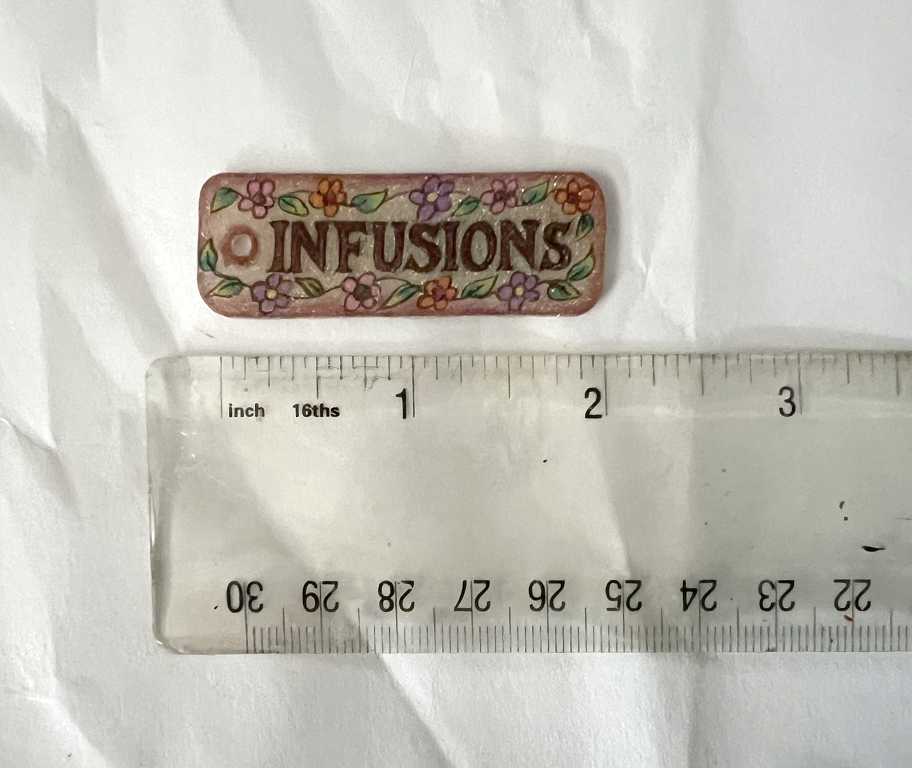
You can see it has shrunk down to 2 inches in length. There is a slight golden sparkle to it which is great for my project. The punched hole is perfect for a jump ring. It has remained translucent so on the back, the writing is backwards. Following some online instructions, when it was fully shrunk but still hot and slightly soft, I pressed an acrylic block on it to make sure it was completely flat.
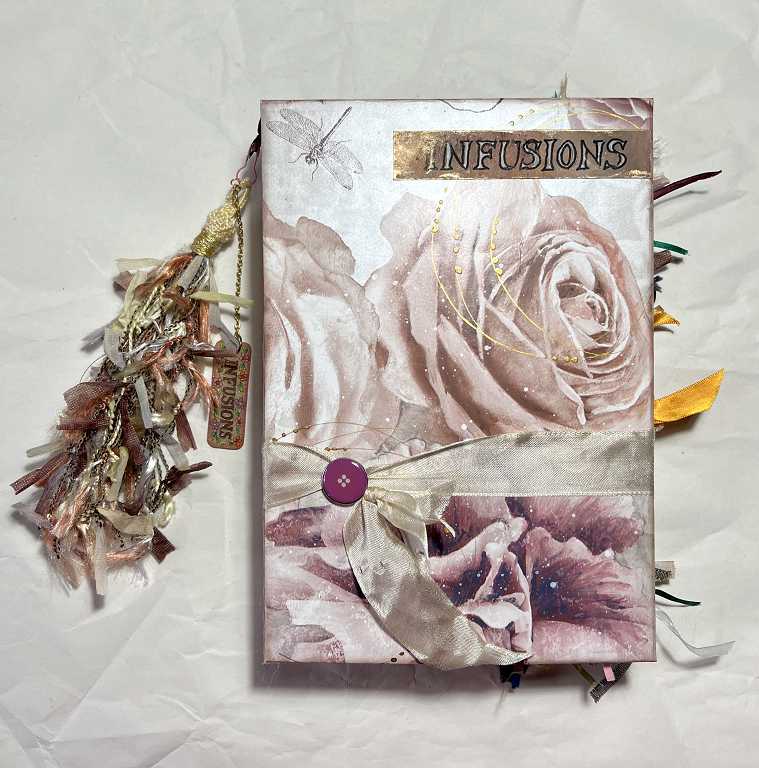
Pictures of the completed spine embellishment
I found some gold-coloured chain in my jewellery findings box, and a couple of jump rings. I cut the chain to the length I wanted and put the small jump ring on the top, to go through the pink bulb pin on the spine embellishment attachment tab, and the larger one through the Shrinky Dink label and the other end of the chain. I also put the tassel through the bulb pin and attached the whole thing to the book.

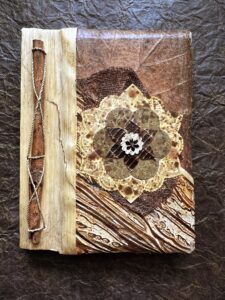
Pictures of the completed project
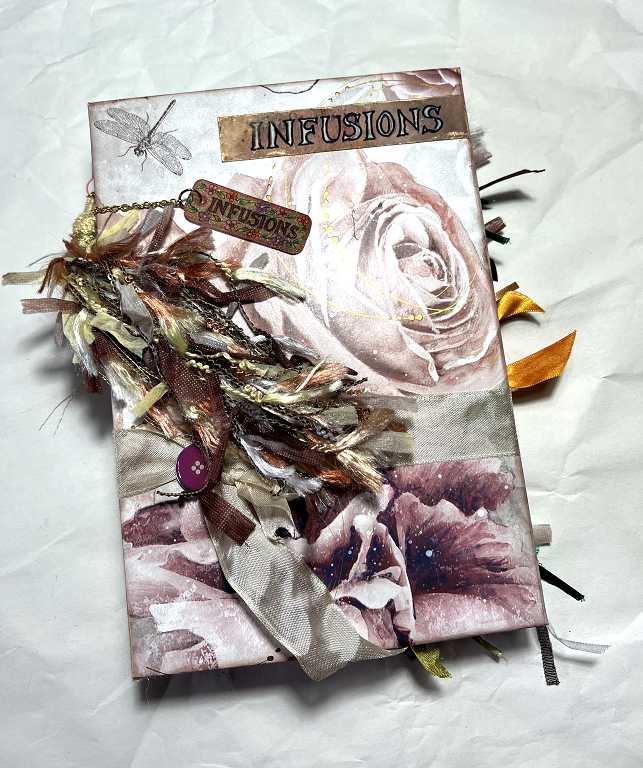
My Infusions Mini-Album – finished at last – too many years since 2017 when I started it! The cover is made from mountboard scraps covered with a wallpaper sample and layers of mesh and ink sprays on the spine. The cover is padded with a thin layer of recycled packaging foam for a luxurious feel. It is also embellished with some fine gold circles and white paint spatters.
Opening the front cover, the inner cover and contents details are revealed. I had some nice Infusions backgrounds in the box when I revived the project, enough to line the cover. The inner cover is a piece of patterned paper embellished with fine gold ink circles. The circular Infusions motifs were in the box with the rest of the project and I added some mark making and text.
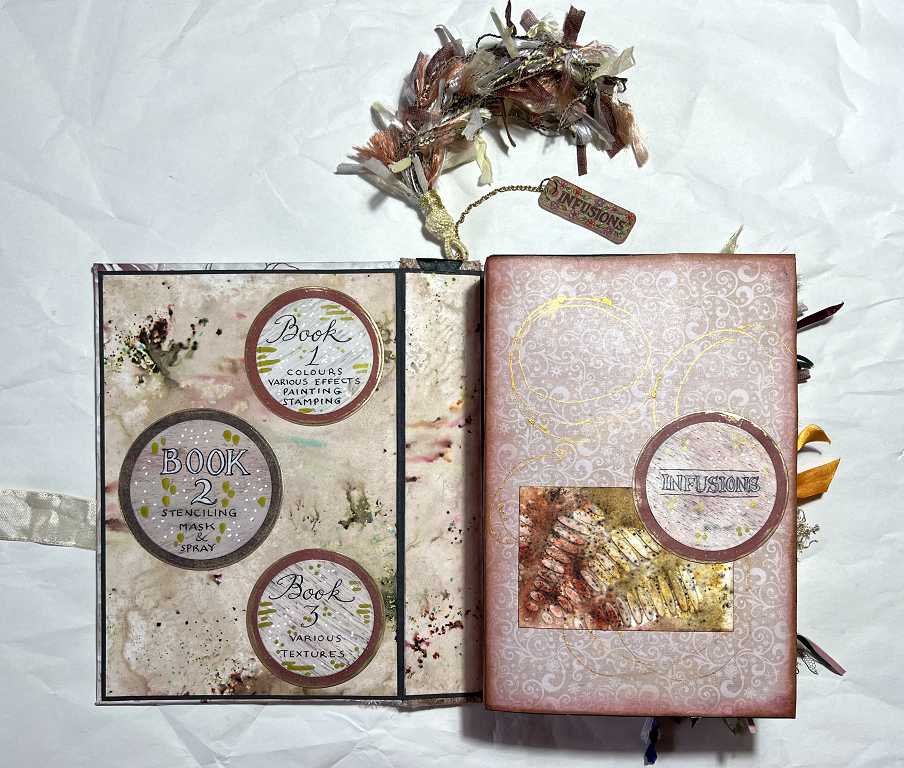
Opening the inner cover, the mini-books are revealed. Each one is made from toilet roll tubes with the pages containing embellished tags giving details of the colours of the Infusions, and the different ways of using them. More Infusions backgrounds and some small square Infusions samples from the box decorated the inner cover.
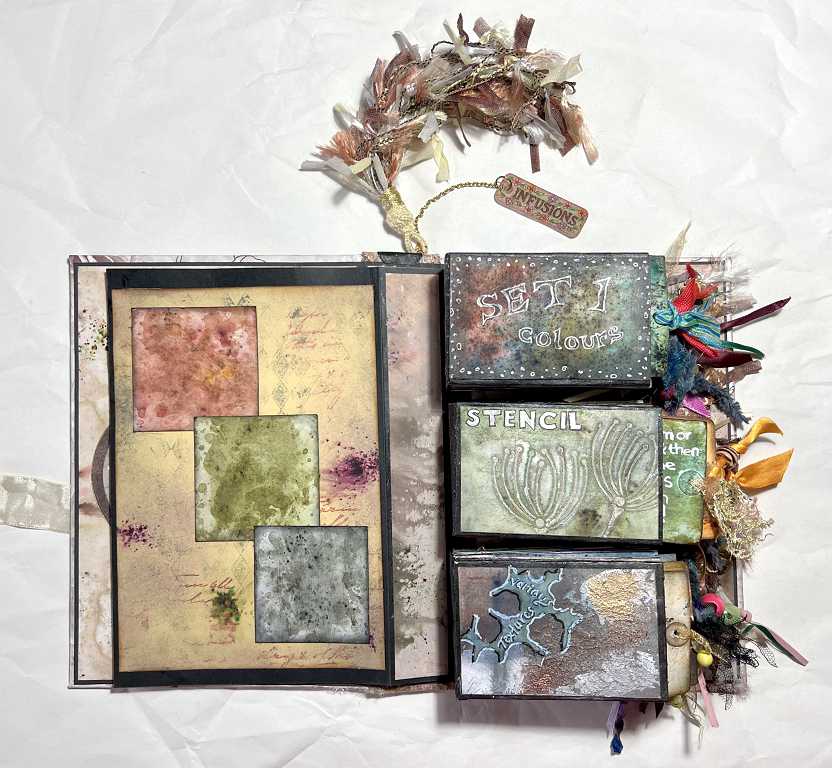
The mini-books are held in place on the back cover with a couple of magnets behind each one. They are easy to remove, to look at the contents and to pull the tags out, and they click back into place in a very satisfying way.

After many problems trying to get the attachment of the mini-books to work, I am more pleased with the result than I would have been with my original plan which didn’t work. The inner cover is now embellished with Infusions-decorated flowers with the magnets for their centres, and an additional embellishment down the right-hand side of the cover. All these are hidden when the mini-books are in place.
The cover and the spine embellishment
The back of the book.

The spine with its embellishment.
The front cover with the spine embellishment laid across it.
Detail of the titles.
A final view of the completed Infusions Mini-Album with its spine embellishment and ribbon closure.
It has been an adventure completing this project, with many pitfalls and frustrations, but a great sense of achievement now it is done! The book itself will be a useful resource to remind me of the many different interations of Infusions, those magical and versatile little powders that are a gift to the mixed media artist. It is definitely time I got them out and started using them again.