INFUSIONS MINI-ALBUM – THE THREE VOLUMES COMPLETED
All three small volumes of this album have now been completed and bound. There were a number of title pages to complete, and tags as well. I was glad I still had my printed instructions, so I was able to complete this task.
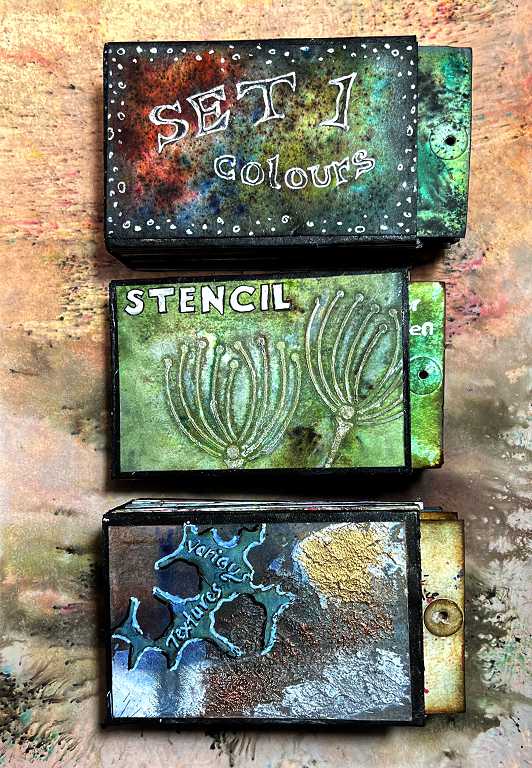
The completed volumes
Here are the small volumes, together with various background pieces, which I made back in 2017. The two large ones will be used for end-papers for the main album which will eventually contain the small volumes.
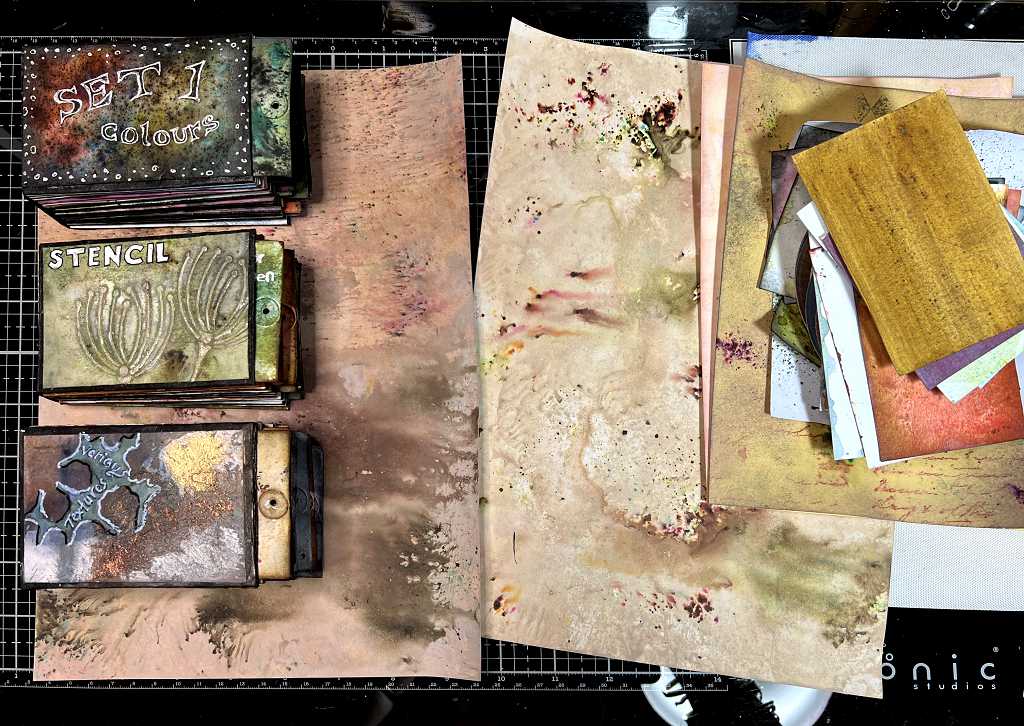
Many of the pages have tags inserted, giving details on the various techniques. These all need to have some sort of tag topper on them, to pull them out, and also to stop them getting pushed too far into the tubes and getting lost.
The colours
Volume 1 begins with samples of all the colours from both sets of Infusions. I haven’t photographed them all – when I eventually do a video flip-through, they will all be shown.
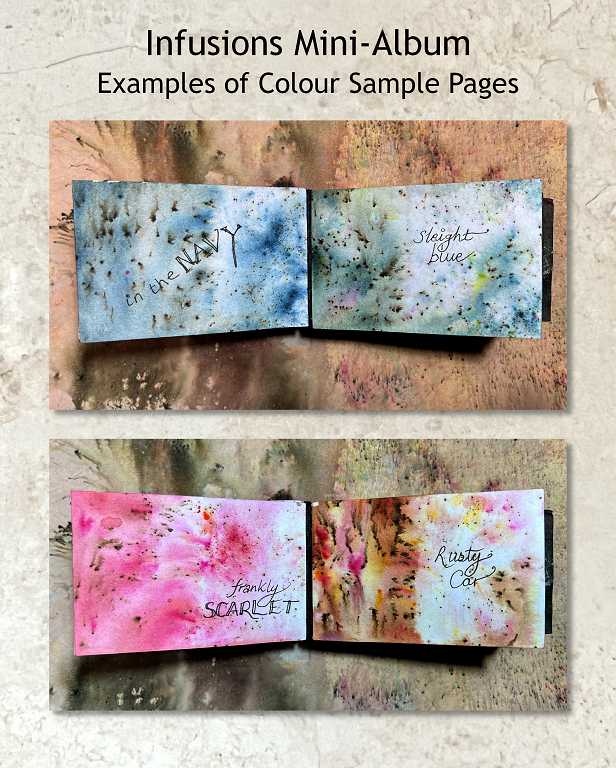
On the left-hand side of each page, the Infusions were left to dry naturally, and on the right, they were blotted off, to show the difference that you can get by treating them differently. They were all sprinkled onto dry paper and then spritzed with water.
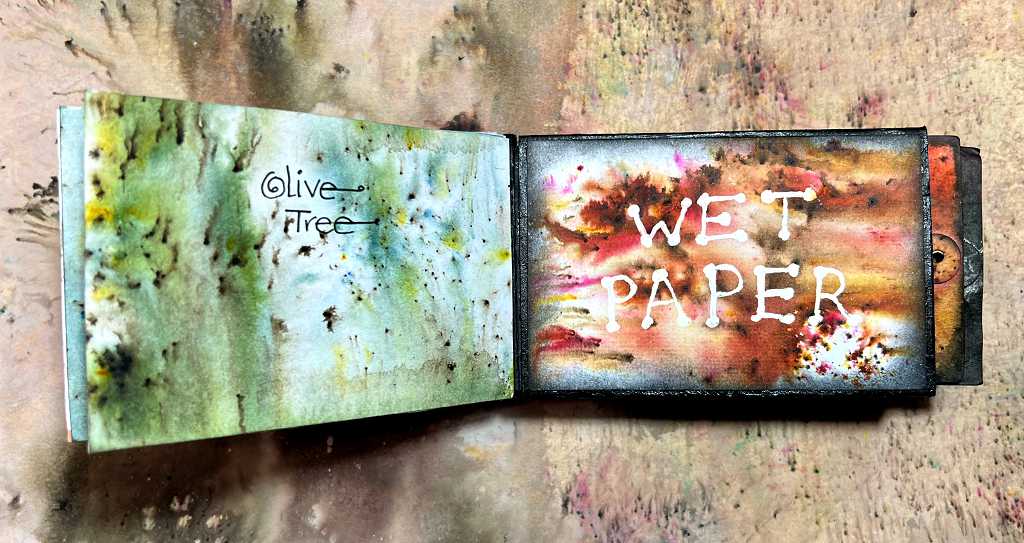
To get a different effect, you can wet the water first, and then sprinkle on the Infusions. The page on the left is the final colour sample one.
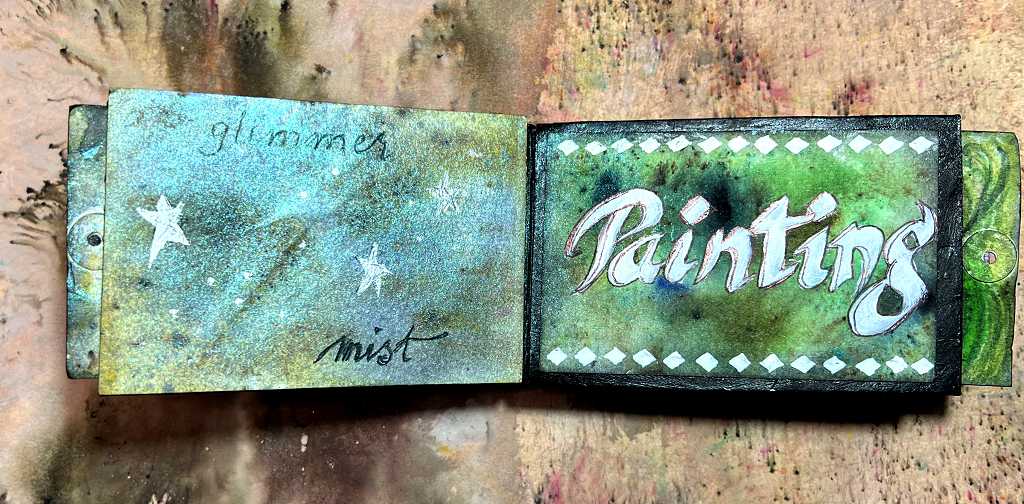
The page on the left in the next photo shows the Infusions being finished with a spritz of glimmer mist. I also added some silver stars with Perfect Pearls (mica powders that you can paint with, amongst other techniques).
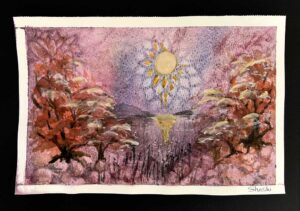
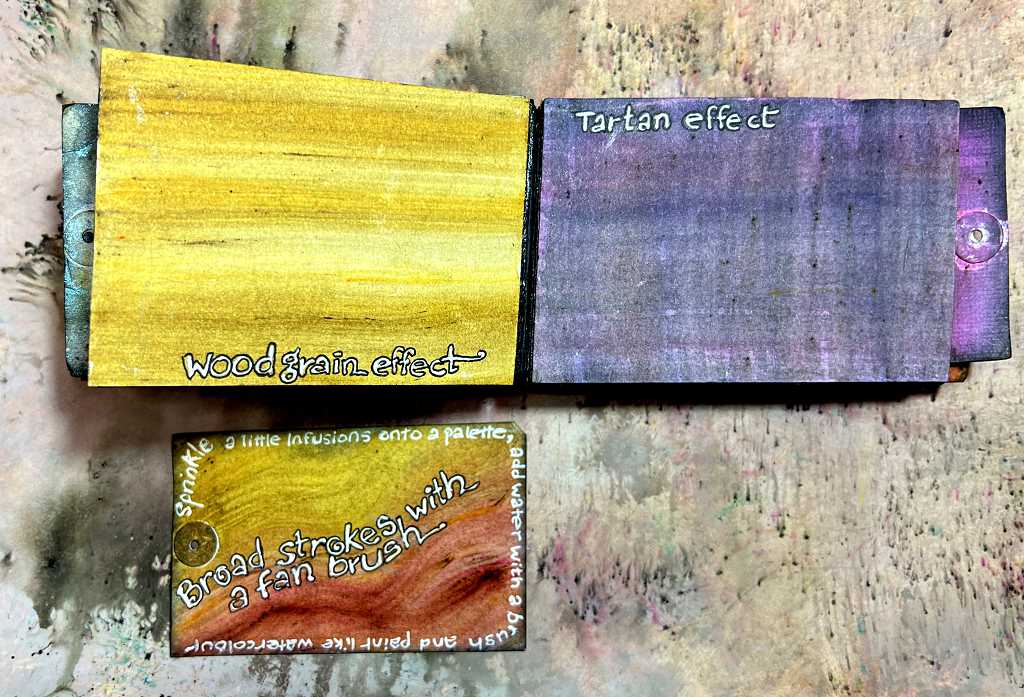
Painting
The “Painting” title page introduces various ways in which you can use Infusions to paint with.
One of my favourite ways is to mix some of the crystals with a little water, and drag it across the page with a fan brush in one direction. This gives a woodgrain effect. If you then repeat the process at right angles, you get a tartan weave effect.
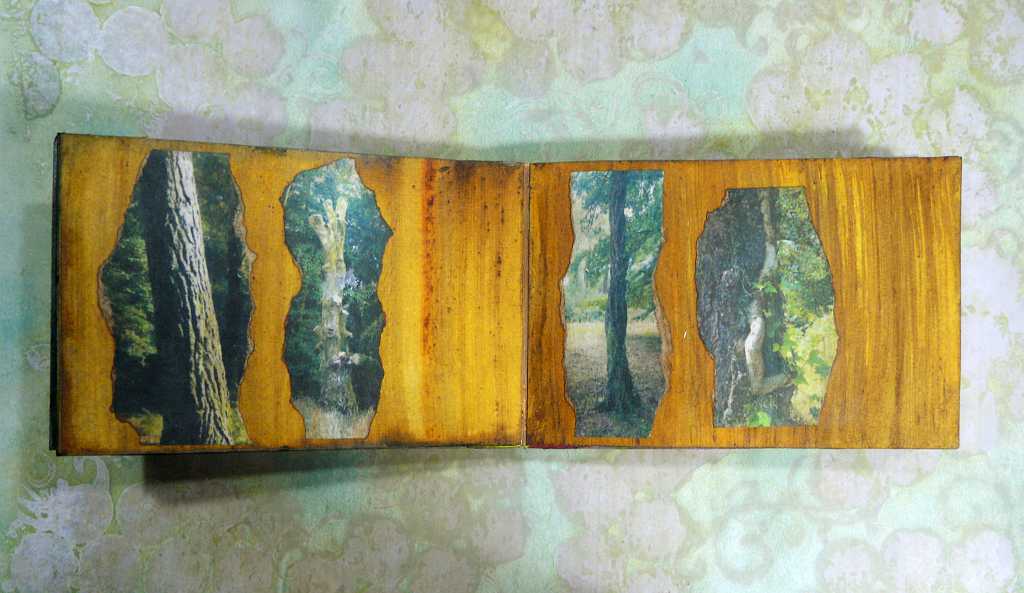
Here is an example where I used the woodgrain effect, in a mini-album I made several years ago following a visit to one of my favourite local woods.
In the next photo, the page on the left shows a stamped image coloured with Infusions painted on like watercolours. You mix some crystals with a little water as with the woodgrain effect, and paint with a fine brush.
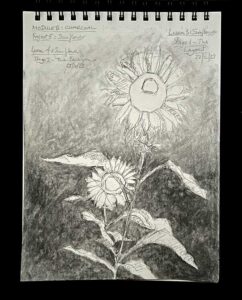
Stamping
Stamping goes very well with Infusions. The following montage gives some examples.
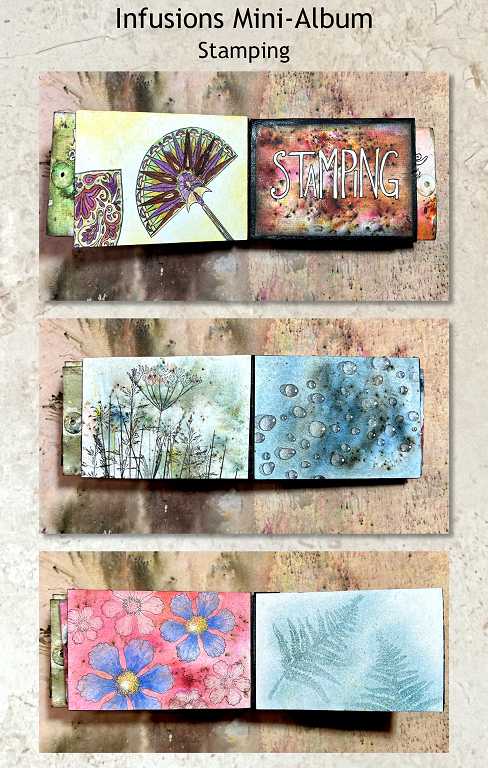
The grasses were a straightforward stamping with archival ink onto an Infusions background. I used the same technique with the water droplets stamp, but used a wet brush to lift the colour from the droplets to create more realism, and added highlights with a white marker pen. I used the same lifting technique for the pink flowers, and the watercolour painting technique for the blue flowers. For the ferms, I stamped the images using Versamark embossing ink (a clear sticky medium) onto a lightly inked background, and sprinkled on the Infusions. I tapped off the excess so that the Infusions remained only on the stamped images. I spritzed it lightly with water to activate the Infusions to produce this ethereal effect.
Stencils
Stencils work very well with Infusions, using a variety of techniques. In the photo below, I sprinkled Infusions through the leaf stencil and with the stencil still in place, spritzed it with water. I lifted the stencil carefully, and turned it over and pressed it down on the next page, to create the blot-off negative image. You can actually do this several times, and I managed to create further images this way on subsequent pages, each one less distinct than the last.

Stencilling with Polyfilla
This is a really fun technique. I have a tub of Polyfilla One-Fill – I think the US equivalent is called Joint Compound. It is a ready-mixed fine paste and it makes an excellent cheap substitute for expensive art moulding pastes.
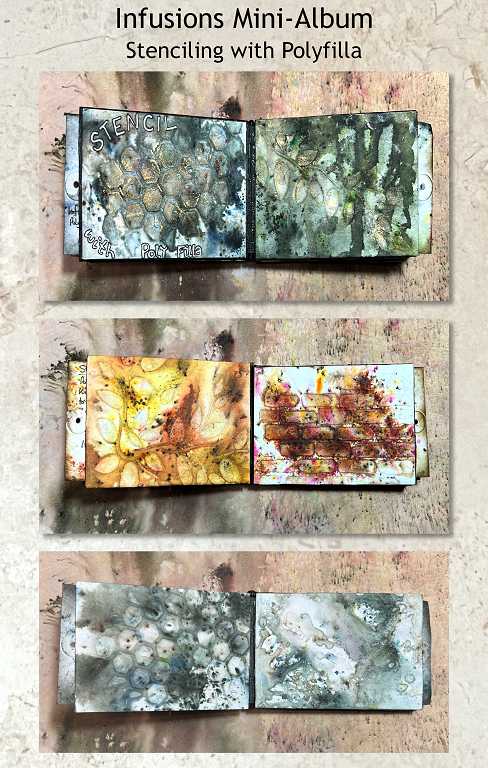
In each case, I spread the Polyfilla through the various stencils using a palette knife, and then carefully removed the stencil. I was careful to wash it immediately so that it didn’t set hard on the stencil and ruin it. While it was still wet, I sprinkled on the Infusions and spritzed them well with water, moving the piece around to encourage them to get into all the texture. I particularly like the last one, which was a Tim Holtz “spatter” stencil – it looks like a rock formation! The Polyfilla is highly textured and has a rough gritty feel to the touch. In some cases I finished it off with a touch of gilding wax.
Mask and spray
I believe I invented this technique. I have never seen anyone else do it. I used my electronic cutting machine to cut a load of flower shapes from white card, and laid them down randomly on the sheet. I then sprinkled on the Infusions and spritzed them to activate them. I lifted up the flower pieces, turned them over and laid them back down in different places, and repeated the process with the Infusions. The result is a subtle layering effect with some flower shapes being more distinct than the ones where there were already Infusions on the sheet. You also end up with a nice collection of double-sided flower pieces that can be made up into 3-D flowers by hand-embossing and layering.
In this example, I have placed a couple of flowers onto the page. The left-hand one is double-layered and the right-hand one has a sparkly orange centre (Stickles glitter glue) which doesn’t show up very well in the photo. I used the technique with leaf shapes in this case, and afterwards, added some detail with black and white pens.

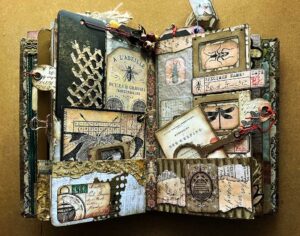
Various techniques
I made examples of various ways of using Infusions with diferent media. Top left is a thick layer of gesso into which I dragged a small glue spatula in vertical lines. The next page shows a patch of crackle paste.
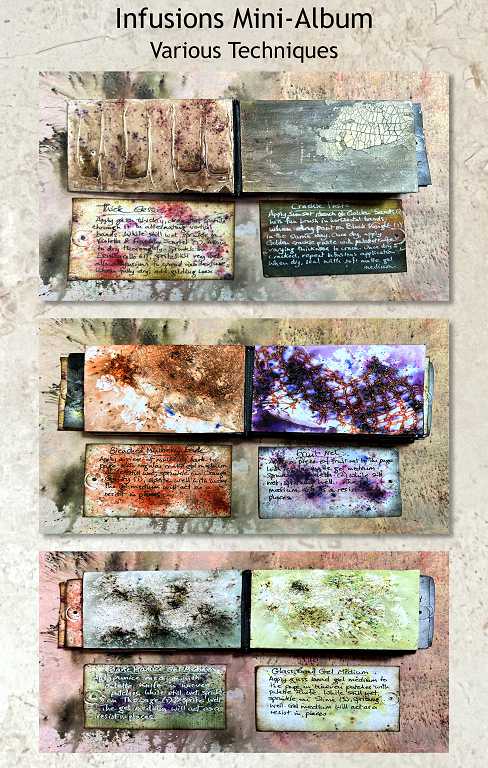
It’s a bit difficult to read the text on the tags in the photo. The middle image shows some mulberry bark glued down on the left, and a piece of orange fruit net on the right. The bottom picture shows coarse pumice gel medium (seriously gritty stuff!) on the left, and glass bead gel medium on the right. I wish the picture showed how it looks in real life because it really sparkles. In every case, once the medium was down and still wet, I sprinkled on Infusions and sprized them well with water, making sure the Infusions went into the texture. Gel media and gesso act as a resist so you get some interesting effects.
Acrylics
You can get some very interesting results combining Infusions with acrylics. I used white fluid acrylic for my examples in this mini-album. Being wet, they will activate the crystals.
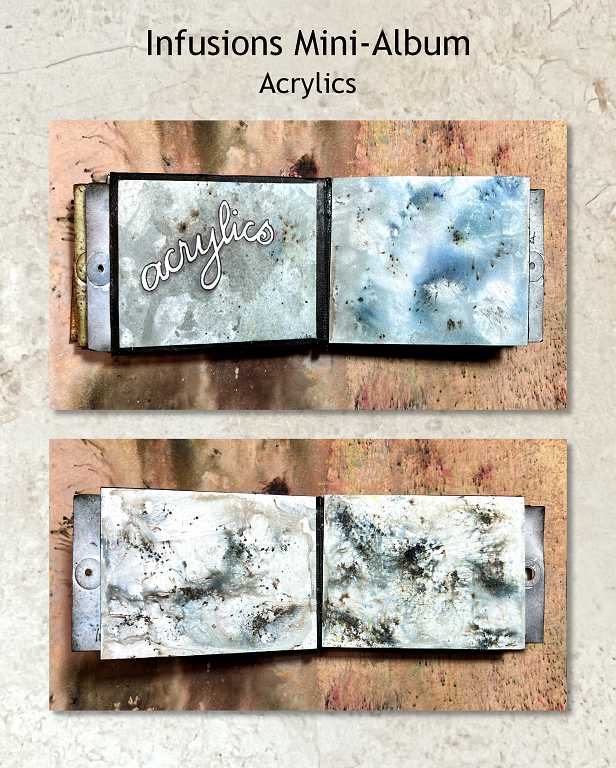
In the first example, I put some white acrylic paint onto an acrylic block and sprinkled the Infusions on top, adding a little more water to get them moving. Then a laid the paper on top of the block to transfer the acrylic. As far as I remember all this time later, this is what I did, but I may have applied the Infusions to the paper first, in the usual way, and then did the transfer. Either way would work, I think. In the second example (double page spread) I painted the acrylic paint directly onto the paper and sprinkled on the Infusions and spritzed them to activate them. It’s a very different result.
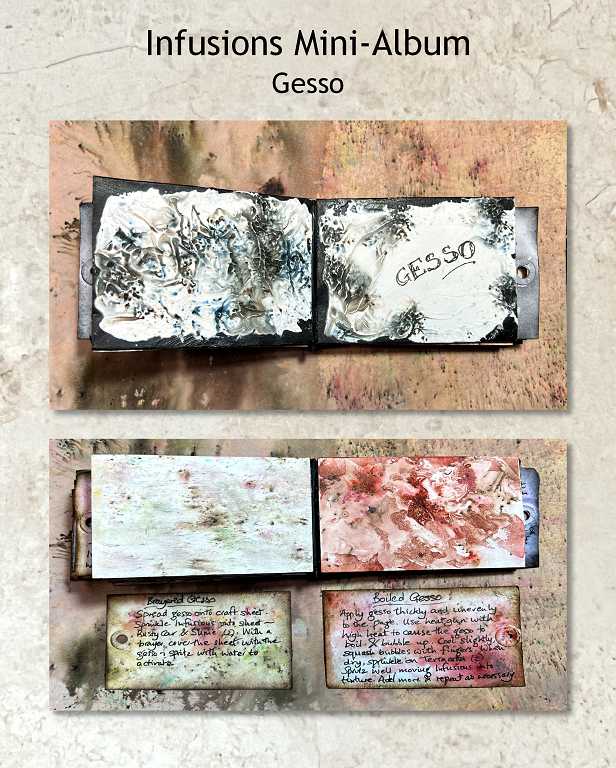 Gesso
Gesso
These samples were among the most fun, and I loved the unexpected results. For the title page spread, I just slapped on the gesso nice and thick, and added Infusions and activated them with water.
The first sample underneath was brayered on. I spread some gesso on a craft sheet and then sprinkled the Infusions onto the card in the usual way, and without activating them with water, I applied the gesso over the top with a brayer. This picked up the Infusions and mixed them into the gesso to give a fantastic subtle streaked effect.
The second sample was dramatic! I applied a thick, uneven layer of gesso onto the page and proceeded to heat it with my heat gun until it actually boiled! It bubbled up in a most satisfying way. I let it cool a bit, and while it was still wet but a skin had formed on the surface, I used my finger to flatten the bubbles, and let the whole thing dry. Then I applied the Infusions in the normal way, and spritzed them well, adding more as required, so that they flowed in and around the texture. Yummy.
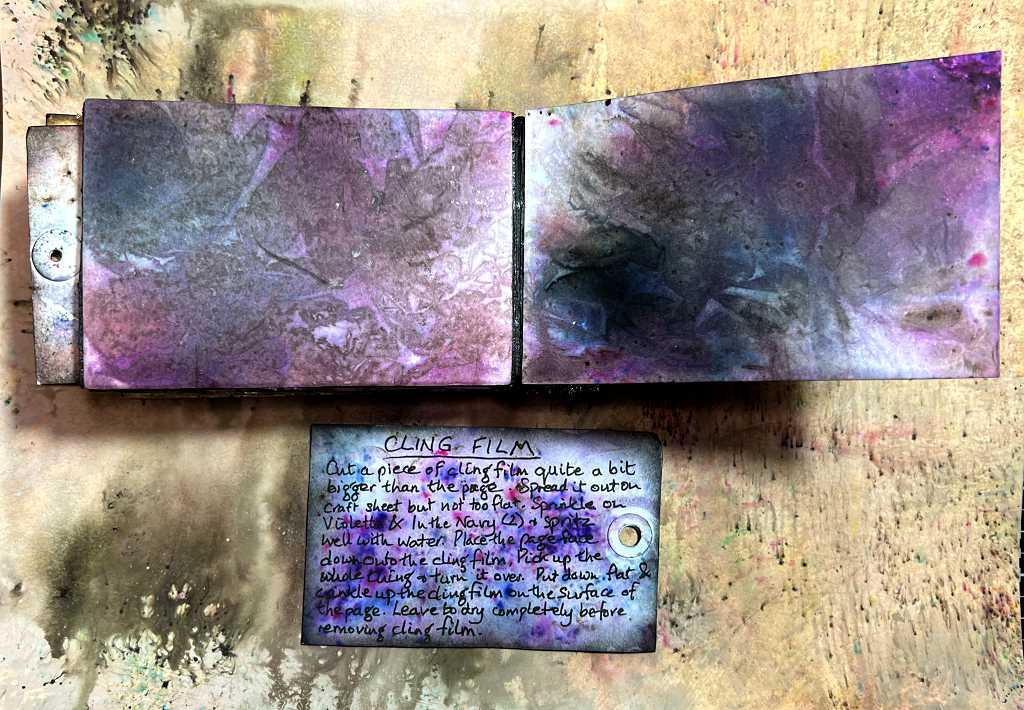
Cling film
My final sample in this entire three-volume mini-album was created with cling film. I know many people will be familiar with this technique as it is freqently used with watercolour. I cut a piece of cling film quite a bit larger than my page, and laid it down, not too smoothly, on the craft sheet. I applied Infusions and activated them, and then laid the card on top. I turned the whole thing over carefully and laid it back down flat, and scrunched up the cling film so that it covered the page to the edges, and left it to dry completely before removing the cling film to reveal the pattern it made.
In each case throughout, the details on the tags include which Infusions I used. Obviously there is endless variety to be had with different choices of colours and mixtures.
Binding
All three mini-volumes have now been bound. Following my recent hidden hinge binding, I completed the binding with small rectangles of roofing felt painted with black acrylic. A small folded tab was glued between pages 1 and 2 of each book so that it was not visible, and the rest was glued over the hinge bindings and onto the back of the book.
There will be no cover on these little books. They will be glued down onto a larger board, and there will be a single cover over the whole thing.