INFUSIONS MINI-ALBUM – PROGRESS ON SEVERAL FRONTS
I’ve had another couple of very fruitful sessions in the studio working on my Infusions Mini-Album.
Cover
Sometimes it’s hard to find patterned paper which is large enough for book covers. For most crafters, the largest size available is 12 x 12 in, which is usually too small for all but the smaller books. A very useful alternative is wallpaper. It is also free – you can go to a builders’ merchant and tear off samples from the rolls, and there’s a huge variety of different designs. I have also kept the offcuts from any decorating that’s been done at home. I have a couple of wallpaper sample books which a shop was throwing away, but the pieces in there are smaller. Another advantge of wallpaper is that it is designed to be hung with a wet wallpaper paste, so it usually stands up pretty well to wet media. Sometimes it has a glazed finish which is resistant to water which is not so helpful, but you can either sand it lightly, or paint on a ground – my favourite is Golden Satin Glazing Liquid which works pretty well for most additional media.
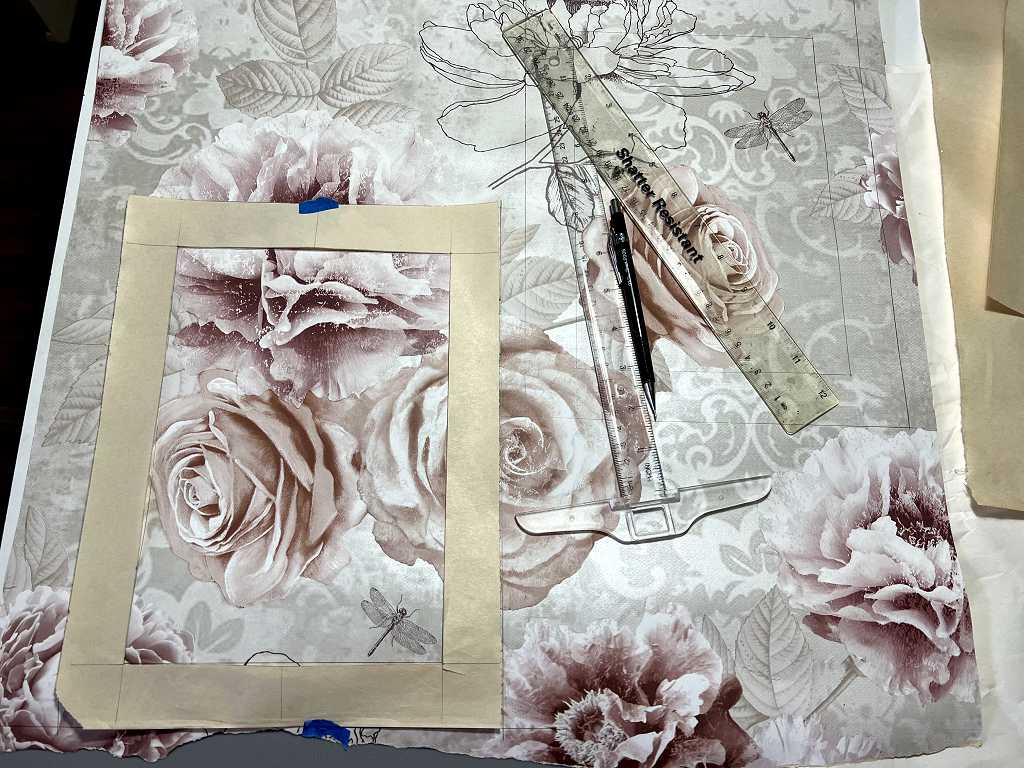
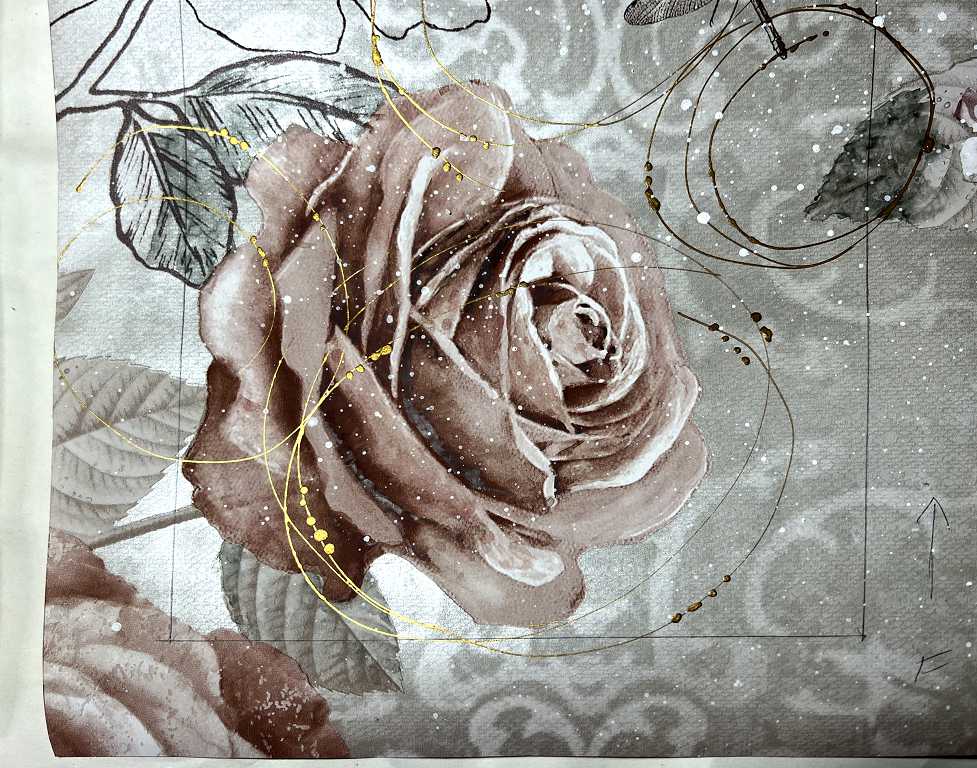
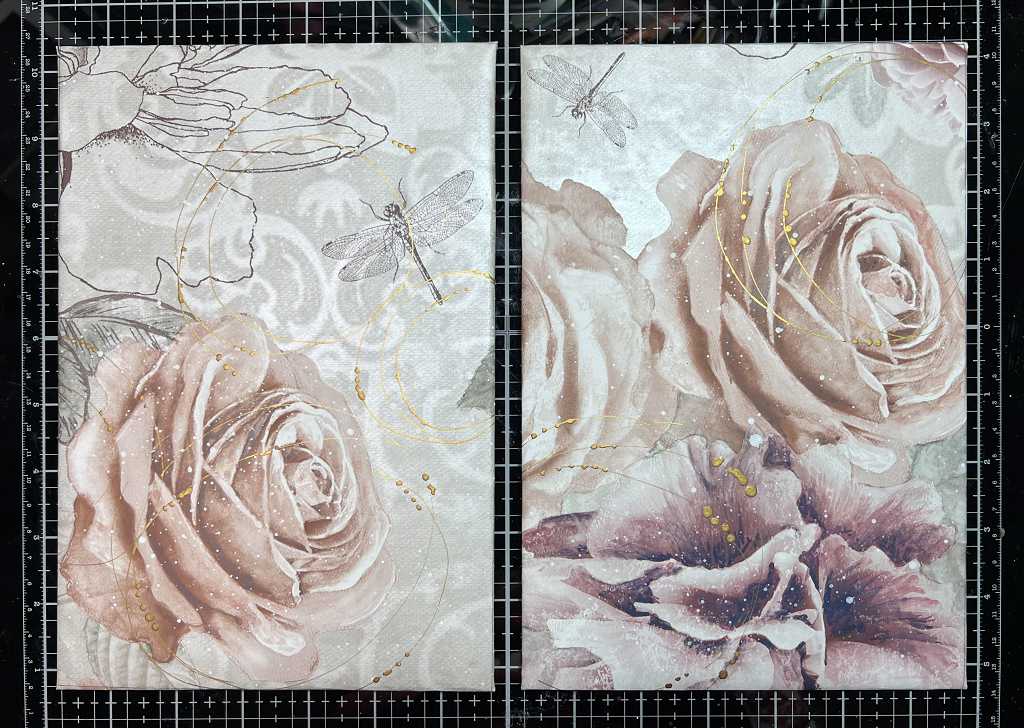
My original thought was to make my own paper cover using the Infusions, but in the end I went for the wallpaper option. There’s nothing to say that the cover has to bear any resemblance to the book contents, after all! I chose this sample piece which is predominantly dusty pink on a slightly glazed silvery background with a lovely mixed media feel to it.
The picture shows the paper viewfinder I cut, with the aperture being the exact size of the finished cover boards. I used this to move around the sample until I found a selection I liked. Then I taped it down and drew the inner rectangle with pencil and ruler to show where to place the cover boards, and used the outer edge of the viewfinder to cut the pieces out, so that there was sufficient overlap to go around to the backs of the boards.
Embellishing the pieces
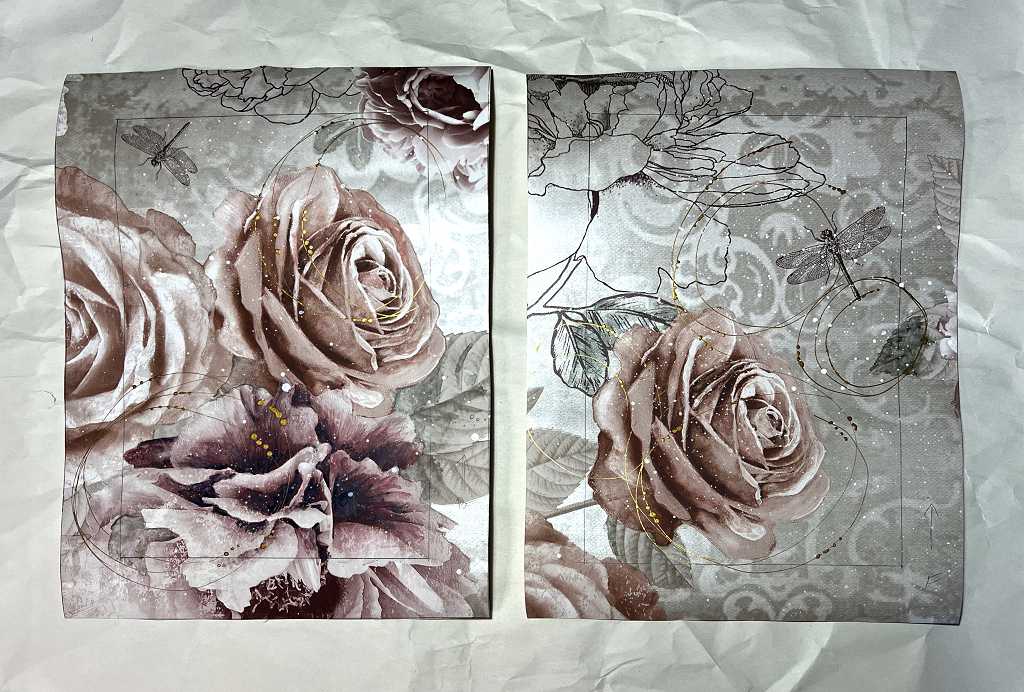
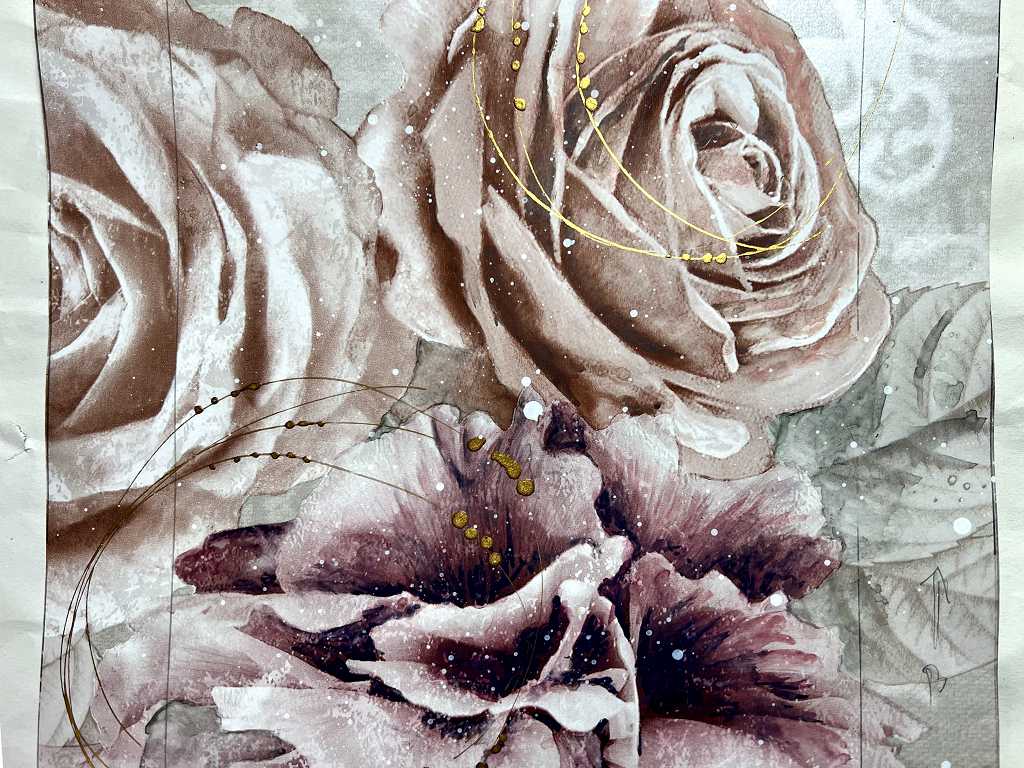
You can see the inner line marking the extent of the cover boards. My original plan was to add some more colour using the Infusions, but the finish looked messy on my trial sample, so I opted for the Kuretake Gansai Tambi watercolours instead. This was the first time I used them since organising them into their tins, and I was very pleased with how well this system worked.
I intensified the colour on the predominant flowers, and also added a little green colour to some of the leaves. When this was dry, I added some swirls with Seth Apter gold iZink in a fineliner bottle with the very fine tip, and finally some white spattering with Dr. Ph. Martin’s Bleed Proof White, diluted to a fluid consistency.
Constructing the cover
I cut two pieces of mountboard to the correct size, and some thin packaging foam to produce a slightly spongey feel to the finished cover.
I glued the foam onto the boards with Fabritac adhesive and trimmed the foam to the edges of the card. Before doing this, I sanded the corners of the mountboard to remove the sharp corners but not sufficiently to make them noticeably rounded.
I lined up the pencil rectangles on the paper pieces with the boards and glued them down, turning the excess wallpaper to the back of the boards, mitred the corners and glued everything down.
The spine
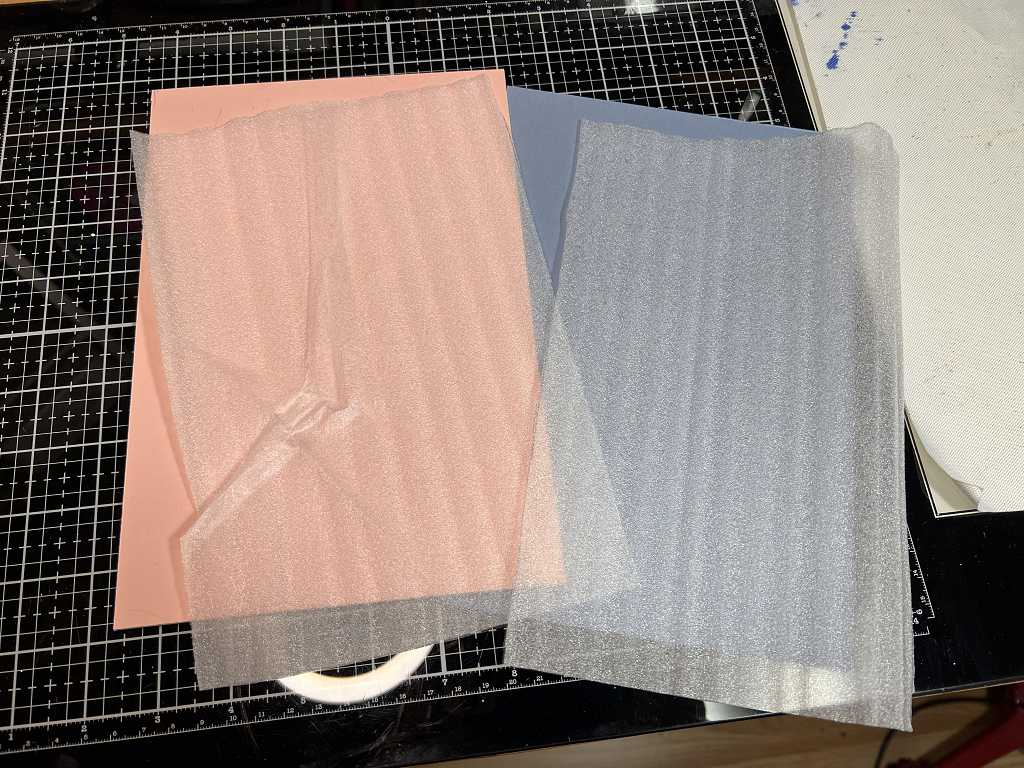
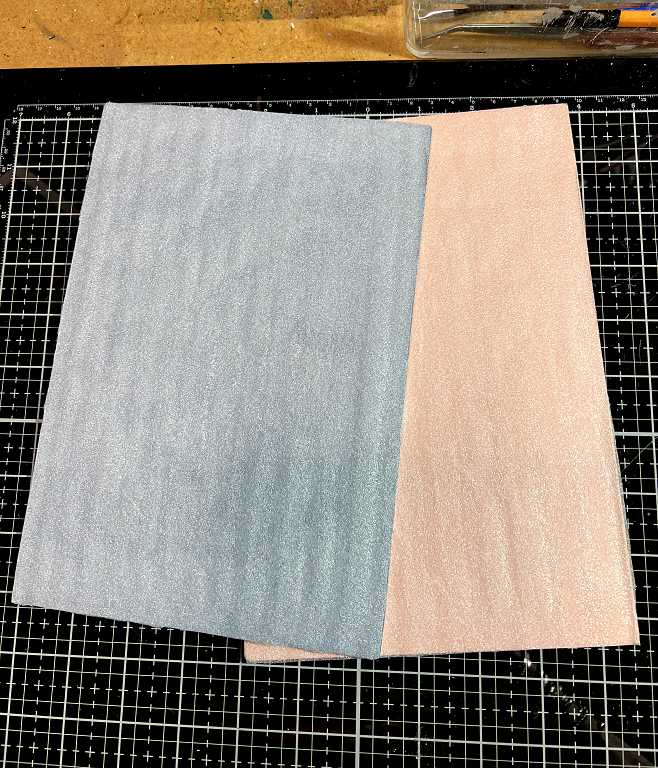
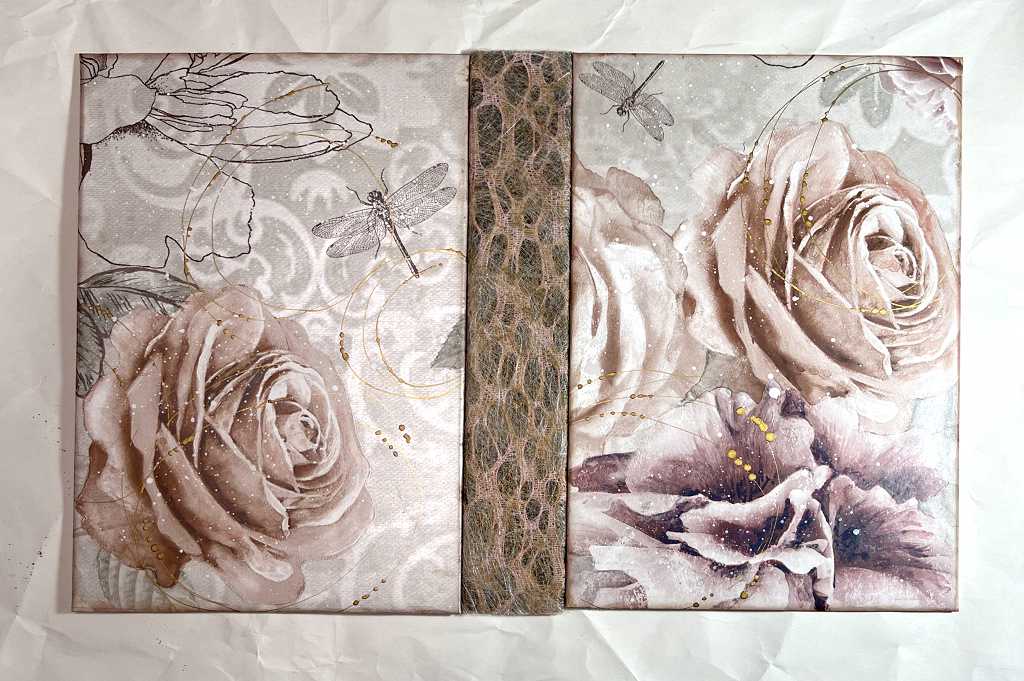
I cut a narrow rectangle of mountboard and covered it entirely with black paper. I had already decided I wanted to overlay this with some of the plastic-like mesh stuff that I’ve got in my stash, but when I put it next to the wallpaper, the pink was much too bright and not the right dusty pink.

I cut a piece to overlay the spine, and a piece of the fine white gossamer stuff that I believe florists use. I sprayed it with brown Distress Spray Stain and some Seth Apter gold iZink until I felt the pink was sufficiently toned down and matching the covers. I laid it over the pink mesh, and glued it in place around the back with Fabritac adhesive. A definite improvement.
Cover construction
My plan was to cover the whole of the inside with a single sheet of paper to hold everything together, but this did not work because on the outside, the spine and boards tended to pull apart, however tightly I butted them against each other. Also, the black paper would not be strong enough to act as a hinge. I thought of using black card but again, I only had 12 x 12 in, and it was also going to add unacceptable thickness. I had some larger black paper sheets which I opted to use.
I then had to think of a way to stabilise the spine-to-cover boards junction. In the end I cut another piece of the gossamer paper and glued this in place over the first piece, but rather than wrapping it around the spine piece, I used this to attach to the cover boards either side of the spine, but on the inside. This is rather difficult to describe, so here’s a cross-section diagram which I hope will help.
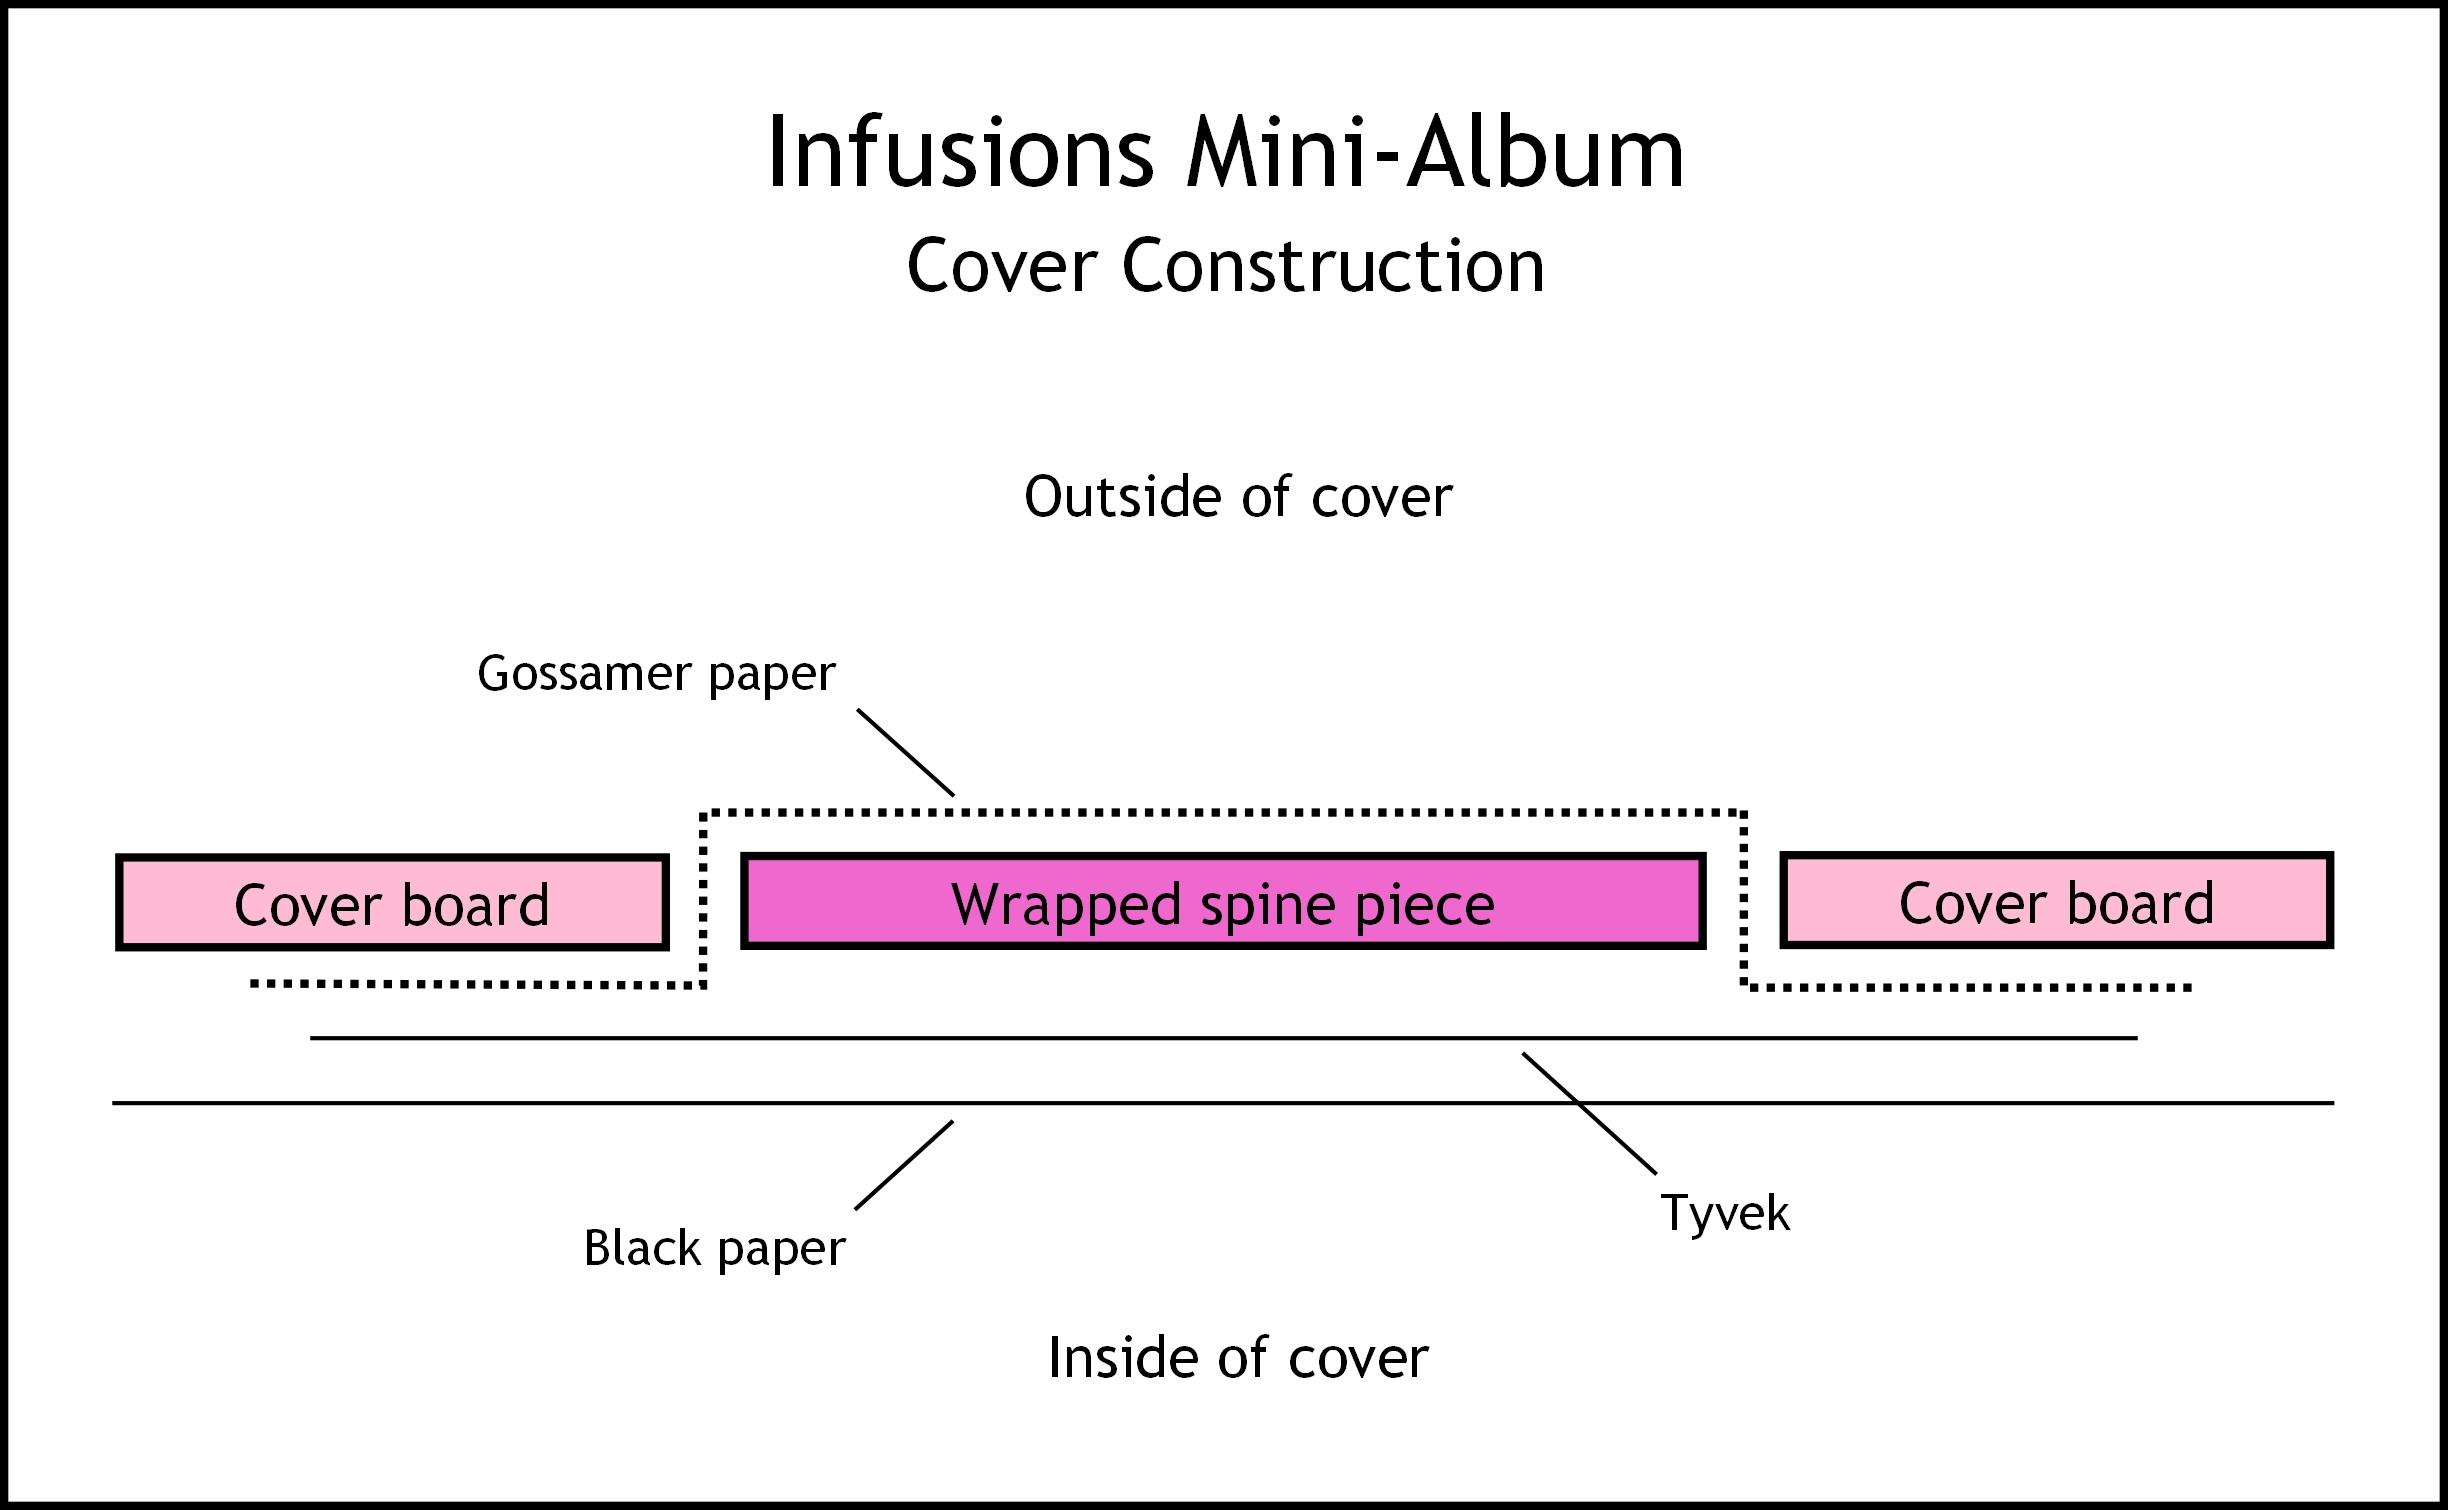
This extra layer of gossamer paper also helped to make the colour scheme of the spine a little more subdued, which was a bonus.
I pulled the gossamer paper as tight as I could, with the cover boards and spine touching one another, and held it in place until the glue set. Again I used Fabritac adhesive which is a good strong glue. This method of constructing the cover seemed to work very well. I sandwiched a piece of Tyvek between the gossamer paper and the black paper to strengthen the cover hinges, and the black paper covered everything on the inside of the cover. I ran my fingers gently along the hinge lines to encourage the paper to fold cleanly, and the construction of the cover was complete.
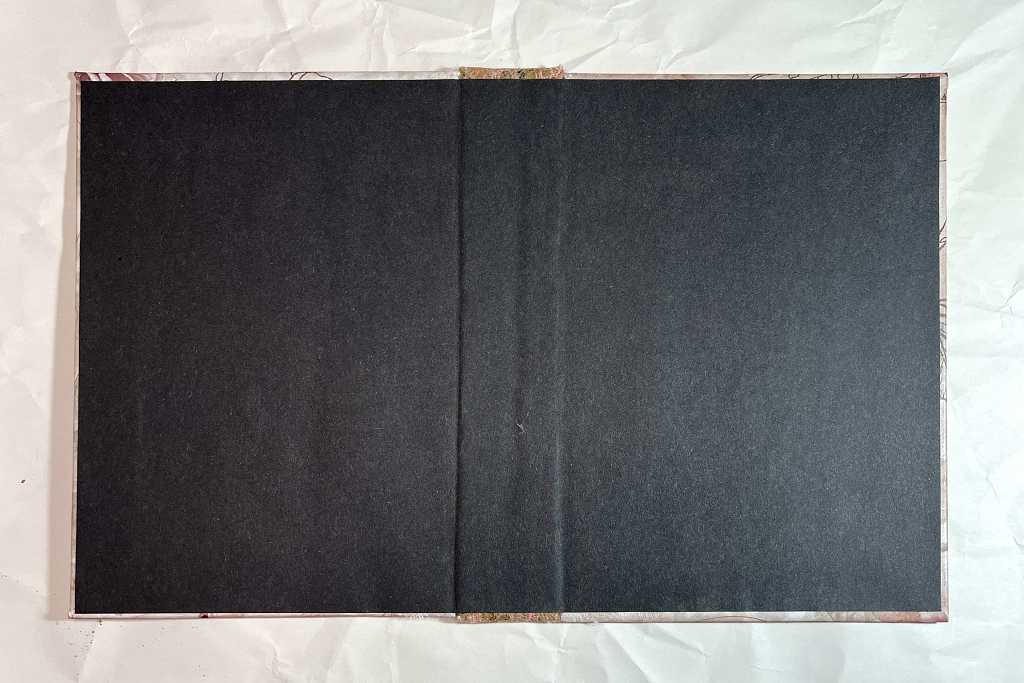
I left the whole thing under a pile of heavy books overnight and it came out fine.
Book closure
I found two pieces of ribbon in my stash and tied them together with a knot. I didn’t have a long enough piece to do this all in one, unfortunately. I pierced a hole in the front cover and inserted a large brad through one end of the ribbon and then through the cover, and taped the tines on the back with masking tape. This will be hidden once the end papers are glued in place. The ribbon will be wrapped around the entire book and held in place by wrapping it around the brad, keeping the book closed.
I need to make a small tab with an eyelet to attach to the top of the spine, from which to hang a spine embellishment. I intend to include a card label in this, with the title of the book.
Tag embellishments
Also in this studio session, I began work on the tag embellishments. These are not merely decorative, but prevent the tags from being pushed into the tubes and getting lost inside.
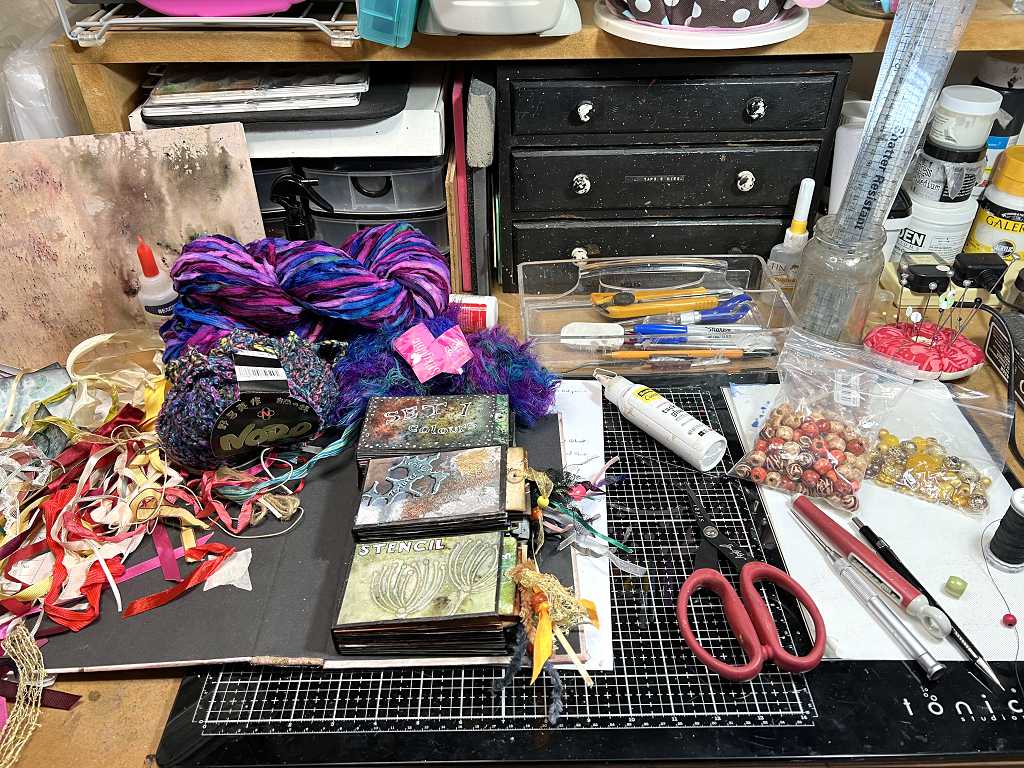
As you can see, I have had great fun rummaging through my stash of ribbons, trims and beads in order to make these decorative elements. I have tried to co-ordinate the colours as far as possible with their respective tags. You can also see the cross of masking tape on the inside of the front cover, covering up the tines of the closure brad.
Final cover construction work
How the cover will work with the album volumes
The small albums will be arranged vertically, and glued to the back cover. When the book is opened, the cover will lie completely flat, and the small albums will be able to be opened easily.
The small albums are different thicknesses. I flattened some more toilet paper tubes in my flower press, and the next day, I painted all the edges with black acrylic paint. These will be stacked and glued together and glued underneath the two thinner albums, to bring their top surfaces up to be level with the thickest book. This is not an entirely necessary step but it will improve the appearance, and also make the front cover of the book lie flat on top of the albums without distortion.
There will be more detailed pictures of everything in the final post(s) on this subject.