ORIENTAL STYLE ALBUM PART 4
Please see part 1 for details of the cover and part 2 and part 3 for the pages of the book up until now.
This post completes the flip-through of this interactive album. I hope you have been enjoying it so far.
Page 13 – Puzzle page
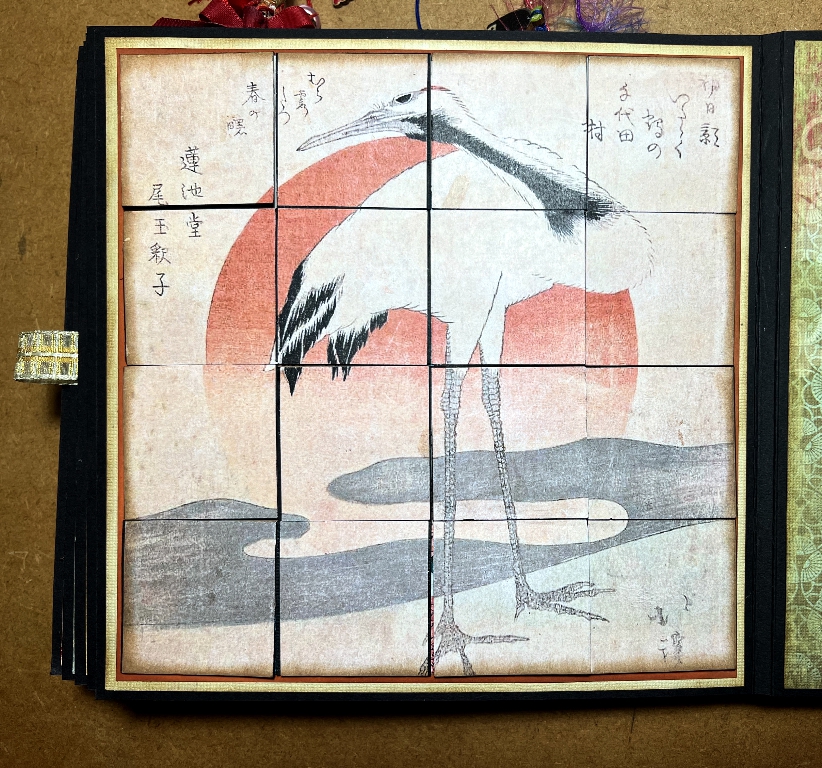
This is a fun interactive page. The top layer is a large image of an Oriental crane (a favourite subject in Oriental art) which I cut into sixteen square tiles. These tiles are mounted and hinged onto a second full image underneath, and can be opened individually. Each one is kept closed with a small magnet.
In order to make the mechanism work, and to conceal the hinges of the tiles, the lower image had to be cut into strips.
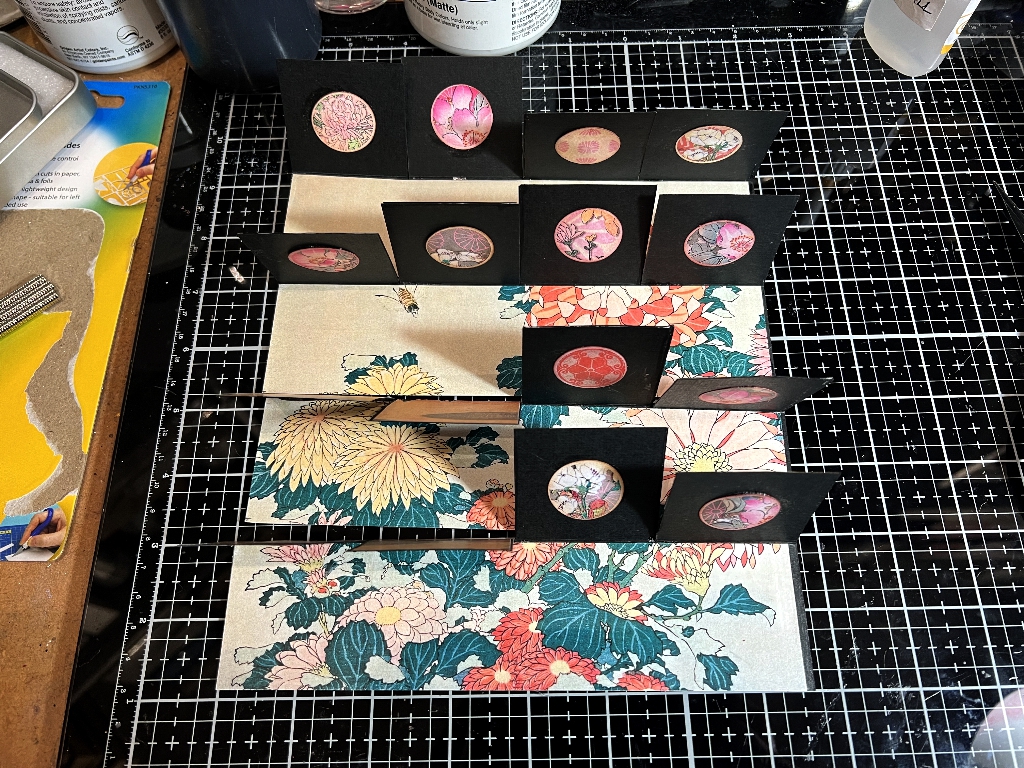
Here you can see how the hinges are folded underneath the top edge of each strip. Each tile is backed with black card and has a small circular image glued onto it. The magnets are concealed between the layers of card in each case, and between the lower image strips and the base layer underneath.
Here is the puzzle page with a few of the tiles opened.
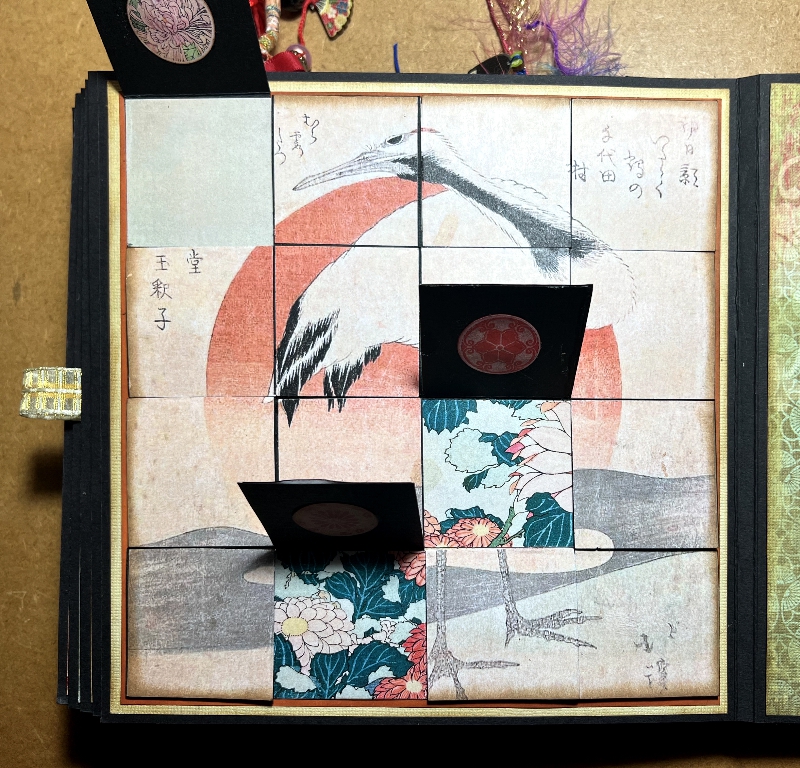
It’s actually quite hard to have all the tiles opened at once, which makes the lower image all the more mysterious! It is a fairly overall kind of design so you aren’t missing much by not seeing it all at once. However, to show it in its full glory, I managed to keep all the tiles open for the following picture.
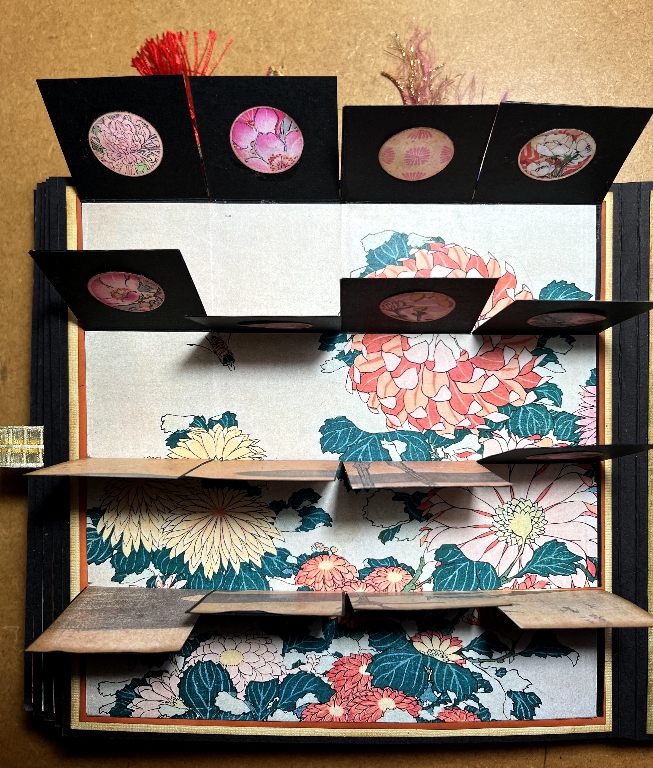
Page 13 and 14 spread
As previously, the opposite page to the interactive one is relatively simple, with no mechanisms to operate.
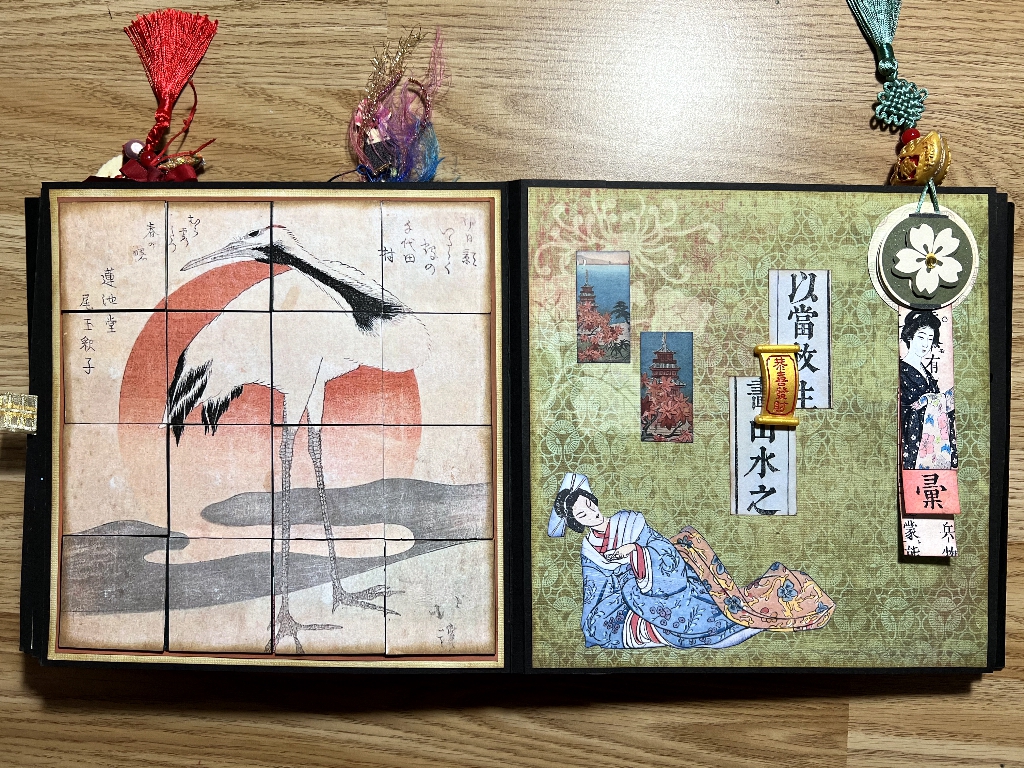
In this case I have simply collaged various elements onto the background paper, choosing here and there small elements of the salmon colour featured in the puzzle page to tie the two pages together. There is a 3-D floral embellishment attaching a little waterfall of three narrow tags at the top right, which has a dangle projecting above the top edge of the book. This consists of two 3-D plastic Chinese charms glued back to back, sandwiching a Chinese tassel. A further 3-D plastic charm adorns the page. I had to buy rather a large pack of these in order to use just a couple, and I don’t think I shall ever find a further use for them as they are really too thick to be much use, so they have gone into my charity shop box for now.
Page 15 – Flip Flap
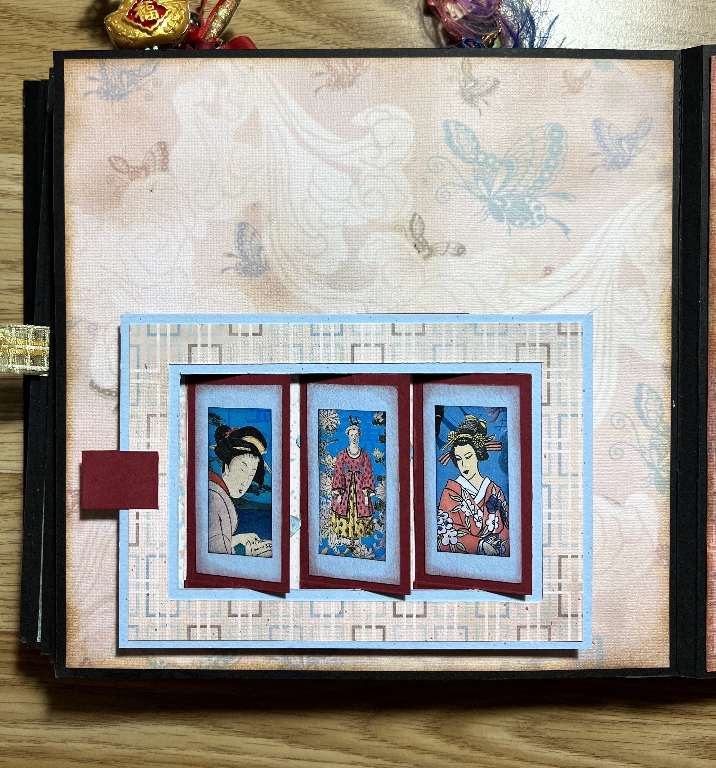
Another really beautiful paper forms the background of this page. The interactive element is at the bottom and has one of the papers from the collection matted and layered over pale blue cardstock from my stash, forming the frame, which also features around each of the small rectangular images on the flaps.
To work the mechanism, you pull the red tab on the left outwards. This causes the flaps to hinge upwards, revealing a second image underneath. When they are in the vertical position, the whole background image is revealed.
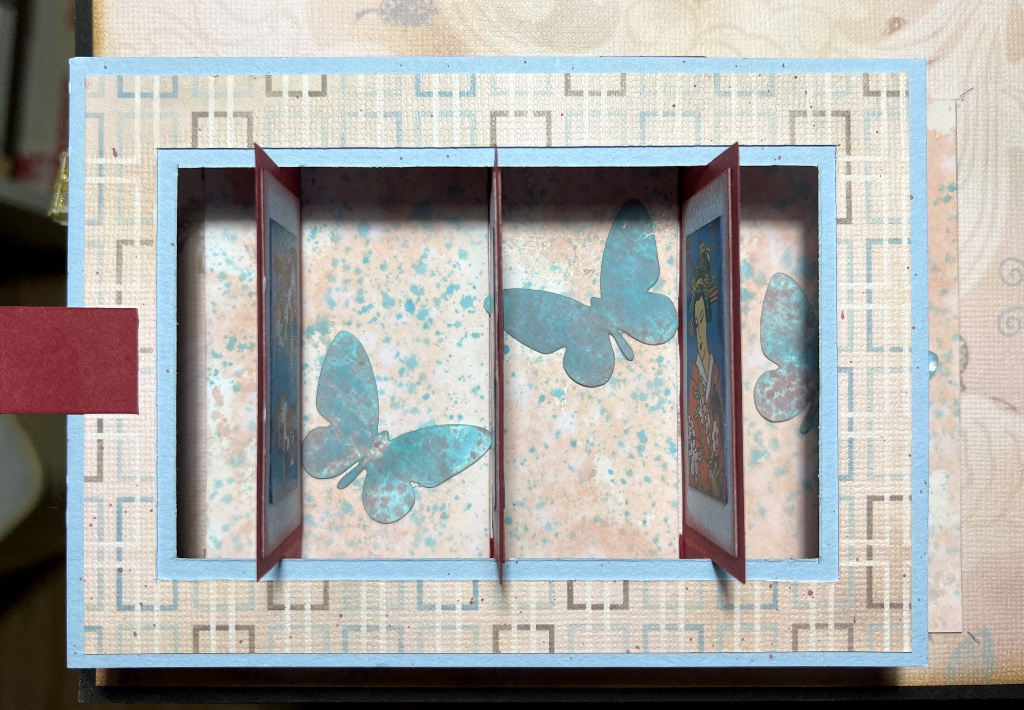
As you pull the tab further, the flaps hinge right over, revealing the small images attached to the backs of them, and once more concealing the background image. In either position, the flaps lie flush with the background.
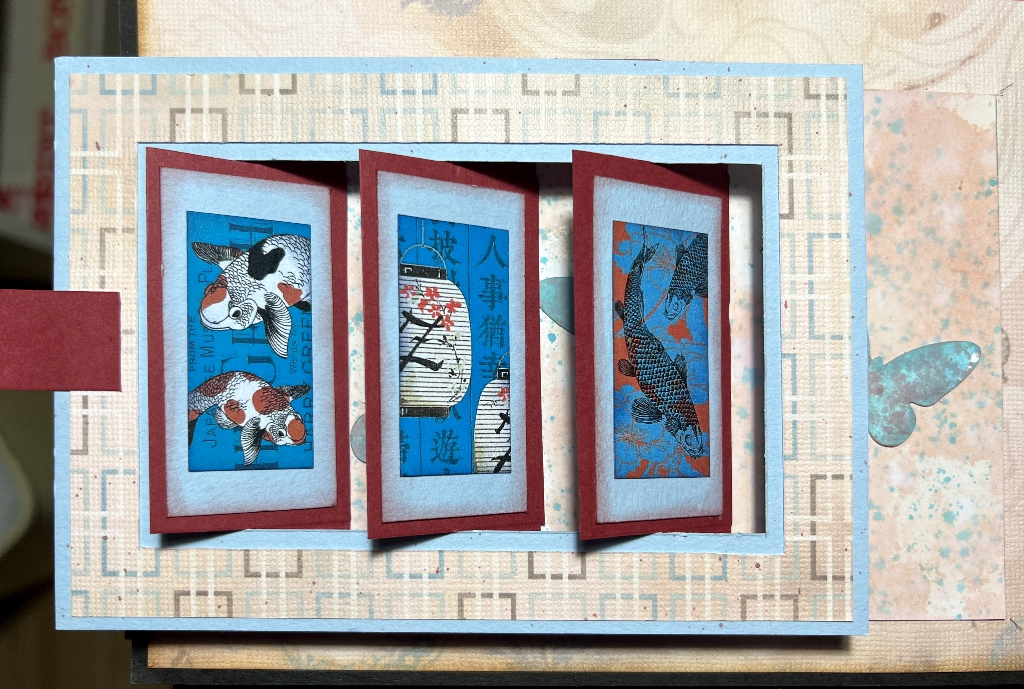
As with all these elements, to see it in real life or on video is far more satisfying than a series of photos. This is another one which is great fun to operate.
Page 15 and 16 spread
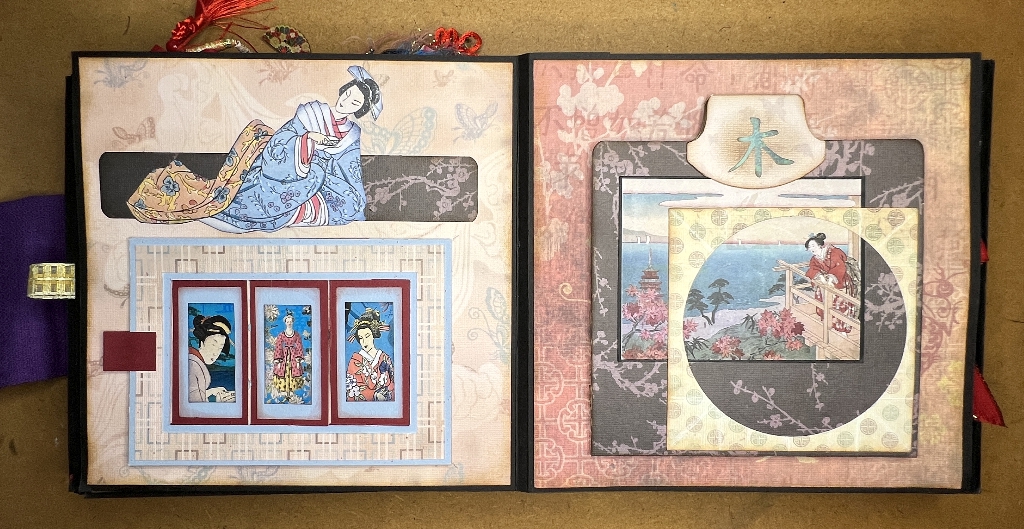
Again I have attempted to co-ordinate the colour scheme of the two facing pages. Since taking the original photo of the flip flap page, I have added another Japanese lady to the top of the page which makes the spread more balanced. You can see that I have chosen the same paper for the strip she is lying on, as that of the background of the interactive element on the following page.
Page 16 – Slider
Apart from the obi to close the cover, this is the final piece I needed to work on in order to complete the entire project. This slider mechanism was demonstrated by Sara-Lee Armstrong in one of her YouTube videos which I saw only a week or so ago, and I knew this was exactly what I needed to complete my book. It is a fun interactive element with hidden secrets!
The square frame with the circular aperture was an afterthought but I think it frames the Japanese lady on the balcony really well, without interrupting the rest of the scene, tying it in nicely with the darker overall background, and also creating balance with the lighter colouring of the previous page. It was the waste part from when I cut out the frame for one of the inside circles in the Turkish map fold element on page 10 (see part 3).
In the previous photo, it looks like merely a collaged layered element on the page, although the tab at the top is a bit of a giveaway that it might operate something.
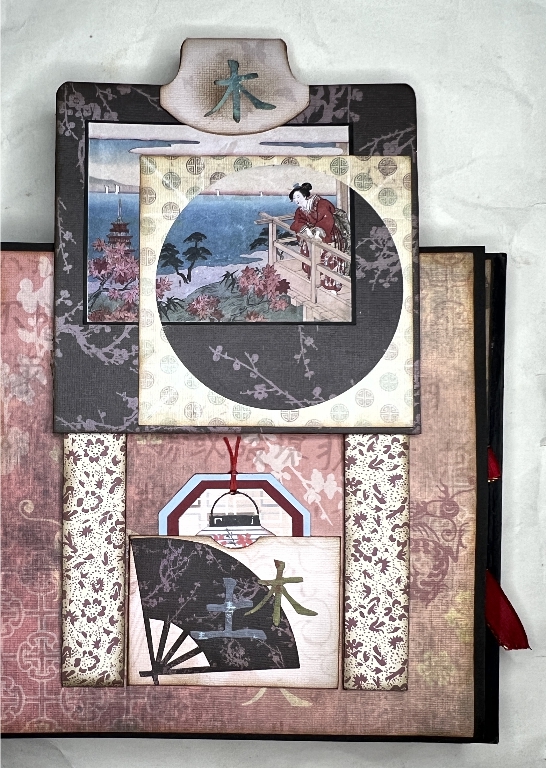
The whole of the top layer slides up to reveal hidden stuff underneath! I created the runners using scraps of the Laura Ashley wallpaper I had in my bedroom before my marriage 40 years ago! Some stash never dies…
Under the slider is a small pocket decorated with a couple of the die-cut embellishments that I bought with the Far East paper stack by DCWV which features throughout the book. Inside the pocket is a small tag topped with a scrap of red twine. I made this to look as if the lantern was hanging from it.
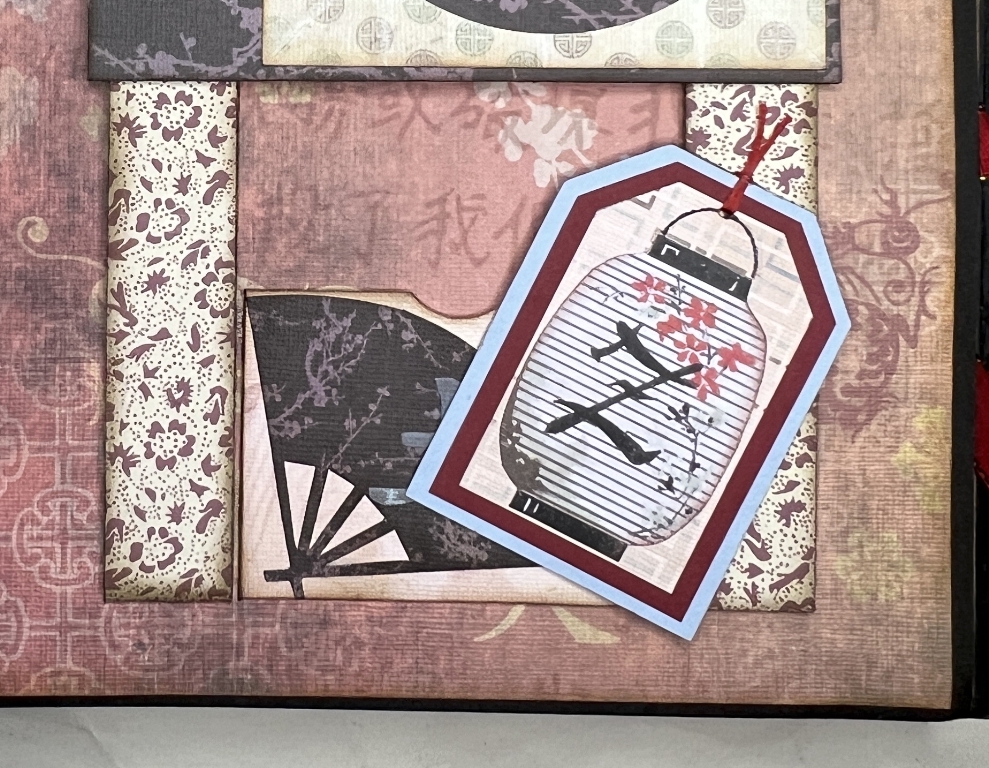
The lantern which decorates this tag is another of the die cut embellishments. I matted and layered it with dark red and pale blue cardstock to co-ordinate with the flip flap on the previous page.
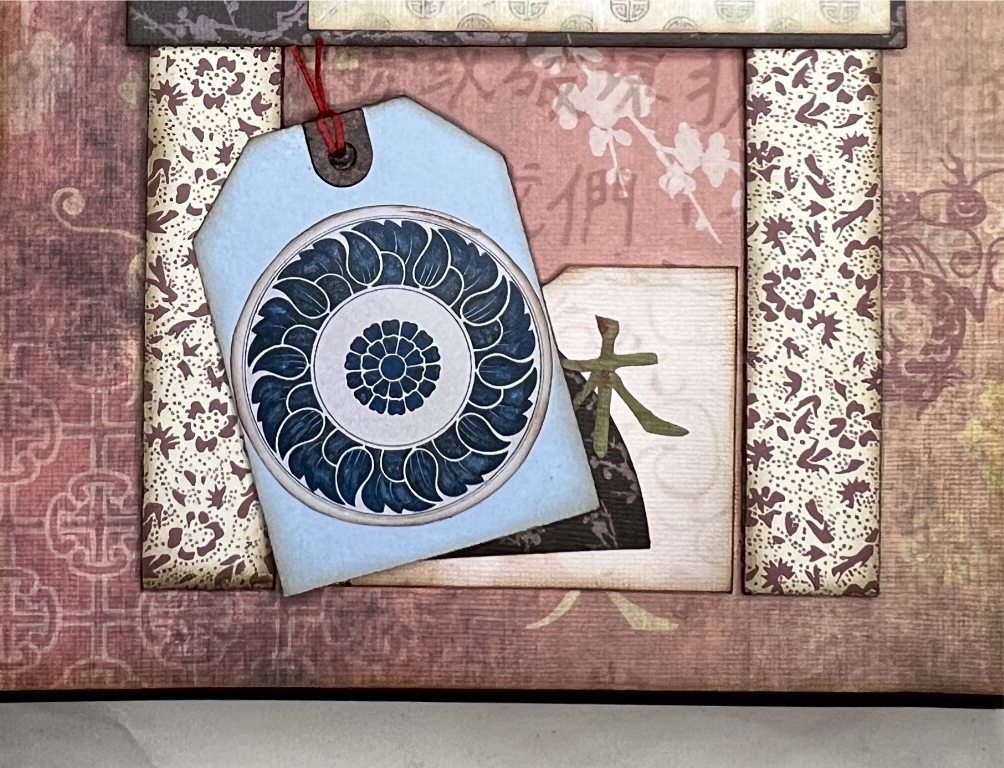
On the back of the tag is another decorative embellishment – the same stylised floral image which I used for the iris shutter on page 12, also in part 3.
What a fun interactive element. “But wait!” – as they say – “There’s more!”
Flip up the front of the whale tail tab at the top (which is kept closed with a concealed magnet), and another smaller whale-tail tab is revealed (shown at the bottom of the next photo). You use this to fold down the top half of the slider element which, when it opens up, reveals more hidden delights! (Bet you weren’t expecting that…)
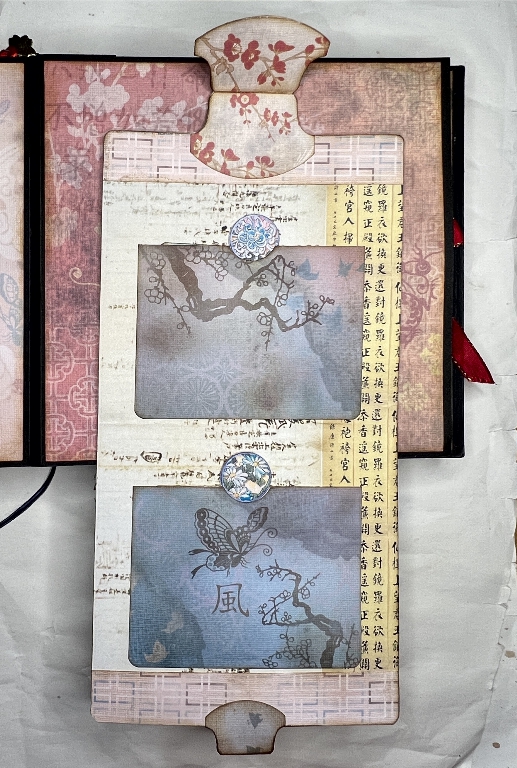
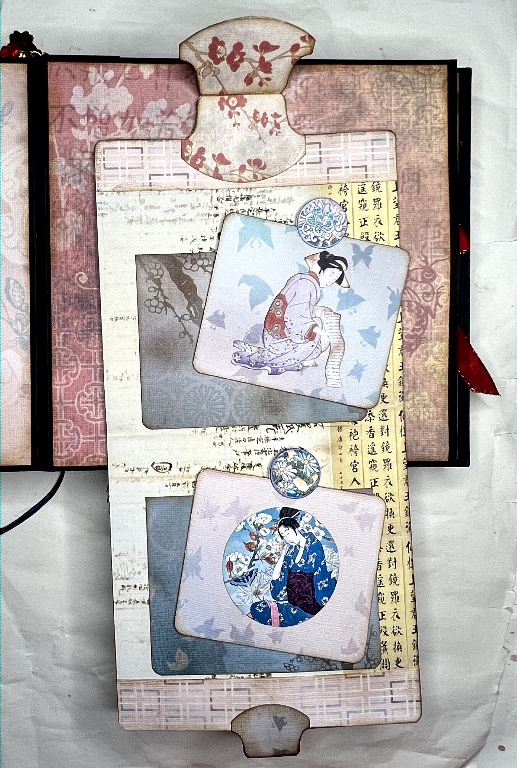
Inside, on a background paper of ancient Oriental script, I have attached two pockets using scraps of the paper collection left over from other pages. Each pocket contains its own tag.
I cut the finger notches in the pockets with a 1 inch circle punch, inserting the card less than half way into the punch. I saved the tiny pieces cut out, and used them to draw around on the tag. This indicated the area where I would need to apply glue. I cut further 1 inch circles for the tag pulls and glued these front and back onto the tags, lining them up with the pencil line I’d drawn, sandwiching the tag between the two discs. I also cut partial circles from scrap card and glued them between the two complete circles of the tag pull so everything would lie flat with no ridge. The discs were then embellished with small circular images from the collection.
This way, when the tag is fully inserted into the pocket, the whole circular pull is revealed, exactly filling the finger notch, which I think gives a lovely finish.
Here are the fronts of the tags:
…and the backs:
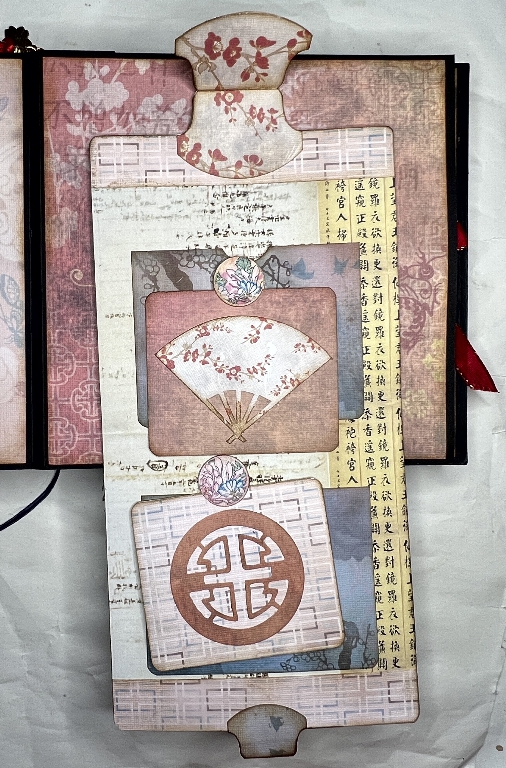
The backs were decorated with further die-cut embellishments from the collection. Tuck them back into the pockets, fold up the flap, fold down the large whale tail tab onto its magnet, and everything disappears and no-one is the wiser! After the iris shutter and the twist and pop, I think this is my favourite interactive element in the album.
Page 17 and 18 spread
This is the final spread of the book, with page 18 being the inside of the back cover.
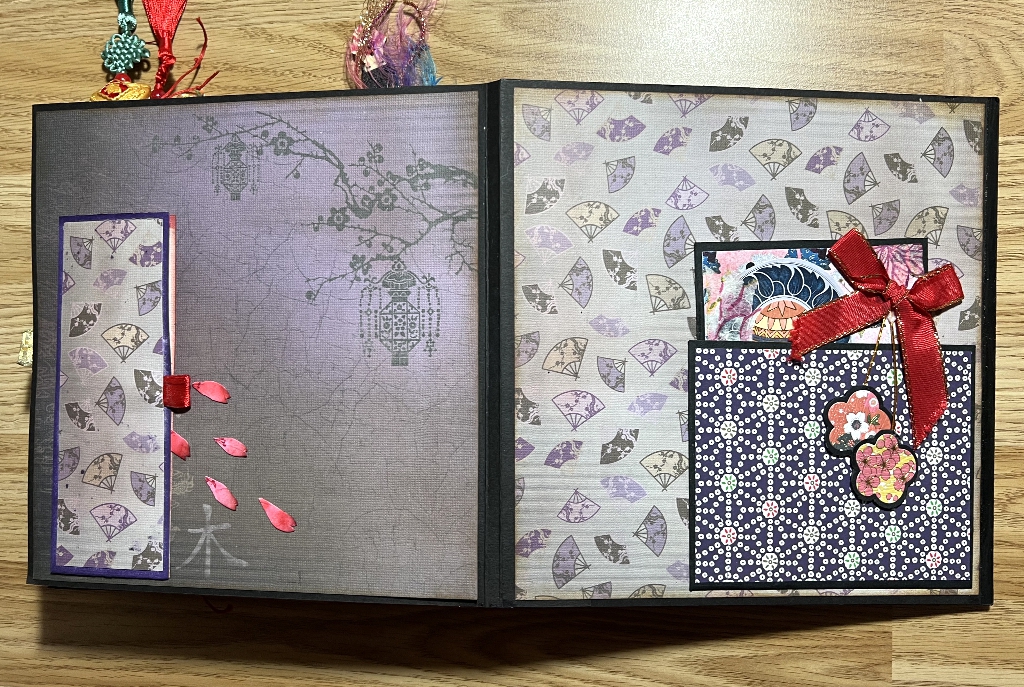
Again, the pages are colour-co-ordinated. I have used the same card to cover the interactive element on page 17 that I used for the background on page 18.
Page 17 – Cherry blossom
You cannot have a Japanese-themed album without including some cherry blossom! The panel on the left hand side of the page opens, using the red ribbon tab, to reveal a floral pop-up. A magnet keeps it closed. I used some of the cut off petals to add to the page, as if they are falling gently from the blossoms. The paper lining the pop-up is, of course, of cherry blossoms, and the background paper (which again is far too beautiful to cover too much) also features a branch of cherry blossom with a hanging lantern.
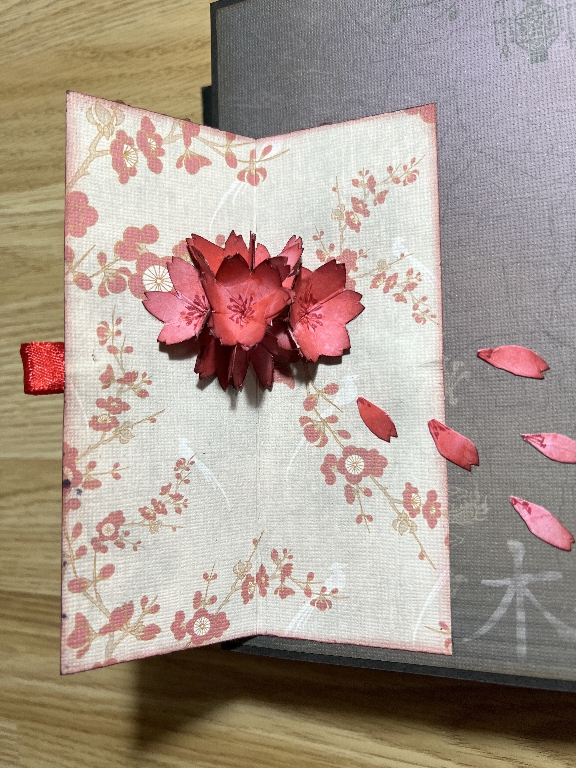
I have made this floral pop-up several times and it is always a delight.
Page 18 – Pocket with tag
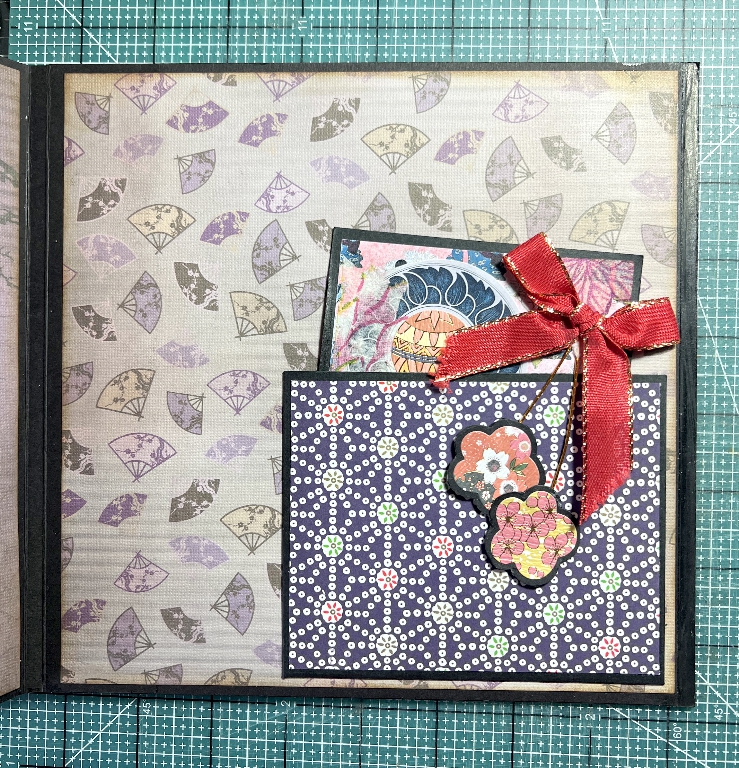
Another relatively plain page with a gorgeous background paper with fans. The paper decorating the pocket is from the little pack of genuine Japanese papers that I bought at a craft show, as are the floral dangles from the tag which I attached with some stiff red wiry stuff which was also in the Japanese pack, and a red ribbon bow. The element is attached to the tag but hangs over onto the outside of the pocket.
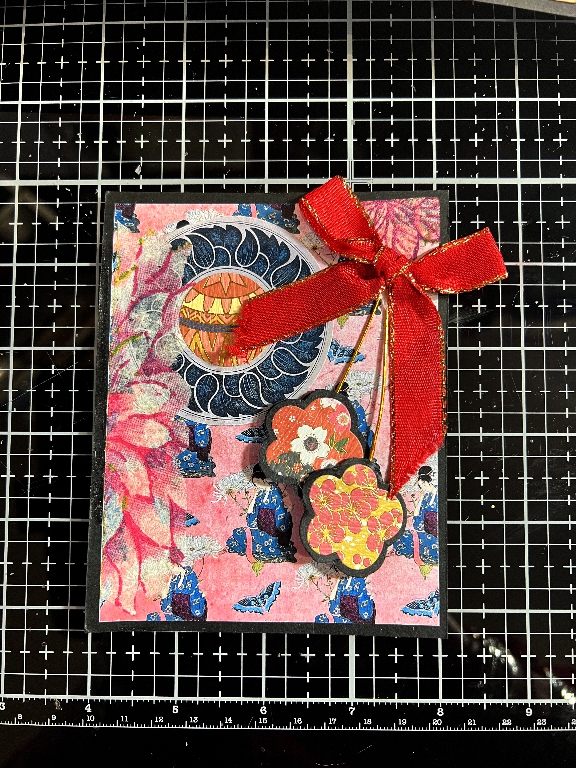
The tag is covered with a digital download background paper with butterflies. The circular motif is yet another example of the stylised blue floral circle that I used for the iris shutter. This time I covered the centre with another circular piece from the Japanese pack.
Overlaying the left-hand side of the tag is the top layer of a piece of napkin, carefully cut around the edges of the flower petals and glued down so that it merges with the rest of the design of the tag. Napkin, like tissue paper, tends to become more translucent once glued down, and is lovely for layering in projects like this. It was from the same napkin that I laminated for page 5, shown in part 2 of this series.
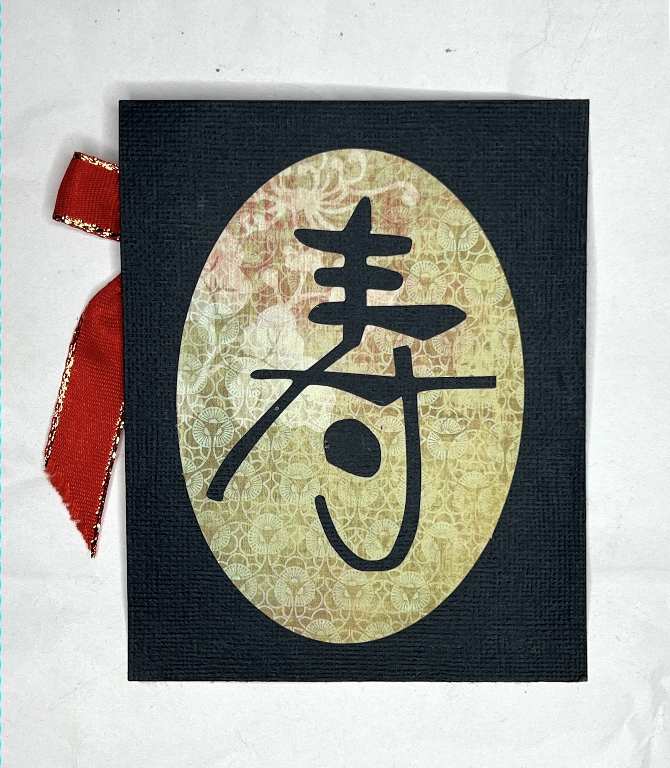
As a final touch to this tag, which I had not embellished when I made it, I added another of the die-cut embellishments from the DCWV set. This was an oval piece cut from one of the papers in the collection, with the character die cut out of it, so when it is laid down on a black background it displays perfectly.
That completes the series on this Oriental Style Album. I hope you have enjoyed the journey. I certainly have, and completing the project at last, after starting it over 3 years ago (!) has given me immense satisfaction, and made me wish I’d got on with it earlier – although if I had, I would have missed out on the experience of making the brilliant slider mechanism shared by Sara-Lee Armstrong. Some things are worth waiting for!
Video
I have now uploaded the video of the flip-through of this album to YouTube:
and also on Instagram: https://www.instagram.com/p/Dc6TDHhz_1_/