TAG TOPPERS
I am currently making a collection of tags from recycled packaging, and as part of the process, I am making tag toppers.
This project is also a stand-alone one, because I’m making a large number of these toppers which will go in my stash, ready to be used when required.
The inspiration came from someone who was doing a mass make of small tags on YouTube. She said they would act as a “tag library” for inspiration, and together they looked absolutely great. She cut the tags from one of the pages out of her masterboard book. I’ve already started making one of those.
A great scrap buster
Anyone who does album making, card making, paper-crafting etc. will generate a lot of paper strips from trimming things down. Making tag toppers is a fantastic way of using these up. You can trim the strips to any width you want, and then cut them into shorter lengths which are twice the height of the topper. You fold them in half and stick them on top of the tag, one side of the fold on each side of the tag.
They are perfectly fine as small squares or rectangles, but if you’ve got corner rounder punches, or any form of fancy corner punch, you can decorate them. After this, the embellishment is limited only by your imagination.
Paper dyeing
I dyed a few of my strips, using a combination of coffee, rust water and Payne’s grey water (a small amount of acrylic mixed into water in a jar).
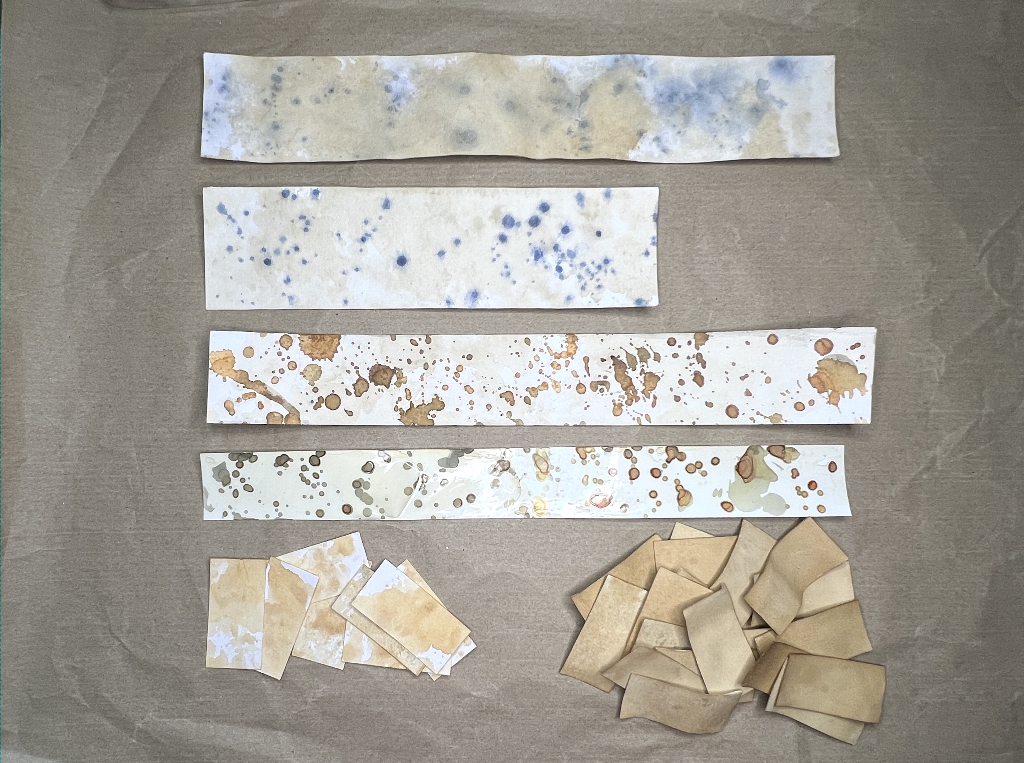
I also dyed some of the tag topper pieces I’d already cut. Everything got some coffee dyeing except the small pieces at bottom left.
I spattered the top strip with Payne’s grey water and then sprayed it with quite a lot of water to spread the blue spots. On the second strip, I lightly misted the paper after spattering, holding the bottle higher and just damping the surface. I left it to activate and the result was much more discreet spotting, but with some interesting feathering too. I really like this effect.
The lower two strips were spattered with rust water. This looks quite pale when wet, but it darkens as it dries. The top strip was regular card, but the lower one appeared to have some sort of coating on it and this got quite sticky as I dried it with the heat tool, and it ended up quite shiny. If you look carefully at a spot about a quarter of the way along from the left, you can see a crack where this surface coating is coming away. None of this would probably have happened if I’d let it dry naturally. Also, some of the rust water has gone grey. This usually happens when it reacts with an organic dye such as tea or coffee, and on both these samples I am surprised it didn’t happen more dramatically – hardly any on the first sample and only in one part on the second. A lot depends on the type of paper, I think. Anyway, I think these strips will be usable, as long as I avoid the cracked part. We shall have to see how well that strip stands up to folding and embellishing later.
At the bottom, the smaller pile of pieces on the left was spattered with rust water alone. The larger pile on the right had several sprays of coffee dyeing, drying in between. They have all buckled quite a bit but that isn’t a problem.
Cutting and folding the strips
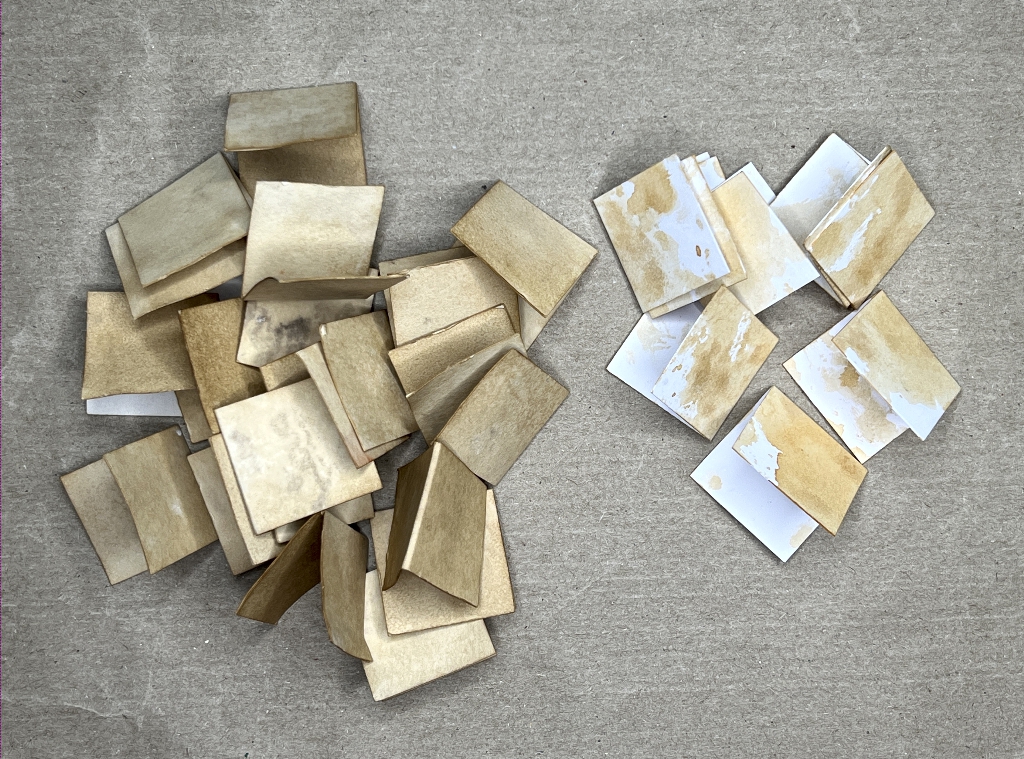
These are all the smaller pieces, folded. There is quite a nice variation in the coffee-dyed ones, and in places there is extra staining where it came into contact with some of the rust water.
Punching the corners
I proceeded to cut a lot more strips from different coloured paper and card, folding and inking them.
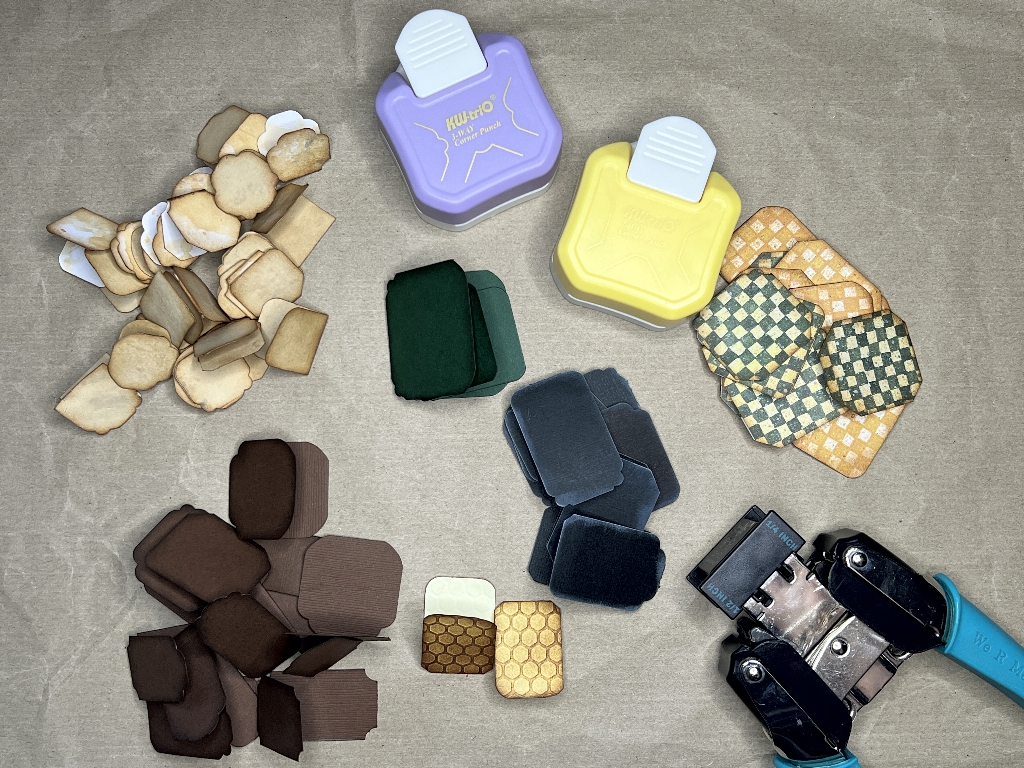
When they were folded, I proceeded to clip the corners with a variety of corner punches – plain corner rounders (2 sizes on the Crop-a-Dile Corner Chomper on the right), and using a couple of punches with three different profiles on each. One has fancy corners and the other has plain diagonal cuts, suitable for making small tags. You can produce infinite variety this way. When you punch them, you do it with them folded, and then open them out.
Here are a few examples of the different variations you can get.
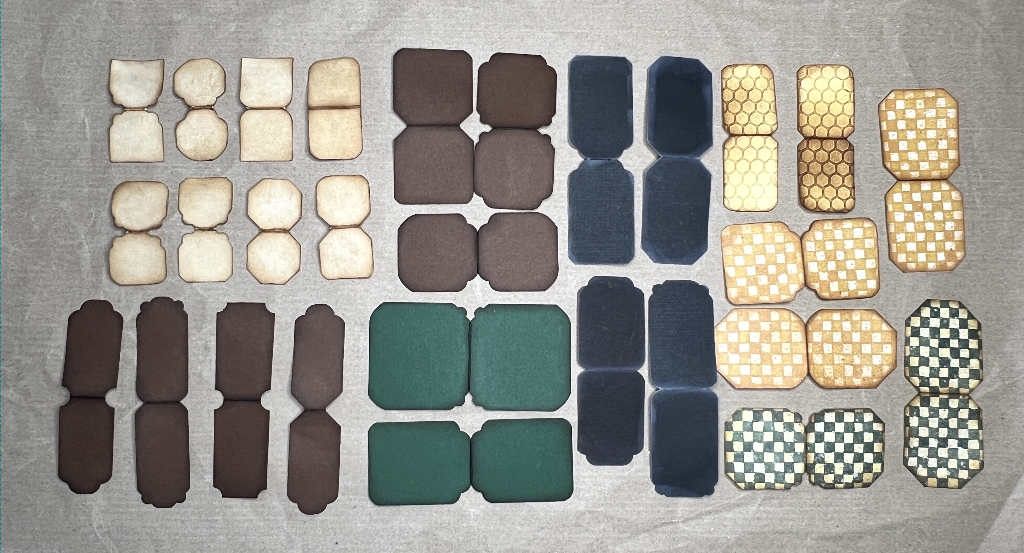
I shall be leaving these toppers as they are, and I will select what I want from them, to decorate the tags I am currently making. Once that project is complete you will see some of these in use. I am deliberately not embellishing them further at this stage, so that I can do so to suit each individual tag as I decorate it. I have deliberately kept the colour palette mostly fairly neutral.
Embellishment of these toppers will include hole-punching, eyelets, buttons, collage, stamping, stencilling, the addition of metal hardware, ribbon, fabric, lace… again, the possibilities are endless. These toppers make a tag look really special.