THE VIDEO SETUP IN MY STUDIO
My friend Caroline on the ArtKula forum asked me today what video setup I had in my studio. Rather than trying to answer her in the chat on the forum, I decided to do a separate post on this, because it might be of interest to others as well. I have deliberately provided the historical background to my system and shown how it changed and developed over time, because someone might benefit from the different stages.
The development of my system
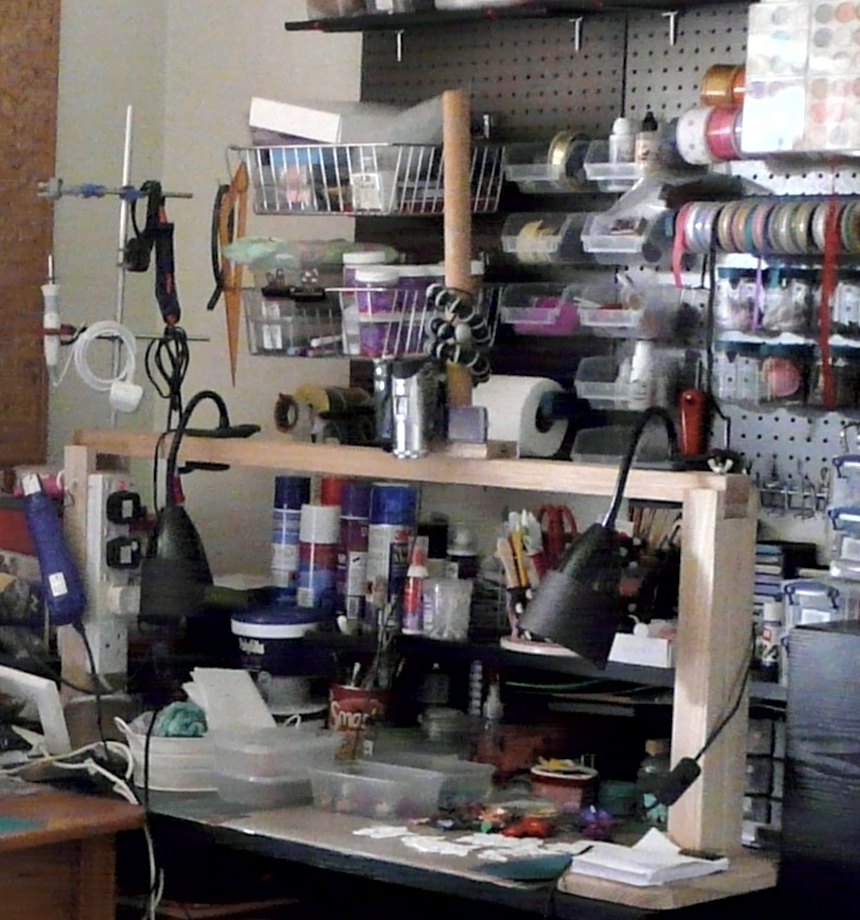
This is the arrangement I had in the studio in our old house. This room was never satisfactory. It was a bedroom which was converted into a combined studio and office and neither function worked well. It faced almost due west and got the full force of the afternoon sun, which meant that a lot of the time I had to draw the curtains and work with artificial light. During its existence I did rearrange the furniture which helped a bit.
I had a dedicated digital video camera in those days and it was an absolute pain transferring the video to the computer for editing. I also had to convert the videos before my video editing software would recognise them. I had to search online for a solution to setting the camera up, and eventually came across someone who had a frame arrangement over her desk with the camera attached to that. A friend of my hubby’s made one for me from wood, and it worked pretty well. It was very substantial so there was no camera shake. Up one side a multi-gang electrical extension lead was attached, so I was able to plug in various things like my heat tool, and lamps. The camera was held in a gorillapod twisted around a paper towel roll holder which was clamped to the top of the frame, and I had two clip-on spotlights with black card extensions attached to the shades. The frame did get in the way a bit, but it was useful for putting things on.
The arrangement of the room
Everyone’s setup is different, and is designed to suit their particular needs. I have struggled a lot in the past to get something that would work for me. Most setups assume that you are working at a table, and there is space behind the table to set up tripods etc., or clip equipment onto the back of the table. My present studio, though, is arranged with a fitted worktop around three sides of the room, with open-fronted kitchen units above and below for storage. Some of them are on castors so they can be pulled out, leaving a space to sit. I have two of these pull-out units permanently in the middle of the room for an extra and much-needed work surface. The problem with the fitted units is that there is no way to put things between them and the wall, so you are left with either having something floor-mounted beside or behind you, or mounted on the work surface.

Lighting
You don’t just need a way of mounting your camera or phone; it is also a question of the lighting. Many mounting systems cast a shadow because the light is above them, and this is very unsatisfactory. There are also lots of different types of lamps, some of which don’t give very good lighting because the light comes from one side. The placing of the work desk can be problematic too, because if it is in direct sunlight, this can really compromise the quality of the video.
I have always struggled with the lighting in my studio. The builder who constructed it for me when we first moved here got the electrician to put spots high up all around the room which I thought was the best idea at the time, to supplement the centre light which I knew would always cast a shadow wherever I was in the space. However, the spots also create shadows! I have always had to turn off all the lights and arrange free-standing lamps to illuminate anything I wanted to photograph.
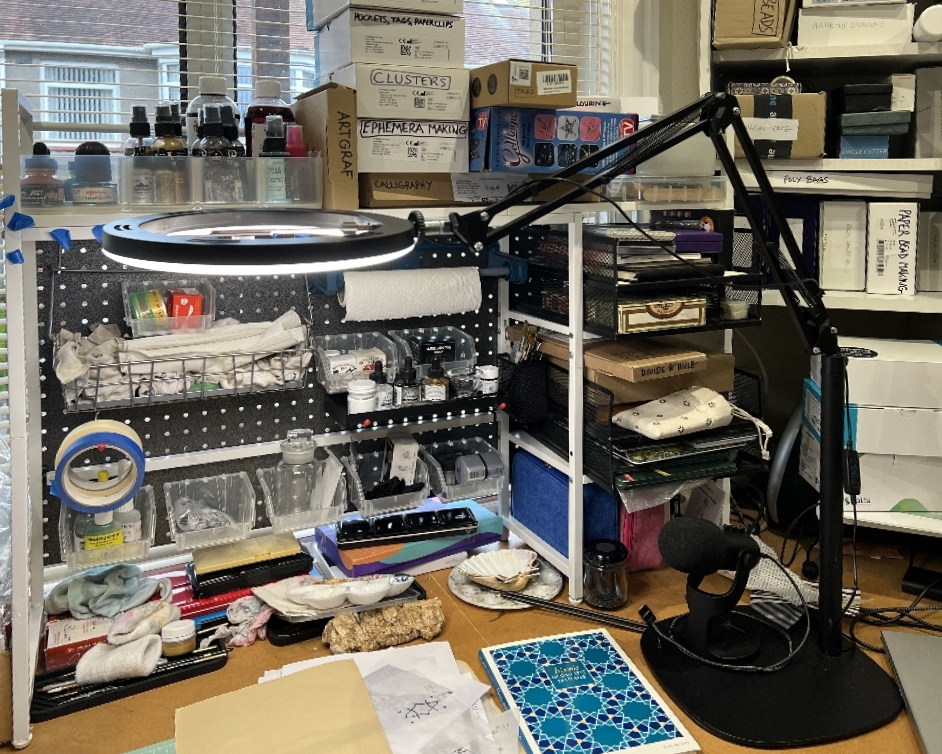
My drawing zone under the window
I am very fortunate to have an upstairs studio facing north. It never gets direct sunlight but that lovely defused light so beloved by artists. I have blocked a certain amount of it by placing my new shelving unit in front of the window but I can often work without artificial light during the day. After setting up the shelving units in that area in front of the window, a new work area was opened up, which is now officially my “clean” drawing area. (The pegboard is now fully set up and holding stuff.)
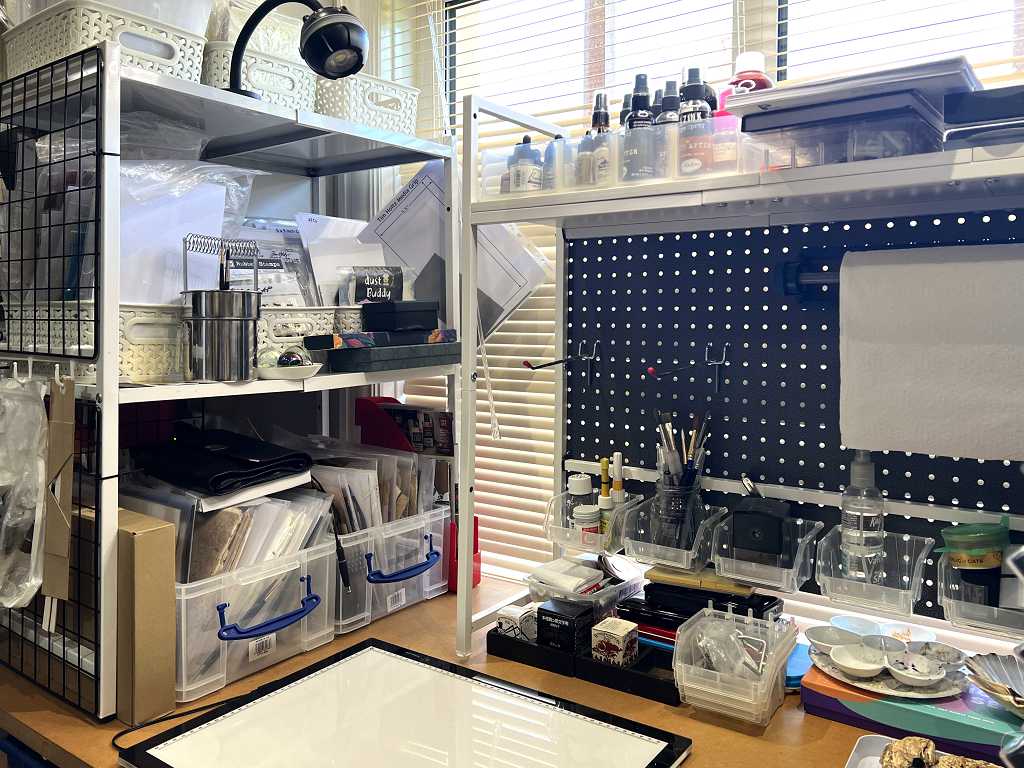
This is where I have set up the new video equipment, but it could be moved.
The main work area
This is my now my “dirty” mixed media area where glueing, inking, acrylics etc. goes on. There is a high shelf above it, onto which are attached two clip-on spot lamps which give light from both directions. From the start, I had the video camera clamped onto this, hanging down on a flexible gooseneck mount. It was never that brilliant and I still had the problems with interfacing the camera with the computer. Thankfully tech has now moved on a lot, and things are much easier these days.
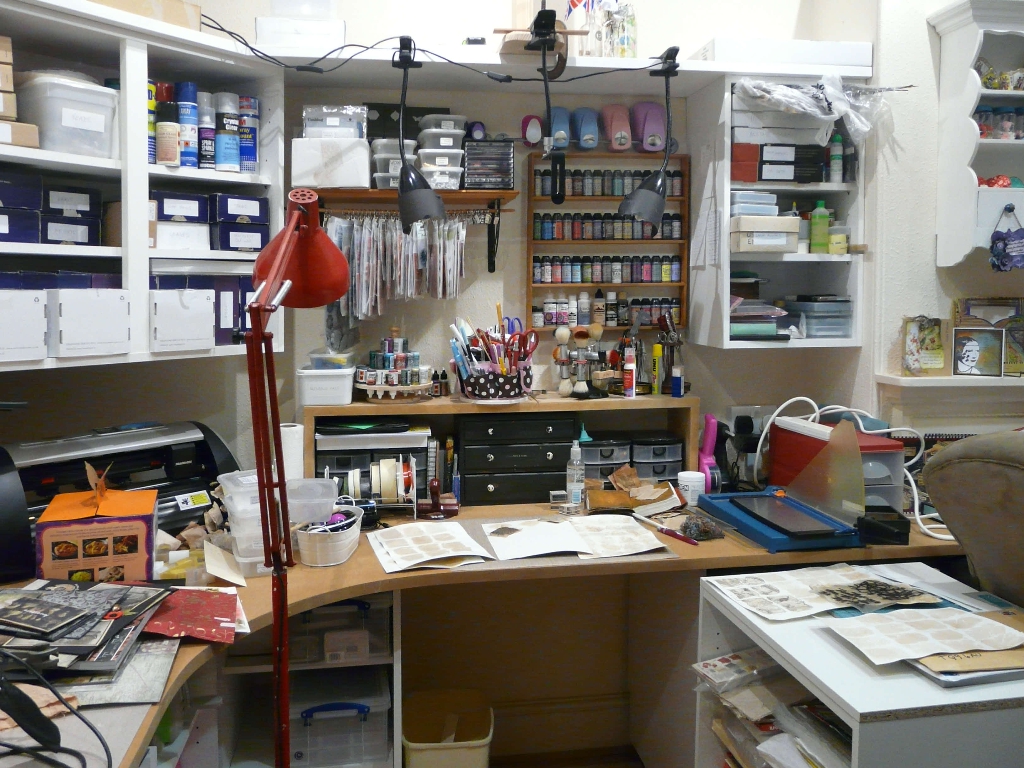
The red floor-standing Anglepoise was a throw-out from one of the hospitals that was closing down many years ago when we lived in Plymouth. My hubby was working there at the time and rescued it for me. It was a bit battered and a dirty cream colour. One day when he was out, I spray painted it with red car paint, doing it on the front drive with no protection and he was very cross with me when he came home because it looked as if murder most foul had been committed on our drive!! That lamp has been my constant companion in the studio since those days back in the late 1980s. It gets pushed around the room and pulled into all sorts of angles to illuminate stuff and to help with photographing things.
The ultimate answer
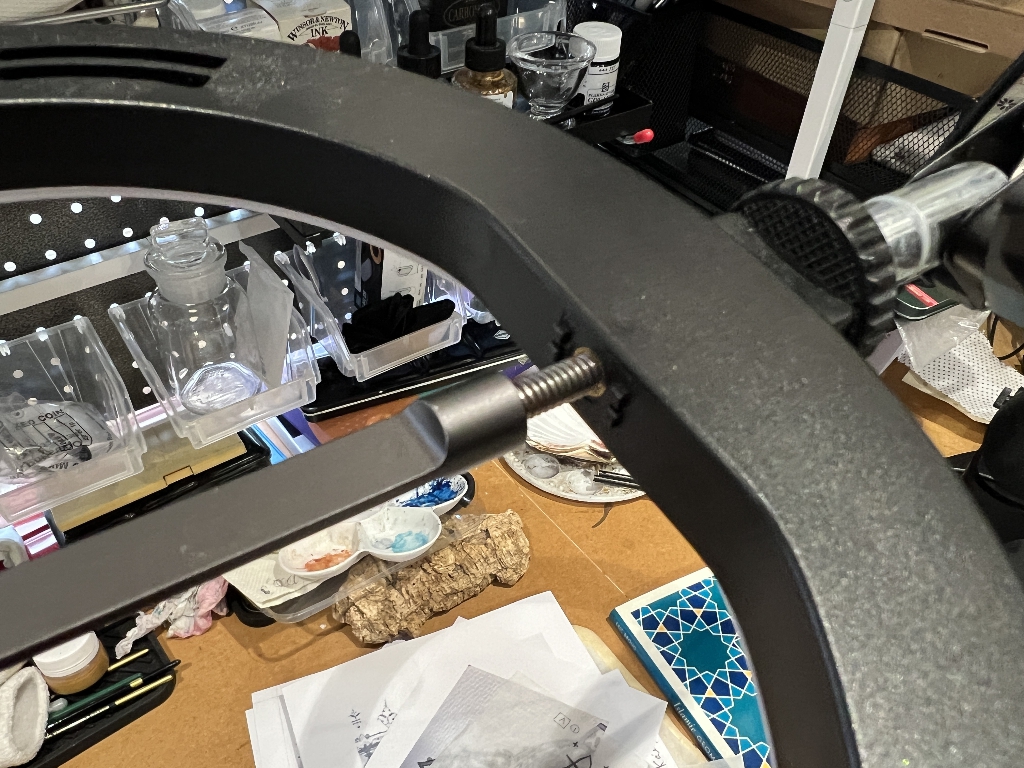
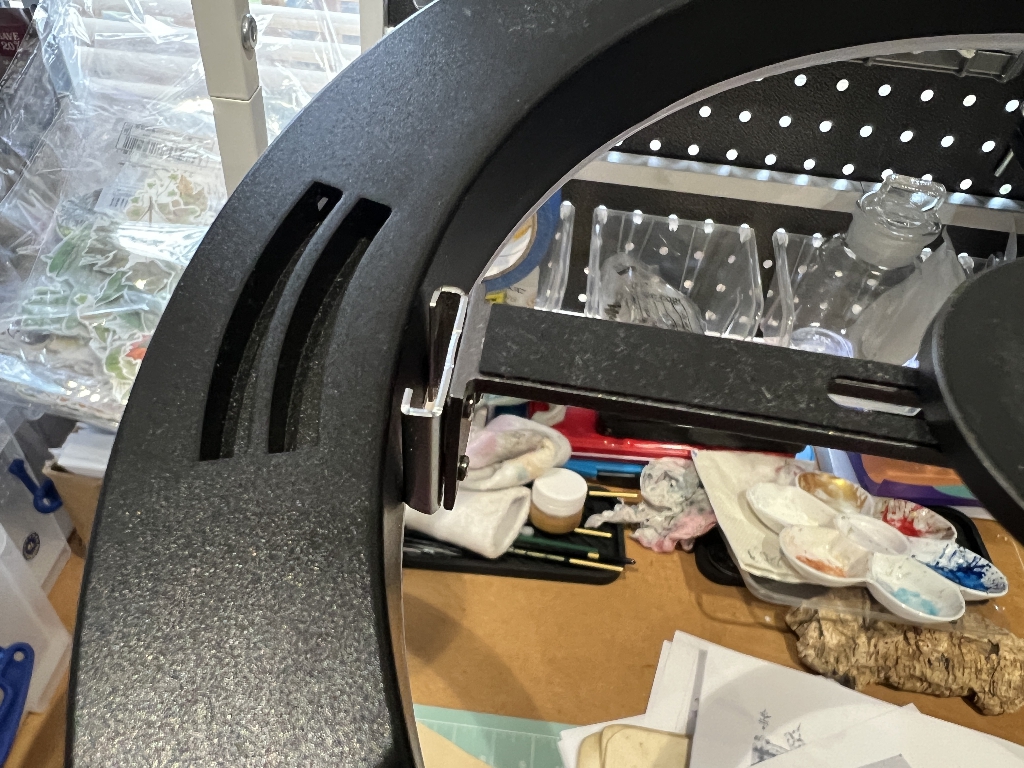
In 2024 I finally found something that would work for me. I bought a ring lamp on an Anglepoise-type mount from Amazon – the “Evershop Ring Light.” (Unfortunately this is no longer available but no doubt a suitable alternative could be found.) It is designed to be floor-mounted, with a heavy flat metal base which is quite thin. The upright part consists of two metal tubes screwed together. I could not get this to work as a floor-standing lamp, for the reason given above – no way to get it behind the work surface. The answer was to remove the bottom tube, and screw the top one directly into the base and make it a table-top lamp. Because the base is so thin, it is as if it has no footprint on the desk at all, and I can put things on it without noticing. The Anglepoise mount makes it extremely versatile, as I can pull it horizontally or raise or lower it, and the ring lamp is rotatable as well.
This is the Amazon picture of it.
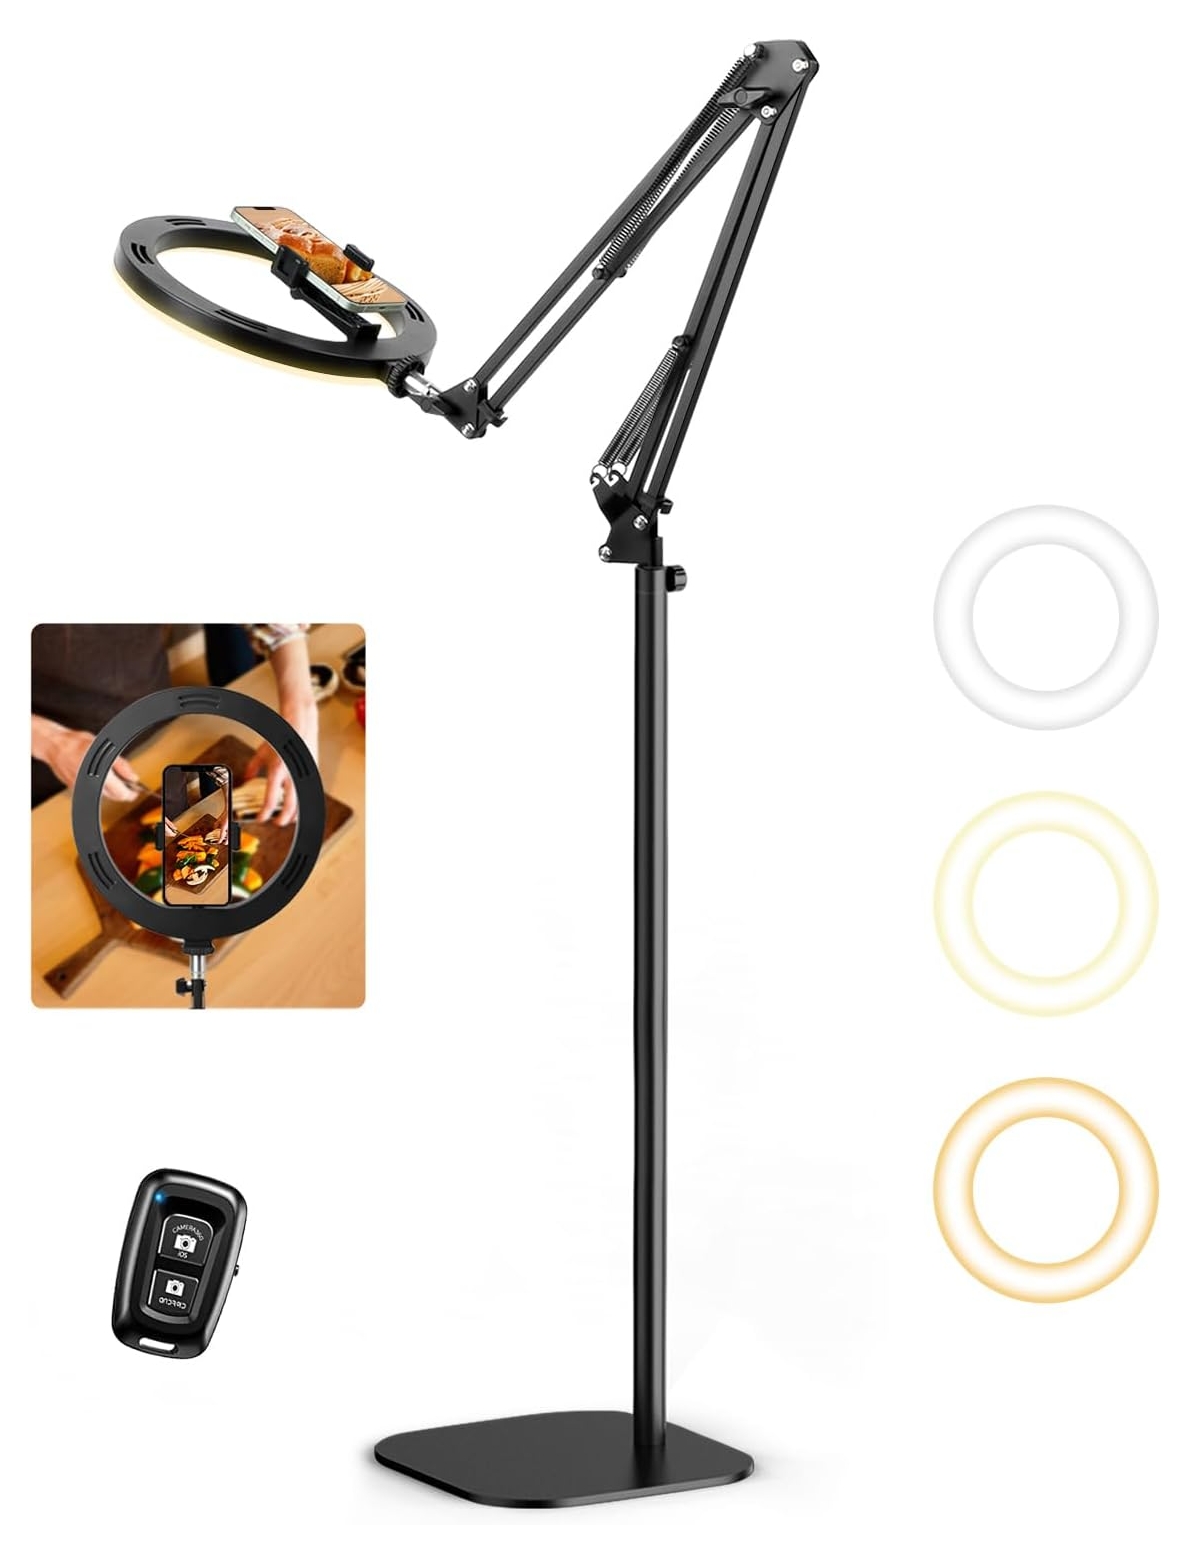
It has three different “colours” and three different brightnesses. It came fitted with a phone clamp, and a small remote control that you can press to take photos – I have temporarily mislaid this, but find it easy enough to press the button on the phone without moving it.
Altering the lamp
I have never got on with those phone clamps. First of all, I have to remove the phone from the case which is a pain, and I find the clamp extremely difficult to put the phone into without pressing phone buttons and losing the camera. I needed something quick and simple as an alternative.
I found the “TechMatte Tripod Mount for MagSafe” from Amazon. Here is Amazon’s picture:
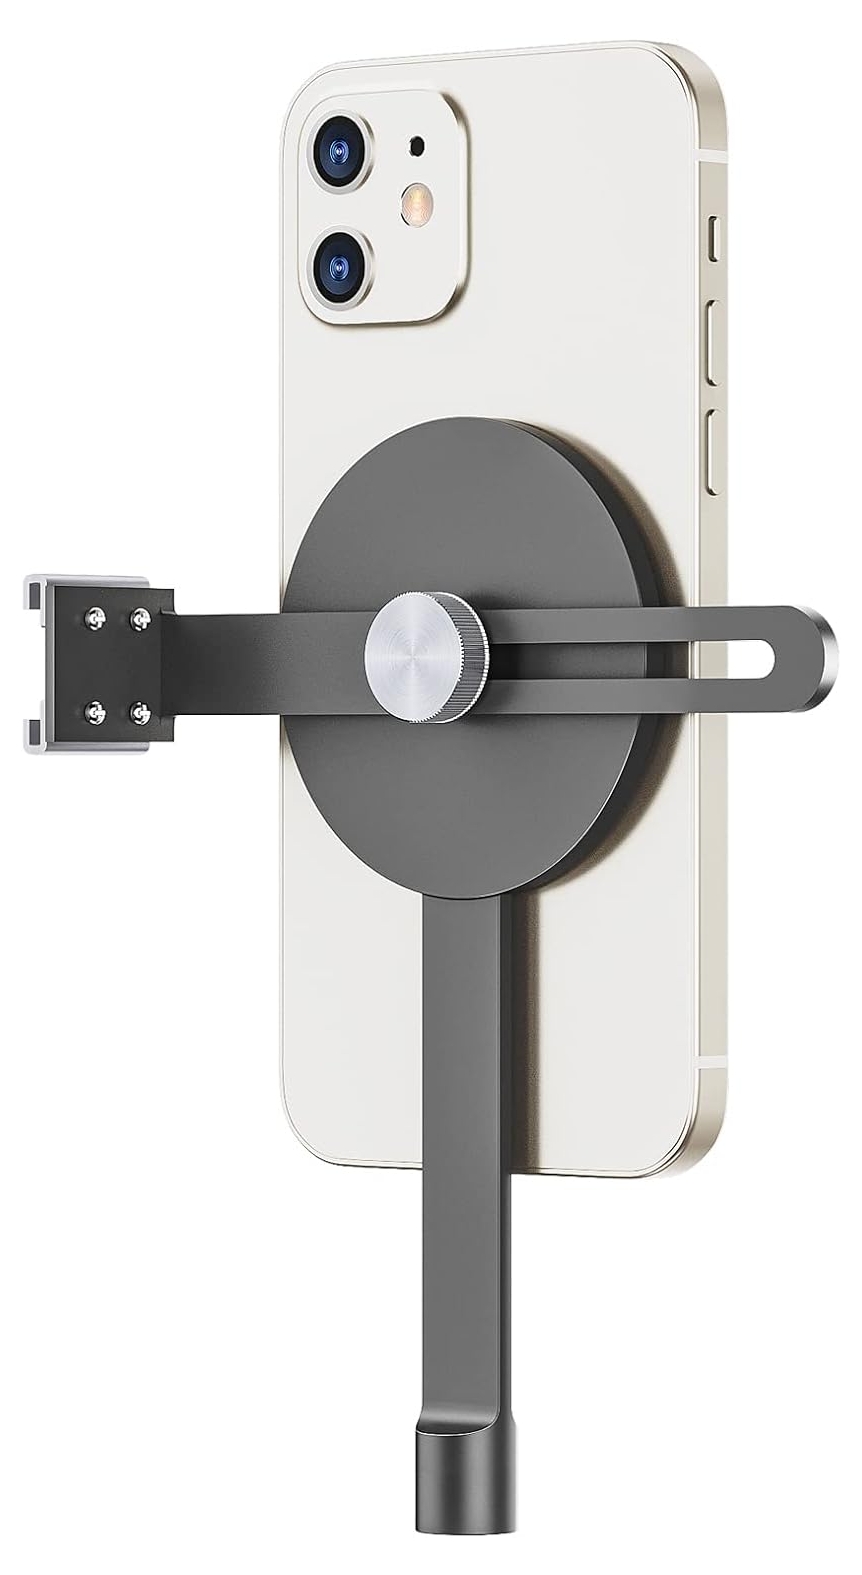
The disc in the centre is a strong magnet. The phone sticks onto it firmly and will not fall off, whatever angle you tip it. It has various adjustments and methods of fixing, and you can see that there is a cold shoe on it for attaching a flash or lamp.
I removed the clamp from the ring light and installed this instead, with the flat magnetic disc facing upwards.
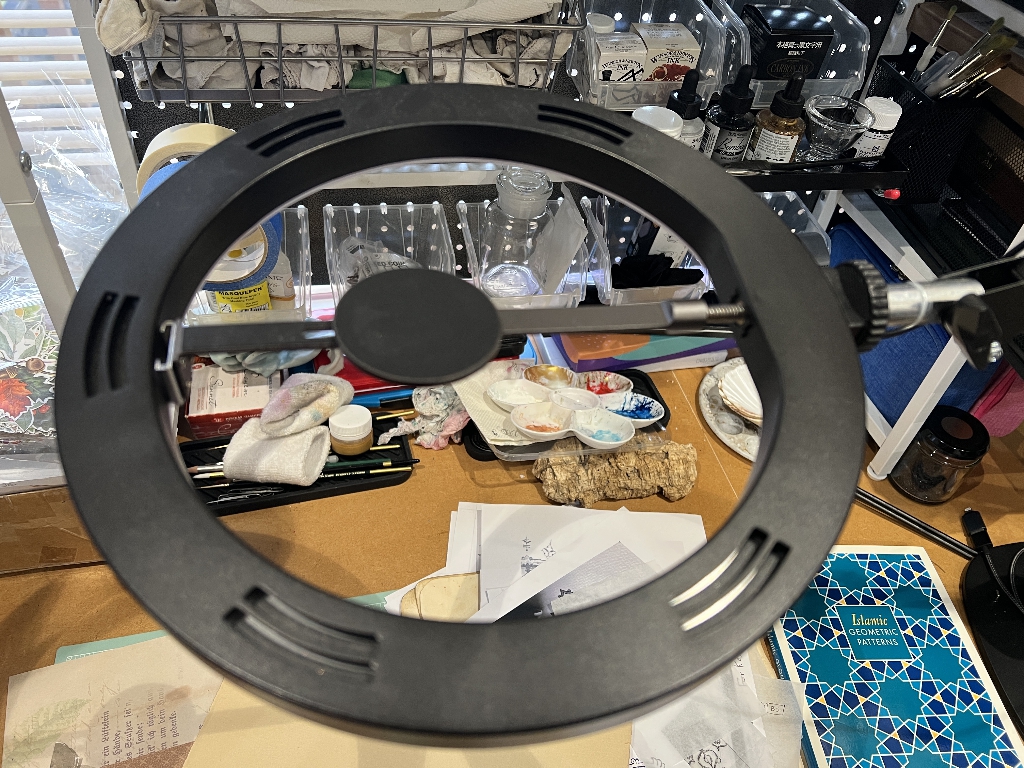
The cold shoe is not attached to the ring light but just pressed against it. I have got the adjustment of the disc tight enough so that the whole thing is firm and won’t move. Here’s the underneath.
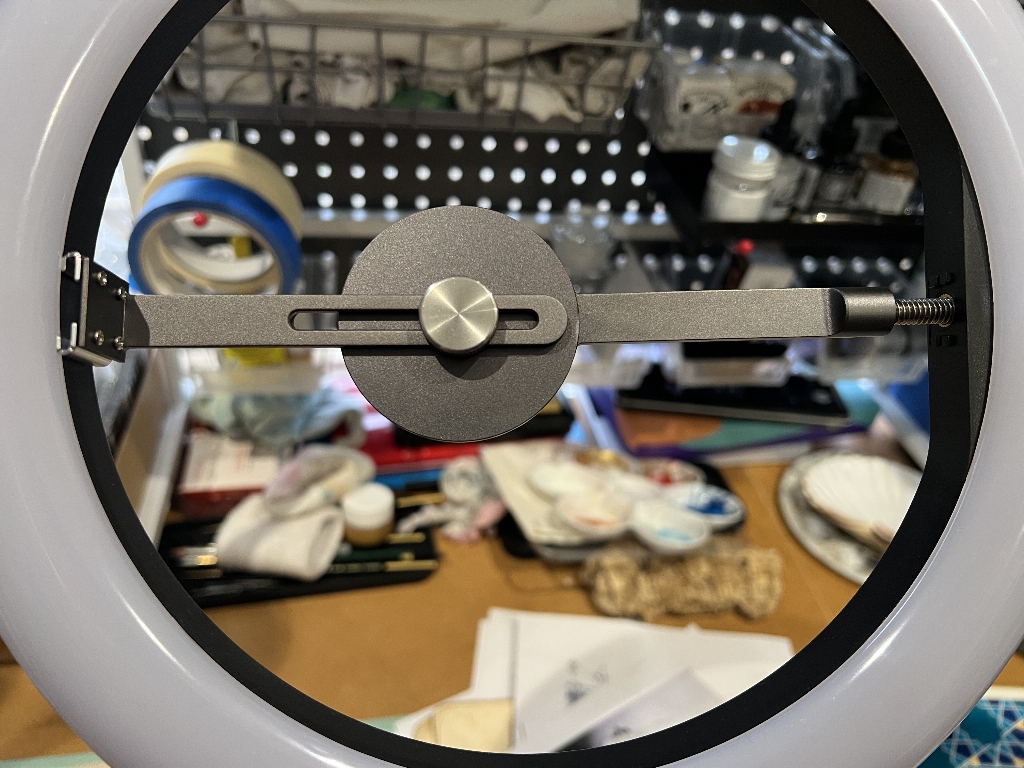
I discovered that I can simply lay the phone onto this and onto the edge of the ring light without removing the case, or even needing the magnetic attachment while the device is set up in the lamp, and it works a treat. Because the phone is in the centre of the light, no shadows are cast. I can adjust the Anglepoise of the lamp to set it up exactly over my work surface and can pull it up and down for closer or more distant views if I want, although I generally use the zoom function on the phone camera for that.
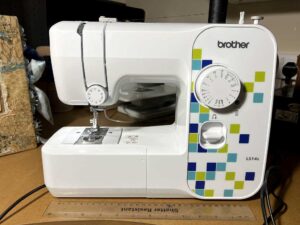
Microphone
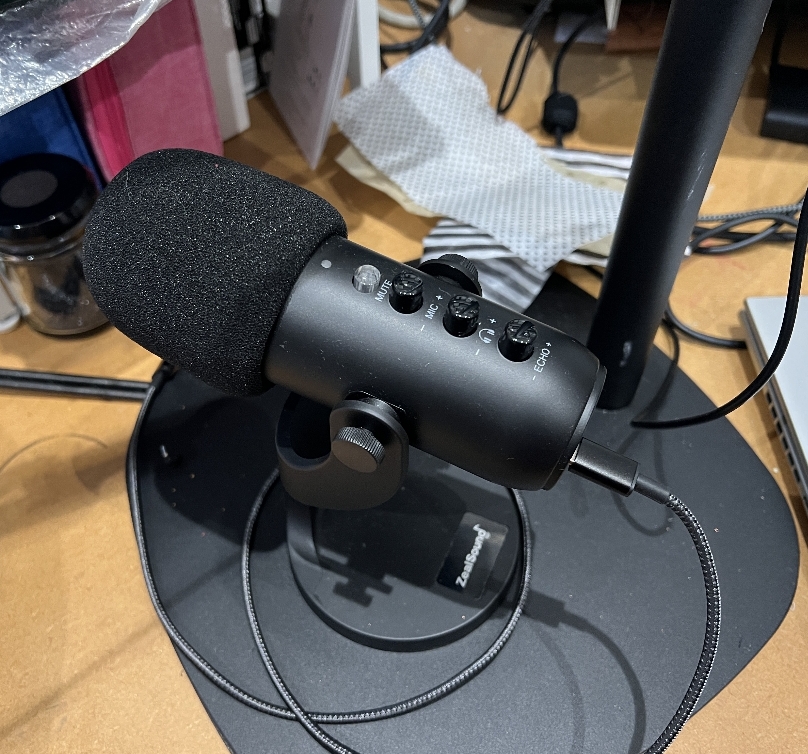
The sound quality of my first videos using this system was pretty poor. The microphone in the phone isn’t brilliant – it’s fine for phone calls etc. but for videos one needs something a bit more sophisticated. I spent a long time researching different microphones including those little clip on ones. I have very limited knowledge of microphone technology and tended to go by Amazon reviews. I eventually chose the Zealsound-K66-USB-Microphone which is a free-standing one from Amazon, at a pretty reasonable price. It is simple to set up and I am very pleased with the result, even being able to produce some (mono) ASMR-type sound effects when I turn up the volume a bit and put it close to the work.

As you can see, its angle is adjustable, and it comes with a removable foam cover for better sound quality. Also in the above photo, you can see the control for the ring light.
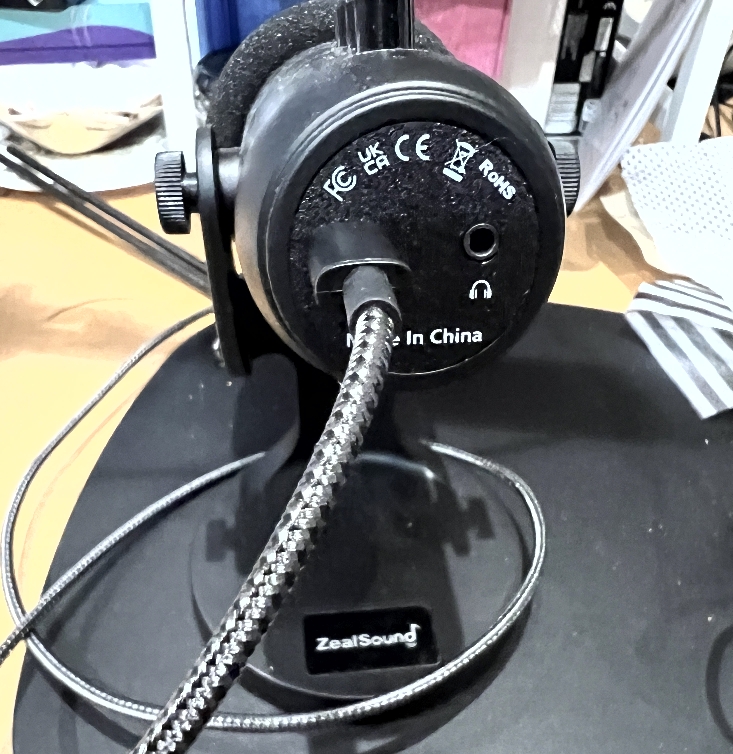
You connect the microphone to the phone with a USB cable – in my case the other end is a lightning connector for the iPhone. You connect wired headphones into the other socket and hear the sound through these – this prevents feedback.
It’s a brilliant microphone. I’m no expert and there are people out there who spend thousands on their microphones but I’m not discerning enough to detect that super-hi-fi sound they want! This is fine for my little art videos.
I hope this has been informative for anyone wanting to video their studio work. There are far better explanations online from the real experts, but I thought it might be helpful to share my journey with its pitfalls, until I finally found something that would work in my situation.